3 4 Pvc Pipe Repair Coupling
One of the most frustrating issues a homeowner can face is an inconsistent temperature in their home. You might find one room sweltering while another is freezing, or your heating or cooling system seems to be running constantly without achieving the desired comfort level. Often, a seemingly minor issue in your HVAC system's drain line can be the culprit, specifically a leak in a 3/4" PVC drain pipe. This article will guide you through troubleshooting and repairing a common problem: a leaking 3/4" PVC pipe using a repair coupling. This is a task many homeowners can tackle themselves, saving money and hassle. However, know your limits and when to call a professional.
Diagnosing the Leaky PVC Drain Pipe
Before jumping into repairs, it's crucial to pinpoint the source of the problem. A slow, consistent drip might be the only initial sign, but ignoring it can lead to bigger issues like water damage and mold growth. Here's a methodical approach to diagnosis:
Step 1: Visual Inspection (No Tools Required)
Begin with a thorough visual inspection of the PVC drain pipe system, particularly focusing on joints and connections. Look for the following:
- Visible Water: Obvious signs of dripping, pooling water, or dampness around pipe fittings.
- Stains or Discoloration: Water stains on walls, ceilings, or floors near the pipe indicate a potential leak.
- Mineral Deposits: White, chalky deposits around joints often signify a slow, ongoing leak. These are left behind as water evaporates.
- Damaged Fittings: Cracks, splits, or loose connections are prime suspects. Pay close attention to where the pipe connects to your HVAC unit.
Carefully trace the entire length of the visible drain line from your HVAC unit to the drain outlet. Often, the leak occurs at a joint or fitting. Feel around joints even if you don’t see any dripping. Dampness or stickiness can point to a leak.
Step 2: Identify the Leaking Section (No Tools Required)
Once you've spotted a potential leak, try to pinpoint the exact source. Often, water travels along the pipe before dripping, making it seem like the leak is somewhere else. Dry the suspected area thoroughly with a clean cloth or paper towel. Observe closely to see where the water reappears. If you have an assistant, have them slowly pour a small amount of water near the suspected leak while you watch the underside of the joint. This can help you trace the source of the leak.
If the leak appears to be coming from a section of pipe between joints, carefully examine the pipe itself for cracks or punctures. This is less common but can happen, especially if the pipe has been exposed to physical stress or extreme temperatures.
Step 3: Assess the Severity and Location
Consider the severity and location of the leak. A slow drip in an easily accessible area is generally manageable for a DIY repair. However, a major leak or a leak in a difficult-to-reach location (e.g., inside a wall) might require professional assistance. Assess your comfort level and ability to safely access and repair the problem before proceeding.
DIY Repair Using a 3/4" PVC Repair Coupling
If you've determined that you can safely and effectively repair the leak yourself, here's a step-by-step guide using a 3/4" PVC repair coupling:
Materials and Tools Required:
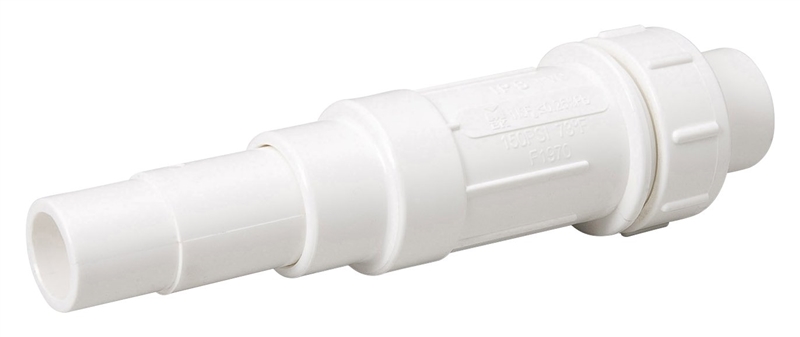
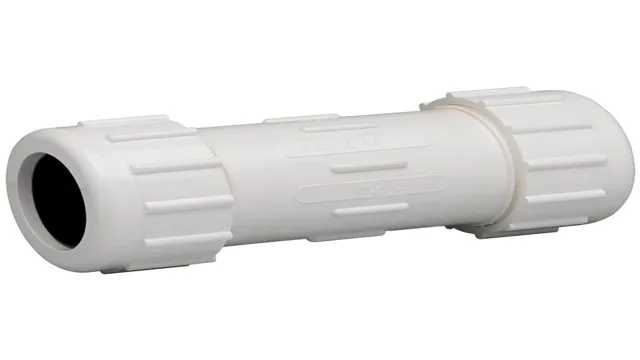
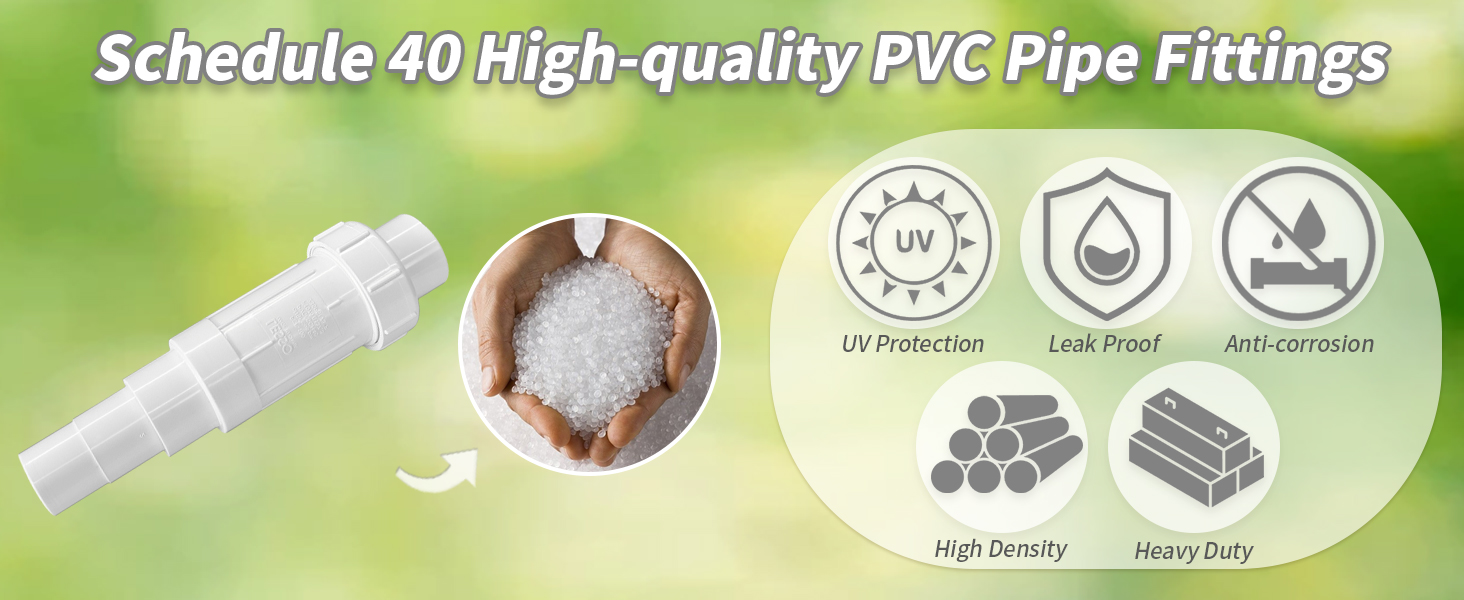
- 3/4" PVC Repair Coupling: This is a special fitting designed to slide over existing pipe, making repairs easier without having to disassemble the entire drain line. Ensure it's rated for the application (drainage).
- PVC Primer and Cement: Essential for creating a strong, watertight bond between the coupling and the existing pipe. Use primer and cement specifically designed for PVC.
- PVC Pipe Cutter or Hacksaw: For cutting the damaged section of pipe. A PVC pipe cutter provides a cleaner, straighter cut.
- Measuring Tape or Ruler: To accurately measure the section of pipe to be removed.
- Deburring Tool or Utility Knife: To remove any burrs or sharp edges from the cut pipe.
- Clean Rags or Paper Towels: For cleaning the pipe surfaces before applying primer and cement.
- Safety Glasses: To protect your eyes from debris and chemicals.
- Gloves: To protect your hands from primer and cement.
Step 1: Turn Off the HVAC System
Before starting any repairs, always turn off your HVAC system at the breaker. This is a crucial safety precaution to prevent electrical shock and potential damage to the system.
Step 2: Measure and Cut the Damaged Section
Carefully measure the length of the damaged section of pipe that needs to be removed. Ensure the repair coupling will completely cover the damaged area with some overlap on either side. Use your PVC pipe cutter or hacksaw to cut out the damaged section. Make clean, straight cuts.
Important: Before cutting, have a plan for where the water will go. You may need a bucket to catch any water remaining in the drain line. Be prepared for some residual water to drain out, even if the system is off.
Step 3: Deburr and Clean the Pipe
Use a deburring tool or utility knife to remove any burrs or sharp edges from the cut ends of the pipe. This will ensure a smooth surface for bonding with the repair coupling. Use clean rags or paper towels to thoroughly clean the outside of the pipe near the cut ends. Remove any dirt, debris, or moisture that could interfere with the bonding process. A clean surface is essential for a good seal.
Step 4: Dry Fit the Repair Coupling
Before applying primer and cement, dry fit the repair coupling over the cut ends of the pipe. This will ensure that it fits properly and that you have enough overlap on each side. Make sure the coupling slides freely and covers the gap completely. This step is critical for ensuring a proper fit before committing to the glue.
Step 5: Apply Primer and Cement
This is the most critical step for a successful repair. Work quickly and deliberately. Apply PVC primer to the outside of the pipe near the cut ends and to the inside of the repair coupling. Use the applicator that comes with the primer can. Apply a generous, even coat. Let the primer dry for a few seconds (refer to the primer's instructions for specific drying times).
Immediately after applying the primer, apply PVC cement to the same areas. Use the applicator that comes with the cement can. Again, apply a generous, even coat. Do not let the cement dry before assembling the joint.
Step 6: Assemble the Joint
Quickly slide the repair coupling over one end of the pipe, pushing it firmly into place. Then, slide the other end of the pipe into the coupling. Twist the coupling slightly as you push it on to ensure even distribution of the cement. Hold the joint firmly in place for at least 30 seconds to allow the cement to set. Avoid moving or disturbing the joint during this time.
Step 7: Allow Sufficient Curing Time
Allow the PVC cement to cure completely before turning the HVAC system back on. Refer to the cement manufacturer's instructions for the recommended curing time. This is typically at least 24 hours, but may vary depending on temperature and humidity. Patience is key here; rushing this step can lead to leaks.
Step 8: Test the Repair
After the cement has fully cured, turn the HVAC system back on at the breaker. Carefully inspect the repair for any signs of leaks. Run the system for a while and continue to monitor the repair for any drips or seepage. If you detect any leaks, the repair may need to be redone, or you may need to consult a professional.
When to Call a Professional
While repairing a leaking PVC drain pipe with a repair coupling is a manageable DIY task for many homeowners, there are situations where calling a professional HVAC technician is the best course of action:
- Extensive Damage: If the damage to the PVC drain pipe is extensive or involves multiple leaks, it may be more cost-effective and efficient to have a professional replace the entire drain line.
- Difficult Access: If the leak is located in a hard-to-reach area, such as inside a wall or ceiling, attempting to repair it yourself could be risky and could potentially cause further damage.
- Complex System: If your HVAC system is complex or has multiple drain lines, it's best to leave the repair to a professional who has the knowledge and experience to diagnose and fix the problem correctly.
- Refrigerant Lines: If the leak is near refrigerant lines or other critical components of the HVAC system, attempting to repair it yourself could be dangerous and could potentially damage the system. Never attempt to repair refrigerant lines yourself.
- Uncertainty: If you're not comfortable working with plumbing or PVC cement, or if you're unsure about any part of the repair process, it's always best to err on the side of caution and call a professional.
- Repeated Failures: If you've attempted to repair the leak yourself multiple times and it continues to leak, it's likely that there's an underlying problem that needs to be addressed by a professional.
Remember, a professional HVAC technician has the tools, training, and experience to diagnose and repair HVAC system problems safely and effectively. While DIY repairs can save money, your safety and the integrity of your HVAC system should always be your top priorities. When in doubt, call a pro.
By following these steps, you can confidently troubleshoot and repair a leaking 3/4" PVC drain pipe using a repair coupling. Remember to prioritize safety, take your time, and don't hesitate to call a professional when needed. With a little knowledge and effort, you can keep your HVAC system running smoothly and your home comfortable.