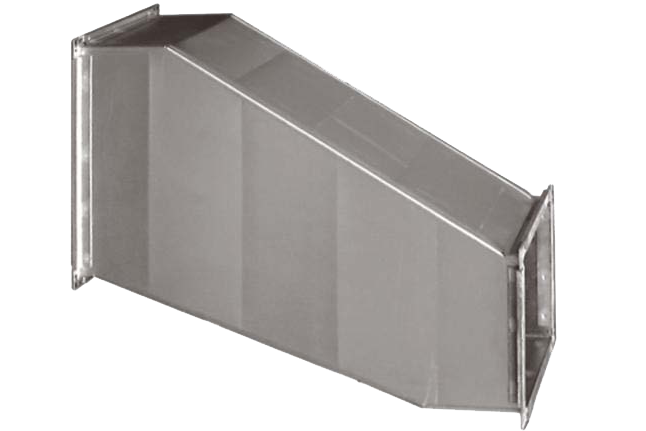
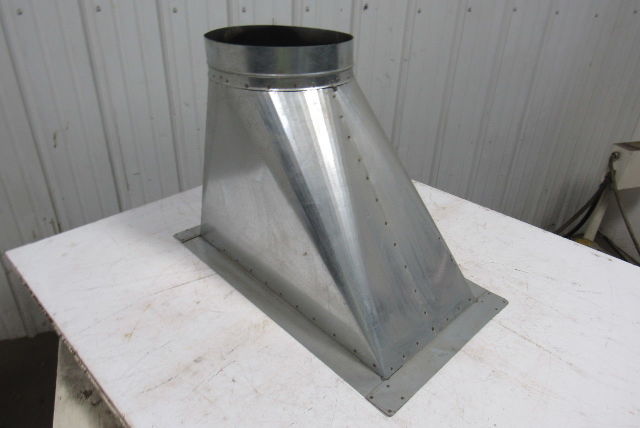
6 Round To Rectangular Duct Transition

Transitioning from a round duct to a rectangular duct is a common practice in HVAC (Heating, Ventilation, and Air Conditioning) systems. This is often necessary to connect different components, optimize airflow, or accommodate space constraints. Understanding the principles and best practices for designing and installing a 6-inch round to rectangular duct transition is crucial for maintaining system efficiency and preventing performance issues.
Why Use a Round to Rectangular Duct Transition?
There are several reasons why you might need to use a round-to-rectangular duct transition:
- Space Constraints: Round ducts are often more efficient in terms of airflow, but rectangular ducts can be easier to fit into tight spaces, such as within walls or above ceilings. A transition allows you to use the best duct shape for each section of the system.
- Connecting Different Components: Many HVAC components, such as fans, air handlers, and grilles, have either round or rectangular connections. A transition piece bridges the gap between these different shapes.
- Optimizing Airflow: While round ducts generally offer lower resistance to airflow, strategically placed rectangular ducts can sometimes better distribute air within a specific area. Transitions allow you to fine-tune the system's airflow.
- Cost Considerations: In some cases, rectangular ductwork might be more cost-effective to install, depending on the layout and materials available.
Understanding the 6-Inch Round Duct
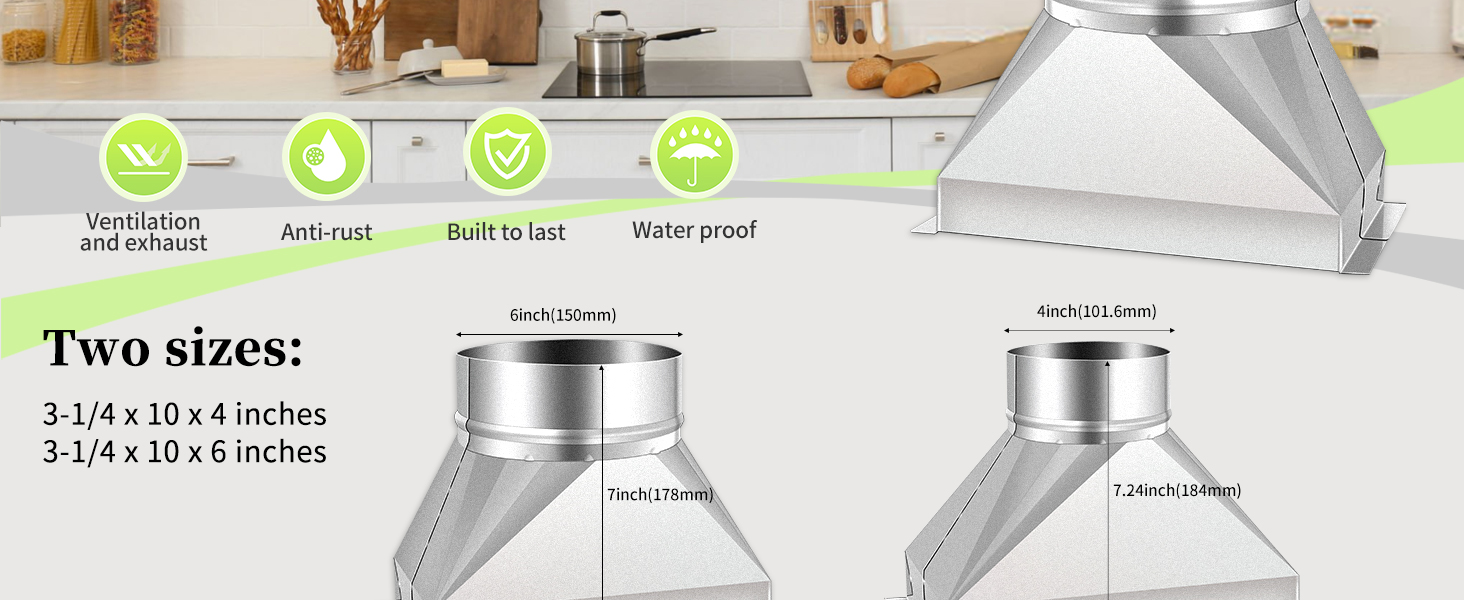
A 6-inch round duct refers to a duct with an inner diameter of 6 inches. This dimension is critical for calculating airflow and ensuring proper system performance. Before designing a transition, it's essential to know the exact diameter of the round duct you're working with.
Think of it like this: the 6-inch diameter is the "pipe" through which the air flows. If the pipe is too small, it restricts the airflow, causing the system to work harder and less efficiently. If it's too large, the air might not be distributed effectively.
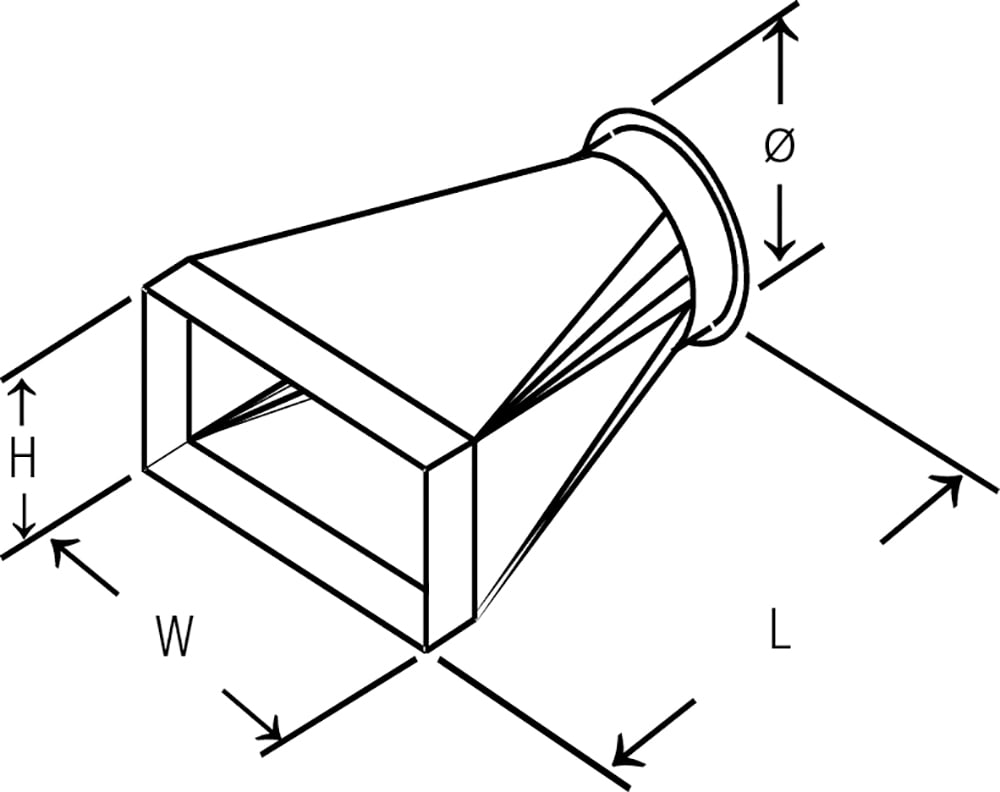
Designing the Rectangular Duct Dimensions
Determining the dimensions of the rectangular duct is a key step. The goal is to maintain a similar cross-sectional area to the 6-inch round duct, minimizing changes in air velocity and pressure.
Calculating the Area of the Round Duct
First, we need to calculate the cross-sectional area of the 6-inch round duct. The formula for the area of a circle is:
Area = πr2
Where:
- π (pi) is approximately 3.14159
- r is the radius of the circle (half the diameter)
In this case, the radius (r) is 3 inches (6 inches / 2). Therefore:
Area = 3.14159 * (3 inches)2 = 3.14159 * 9 square inches = approximately 28.27 square inches
So, the cross-sectional area of the 6-inch round duct is approximately 28.27 square inches.
Determining Rectangular Duct Dimensions
Now, we need to find the dimensions of a rectangular duct that has a similar area. The area of a rectangle is:
Area = Length * Width
We need to choose a length and width that, when multiplied together, result in approximately 28.27 square inches. There are many possible combinations, but some common and practical dimensions include:
- 3 inches x 9.42 inches: This combination is relatively compact and can be suitable for tight spaces.
- 4 inches x 7.07 inches: This might be a good choice if you need a slightly wider duct.
- 5 inches x 5.65 inches: This option is closer to a square shape.
Important Considerations:
- Aspect Ratio: The aspect ratio is the ratio of the length to the width of the rectangular duct. A very high aspect ratio (e.g., a very long and narrow duct) can lead to increased friction and reduced airflow. Ideally, keep the aspect ratio below 4:1.
- Space Availability: Choose dimensions that fit within the available space in your installation.
- Standard Duct Sizes: Consider using standard duct sizes to simplify fabrication and installation. You might need to slightly adjust the calculated dimensions to match readily available materials.
Example: Let's say you have a space constraint of a maximum height of 4 inches. You would then choose the 4 inches x 7.07 inches configuration. If standard duct sizes are in increments of 1 inch, you might round that to 4 inches x 7 inches. This will change the area to 28 inches square, which is close enough to the 28.27 sq in of the round duct.
Transition Design Considerations
The design of the transition piece itself is critical for minimizing airflow restrictions. Here are some key considerations:
- Smooth Transition: The transition should be as gradual as possible. Abrupt changes in duct shape can create turbulence and increase pressure drop.
- Angle of Transition: The angle of the transition should be kept as small as possible, ideally less than 30 degrees. A smaller angle helps to maintain laminar airflow.
- Length of Transition: A longer transition piece will generally provide a smoother transition than a shorter one, but space constraints might limit the length.
- Material: The transition piece should be made of the same material as the ducts it connects (typically galvanized steel).
- Sealing: All seams and connections should be properly sealed to prevent air leaks. Use duct tape or mastic for sealing.
Imagine trying to pour water from a small funnel into a large bucket. If you just abruptly jam the funnel into the bucket, the water will splash and spill. But if you gently and smoothly insert the funnel, the water will flow more efficiently. The duct transition is similar – a smooth transition allows the air to flow without unnecessary turbulence.
Fabrication and Installation
You can either purchase a pre-fabricated round-to-rectangular duct transition or fabricate one yourself. If you choose to fabricate it yourself, you'll need sheet metal, cutting tools, bending tools, and sealing materials.
Steps for Fabrication (DIY):
- Measure and Cut: Carefully measure and cut the sheet metal according to your design. Accuracy is crucial for a proper fit.
- Bend: Use bending tools to shape the sheet metal into the desired transition shape. Be precise and avoid sharp bends.
- Assemble: Assemble the transition piece, ensuring tight seams.
- Seal: Seal all seams and connections with duct tape or mastic.
Installation:
- Connect: Connect the round end of the transition to the 6-inch round duct using appropriate connectors (e.g., slip connectors, couplings).
- Connect: Connect the rectangular end of the transition to the rectangular duct using appropriate connectors (e.g., flanges, drive cleats).
- Secure: Secure the transition piece to the ducts using screws or rivets.
- Seal: Ensure all connections are properly sealed to prevent air leaks.
- Support: Provide adequate support for the ductwork to prevent sagging.
Common Mistakes to Avoid
Here are some common mistakes to avoid when designing and installing round-to-rectangular duct transitions:
- Incorrect Area Calculation: Using the wrong dimensions or formulas can lead to a poorly sized transition.
- Abrupt Transitions: Sharp angles and sudden changes in duct shape can create turbulence and reduce airflow.
- Poor Sealing: Air leaks can significantly reduce system efficiency.
- Inadequate Support: Sagging ductwork can restrict airflow and damage the system.
- Ignoring Aspect Ratio: Using a very high aspect ratio for the rectangular duct can increase friction and pressure drop.
Troubleshooting Airflow Problems After Installation
If you experience airflow problems after installing a round-to-rectangular duct transition, consider the following:
- Check for Air Leaks: Inspect all connections and seams for air leaks. Use a smoke test to identify leaks.
- Measure Airflow: Use an anemometer to measure airflow at different points in the system.
- Inspect Ductwork: Look for any obstructions or kinks in the ductwork.
- Verify Component Compatibility: Ensure that all components in the system are properly sized and compatible.
Conclusion
A properly designed and installed 6-inch round-to-rectangular duct transition is essential for maintaining the efficiency and performance of your HVAC system. By understanding the principles of airflow, carefully calculating duct dimensions, and avoiding common mistakes, you can ensure a smooth and efficient transition that optimizes your system's performance. Remember to prioritize smooth transitions, proper sealing, and adequate support to achieve the best results. Always consult with a qualified HVAC professional if you have any doubts or concerns about your installation.