Ac Condenser Capacitor
One of the most frustrating experiences for any homeowner is when their air conditioner suddenly stops working, especially during the hottest days of summer. While a complete AC failure can stem from various issues, a surprisingly common culprit is a malfunctioning condenser capacitor. This small, inexpensive component plays a crucial role in starting and running your outdoor AC unit’s fan motor and compressor. A failing capacitor can lead to a system that struggles to start, blows warm air, or simply doesn’t turn on at all.
Before you call a costly HVAC technician, it’s worth taking a few simple steps to diagnose the problem and, if possible, attempt a simple fix. This guide will walk you through the process, ensuring your safety and helping you determine whether it's a DIY job or a task best left to the professionals.
Safety First! Before You Begin
Working with electrical components, even seemingly small ones, requires extreme caution. Always disconnect power to the AC unit before attempting any troubleshooting or repairs. Locate the outdoor disconnect box, usually a gray metal box near the condenser unit, and turn the breaker to the OFF position. It's best practice to use a non-contact voltage tester to ensure the power is completely off. If the tester indicates voltage, stop immediately and call a qualified electrician.
Wait at least 5 minutes after disconnecting power. Capacitors store electricity, even when disconnected from the power source. This waiting period allows the capacitor to discharge some of its stored energy.
Remember, if at any point you feel uncomfortable or unsure about the process, stop and contact a qualified HVAC technician. Your safety is the priority.
Identifying a Potential Capacitor Problem
Several symptoms can indicate a failing or failed condenser capacitor:
- The AC unit hums but the fan doesn't spin: This is a classic sign. The capacitor might not be providing enough power to start the fan motor.
- The fan spins slowly: A weak capacitor can cause the fan to run sluggishly.
- The AC unit blows warm air: If the compressor isn’t starting or running efficiently due to a bad capacitor, the system won't cool effectively.
- The AC unit cycles on and off frequently (short cycling): This can be caused by various issues, but a failing capacitor is one possibility.
- The AC unit doesn't turn on at all: While other issues can cause this, a completely dead capacitor can prevent the unit from starting.
- A bulging or leaking capacitor: A visually damaged capacitor is a clear indication of failure.
Step-by-Step Capacitor Diagnosis
Follow these steps to diagnose the capacitor:
Step 1: Visual Inspection
After disconnecting the power and waiting at least 5 minutes, carefully remove the service panel on the side of the AC condenser unit. This panel is usually held in place by screws. Take a picture of the wiring before disconnecting anything – this will be invaluable when you need to reconnect it.
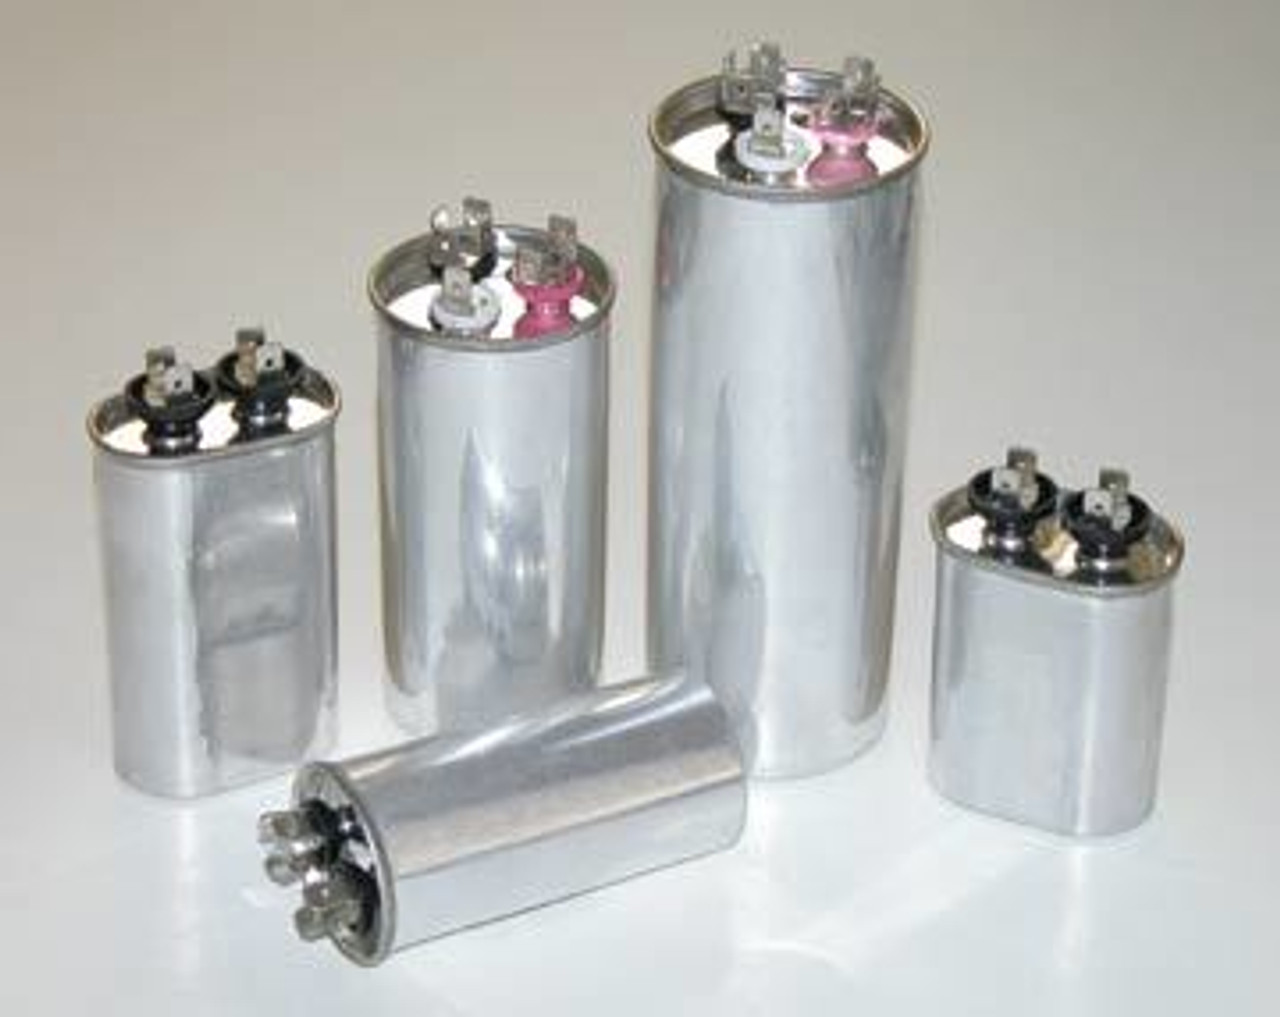
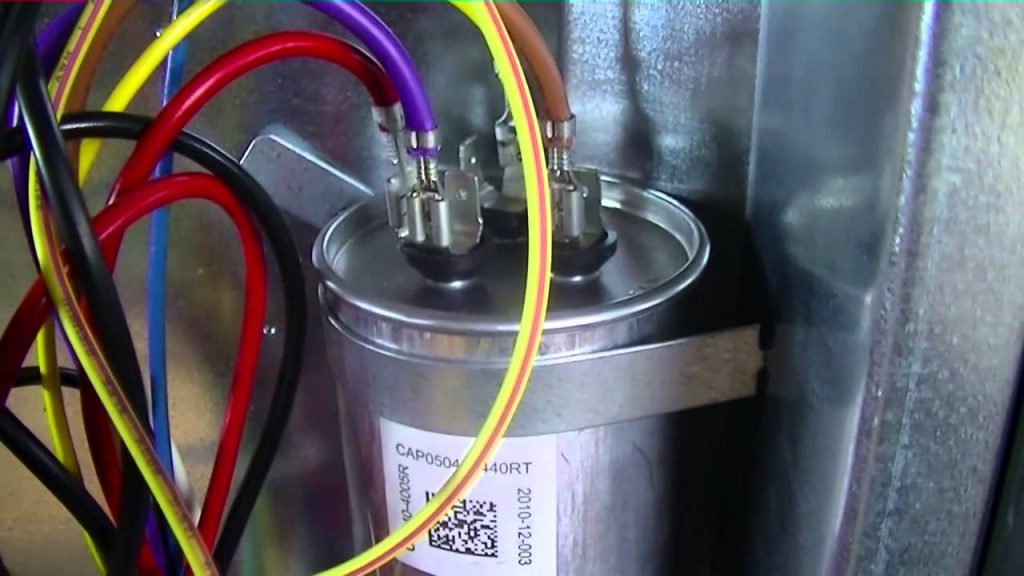
Locate the capacitor. It's typically a cylindrical component, often silver or gray, with wires connected to it. Carefully inspect the capacitor for any visible signs of damage, such as:
- Bulging: A domed or swollen top or bottom.
- Leaking: Any signs of fluid leakage.
- Rust or corrosion: Around the terminals or body of the capacitor.
- Cracks: Any visible cracks in the casing.
If you see any of these signs, the capacitor is likely bad and needs to be replaced. Proceed to the replacement steps (after reading the warning section below).
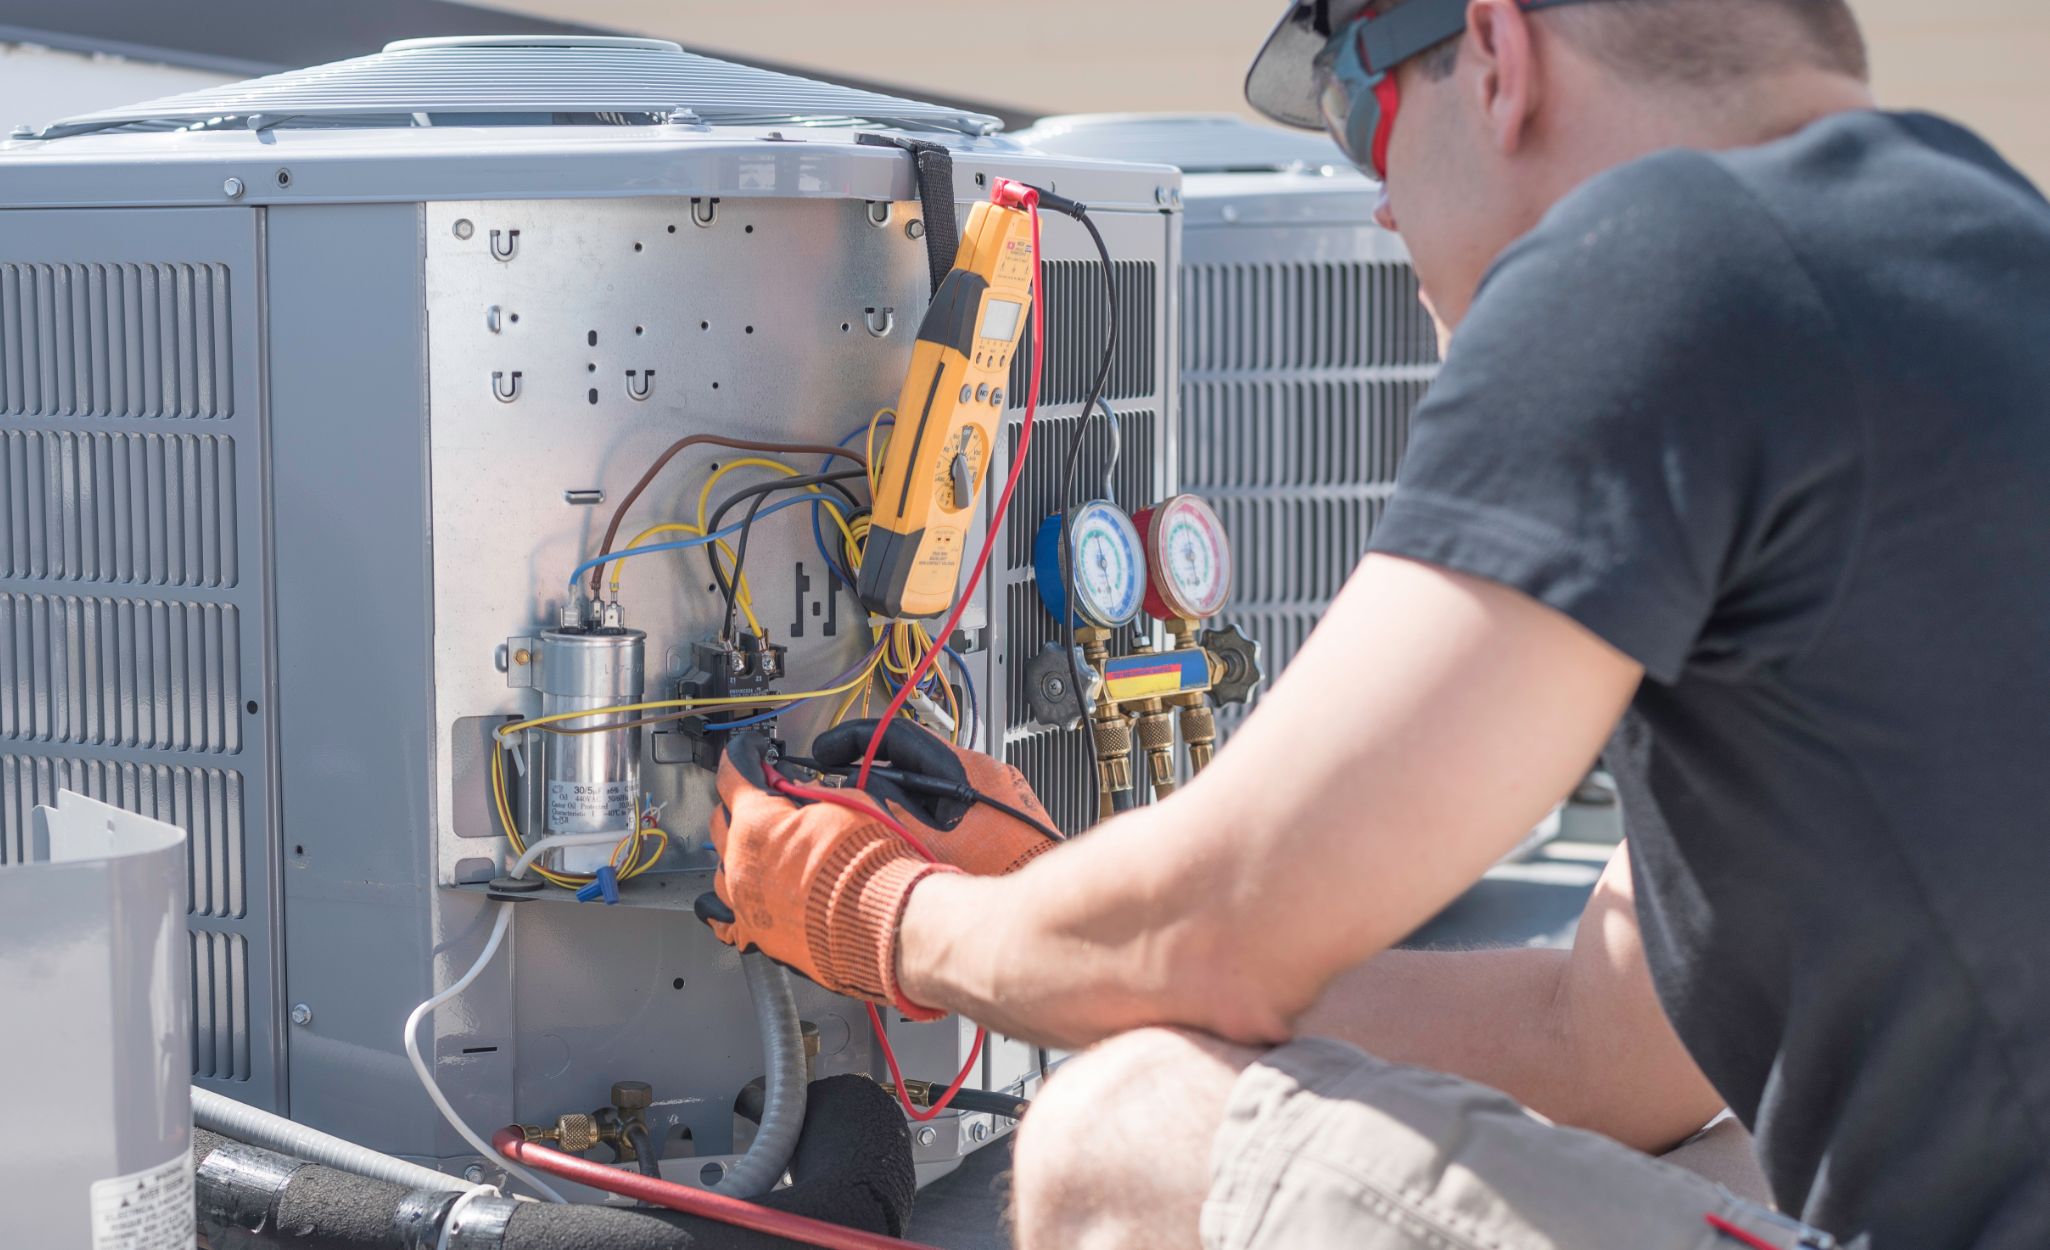
Step 2: Testing the Capacitor (Requires a Multimeter)
Warning: This step involves working with electrical components and requires a basic understanding of multimeter operation. If you're not comfortable with using a multimeter, skip this step and consult an HVAC technician.
To test the capacitor, you'll need a multimeter that can measure capacitance (usually marked with a "µF" or "MFD").
- Disconnect the power to the AC unit and wait at least 5 minutes to allow the capacitor to discharge.
- Carefully disconnect the wires from the capacitor terminals. Again, take a picture of the wiring before disconnecting!
- Set your multimeter to the capacitance setting (µF or MFD).
- Connect the multimeter probes to the capacitor terminals. Polarity doesn't matter for most AC capacitors.
- Read the capacitance value on the multimeter.
- Compare the reading to the rated capacitance value printed on the capacitor label. The actual value can vary slightly (usually within +/- 5% to 10%), but a significantly lower reading indicates a failing capacitor. For example, a capacitor rated at 45 µF might read 40 µF or lower if it's failing.
Important: After testing, short the terminals of the capacitor with an insulated screwdriver to ensure it is completely discharged before handling it further.
DIY Fix: Replacing the Capacitor (If Applicable)
If the capacitor shows visible signs of damage or the multimeter reading is significantly below the rated value, you can attempt to replace it yourself, provided you are comfortable working with electrical components and have followed all safety precautions.
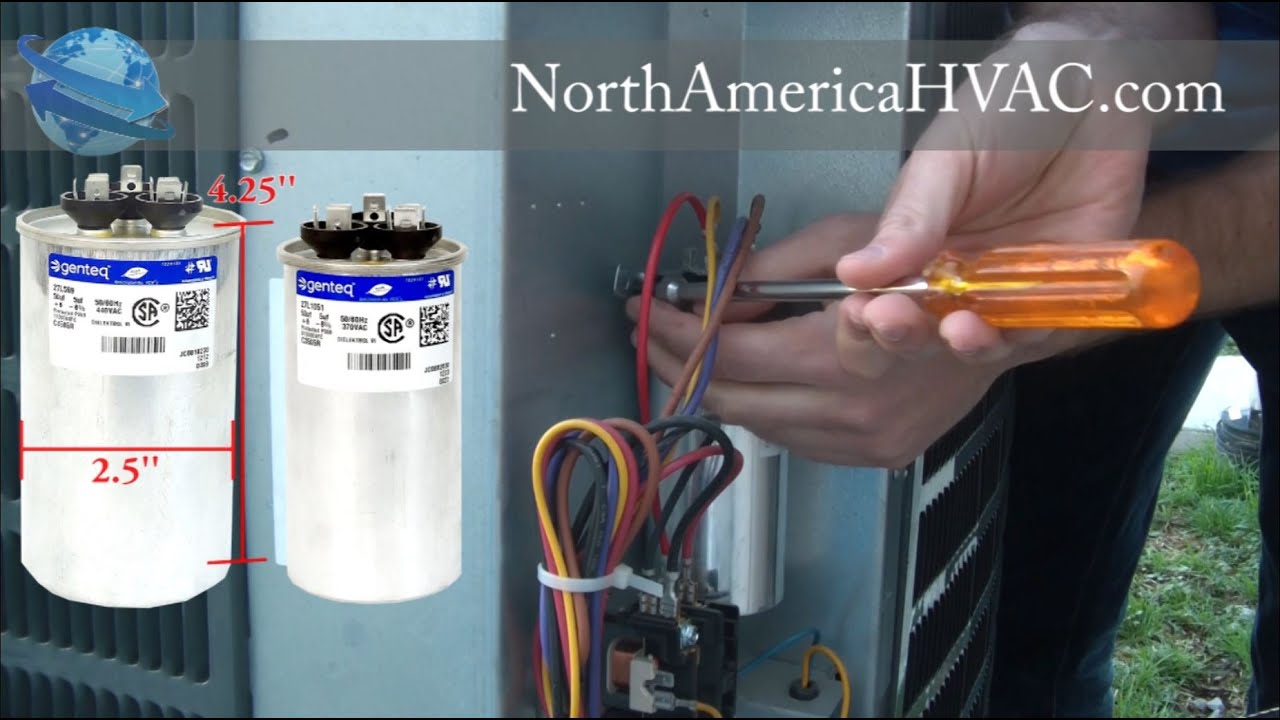
- Purchase a replacement capacitor with the exact same specifications (voltage and microfarad rating) as the original. This is crucial! You can find these at most HVAC supply stores or online retailers. Using a capacitor with different specifications can damage your AC unit.
- Take a picture of the wiring before disconnecting anything! This is extremely important for proper reassembly.
- Disconnect the wires from the old capacitor, one at a time.
- Connect the wires to the corresponding terminals on the new capacitor, using the picture you took as a guide. Ensure the connections are secure.
- Carefully place the new capacitor in the same location as the old one.
- Reattach the service panel to the AC unit.
- Restore power to the AC unit by turning the breaker back ON.
After restoring power, observe the AC unit. The fan should start spinning, and the compressor should kick in. Give the unit some time to run and ensure it's cooling properly.
When to Call a Professional
While replacing a capacitor can be a straightforward DIY project for some homeowners, there are situations where it's best to call a qualified HVAC technician:
- You're not comfortable working with electricity: Safety is paramount. If you feel unsure at any point, don't proceed.
- You're unable to identify the correct replacement capacitor: Using the wrong capacitor can damage your AC unit.
- The AC unit still doesn't work after replacing the capacitor: This indicates a more complex issue that requires professional diagnosis and repair. There could be problems with the compressor, fan motor, wiring, or other components.
- You notice any other unusual sounds or smells coming from the AC unit: These could be signs of a more serious problem.
- You suspect a refrigerant leak: Refrigerant handling requires specialized equipment and certifications.
- You're dealing with a hard-start kit: Hard-start kits add complexity, and improper installation can be hazardous.
- If the capacitor blows again shortly after replacement: There may be an underlying issue stressing the capacitor, which needs to be identified and corrected by a professional. A common cause is an aging compressor.
- If you live in an apartment or condo: Some rental agreements restrict tenants from performing any HVAC repairs.
In these situations, contacting a qualified HVAC technician is the safest and most efficient way to resolve the problem and ensure your AC unit is running correctly.
Preventative Maintenance
To help prevent capacitor failure and other AC problems, consider these preventative maintenance tips:
- Regularly clean the AC condenser unit: Remove any debris, leaves, or grass clippings that may be blocking airflow. A garden hose can be used to gently wash the fins.
- Change the air filters regularly: Dirty air filters restrict airflow and can cause the AC unit to work harder, potentially stressing the capacitor and other components.
- Schedule annual AC maintenance: A professional HVAC technician can inspect your system, clean the coils, check the refrigerant levels, and identify any potential problems before they become major issues. These checkups often catch early signs of capacitor degradation.
Understanding Capacitor Ratings
When selecting a replacement capacitor, it's crucial to match the original specifications. Here's a breakdown of what those specifications mean:
- Microfarads (µF or MFD): This indicates the capacitor's capacitance, which is its ability to store an electrical charge. It's critical to match the µF/MFD rating exactly. Using a capacitor with a different capacitance can damage your AC unit.
- Voltage (VAC): This indicates the maximum voltage the capacitor can handle. The replacement capacitor must have a voltage rating equal to or higher than the original.
- Terminal Types: Capacitors come with different terminal types, such as quick-connect terminals or screw terminals. Ensure the replacement capacitor has the same terminal type as the original for easy wiring.
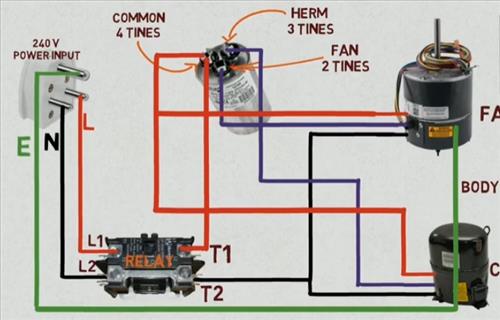
- Dual Run vs. Single Run: Some capacitors are "dual run" capacitors, which have three terminals and are used to start both the fan motor and the compressor motor. Single run capacitors only have two terminals. Make sure you get the correct type for your system.
By understanding these ratings, you can ensure you select the correct replacement capacitor for your AC unit.
By following these steps, you can confidently diagnose and potentially fix a common AC problem – a failing condenser capacitor. Remember to prioritize safety and know when to call a professional. With a little knowledge and effort, you can keep your AC running smoothly and stay comfortable all summer long.