Ac Window Unit Compressor Not Kicking On

One of the most frustrating problems homeowners face, especially during the peak of summer or the dead of winter, is an air conditioner that stubbornly refuses to cool. While several components can contribute to this issue, a frequently encountered culprit is the compressor failing to kick on. The compressor is the heart of your AC unit; without it, the refrigerant cannot circulate, and cooling is impossible. Before you resign yourself to a sweltering home and a hefty repair bill, there are several troubleshooting steps you can take to diagnose the problem and potentially resolve it yourself. This guide provides a methodical approach to identifying why your AC compressor isn't starting, along with safe and simple DIY solutions.
Understanding the Compressor's Role
First, let's briefly understand what the compressor does. Think of it as the pump that circulates refrigerant throughout the AC system. The compressor increases the pressure and temperature of the refrigerant, allowing it to release heat in the outdoor condenser coil. Without a functioning compressor, the refrigerant stays stagnant, and the indoor evaporator coil can't absorb heat from your home.
Safety First!
Before you begin any troubleshooting, ensure the AC unit is turned OFF. Locate the circuit breaker for the AC unit and switch it off. This is crucial to prevent electrical shock. Even with the unit off, some internal components can store an electrical charge, so it's best to exercise extreme caution.
Step-by-Step Troubleshooting
We'll follow a systematic approach, starting with the easiest checks and moving to more complex ones. We'll also distinguish between checks you can do without tools and those requiring basic equipment.
1. Initial Visual Inspection (No Tools Required)
Begin with a thorough visual inspection of both the indoor and outdoor units.
- Check the Air Filter: A clogged air filter is one of the most common causes of AC problems. A dirty filter restricts airflow, causing the evaporator coil to freeze up. The frozen coil can prevent the compressor from starting. Replace the air filter immediately if it's dirty. Even if it doesn't solve the compressor issue, a clean filter is essential for efficient operation.
- Inspect the Outdoor Unit: Look for any obvious signs of damage to the outdoor unit. Are there bent fins on the condenser coil? Are there any obstructions blocking airflow around the unit, such as overgrown plants or debris? Clear any obstructions and gently straighten any bent fins with a fin comb (available at most hardware stores).
- Check for Ice: Look for ice buildup on the refrigerant lines or the indoor evaporator coil. If you see ice, the compressor might be trying to run but can't due to the restricted airflow or other issues. Turn the unit off and allow the ice to melt completely before proceeding.
2. Thermostat Check (No Tools Required)
The thermostat is the brain of your cooling system. If it's not set correctly, the compressor won't receive the signal to turn on.
- Verify the Settings: Ensure the thermostat is set to "Cool" and the temperature is set lower than the current room temperature. It sounds obvious, but it's easily overlooked.
- Check the Batteries: If your thermostat is battery-powered, make sure the batteries are fresh. Low batteries can cause erratic behavior. Replace the batteries.
- Test the Fan Setting: Set the thermostat fan setting to "Auto." If it's set to "On," the indoor fan will run continuously, but the compressor might not engage.
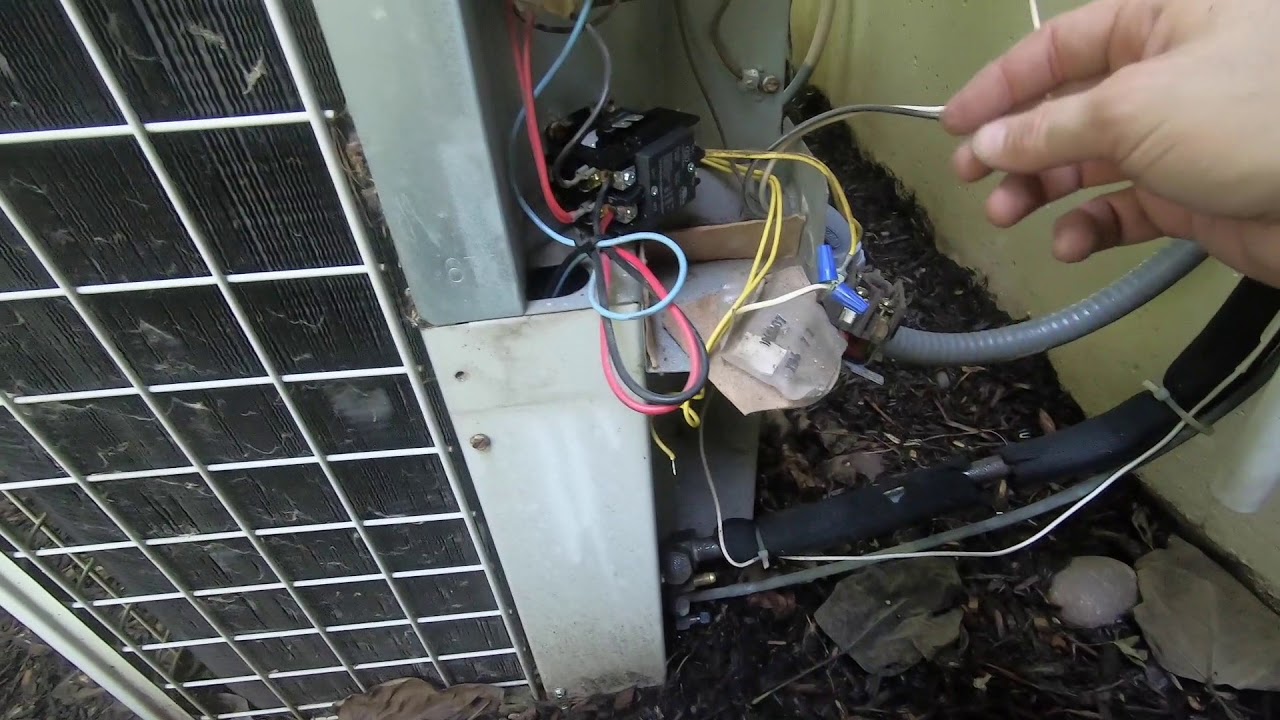
3. Circuit Breaker Check (No Tools Required, but Safety Critical!)
A tripped circuit breaker is a common cause of compressor failure. The compressor requires a significant amount of power to start, and a surge can easily trip the breaker.
- Locate the Breaker: Find the circuit breaker that controls the AC unit (usually labeled).
- Check the Position: If the breaker is tripped, it will be in the "Off" or "Middle" position.
- Reset the Breaker: Turn the breaker fully to the "Off" position and then back to the "On" position. If the breaker trips again immediately, there's likely a short circuit in the system, and you should call a professional HVAC technician. Do not repeatedly reset the breaker.
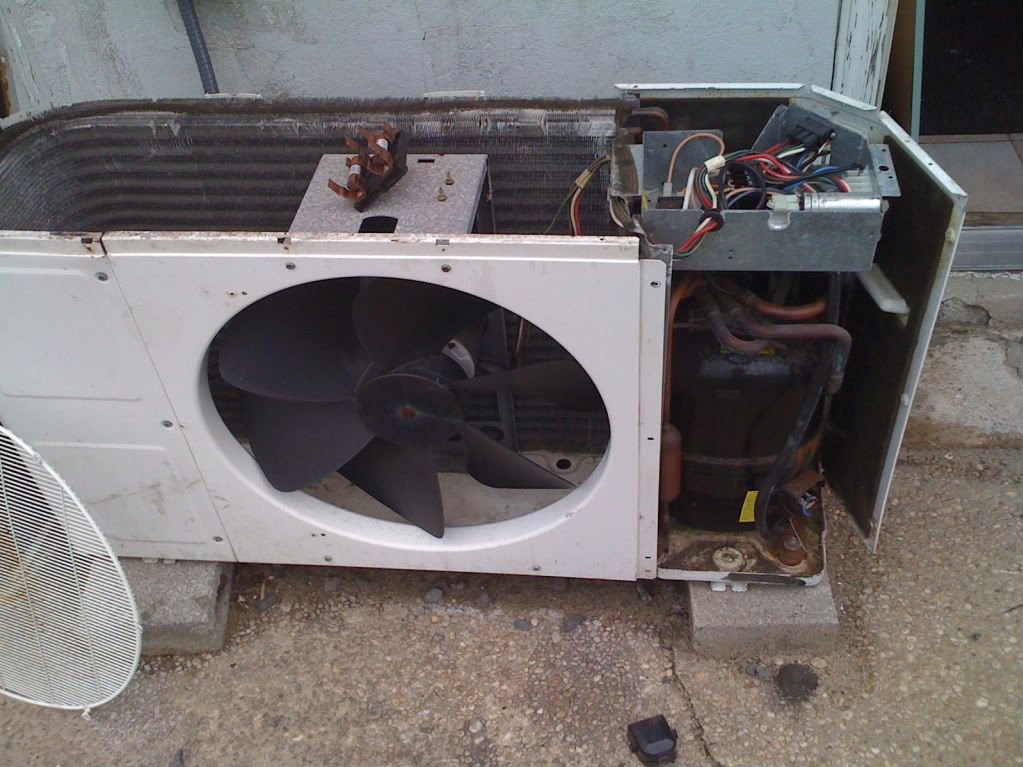
4. Capacitor Check (Requires Basic Tools and Caution!)
The capacitor is a small, cylindrical component that provides the electrical surge needed to start the compressor motor. A weak or failed capacitor is a frequent cause of compressor problems.
WARNING: Capacitors can store a dangerous electrical charge even after the unit is turned off. Use extreme caution when working with capacitors. If you are not comfortable working with electricity, call a professional.
Tools Needed: Screwdriver, Multimeter (optional but recommended for accurate testing)
- Locate the Capacitor: The capacitor is usually located inside the outdoor unit, near the compressor. It's typically a cylindrical component, often silver or gray.
- Visually Inspect the Capacitor: Look for any signs of damage, such as bulging, leaking, or corrosion. If the capacitor is visibly damaged, it needs to be replaced.
- Discharge the Capacitor (Critical!): Before touching the capacitor, you must discharge it. Use a screwdriver with an insulated handle to short across the capacitor terminals. Touch both terminals simultaneously with the screwdriver blade. You may see a small spark. This dissipates any stored charge. Repeat this process a few times for good measure.
- Test the Capacitor (Using a Multimeter - Optional): If you have a multimeter with a capacitance function, you can test the capacitor's microfarad (µF) rating. Disconnect the wires from the capacitor (after discharging it, of course!). Set the multimeter to the capacitance setting and connect the probes to the capacitor terminals. Compare the reading on the multimeter to the rated capacitance printed on the capacitor. If the reading is significantly lower (more than 10% below) than the rated value, the capacitor is likely failing and needs to be replaced.
- Replacing the Capacitor (DIY with Caution or Call a Pro): If you're comfortable, you can replace the capacitor yourself. Ensure you purchase a replacement capacitor with the same microfarad (µF) rating and voltage as the original. Carefully disconnect the wires from the old capacitor, noting their positions. Connect the wires to the new capacitor in the same configuration. Secure the new capacitor in place. If you're unsure about any of these steps, it's best to call a professional.
5. Compressor Overload Protector (Requires Basic Tools)
The compressor overload protector is a safety device that shuts off the compressor if it overheats. It's designed to protect the compressor from damage.
Tools Needed: Multimeter
- Locate the Overload Protector: The overload protector is usually located on or near the compressor. It may be a small, rectangular or cylindrical component.
- Test for Continuity: Use a multimeter to test for continuity across the overload protector terminals. Disconnect the wires from the overload protector. Set the multimeter to the continuity setting. Touch the probes to the overload protector terminals. If the multimeter shows no continuity (open circuit), the overload protector may have tripped.
- Resetting the Overload Protector: Some overload protectors have a reset button. If you find one, try pressing it. After pressing the reset button, retest for continuity. If continuity is restored, the overload protector was likely tripped due to overheating. If there is no reset button, the overload protector may reset itself after the compressor cools down. Wait for a while and try to turn on the AC again. If the overload protector trips repeatedly, there's likely a more serious problem with the compressor, and you should call a professional.
6. Start Relay (More Advanced - Consider a Professional)
The start relay helps the compressor motor start by providing an extra boost of power. A faulty start relay can prevent the compressor from starting.
This step is more advanced and requires a good understanding of electrical circuits. If you are not comfortable with this, it's best to call a professional.
Tools Needed: Multimeter
- Locate the Start Relay: The start relay is typically located near the compressor, often inside a small electrical box.
- Visually Inspect the Start Relay: Look for any signs of damage, such as burnt wires or a cracked casing.
- Test the Start Relay: Use a multimeter to test the continuity of the start relay coils. Disconnect the wires from the start relay. Refer to the wiring diagram for your AC unit to identify the correct terminals to test. If the multimeter shows no continuity (open circuit), the start relay is likely faulty and needs to be replaced.
When to Call a Professional
While these troubleshooting steps can help you identify and potentially resolve common compressor problems, some issues are beyond the scope of DIY repair. Call a qualified HVAC technician if:
- You are not comfortable working with electricity.
- You suspect a refrigerant leak. Refrigerant handling requires specialized equipment and certification.
- The compressor is making unusual noises, such as grinding or rattling.
- The circuit breaker trips repeatedly after resetting it.
- You have tested the capacitor and start relay and are still unable to diagnose the problem.
- The compressor is still not starting after performing all the troubleshooting steps.
Attempting to repair complex AC issues without the proper knowledge and tools can be dangerous and may void your warranty. It's always best to err on the side of caution and seek professional help when needed.
Preventative Maintenance
To minimize the likelihood of future compressor problems, consider these preventative maintenance tips:
- Change the air filter regularly (every 1-3 months).
- Clean the outdoor unit regularly, removing any debris or obstructions.
- Schedule annual professional AC maintenance. A technician can inspect and clean the system, check refrigerant levels, and identify potential problems before they become major issues.
By following these troubleshooting steps and preventative maintenance tips, you can keep your AC unit running smoothly and efficiently, ensuring a comfortable home environment throughout the year.