Adjusting Gas Burner Flame

Understanding how to adjust the flame on a gas burner is crucial for safety, efficiency, and maintaining the lifespan of your appliances. Whether it's your furnace, water heater, or gas stove, a properly adjusted flame ensures optimal performance and minimizes the risk of carbon monoxide buildup. This guide will walk you through the process of identifying, understanding, and adjusting your gas burner flame.
Understanding the Importance of a Proper Gas Burner Flame
A gas burner flame isn't just a source of heat; it's a visual indicator of how well your appliance is functioning. An improperly adjusted flame can lead to several problems, including:
- Reduced Efficiency: A poorly adjusted flame wastes fuel, increasing your energy bills.
- Carbon Monoxide Production: Incomplete combustion can produce dangerous levels of carbon monoxide (CO), a colorless, odorless gas that can be fatal.
- Soot Buildup: Inefficient burning creates soot, which can clog vents and heat exchangers, further reducing efficiency and increasing the risk of fire.
- Equipment Damage: An improper flame can overheat components, shortening the lifespan of your appliance.
Identifying a Proper Gas Burner Flame
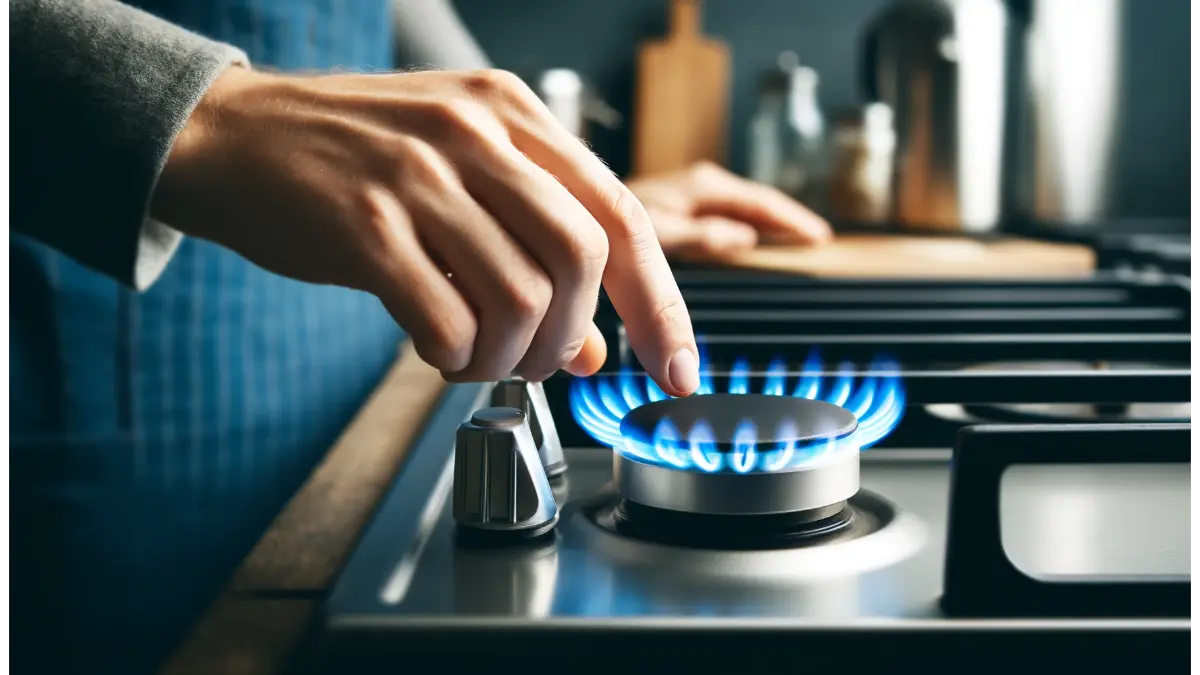
A healthy gas burner flame should be blue with a crisp, well-defined shape. There should be minimal or no yellow tipping. Here's a breakdown of what to look for:
- Color: Blue is ideal. A blue flame indicates complete combustion, meaning the gas is burning efficiently and cleanly.
- Shape: The flame should be steady and consistent, without flickering or lifting off the burner. It should also be well-defined, not lazy or wispy.
- Yellow Tipping: A small amount of yellow at the very tip of the flame might be acceptable in some cases, but excessive yellow indicates incomplete combustion and a need for adjustment.
- Soot: Any signs of soot or black residue around the burner are a clear indication of a problem and require immediate attention.
Flame Colors and What They Indicate
- Blue Flame: Proper combustion; indicates sufficient oxygen.
- Yellow Flame: Incomplete combustion; indicates insufficient oxygen, dirty burner, or incorrect gas pressure.
- Orange Flame: Often indicates dust or debris burning off. May be temporary, but monitor for persistence.
- Red Flame: Could indicate the presence of impurities in the gas line or poor ventilation. Requires investigation.
Safety Precautions Before Adjusting the Flame
Safety is paramount when working with gas appliances. Before you begin any adjustments, take the following precautions:
- Turn off the gas supply: Locate the gas shut-off valve for the appliance and turn it to the "off" position. This is typically a valve on the gas line leading to the appliance.
- Ventilate the area: Open windows and doors to ensure adequate ventilation.
- Disconnect the power: For appliances with electrical components (like furnaces and water heaters), disconnect the power supply to prevent electrical shock.
- Use appropriate tools: Have the necessary tools on hand, such as a screwdriver, wrench, and possibly a manometer (for measuring gas pressure, although this is typically best left to a professional).
- If in doubt, call a professional: If you're uncomfortable working with gas appliances, don't hesitate to call a qualified HVAC technician or gas fitter. It's better to be safe than sorry.
Adjusting the Air Shutter
The most common method for adjusting a gas burner flame involves adjusting the air shutter. The air shutter is a small, adjustable opening that controls the amount of air that mixes with the gas before combustion. More air generally results in a bluer, more efficient flame.
- Locate the air shutter: The air shutter is usually located near the base of the burner, where the gas line connects. It may be a rotating sleeve or a sliding plate with an opening.
- Loosen the locking screw: There's usually a screw that locks the air shutter in place. Loosen this screw slightly so you can adjust the shutter. Do not remove the screw completely.
- Adjust the air shutter:
- To increase air: Open the air shutter by rotating or sliding it to expose more of the opening. This will allow more air to mix with the gas.
- To decrease air: Close the air shutter by rotating or sliding it to cover more of the opening. This will reduce the amount of air mixing with the gas.
- Observe the flame: After each adjustment, relight the burner (following the appliance's lighting instructions) and observe the flame. Look for a blue, crisp flame with minimal yellow tipping.
- Fine-tune the adjustment: Continue making small adjustments to the air shutter until you achieve the desired flame characteristics.
- Tighten the locking screw: Once you're satisfied with the flame, tighten the locking screw to secure the air shutter in its position.
- Re-check the flame: After tightening the screw, relight the burner again to ensure the flame hasn't changed.
Common Air Shutter Adjustment Issues
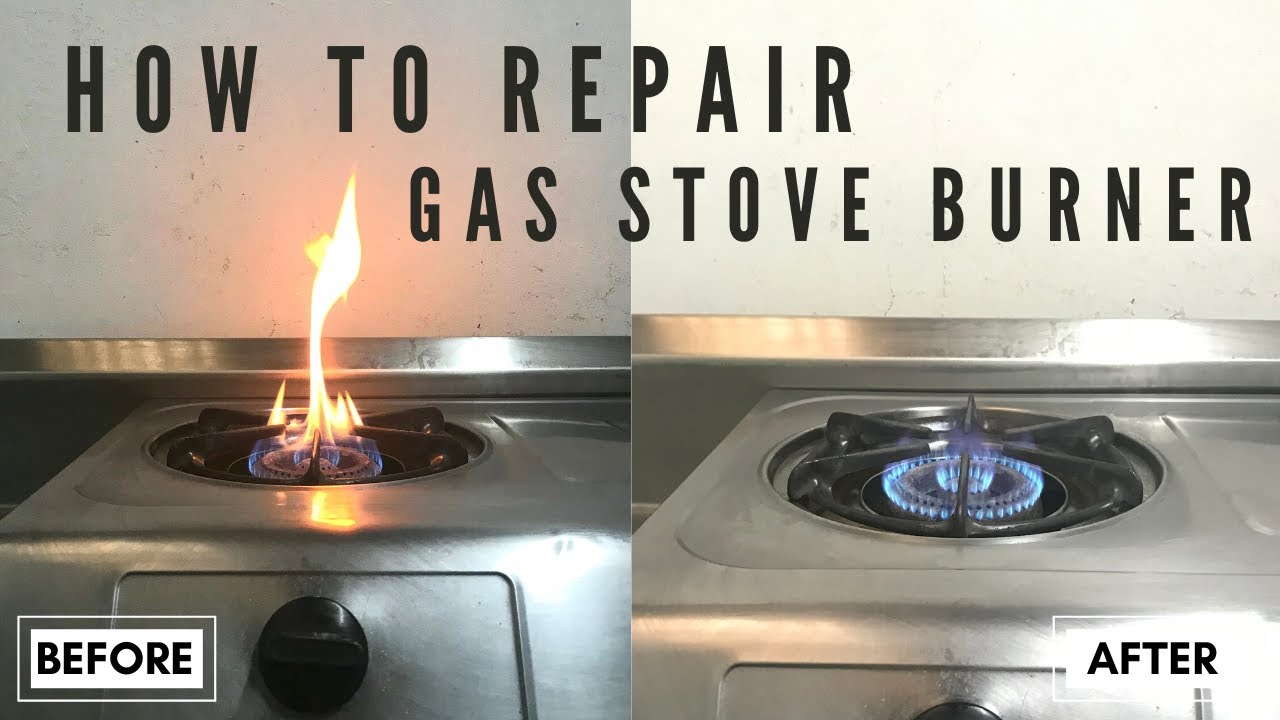
- Flame Lifting Off the Burner: This usually indicates too much air. Reduce the air by closing the air shutter slightly.
- Yellow, Sooty Flame: This usually indicates not enough air. Increase the air by opening the air shutter slightly.
- Flame is Noisy: Excessive air can cause a roaring or hissing sound. Reduce the air until the noise subsides.
Adjusting the Gas Pressure (Advanced - Requires a Professional)
While adjusting the air shutter is the most common method, sometimes the issue lies with the gas pressure. Gas pressure is the force at which gas is supplied to the burner. Adjusting gas pressure is a more complex procedure that should generally be performed by a qualified professional using a manometer to ensure it's within the appliance's specified range.
Why leave this to a professional? Incorrect gas pressure can be extremely dangerous, leading to incomplete combustion, carbon monoxide production, and potential explosions. Professionals have the necessary tools, training, and experience to safely and accurately adjust gas pressure.
If you suspect a gas pressure issue (e.g., the flame is consistently yellow despite adjusting the air shutter), contact a qualified HVAC technician or gas fitter.
Cleaning the Burner
Sometimes, a poor flame is simply due to a dirty burner. Dust, debris, and spiderwebs can accumulate on the burner, obstructing the flow of gas and air.
- Turn off the gas and power: As always, start by turning off the gas supply and disconnecting the power to the appliance.
- Remove the burner: Carefully remove the burner assembly from the appliance, following the manufacturer's instructions.
- Clean the burner ports: Use a wire brush or a specialized burner cleaning tool to clear any obstructions from the burner ports (the small holes where the gas comes out). A straightened paperclip can also be used for this purpose.
- Clean the burner body: Wipe down the burner body with a damp cloth to remove any dust or debris.
- Reassemble the burner: Carefully reassemble the burner assembly, ensuring all components are properly aligned and secured.
- Relight the burner: Turn the gas and power back on and relight the burner, following the appliance's lighting instructions. Observe the flame and make any necessary adjustments to the air shutter.
Troubleshooting Common Flame Problems
Here's a quick troubleshooting guide for common gas burner flame problems:
- Yellow Flame:
- Possible Causes: Insufficient air, dirty burner, incorrect gas pressure, blocked vent.
- Solutions: Adjust air shutter, clean burner, check gas pressure (professional), inspect vent for obstructions.
- Orange Flame:
- Possible Causes: Dust or debris burning off, impurities in the gas line.
- Solutions: Monitor the flame; if persistent, contact a professional to inspect the gas line.
- Red Flame:
- Possible Causes: Impurities in the gas line, poor ventilation.
- Solutions: Contact a professional to inspect the gas line and ensure adequate ventilation.
- Flame Lifting Off the Burner:
- Possible Causes: Too much air.
- Solutions: Reduce air by closing the air shutter slightly.
- Flame is Noisy:
- Possible Causes: Excessive air.
- Solutions: Reduce air until the noise subsides.
- Pilot Light Won't Stay Lit:
- Possible Causes: Dirty pilot light orifice, faulty thermocouple, insufficient gas pressure.
- Solutions: Clean pilot light orifice (carefully), replace thermocouple (if necessary), check gas pressure (professional).
Regular Maintenance
Regular maintenance is key to preventing flame problems and ensuring the safe and efficient operation of your gas appliances.
- Annual Inspection: Have your gas appliances inspected annually by a qualified HVAC technician or gas fitter. They can identify potential problems before they become serious and ensure your appliances are operating safely and efficiently.
- Clean Burners Regularly: Clean the burners of your gas appliances regularly, especially if you notice any signs of a poor flame.
- Check Vents: Ensure that the vents for your gas appliances are clear of obstructions, such as leaves, snow, or bird nests.
- Install Carbon Monoxide Detectors: Install carbon monoxide detectors throughout your home and test them regularly. Replace the batteries as needed.
When to Call a Professional
While some flame adjustments are relatively straightforward, there are situations where it's best to call a professional:
- You're uncomfortable working with gas appliances.
- You suspect a gas leak.
- You can't achieve a proper flame after adjusting the air shutter and cleaning the burner.
- You suspect a gas pressure issue.
- You notice any unusual odors or noises coming from your gas appliances.
- You have any concerns about the safety of your gas appliances.
Remember, your safety is always the top priority. When in doubt, call a qualified professional.