Air At 30000 Feet Is At A Temperature Of

Have you ever noticed a persistent chill in your home, even with the thermostat cranked up? Or perhaps certain rooms are noticeably colder than others? This is a common problem many homeowners face, and while it might seem like a minor inconvenience, it can lead to discomfort, increased energy bills, and even potential health issues. Understanding why your home feels cold, especially when you're trying to heat it, is the first step towards finding a solution.
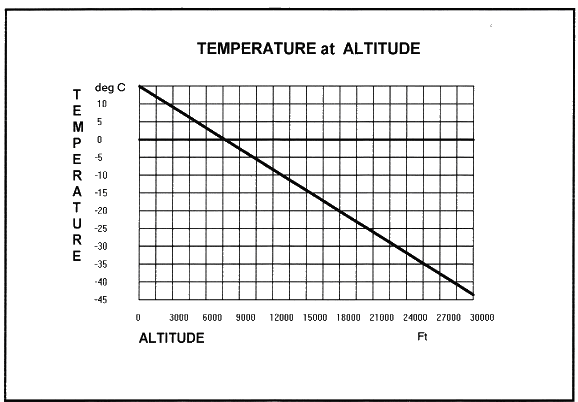
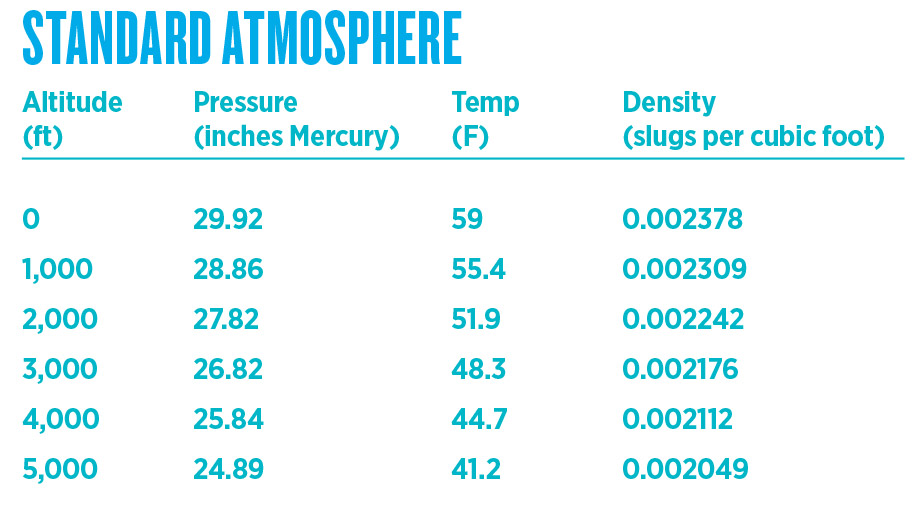
Understanding the Problem: The "30,000 Feet" Analogy
Think about the air outside at 30,000 feet – where airplanes fly. The temperature up there is drastically different from what we experience on the ground. That's because air temperature decreases with altitude. While your house isn't soaring to those heights, the concept of temperature variation due to insulation deficiencies and air leaks is analogous. Inefficient insulation and gaps in your home's envelope allow the warm air you're paying for to escape, while cold air seeps in, creating a sensation of being at a significantly higher (and colder) "altitude" within your own home.
This article will guide you through diagnosing the likely causes of a cold house and provide practical DIY fixes you can implement yourself. Remember, safety is paramount. If at any point you feel uncomfortable or unsure about a task, it's always best to call a qualified professional.
Step 1: Identifying the Cold Spots
Before diving into technical diagnostics, it's crucial to pinpoint the areas in your house that feel the coldest. This will help you narrow down the potential problem areas.
What you'll need:
- Your hands (a reliable temperature sensor!)
- A notebook and pen (to record your findings)
The Process:
- Systematically go through each room in your house. Pay particular attention to exterior walls, windows, and doors.
- Feel for drafts. Run your hand along window and door frames, where the wall meets the floor and ceiling, and around electrical outlets. A noticeable breeze indicates an air leak.
- Note the temperature differences. Does one room feel significantly colder than another? Does one area of a room (e.g., near a window) feel colder than another?
- Record your observations. Write down the location and severity of any drafts or cold spots you find. For example, "Drafty near the bottom of the front door," or "Very cold near the living room window."
Step 2: Inspecting Windows and Doors
Windows and doors are common culprits for heat loss. Over time, the seals around them can deteriorate, leading to drafts and increased energy bills.
What you'll need:
- A candle or incense stick (to visualize airflow)
- A flashlight (to inspect seals)
- Caulk or weather stripping (for temporary fixes - see below)
The Process:
- Candle/Incense Test: Light a candle or incense stick and slowly move it around the edges of your windows and doors, both inside and outside. If the flame flickers or the smoke wavers, it indicates an air leak.
- Visual Inspection: Use a flashlight to carefully inspect the weather stripping around your doors and windows. Look for cracks, gaps, or areas where the stripping is missing or damaged.
- Check for Gaps: Examine the caulking around the window and door frames. Is it cracked, crumbling, or missing?
DIY Fixes:
- Re-caulking: If you find cracks in the caulking, remove the old caulking with a utility knife or caulk remover. Clean the surface thoroughly and apply new caulk. Be sure to choose a caulk that is suitable for exterior use and can withstand temperature changes. Smooth the caulk line with your finger or a caulking tool.
- Replacing Weather Stripping: If the weather stripping is damaged or missing, replace it with new weather stripping. You can find weather stripping at most hardware stores. Be sure to measure the gap between the door/window and the frame before purchasing weather stripping to ensure you get the correct size.
- Temporary Solutions: For a quick fix, you can use rope caulk or even tape to seal small gaps around windows and doors. This is a temporary solution, but it can help reduce drafts until you can make more permanent repairs.
Step 3: Checking for Air Leaks Around Outlets and Fixtures
Believe it or not, electrical outlets and light fixtures can be significant sources of drafts. Gaps around these fixtures allow air to flow freely from the exterior walls into your home.
What you'll need:
- Foam outlet/switch gaskets
- Caulk or sealant (for larger gaps)
- Screwdriver (to remove outlet/switch covers)
The Process:
- Turn off the power to the circuit at the breaker box before working with electrical outlets. Safety first!
- Remove the outlet or switch cover plate.
- Inspect for gaps. Look for any visible gaps around the outlet or switch box.
- Install foam gaskets. Place a foam gasket behind the cover plate before reattaching it. These gaskets create a seal that prevents air from flowing through the outlet.
- For larger gaps, use caulk or sealant to fill any gaps around the outlet or switch box. Make sure the sealant is dry before restoring power to the circuit.
Step 4: Inspecting Attic Insulation
Attic insulation plays a crucial role in maintaining a comfortable temperature in your home. Insufficient or damaged insulation can lead to significant heat loss in the winter and heat gain in the summer.
What you'll need:
- A flashlight
- A ruler or measuring tape
- Protective clothing (long sleeves, pants, gloves, dust mask, eye protection)
The Process:
- Access the attic safely. Use a sturdy ladder and wear appropriate protective clothing.
- Inspect the insulation level. Use a ruler or measuring tape to measure the depth of the insulation. The recommended insulation level for attics varies depending on your climate zone, but generally, you should have at least 12-15 inches of fiberglass or cellulose insulation.
- Look for gaps or damage. Check for areas where the insulation is missing, compressed, or damaged by water or pests. Pay particular attention to areas around vents, chimneys, and recessed lighting.
- Check for air leaks. Look for gaps or cracks in the attic floor that could allow air to leak into your home. Seal any gaps you find with caulk or sealant.
DIY Fixes:
- Adding Insulation: If you find that your attic insulation is insufficient, you can add more insulation yourself. Loose-fill insulation (fiberglass or cellulose) is relatively easy to install using a blower, which you can rent from most home improvement stores.
- Sealing Air Leaks: Use caulk or sealant to seal any gaps or cracks in the attic floor. You can also use expanding foam to seal larger gaps.
Step 5: Checking the Furnace and Ductwork
Your furnace is the heart of your home's heating system, and the ductwork is the circulatory system that distributes warm air throughout your house. Problems with either of these components can lead to cold spots and reduced heating efficiency.
What you'll need:
- A flashlight
- Duct tape (for temporary fixes)
The Process:
- Visually inspect the furnace for any obvious signs of damage, such as rust, cracks, or leaks. Listen for any unusual noises coming from the furnace while it's running. If you smell gas, evacuate the house immediately and call the gas company.
- Inspect the ductwork. Look for any visible leaks, tears, or disconnections in the ductwork. Pay particular attention to joints and seams.
- Feel for air leaks. While the furnace is running, run your hand along the ductwork to feel for any air leaks.
DIY Fixes:
- Sealing Duct Leaks: Use duct tape to seal any small leaks in the ductwork. For larger leaks, you may need to use mastic sealant.
- Replacing Ductwork: If you find that sections of your ductwork are severely damaged or corroded, you may need to replace them.
When to Call a Professional
While many of the fixes outlined above are relatively simple and can be done yourself, there are certain situations where it's best to call a professional. Attempting repairs beyond your skill level can be dangerous and could potentially damage your home or heating system.
Here are some situations where you should definitely call a professional:
- Furnace Problems: Any problems with your furnace, such as a gas leak, unusual noises, or failure to ignite, should be addressed by a qualified HVAC technician.
- Complex Ductwork Issues: If you have extensive ductwork damage or need to reconfigure your ductwork system, it's best to hire a professional.
- Electrical Problems: Any electrical repairs should be done by a licensed electrician.
- Roof Leaks: If you suspect that your roof is leaking, it's important to call a roofing contractor to assess the damage and make necessary repairs.
- Insulation Issues: While you can add insulation yourself, if you have extensive insulation problems, such as mold or pest infestations, it's best to call a professional insulation contractor.
- You are unsure: If you've tried the basic steps and are still unsure about the cause of the problem or how to fix it, it's always best to err on the side of caution and call a professional.
Conclusion: Staying Warm and Saving Money
By following these steps, you can identify and address many of the common causes of a cold house. Remember to prioritize safety and call a professional when necessary. By taking proactive steps to improve your home's insulation and eliminate air leaks, you can stay warm, save money on your energy bills, and create a more comfortable living environment. Remember to carefully note all your findings as you inspect your house. This information can be valuable for a professional if you decide to seek outside help.
Good luck, and stay warm!