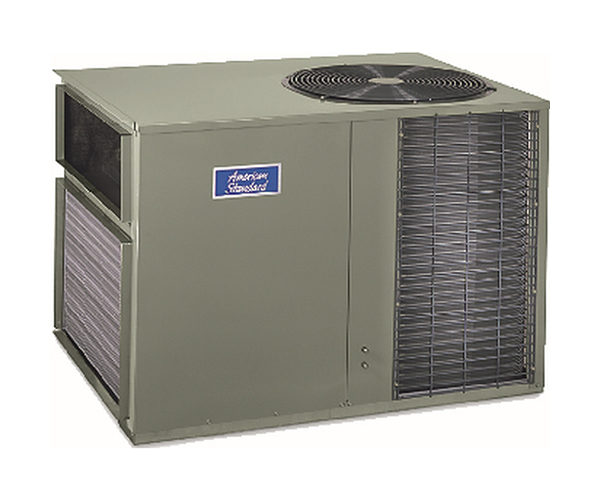
American Standard 2.5 Ton Heat Pump
Your American Standard 2.5 ton heat pump is designed to keep your home comfortable year-round, providing both heating and cooling. However, like any complex piece of machinery, it can sometimes encounter issues. One of the most common problems homeowners face is insufficient heating or cooling. This often manifests as the system running constantly without adequately reaching the desired temperature.
Diagnosing Insufficient Heating or Cooling
Before calling a professional, let's walk through a methodical troubleshooting process. Safety is paramount, so always disconnect power to the unit at the breaker box before performing any maintenance or inspection.
Step 1: Check the Thermostat
This might seem obvious, but it's the most frequent cause of problems. Ensure your thermostat is set to the correct mode (heat or cool) and the desired temperature. A simple mistake here can lead to frustration.
Action: Verify the thermostat is set to "Heat" and a temperature higher than the current room temperature, or "Cool" and a temperature lower than the current room temperature. If using a programmable thermostat, double-check the program settings to ensure they align with your needs. Battery problems can also cause issues; replace them if they're old.
Step 2: Inspect the Air Filter
A dirty air filter is a major culprit behind reduced airflow and efficiency. A clogged filter restricts airflow, forcing the heat pump to work harder and potentially leading to overheating or freezing.
Action: Locate the air filter, usually near the indoor unit (furnace or air handler). Remove the filter and visually inspect it. If it's visibly dirty (dust, debris), replace it with a new filter of the correct size and MERV rating as recommended by the manufacturer. Replace the filter even if it doesn't look *extremely* dirty; it could still be restricting airflow. A clean filter improves efficiency and extends the life of your system.
Step 3: Examine the Outdoor Unit (Condenser)
The outdoor unit is crucial for both heating and cooling. Inspect it carefully, paying attention to the following:
A. Obstructions: Are there any obstructions blocking airflow around the unit? This could include bushes, debris, or even snow accumulation.
Action: Clear any obstructions at least 2-3 feet around the unit. Trim bushes, remove leaves, and ensure snow isn't blocking the coils.
B. Coil Condition: Visually inspect the condenser coils for dirt, debris, or ice (in heating mode).
Action: * Dirt/Debris: Use a garden hose with a gentle spray nozzle to clean the coils. Spray from the inside out to avoid bending the fins. Do not use a pressure washer, as this can damage the delicate fins. Allow the unit to dry completely before turning it back on. * Ice: If the coils are frozen, this could indicate a problem with the defrost cycle. Do not attempt to manually chip away the ice. We'll address this in a later step.
C. Fan Operation: Observe the fan while the unit is running (after restoring power, of course!). Is it spinning freely and at a reasonable speed? Is it making any unusual noises?
Action: If the fan isn't spinning, is spinning slowly, or is making loud noises, turn off the unit immediately. This usually indicates a motor problem that requires professional attention.
Step 4: Check the Indoor Unit (Air Handler)
The indoor unit distributes the heated or cooled air throughout your home. Check the following:
A. Blower Fan: Confirm that the blower fan is running when the heat pump is calling for heat or cool. You should feel air coming from the vents.
Action: If the blower fan isn't running, check the breaker to ensure the indoor unit is receiving power. If the breaker has tripped, reset it. If it trips again immediately, this indicates a more serious electrical problem requiring professional diagnosis.
B. Airflow: Assess the airflow from the vents in your home. Is it strong, weak, or non-existent?
Action: Weak airflow, even with a clean filter and a running blower fan, could indicate ductwork issues (leaks, blockages). Ductwork problems are best left to professionals with specialized equipment for inspection and repair.
Step 5: Addressing Ice on the Outdoor Unit (Heating Mode)
As mentioned earlier, ice on the outdoor unit during heating mode is a common issue. Heat pumps have a defrost cycle that's designed to melt this ice. If the ice is excessive or persistent, it could indicate a problem with the defrost cycle itself.
A. Defrost Cycle Observation: Monitor the outdoor unit during heating mode. The unit should periodically switch to cooling mode (you might notice steam rising from the unit) to melt the ice. This cycle typically lasts a few minutes.
Action: If the unit never enters defrost mode, or if it enters defrost mode but the ice doesn't melt, this could indicate a faulty defrost timer, defrost sensor, or reversing valve. These components require professional diagnosis and repair.
B. Emergency Heat: In the meantime, you can temporarily switch your thermostat to "Emergency Heat" mode. This disables the heat pump and relies on auxiliary electric resistance heaters to provide heat. Be aware that this method is less energy-efficient and will result in higher electricity bills.
Step 6: Refrigerant Leaks - A Serious Concern
Low refrigerant levels can significantly impact the performance of your heat pump, leading to insufficient heating or cooling. Unfortunately, detecting refrigerant leaks is not a DIY task.
Signs of a Possible Refrigerant Leak: * Ice forming on the refrigerant lines. * Hissing sound coming from the unit. * Noticeably reduced cooling or heating performance. * Increased energy bills without any change in usage.
Action: If you suspect a refrigerant leak, immediately contact a qualified HVAC technician. Refrigerant leaks require specialized equipment to locate and repair. Additionally, it's illegal to knowingly release refrigerant into the atmosphere.
When to Call a Professional
While many issues can be addressed with simple DIY troubleshooting, some problems require the expertise of a qualified HVAC technician. Here's a summary of situations that warrant professional intervention:
- Any electrical issues, including tripped breakers that repeatedly trip.
- Fan motor problems (outdoor or indoor).
- Suspected refrigerant leaks.
- Defrost cycle malfunctions.
- Compressor problems (unusual noises, failure to start).
- Ductwork issues (leaks, blockages).
- Problems with the reversing valve.
- If you are uncomfortable working with electrical components.
- If your DIY efforts haven't resolved the issue.
Attempting to repair complex components without proper training and equipment can be dangerous and could potentially void your warranty. It's always better to err on the side of caution and consult a professional when in doubt.
Preventative Maintenance
The best way to avoid heat pump problems is to perform regular preventative maintenance. Consider the following:
- Regular Air Filter Replacement: As discussed earlier, this is crucial for maintaining airflow and efficiency.
- Annual Professional Inspection: Schedule an annual inspection and tune-up with a qualified HVAC technician. They can identify potential problems before they escalate and ensure your system is running optimally.
- Coil Cleaning: Clean the outdoor coils at least once a year, or more frequently if you live in a dusty or debris-prone environment.
- Clear Obstructions: Regularly check and clear any obstructions around the outdoor unit.
By following these troubleshooting steps and preventative maintenance tips, you can help ensure your American Standard 2.5 ton heat pump provides reliable and efficient heating and cooling for years to come. Remember, when in doubt, consult a qualified HVAC professional.