At What Temperature Does Concrete Melt
Understanding Concrete and High Temperatures
Concrete is a remarkably durable material used extensively in construction, from foundations to sidewalks. But like any material, it has its limits. A common question that arises, particularly when considering fire safety or industrial applications, is: At what temperature does concrete melt? The answer is complex and depends on what we consider "melting" and the type of concrete involved.
While concrete doesn't truly "melt" in the same way that ice melts into water, it undergoes significant changes at high temperatures. The main components of concrete – cement paste and aggregate – react differently to heat. This article will explore these changes and provide a clearer understanding of concrete's behavior at high temperatures.
The Components of Concrete and Their Response to Heat
To understand how concrete behaves under extreme heat, it's essential to consider its components:
- Cement Paste: This is the binder that holds the aggregate together. It's primarily composed of hydrated calcium silicate compounds.
- Aggregate: These are the filler materials, typically consisting of sand, gravel, or crushed stone. The type of aggregate significantly influences the concrete's fire resistance.
- Water: Water is crucial for the hydration process that allows the cement to set. Even after setting, concrete contains bound water.
When concrete is exposed to high temperatures, several things happen:
- Evaporation of Moisture: Initially, free water within the concrete evaporates. This occurs at around 100°C (212°F).
- Dehydration of Cement Paste: As the temperature rises further, chemically bound water within the cement paste is released. This process, called dehydration, starts around 300°C (572°F) and continues up to about 500°C (932°F).
- Decomposition of Calcium Hydroxide: Calcium hydroxide, a byproduct of cement hydration, decomposes into calcium oxide and water vapor around 500°C (932°F).
- Decomposition of Calcium Silicate Hydrates: The main strength-giving component, calcium silicate hydrate, starts to decompose at temperatures above 600°C (1112°F).
- Aggregate Expansion and Contraction: Different aggregates have different thermal expansion coefficients. Uneven expansion and contraction between the aggregate and cement paste can cause cracking and spalling.
Defining "Melting" in the Context of Concrete
It's important to clarify what we mean by "melting" when discussing concrete. Concrete doesn't transition into a molten liquid at a specific temperature like some metals do. Instead, it undergoes a gradual degradation process.
Here's a breakdown of the stages:
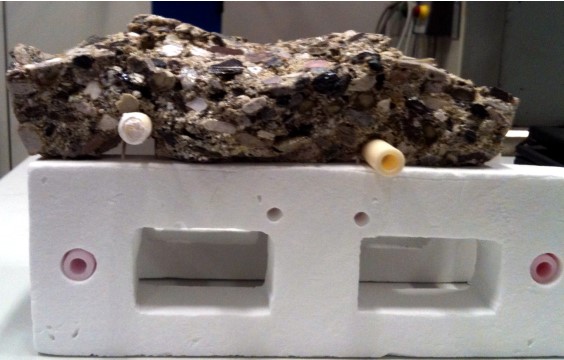
- Spalling: This is the most common and visible effect of high heat. It involves the breaking away of surface layers of concrete due to the buildup of internal pressure from expanding steam and thermal stresses.
- Cracking: High temperatures cause internal stresses that lead to cracking. These cracks weaken the concrete structure.
- Strength Loss: The chemical changes within the cement paste and the expansion/contraction of the aggregate significantly reduce the concrete's compressive strength.
- Softening: At very high temperatures, the cement paste starts to soften and lose its binding properties. This is the closest concrete gets to "melting," but it's more accurately described as a gradual decomposition.
While a defined "melting point" doesn't exist for concrete, significant structural damage and weakening occur at temperatures starting around 300°C (572°F), with substantial strength loss becoming apparent above 500°C (932°F). The actual point where the concrete becomes structurally unsound depends on factors such as the type of aggregate, the concrete mix design, and the duration of exposure to high temperatures.
Factors Influencing Concrete's Heat Resistance
Several factors influence how well concrete withstands high temperatures:
- Aggregate Type: Siliceous aggregates (e.g., quartz) have a higher thermal expansion coefficient than calcareous aggregates (e.g., limestone). This means siliceous aggregates expand more when heated, leading to greater stress within the concrete and increased spalling. Concrete with calcareous aggregates generally performs better in fire.
- Concrete Mix Design: The water-cement ratio, the type of cement used, and the presence of admixtures all affect the concrete's heat resistance. For example, concretes with a lower water-cement ratio tend to be denser and more resistant to fire damage.
- Moisture Content: Concrete with a high moisture content is more prone to spalling because the rapid evaporation of water creates significant internal pressure.
- Reinforcement: Steel reinforcement within the concrete can lose strength at high temperatures, further weakening the structure. However, the concrete cover provides some insulation to the steel.
- Exposure Duration and Intensity: The longer the concrete is exposed to high temperatures, and the higher the temperature, the more damage it will sustain.
The "Melting" Temperature: A More Precise Look
While concrete doesn't have a single melting point, let's pinpoint specific temperatures where critical changes occur:
- 212°F (100°C): Evaporation of free water begins.
- 572°F (300°C): Dehydration of cement paste starts, leading to a gradual loss of strength.
- 932°F (500°C): Calcium hydroxide decomposes, and significant strength loss becomes evident.
- 1112°F (600°C): Decomposition of calcium silicate hydrates begins, further weakening the concrete.
- 1832-2552°F (1000-1400°C): At these very high temperatures, the aggregate itself can begin to soften or decompose, depending on its composition. Siliceous aggregates are more prone to this type of degradation. This is where the cement paste and aggregate begin to lose their structural integrity completely, resembling a softened, partially molten state, but it's still not true melting.
Keep in mind that these temperatures are approximate and can vary depending on the specific composition of the concrete.
Practical Implications: Fire Resistance and Safety
Understanding concrete's behavior at high temperatures is crucial for fire safety and structural design.
- Fire-Resistant Concrete: Special concrete mixes can be designed to improve fire resistance. These mixes often include:
- Calcareous aggregates (limestone).
- Additives that reduce moisture content.
- Steel fibers to reduce spalling.
- Building Codes: Building codes specify minimum fire resistance ratings for different structural elements, based on the occupancy and size of the building. These ratings dictate the thickness of concrete required to protect structural steel from excessive heat.
- Post-Fire Inspection: After a fire, concrete structures should be thoroughly inspected by a qualified engineer to assess the extent of the damage. Spalling, cracking, and strength loss can compromise the structural integrity of the building.
Household Analogy: The Toaster Oven Dilemma
Let's shift gears to a more familiar scenario: Your toaster oven isn't heating up. While seemingly unrelated, this troubleshooting exercise demonstrates a practical approach to problem-solving.
Troubleshooting a Toaster Oven That Won't Heat
A toaster oven that won't heat is a common kitchen woe. Here's a step-by-step guide to diagnose and potentially fix the issue. Remember safety first! Always unplug the toaster oven before attempting any repairs.
- Check the Power Cord and Outlet:
- Visual Inspection: Examine the power cord for any visible damage, such as cuts, frayed wires, or exposed conductors. A damaged cord is a serious electrical hazard and must be replaced. Do not attempt to repair a damaged cord yourself.
- Outlet Test: Plug the toaster oven into a different outlet that you know is working. Use a lamp or another small appliance to confirm the outlet's functionality.
- Verify the Settings:
- Power Switch: Ensure the toaster oven's power switch is in the "On" position. Sometimes, the obvious is overlooked.
- Temperature and Timer Settings: Make sure the temperature dial is set to the desired temperature and the timer is set for the appropriate cooking time. Some toaster ovens require both a temperature and timer setting to activate the heating elements.
- Function Selection: Check the function selector (e.g., toast, bake, broil) and ensure it's set to the correct mode.
- Inspect the Heating Elements:
- Visual Inspection: Carefully examine the heating elements (usually coils) for any signs of damage, such as breaks, cracks, or discoloration. *A broken heating element will not heat.*
- Continuity Test (Requires a Multimeter): This step involves working with electricity and should only be attempted if you are comfortable using a multimeter and understand basic electrical safety.
- Unplug the toaster oven.
- Set the multimeter to the continuity setting (usually indicated by a diode symbol or a sound wave symbol).
- Touch the multimeter probes to the terminals of the heating element.
- If the multimeter shows continuity (a reading close to zero or a beep), the heating element is likely intact. If the multimeter shows no continuity (an open circuit), the heating element is broken and needs to be replaced.
- Check the Thermostat:
- The thermostat controls the temperature of the toaster oven. If it's faulty, it may not allow the heating elements to turn on.
- Testing the thermostat typically requires advanced electrical knowledge and specialized tools. This is best left to a qualified appliance repair technician.
- Inspect the Timer:
- If the timer is malfunctioning, it may not be activating the heating elements.
- Like the thermostat, timer issues often require professional diagnosis and repair.
- Clean the Toaster Oven:
- Excessive crumbs and food debris can sometimes interfere with the proper operation of the toaster oven. Thoroughly clean the interior, including the heating elements.
DIY Fixes You Can Attempt
- Replacing a Heating Element: If you've determined that a heating element is broken and you're comfortable with basic electrical repairs, you may be able to replace it yourself.
- Purchase a replacement heating element that is compatible with your toaster oven model.
- Unplug the toaster oven and allow it to cool completely.
- Carefully remove the old heating element, noting how it's connected.
- Install the new heating element, ensuring it's securely connected.
- Plug in the toaster oven and test it.
- Cleaning Electrical Contacts: Sometimes, corrosion can build up on electrical contacts, preventing proper current flow. Carefully cleaning these contacts with a contact cleaner (available at electronics stores) *might* restore functionality.
When to Call a Professional
The following repairs should always be left to a qualified appliance repair technician:
- Any repairs involving gas components (if your toaster oven has them).
- Repairs to the thermostat or timer.
- Any repairs that require advanced electrical knowledge or specialized tools.
- If you are uncomfortable working with electricity.
Working with electricity can be dangerous. If you are not confident in your abilities, always err on the side of caution and seek professional help.
Conclusion
Understanding the limitations of materials, whether it's the temperature tolerance of concrete or the functionality of a toaster oven, empowers you to make informed decisions about safety, maintenance, and repair. While concrete doesn't "melt" in the traditional sense, it undergoes significant degradation at high temperatures, impacting its structural integrity. Similarly, a seemingly simple appliance like a toaster oven can present various troubleshooting challenges. By following a systematic approach and understanding your own capabilities, you can tackle many household problems with confidence. Always prioritize safety and seek professional help when dealing with complex or potentially dangerous repairs.