Attic Fan Motor And Thermostat Replacement
Attic fans are vital for maintaining a comfortable and energy-efficient home. They work by drawing hot air out of your attic, preventing it from radiating down into your living spaces. When an attic fan motor or thermostat fails, your home can become hotter and your energy bills can increase. This guide provides a comprehensive overview of attic fan motor and thermostat replacement, empowering you to make informed decisions and potentially handle the project yourself.
Understanding Attic Fan Systems
Before diving into the replacement process, it's crucial to understand how attic fans work and the function of each component.
Components of an Attic Fan System
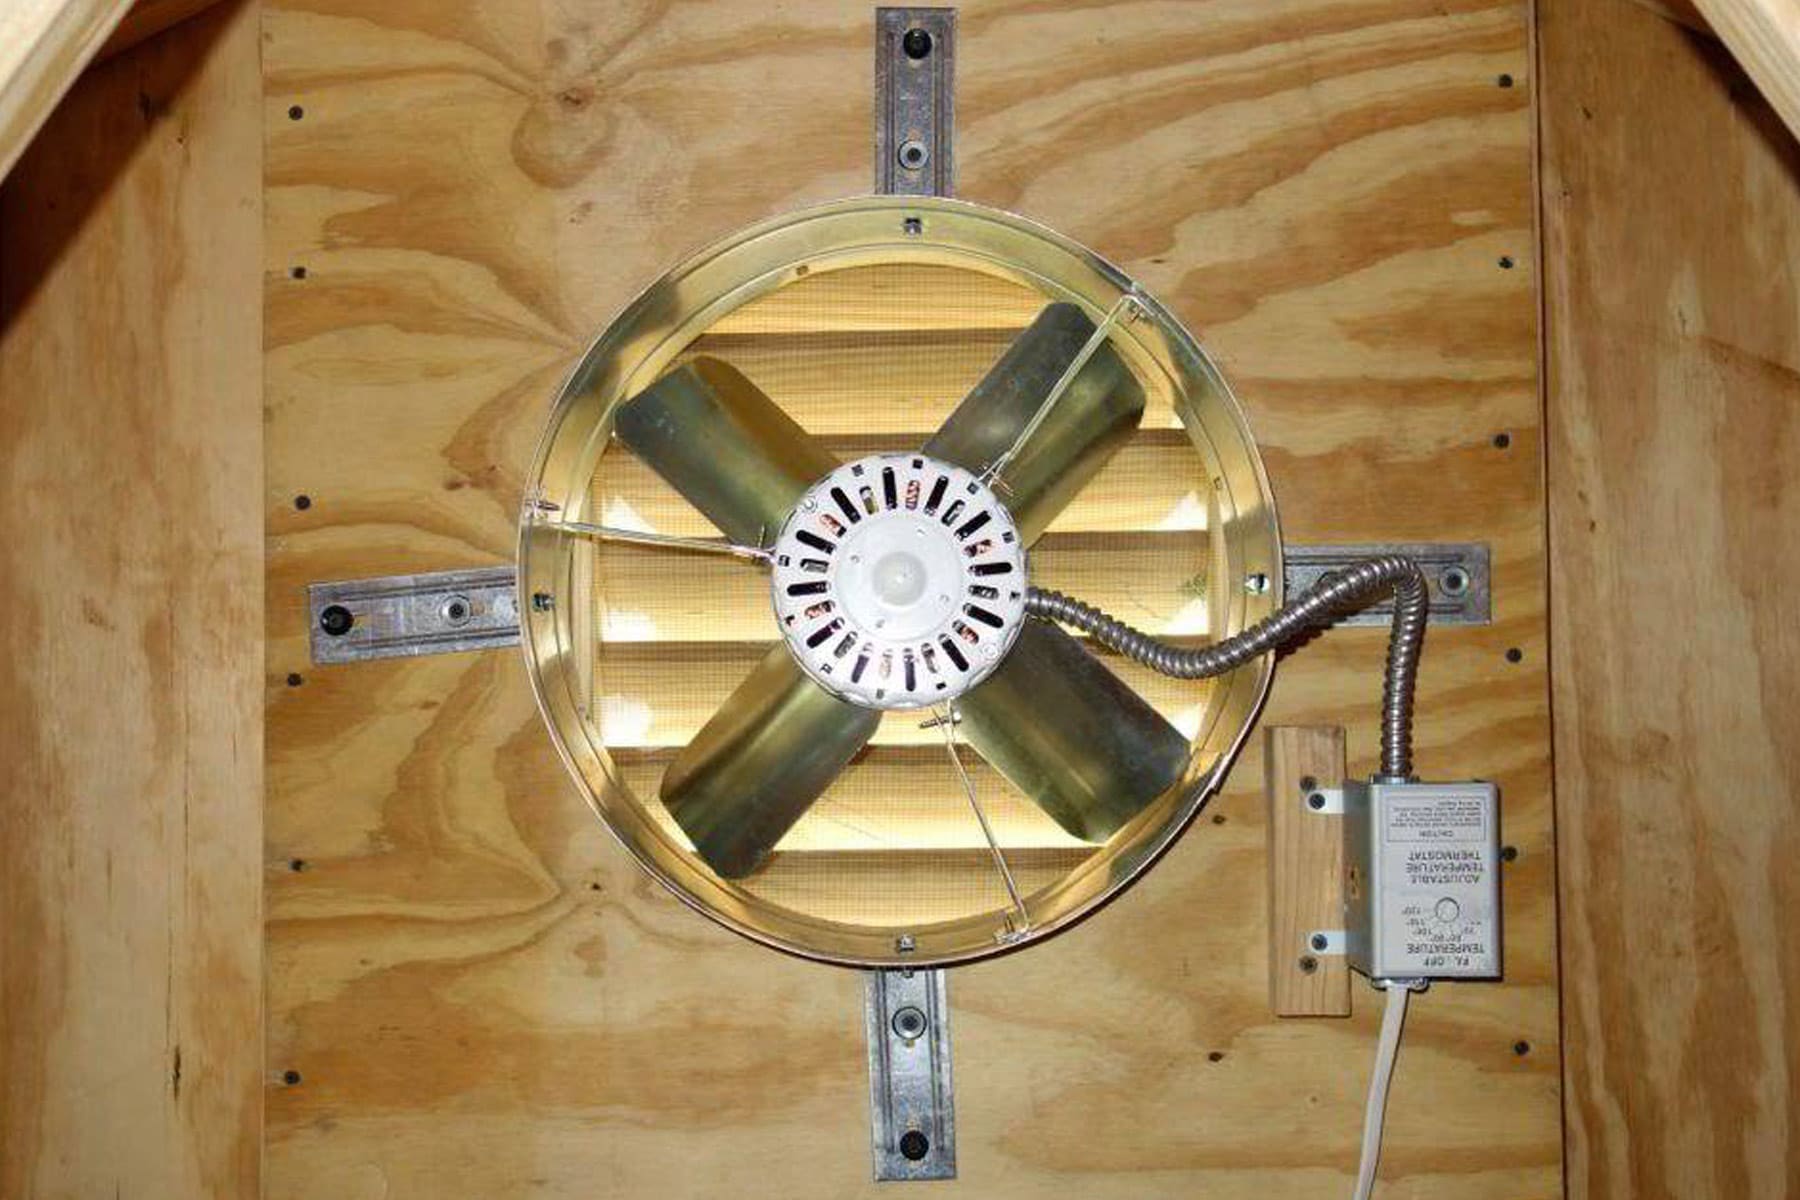
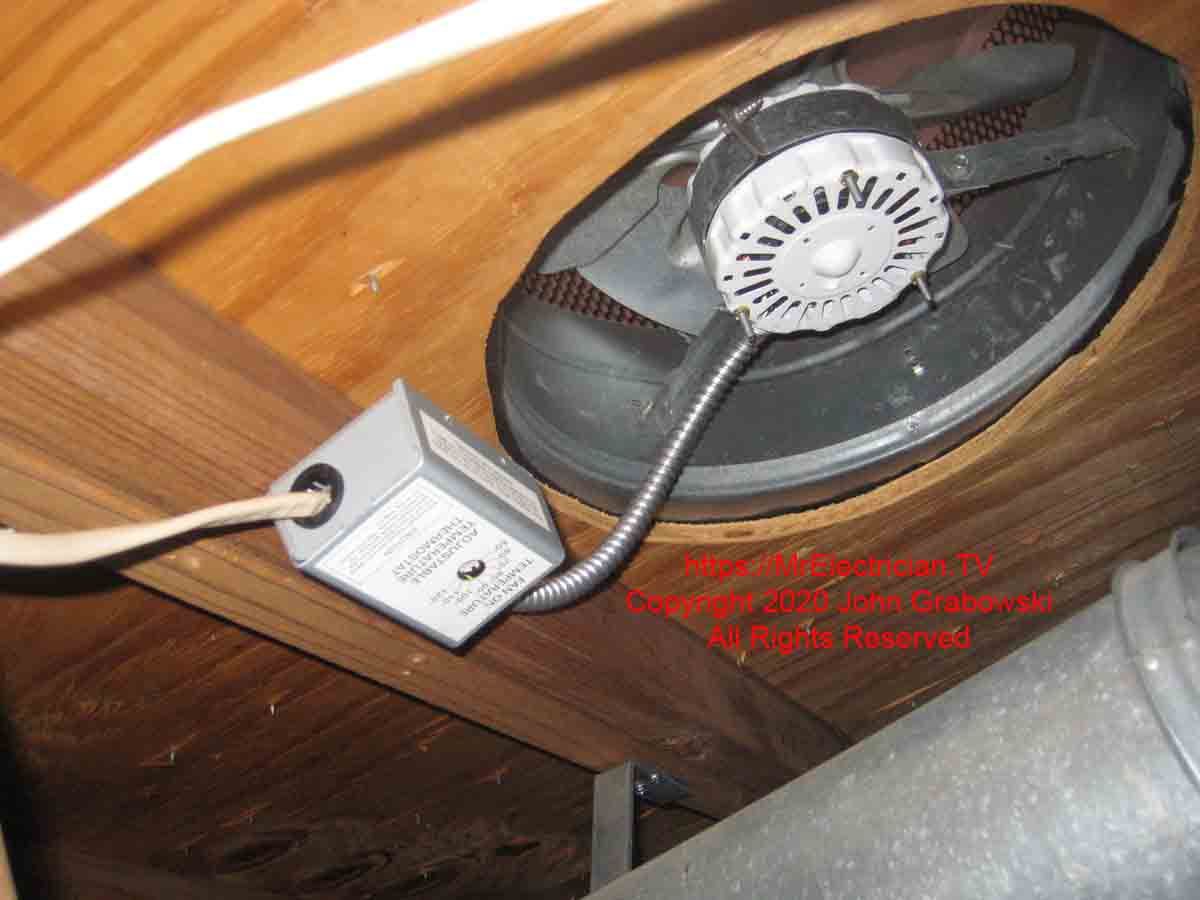
- Fan Motor: The engine that drives the fan blades, circulating air. It's the core component responsible for ventilation.
- Fan Blades: Attached to the motor, these blades create airflow to exhaust hot air.
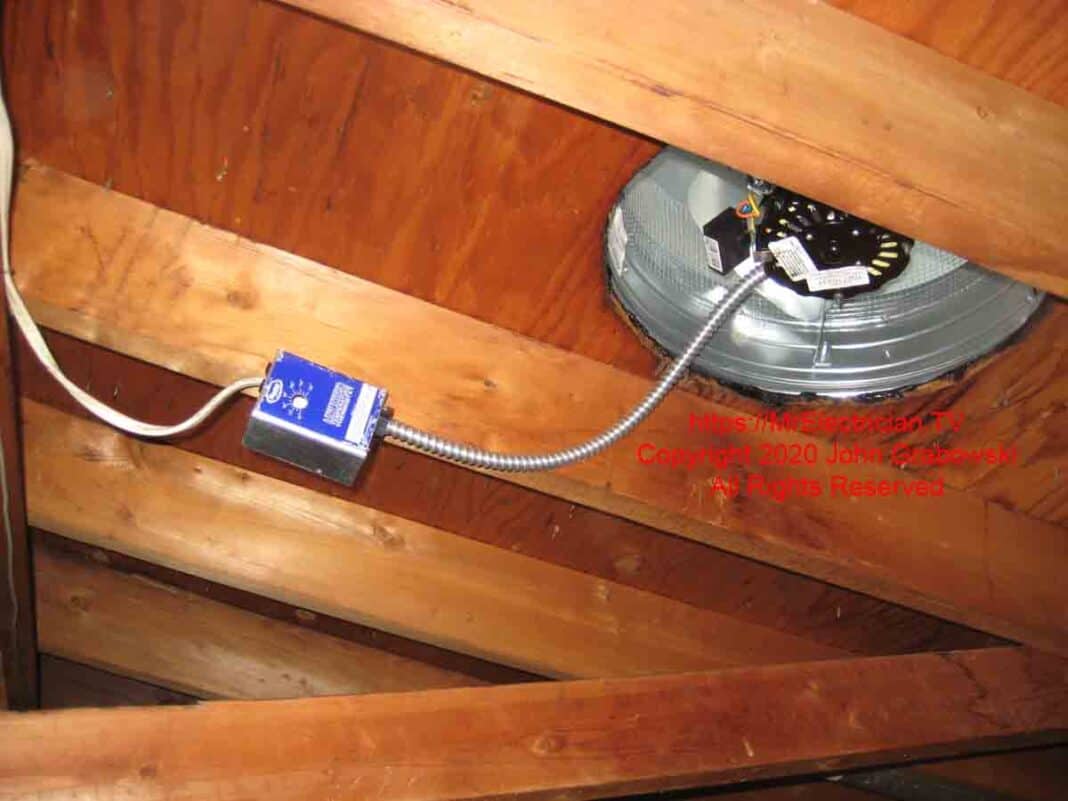
- Thermostat: A sensor that monitors the attic temperature and automatically turns the fan on or off based on preset temperature thresholds. Think of it as a temperature-controlled switch.
- Housing: The protective structure that encloses the fan motor and blades, providing support and preventing debris from entering the system.
- Wiring: Electrical wires that supply power to the motor and transmit signals from the thermostat. Proper wiring is essential for safe and efficient operation.
Types of Attic Fans
Attic fans come in various types, each with its own characteristics and installation requirements. Common types include:
- Whole-House Fans: These fans are typically mounted in the ceiling of the uppermost floor and exhaust air from the entire house into the attic. They require significant structural modifications for installation.
- Gable Fans: Mounted in the gable (triangular wall) of the attic, these fans are relatively easy to install and are a popular choice for many homes.
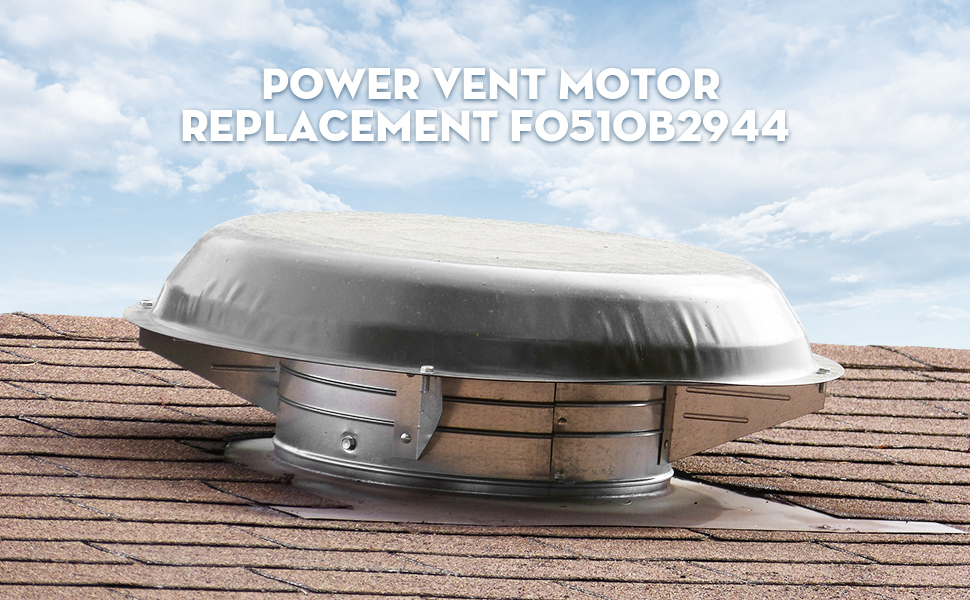
- Roof-Mounted Fans: Installed directly on the roof, these fans provide excellent ventilation but require professional installation to ensure a weatherproof seal.
- Solar-Powered Attic Fans: Powered by solar panels, these fans offer an environmentally friendly and energy-efficient ventilation solution.
Diagnosing the Problem
Before replacing any components, it's important to accurately diagnose the problem. A faulty motor or thermostat can cause similar symptoms, so careful troubleshooting is necessary.
Identifying a Faulty Fan Motor
Common signs of a failing fan motor include:
- The fan doesn't turn on at all: This could indicate a completely dead motor or a problem with the power supply.
- The fan runs intermittently: The motor may be overheating or experiencing internal issues.
- The fan makes unusual noises: Grinding, squealing, or rattling sounds can indicate worn bearings or other mechanical problems.
- The fan runs slowly: A weakened motor may not be able to spin the blades at the proper speed.
- Burning smell: This is a serious sign of an electrical problem and should be addressed immediately. Turn off the power to the fan.
Identifying a Faulty Thermostat
Signs of a malfunctioning thermostat include:
- The fan doesn't turn on even when the attic is hot: The thermostat may not be sensing the temperature correctly.
- The fan runs constantly, even when the attic is cool: The thermostat may be stuck in the "on" position.
- Inconsistent operation: The fan turns on and off erratically, regardless of the attic temperature.
Troubleshooting Steps
- Check the Power Supply: Ensure the fan is receiving power. Check the circuit breaker and any fuses. Use a multimeter to verify voltage at the fan's wiring.
- Inspect the Wiring: Look for loose connections, frayed wires, or signs of damage.
- Test the Thermostat (if possible): Some thermostats have a test function. If not, you can try manually adjusting the temperature setting to see if the fan responds.
- Visually Inspect the Motor: Look for signs of damage, such as cracks, leaks, or corrosion.
- Listen Carefully: Pay attention to any unusual noises coming from the motor or fan blades.
Replacing the Fan Motor
Replacing the fan motor is a straightforward process for many homeowners. However, if you're uncomfortable working with electricity, it's best to hire a qualified electrician.
Tools and Materials
- New fan motor (identical to the old one)
- Screwdrivers (various sizes)
- Wire strippers
- Wire connectors (wire nuts)
- Multimeter
- Electrical tape
- Safety glasses
- Gloves
Step-by-Step Instructions
- Turn Off the Power: Completely disconnect the power to the attic fan at the circuit breaker. Double-check with a multimeter to ensure the power is off. This is the most important safety precaution.
- Access the Fan Motor: Remove the fan housing cover. You may need to unscrew or unclip it.
- Disconnect the Wiring: Carefully disconnect the wires from the old motor. Note the color-coding of the wires (e.g., black to black, white to white, green to ground). Labeling the wires with tape before disconnecting them can be helpful.
- Remove the Old Motor: Unscrew the motor from its mounting bracket. It may be held in place by bolts or screws.
- Install the New Motor: Mount the new motor onto the bracket, ensuring it's securely fastened.
- Reconnect the Wiring: Connect the wires from the new motor to the corresponding wires in the attic, using wire connectors (wire nuts). Ensure the connections are tight and secure. Wrap each connection with electrical tape for added safety.
- Reinstall the Fan Housing: Replace the fan housing cover, ensuring it's properly secured.
- Test the Fan: Turn the power back on at the circuit breaker. Test the fan to ensure it's working properly.
Replacing the Thermostat
Replacing the thermostat is generally easier than replacing the fan motor. Again, prioritize safety and disconnect the power before starting.
Tools and Materials
- New thermostat (compatible with your attic fan)
- Screwdrivers
- Wire strippers
- Wire connectors (wire nuts)
- Electrical tape
- Pencil or marker (for labeling)
Step-by-Step Instructions
- Turn Off the Power: Disconnect the power to the attic fan at the circuit breaker.
- Access the Thermostat: Locate the thermostat, usually mounted on a wall or near the fan. Remove the thermostat cover.
- Disconnect the Wiring: Carefully disconnect the wires from the old thermostat. Note the color-coding and position of the wires. Labeling them with a pencil or marker is highly recommended.
- Remove the Old Thermostat: Unscrew the thermostat from the wall or mounting bracket.
- Install the New Thermostat: Mount the new thermostat in the same location.
- Reconnect the Wiring: Connect the wires to the corresponding terminals on the new thermostat, following the wiring diagram provided with the thermostat. Ensure the connections are tight and secure.
- Set the Temperature: Set the desired temperature range on the new thermostat. Most thermostats have adjustable settings for the "on" and "off" temperatures.
- Reinstall the Thermostat Cover: Replace the thermostat cover.
- Test the Fan: Turn the power back on and test the fan to ensure it turns on and off at the set temperatures.
Choosing the Right Replacement Parts
Selecting the correct replacement parts is crucial for ensuring proper performance and longevity of your attic fan system.
Fan Motor
- Voltage and Amperage: The new motor must have the same voltage and amperage ratings as the old motor. These ratings are typically printed on a label on the motor housing.
- Horsepower (HP): While not always necessary to match exactly, selecting a motor with similar horsepower will ensure adequate airflow.
- Shaft Size and Rotation: The shaft size and rotation direction must be compatible with the fan blades.
- Brand and Quality: Choose a reputable brand known for quality and reliability.
Thermostat
- Temperature Range: Select a thermostat with a temperature range that suits your needs.
- Compatibility: Ensure the thermostat is compatible with your attic fan system (voltage and wiring requirements).
- Adjustability: Choose a thermostat with adjustable temperature settings for greater control.
- Digital vs. Analog: Consider the pros and cons of digital and analog thermostats. Digital thermostats offer more precise temperature control, while analog thermostats are generally simpler and less expensive.
Safety Precautions
Working with electricity can be dangerous. Always follow these safety precautions:
- Turn off the power: Always disconnect the power to the attic fan at the circuit breaker before working on it.
- Use insulated tools: Use tools with insulated handles to prevent electric shock.
- Wear safety glasses and gloves: Protect your eyes and hands from injury.
- Work in a well-lit area: Ensure you have adequate lighting to see what you're doing.
- If unsure, hire a professional: If you're not comfortable working with electricity, it's best to hire a qualified electrician.
When to Call a Professional
While many homeowners can successfully replace an attic fan motor or thermostat, there are situations where it's best to call a professional electrician or HVAC technician.
- If you're uncomfortable working with electricity: Your safety is paramount.
- If you're unsure about the diagnosis: A professional can accurately identify the problem and recommend the appropriate solution.
- If you encounter complex wiring issues: Messing with wiring without proper knowledge can be dangerous.
- If the fan is difficult to access: Roof-mounted fans, in particular, can be challenging to access and require specialized equipment.
- If you suspect a larger electrical problem: A burning smell or other signs of electrical problems should be addressed by a professional immediately.
Maintaining Your Attic Fan
Regular maintenance can help extend the life of your attic fan and prevent future problems.
- Clean the fan blades: Dust and debris can accumulate on the fan blades, reducing airflow. Clean the blades regularly with a soft cloth.
- Lubricate the motor bearings: Some fan motors have lubrication points. Apply a few drops of light machine oil to these points as needed.
- Inspect the wiring: Check the wiring for loose connections or damage.
- Check the thermostat settings: Ensure the thermostat is set to the desired temperature range.
- Clear obstructions: Make sure nothing is blocking the airflow around the fan.
By following these guidelines, you can effectively troubleshoot, replace, and maintain your attic fan motor and thermostat, ensuring a comfortable and energy-efficient home.