Beckett Oil Burner Air Adjustment Manual
Understanding and Adjusting Airflow in Your Beckett Oil Burner
Maintaining optimal performance in your oil-fired heating system depends heavily on proper airflow to your Beckett oil burner. Correct air adjustment ensures clean, efficient combustion, minimizing soot buildup and maximizing fuel efficiency. This guide provides homeowners and DIY enthusiasts with a detailed understanding of how to adjust the air settings on their Beckett oil burners.
Why Air Adjustment Matters
The right air-to-fuel ratio is critical for complete combustion. Too little air leads to incomplete burning, producing soot, carbon monoxide (a deadly gas!), and wasted fuel. Too much air cools the flame, also reducing efficiency and potentially causing the burner to cycle on and off frequently (short cycling). A properly adjusted burner burns cleanly, producing minimal smoke and maximizing heat output.
Safety First!
Warning: Working with oil burners involves potentially hazardous materials and electrical components. Always take these precautions:
- Turn off the power to the burner at the circuit breaker before beginning any work.
- Allow the burner to cool completely before touching any components.
- Never work on an oil burner if you smell oil or gas. Ventilate the area immediately and call a qualified HVAC technician.
- If you are uncomfortable with any step, call a professional. Improper adjustments can lead to dangerous situations.
- Have a carbon monoxide detector installed and working properly.
Tools and Materials You'll Need
Before you start, gather these essential tools:
- Screwdrivers (Phillips and flathead)
- Wrenches (assorted sizes)
- Combustion analyzer (optional, but highly recommended for precise adjustments)
- Smoke tester (optional, for checking smoke levels)
- Clean rags
- Work gloves
- Safety glasses
- Copy of your Beckett oil burner manual (find the exact model number on the burner).
Locating the Air Adjustment Components
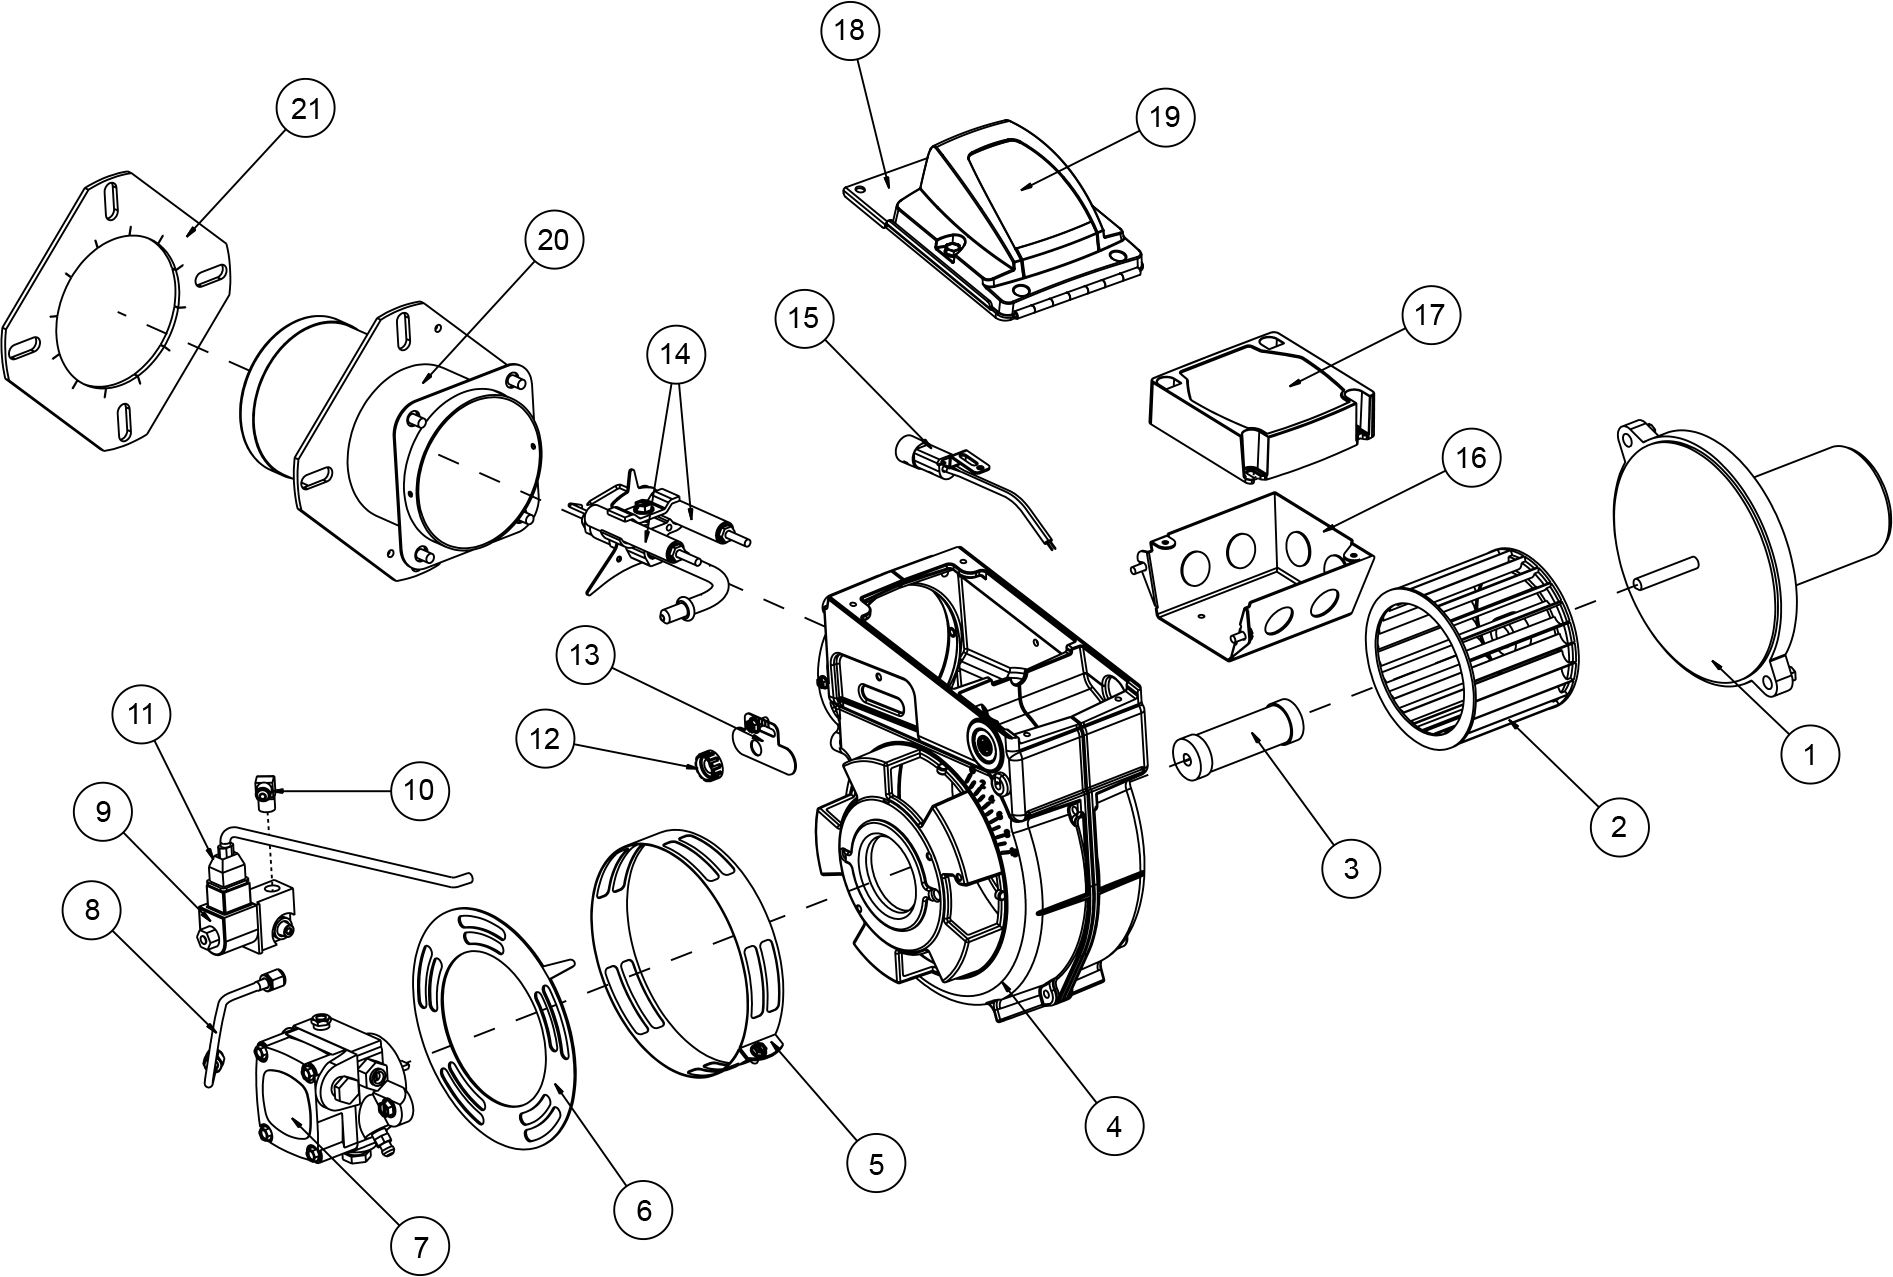
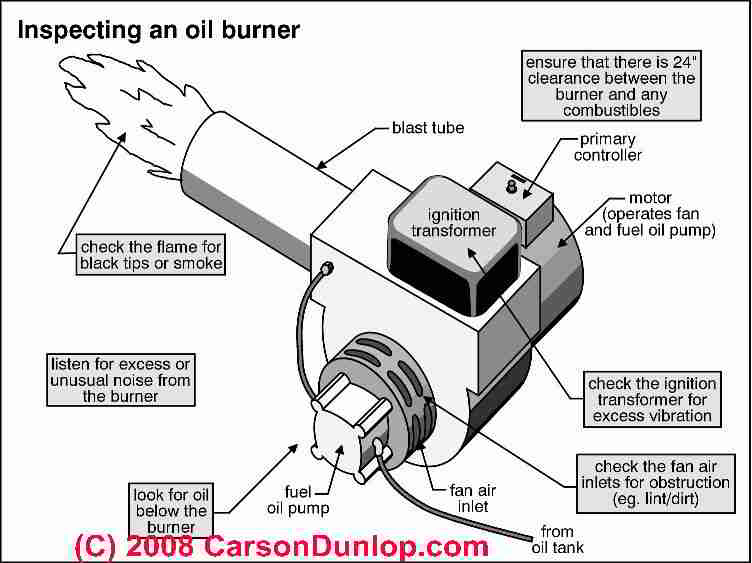
Beckett oil burners typically have several components that control airflow:
- Air Shutter: This is the primary control for adjusting airflow. It's usually a rotating band or a sliding plate with openings that control the amount of air entering the burner.
- Turbulator: Located inside the burner housing, the turbulator helps mix air and fuel for better combustion. It's less frequently adjusted by homeowners.
- Draft Regulator: This device is installed in the flue pipe and helps maintain consistent draft, preventing backdrafting and ensuring proper venting of combustion gases. It might require adjustment to compensate for changes in airflow at the burner.
Step-by-Step Air Adjustment Process
Note: This is a general guide. Always refer to your specific Beckett oil burner manual for detailed instructions and recommended settings. The manual is your most important resource. Also, record initial settings before making any changes. That way it is easier to go back if things get worse.
- Preparation: Turn off the power to the burner and allow it to cool down. Clean the burner area of any debris or spilled oil.
- Initial Inspection: Check the air shutter for any obstructions or damage. Make sure it moves freely. Inspect the turbulator (if accessible) for any signs of soot buildup or damage.
- Starting the Burner: Turn the power back on and start the burner. Observe the flame through the observation port (if available). A healthy flame should be bright yellow-orange, with minimal smoke.
- Adjusting the Air Shutter:
- Too little air: If the flame is smoky, dark orange, or flickering, gradually open the air shutter to increase airflow. Make small adjustments and allow the burner to run for a few minutes between each adjustment to observe the effect on the flame.
- Too much air: If the flame is very bright, almost white, and appears unstable, gradually close the air shutter to reduce airflow. Again, make small adjustments and allow the burner to stabilize.
- Using a Combustion Analyzer (Recommended): A combustion analyzer provides precise readings of oxygen (O2), carbon monoxide (CO), and other combustion gases. This is the most accurate way to adjust the air settings. Follow the analyzer's instructions for probe placement and operation. Aim for O2 levels specified in your Beckett oil burner manual (typically between 3% and 7%). CO levels should be as low as possible, ideally below 100 ppm.
- Checking Smoke Levels (Optional): A smoke tester draws a sample of flue gas through a filter paper. The darkness of the spot on the filter paper indicates the amount of smoke. Aim for a smoke number of 0 or 1, as specified in your manual.
- Adjusting the Draft Regulator (If Necessary): The draft regulator should maintain a consistent draft, typically between -0.02 and -0.04 inches of water column. Adjust the regulator's weight or damper to achieve the desired draft.
- Final Verification: After making all adjustments, run the burner for at least 15 minutes and recheck the flame appearance, combustion gas readings (if using a combustion analyzer), and smoke levels.
- Record Your Settings: Write down the final air shutter position, draft regulator setting, and combustion gas readings for future reference.
Common Issues and Troubleshooting
Here are some common problems you might encounter during air adjustment:
- Excessive Smoke: Indicates incomplete combustion. Check for insufficient airflow, a dirty nozzle, or a malfunctioning fuel pump.
- Puffbacks: These are small explosions caused by the ignition of accumulated oil vapors. They are dangerous and require immediate attention. Check for a delayed ignition, a dirty burner, or a blocked flue. Call a professional immediately!
- Short Cycling: The burner turns on and off frequently. This could be due to excessive airflow cooling the flame, a malfunctioning thermostat, or a blocked heat exchanger.
- Soot Buildup: Indicates incomplete combustion. Check for insufficient airflow, a dirty nozzle, or a blocked flue.
- High Carbon Monoxide Levels: A serious safety hazard. Indicates incomplete combustion. Ensure adequate ventilation and call a professional immediately!
When to Call a Professional
While some air adjustment tasks can be handled by homeowners, certain situations require the expertise of a qualified HVAC technician:
- If you are uncomfortable working with oil burners.
- If you suspect a fuel leak or gas leak.
- If you experience puffbacks or other unusual burner behavior.
- If you are unable to achieve acceptable combustion gas readings or smoke levels.
- If you suspect a more serious problem, such as a malfunctioning fuel pump, igniter, or control system.
- If your burner is old or in poor condition.
Estimated Repair Costs
The cost of repairing an oil burner can vary widely depending on the nature of the problem. Here are some general estimates:
- Nozzle Replacement: $50 - $150
- Fuel Filter Replacement: $75 - $200
- Igniter Replacement: $150 - $350
- Fuel Pump Replacement: $300 - $600
- Control System Replacement: $400 - $800
- Complete Burner Replacement: $1500 - $4000+
- Combustion Analysis and Adjustment: $150-$300
These are just estimates. Always get a quote from a qualified HVAC technician before proceeding with any repairs. Labor costs can vary significantly depending on your location.
Preventative Maintenance for Optimal Performance
Regular maintenance is key to keeping your Beckett oil burner running efficiently and safely. Here are some essential tasks:
- Annual Tune-Up: Schedule a professional tune-up each year. This typically includes cleaning the burner, replacing the nozzle and fuel filter, checking the ignition system, and adjusting the air settings.
- Clean the Burner Area: Keep the area around the burner clean and free of debris.
- Monitor the Flame: Regularly observe the flame for any signs of problems.
- Check the Flue Pipe: Inspect the flue pipe for any signs of leaks or corrosion.
- Replace the Air Filter (If Applicable): Some oil burners have air filters that need to be replaced periodically.
- Carbon Monoxide Detectors: Ensure you have working carbon monoxide detectors and that they are properly placed.
By understanding the principles of air adjustment and performing regular maintenance, you can keep your Beckett oil burner running efficiently and safely for years to come. Remember, when in doubt, always consult a qualified HVAC professional.