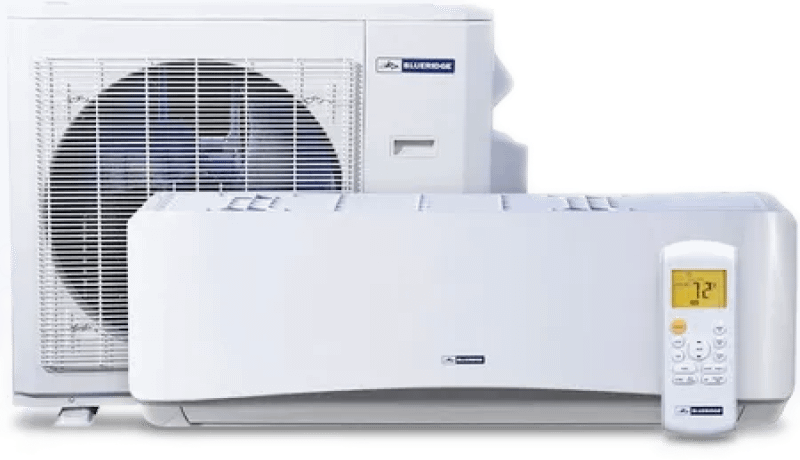
Best Mini Split Heat And Air
Mini-split heat and air systems are a fantastic way to efficiently heat and cool specific areas of your home. But like any appliance, they can sometimes run into trouble. One of the most common complaints homeowners have is a sudden decrease in cooling or heating performance. Your mini-split might be running, but the air just isn't as cold or hot as it used to be. Don't panic! Before you call a professional, let's walk through some troubleshooting steps you can take yourself.
Step 1: Initial Checks – The Obvious First
Before diving into more complicated diagnostics, let's rule out the simple stuff. These checks can often resolve the issue quickly.
1.1. Is the Unit On?
This might sound silly, but double-check that the unit is actually turned on and set to the correct mode (cooling or heating). It's easy to accidentally bump the remote or have a power surge that changes the settings.
1.2. Remote Control Batteries
A weak remote can cause communication problems. Try replacing the batteries in your remote control with fresh ones.
1.3. Temperature Setting
Make sure the temperature setting on your remote is significantly lower than the room temperature when cooling, and significantly higher when heating. A setting too close to the current room temperature won't trigger the unit to work effectively.
1.4. Airflow Obstructions
Check the indoor unit for anything blocking the airflow. Curtains, furniture, or even decorations placed too close to the unit can restrict its ability to circulate air properly.
Step 2: Cleaning the Filters – The Most Common Culprit
Dirty air filters are the number one cause of reduced performance in mini-split systems. They restrict airflow, making the unit work harder and less efficiently. This can lead to overheating, reduced cooling/heating, and even damage to the unit over time.
2.1. Locate the Air Filters
The air filters are usually located behind a removable panel on the indoor unit. Consult your owner's manual if you're unsure where they are. Typically, you can release the panel by gently lifting it or pressing a release button.
2.2. Remove the Filters
Carefully remove the air filters. Note their orientation so you can replace them correctly. They usually slide out easily.
2.3. Cleaning Options
There are two main ways to clean your filters:
- Vacuuming: Use a vacuum cleaner with a brush attachment to gently remove dust and debris from the filters.
- Washing: Wash the filters with mild soap and water. Rinse them thoroughly to remove all soap residue. Allow the filters to air dry completely before reinstalling them. Never put wet filters back in the unit.
2.4. Frequency of Cleaning
Ideally, you should clean your mini-split filters every 2-4 weeks, depending on how often you use the unit and the air quality in your home. If you have pets or live in a dusty environment, you might need to clean them more frequently.
Step 3: Checking the Outdoor Unit
The outdoor unit plays a crucial role in the cooling and heating process. Obstructions or debris around the outdoor unit can significantly impact its performance.
3.1. Safety First!
Before inspecting or cleaning the outdoor unit, turn off the power to the unit at the breaker box. This is crucial for your safety.
3.2. Clear Obstructions
Inspect the area around the outdoor unit for any obstructions like bushes, leaves, snow, or debris. Ensure there's at least 2-3 feet of clear space around the unit for proper airflow.
3.3. Clean the Fins
The outdoor unit has fins that help dissipate heat. Over time, these fins can become clogged with dirt, leaves, and other debris. Use a garden hose with a gentle spray nozzle to clean the fins from the inside out. Avoid using a high-pressure washer, as it can damage the fins.
3.4. Inspect the Fan
Visually inspect the fan blades for any damage or obstructions. If you notice any bent or broken blades, do not attempt to repair them yourself. Contact a qualified technician.
Step 4: Checking for Ice Buildup
Ice buildup on the outdoor unit, particularly during the winter months when in heat pump mode, can severely reduce its efficiency. This often happens when the unit is struggling to extract heat from the cold outdoor air.
4.1. Identify Ice Buildup
Carefully inspect the outdoor unit for any visible ice buildup on the coils or fins. A thin layer of frost is normal during defrost cycles, but thick ice accumulation is a problem.
4.2. Allow Natural Defrosting
Often, the unit will automatically initiate a defrost cycle to melt the ice. Let the unit run its defrost cycle, which typically lasts for 10-15 minutes. You may notice steam coming from the unit during this process. Do not attempt to manually chip away the ice, as this can damage the coils.
4.3. Check Airflow
As with the general outdoor unit check, ensure proper airflow around the unit. Obstructions can exacerbate ice buildup.
4.4. If Ice Persists
If ice buildup persists even after defrost cycles and you’ve cleared any obstructions, it could indicate a more serious problem, such as a refrigerant leak or a faulty defrost system. This requires professional attention.
Step 5: Checking the Condensate Drain Line
Mini-split systems produce condensation, which is drained away through a condensate drain line. If this line becomes clogged, water can back up, leading to leaks, reduced cooling efficiency, and potential mold growth.
5.1. Locate the Drain Line
The condensate drain line is usually a small PVC pipe that exits the indoor unit and runs to an outside drain or a floor drain. Consult your owner's manual if you're unsure of its location.
5.2. Check for Blockages
Visually inspect the drain line for any signs of blockage, such as algae growth, dirt, or debris. You might also notice water dripping from the indoor unit instead of draining properly.
5.3. Clear the Drain Line
There are several ways to clear a clogged drain line:
- Wet/Dry Vacuum: Use a wet/dry vacuum to suck out any blockage from the drain line. Place the vacuum hose over the end of the drain line and seal it as best as possible. Turn on the vacuum and let it run for a few minutes.
- Wire Brush or Stiff Wire: Gently insert a wire brush or stiff wire into the drain line to break up any clogs. Be careful not to damage the pipe.
- Vinegar Flush: Pour a cup of white vinegar into the drain line to dissolve any algae or mineral deposits. Let it sit for about 30 minutes, then flush with water.
5.4. Preventative Maintenance
To prevent future clogs, pour a cup of white vinegar into the drain line every few months.
When to Call a Professional – The Crucial Line
While these troubleshooting steps can resolve many common mini-split problems, there are situations where professional help is essential. Do not attempt to fix these issues yourself, as it could be dangerous or cause further damage to the unit.
- Refrigerant Leaks: If you suspect a refrigerant leak (e.g., hissing sound, visible oily residue, significantly reduced cooling performance), immediately turn off the unit and contact a qualified HVAC technician. Refrigerant leaks require specialized equipment and training to repair safely and effectively.
- Electrical Problems: Any electrical issues, such as sparks, burning smells, or a tripped breaker, should be handled by a licensed electrician or HVAC technician. Do not attempt to diagnose or repair electrical problems yourself.
- Compressor Issues: The compressor is the heart of the mini-split system. If you suspect a compressor problem (e.g., loud noises, unit not cooling or heating at all), contact a qualified technician. Compressor repairs are complex and require specialized tools and knowledge.
- Frozen Coils (Persistently): While a little frost can be normal, if your indoor or outdoor coils are consistently freezing up, even after defrost cycles, it can indicate a more serious issue like low refrigerant or airflow problems. A technician can diagnose the root cause and implement the correct repair.
- Complex Component Failure: If you suspect that a specific component, like the fan motor, control board, or thermistor, has failed, it’s best to consult a professional. Replacing these components often requires specialized knowledge and tools.
- You've Tried Everything Else: If you've followed all the troubleshooting steps above and your mini-split is still not working correctly, it's time to call in a professional. They have the expertise and equipment to diagnose and repair more complex issues.
By following these troubleshooting steps, you can often resolve common mini-split problems yourself, saving time and money. However, it's important to know your limits and never hesitate to call a professional when needed. Regular maintenance, such as cleaning the filters and keeping the outdoor unit clear, can help prevent many problems from occurring in the first place.