Can You Use Pvc For Hot Water
We've all been there: you hop into the shower, expecting a cascade of warm water, only to be greeted by a frigid blast. A malfunctioning water heater is a common household headache. Before you resign yourself to shivering showers or calling a plumber, let's explore some troubleshooting steps you can safely take to diagnose and potentially fix the problem.
Troubleshooting Your Water Heater: A Step-by-Step Guide
This guide focuses on electric and gas water heaters. Remember, safety is paramount. If you are uncomfortable with any of these steps, or if you suspect a gas leak, immediately call a qualified professional.
Step 1: The Obvious Checks: Power & Gas Supply
Start with the simplest possibilities:
- Electric Water Heaters:
- Check the Circuit Breaker: Locate the breaker for your water heater in your electrical panel. Is it tripped (in the "off" position)? If so, reset it by flipping it all the way to "off" and then back to "on." If it trips again immediately or soon after, do not continue using the water heater. This indicates a more serious electrical issue that requires a qualified electrician.
- Check the Power Cord (if applicable): Some smaller electric water heaters might plug into a standard outlet. Ensure the cord is securely plugged in. Try plugging another appliance into the outlet to verify the outlet is working.
- Gas Water Heaters:
- Check the Gas Valve: Locate the gas valve near the water heater. Ensure it is in the "on" position.
- Check the Pilot Light: Most older gas water heaters have a pilot light. If the pilot light is out, follow the manufacturer's instructions (usually found on a label on the water heater) to relight it. Be extremely cautious when working with gas. If you smell gas, immediately evacuate the area and call your gas company.
- Inspect the Gas Line: Visually inspect the gas line leading to the water heater for any signs of damage or corrosion. If you see anything suspicious, do not attempt to repair it yourself. Call a gas professional.
Step 2: Temperature Settings and Thermostat Issues
Sometimes, the problem isn't a complete failure, but simply an incorrect setting.
- Check the Thermostat Setting: Most water heaters have a thermostat dial. Make sure it's set to a reasonable temperature (typically between 120°F and 140°F). Don't crank it up too high, as this can be a scalding hazard and wastes energy.
- Electric Water Heater Thermostats: Electric water heaters usually have two thermostats (an upper and a lower). Accessing these typically involves removing an access panel (after turning off the power at the breaker, of course!). Before touching anything inside, use a non-contact voltage tester to ensure the power is completely off. Once you've confirmed the power is off, you can carefully examine the thermostats. Look for signs of damage, such as burns or corrosion. A faulty thermostat can be replaced, but this often requires some electrical knowledge. If you're not comfortable, call a qualified electrician.
Step 3: Inspecting the Heating Elements (Electric Water Heaters Only)
If you suspect a faulty heating element in an electric water heater, you can test it with a multimeter.
- Turn Off the Power: This is crucial. Turn off the breaker to the water heater at the electrical panel.
- Drain Some Water: Drain a few gallons of water from the tank to lower the water level below the heating elements. This prevents water from leaking when you remove the elements.
- Access the Heating Elements: Remove the access panels and insulation covering the heating elements.
- Disconnect the Wires: Carefully disconnect the wires from the heating element terminals.
- Test for Continuity: Set your multimeter to the ohms setting (resistance). Place one probe on each terminal of the heating element. You should get a reading between 10 and 20 ohms. If you get a reading of infinity (open circuit) or zero (short circuit), the heating element is faulty and needs to be replaced.
- Replace the Heating Element: Purchase a replacement heating element that is the correct voltage and wattage for your water heater. Install the new element, reconnect the wires, and replace the insulation and access panels.
- Refill the Tank: Slowly refill the water heater tank before turning the power back on. This prevents the heating elements from burning out prematurely.
- Turn On the Power: Turn the breaker back on and wait for the water to heat up.
Replacing a heating element involves working with electricity and water. If you are not comfortable with these tasks, call a qualified electrician.
Step 4: Sediment Buildup and Tank Flushing
Over time, sediment can accumulate at the bottom of your water heater tank, reducing its efficiency and potentially causing damage.
- Why Flush the Tank? Sediment acts as an insulator, making the water heater work harder to heat the water. It can also corrode the tank and heating elements.
- How to Flush the Tank:
- Turn Off the Power/Gas: For electric heaters, turn off the breaker. For gas heaters, turn the gas valve to the "pilot" setting or "off" position.
- Turn Off the Cold Water Supply: Locate the cold water shut-off valve on the cold water pipe leading to the water heater and turn it off.
- Attach a Hose: Connect a garden hose to the drain valve at the bottom of the water heater.
- Run the Hose to a Safe Location: Run the other end of the hose to a drain, outside, or another safe location where you can dispose of the water. Be aware that the water may be hot.
- Open the Drain Valve: Carefully open the drain valve. The water will likely be dirty and sediment-filled.
- Open a Hot Water Faucet: Open a hot water faucet somewhere in your house to allow air into the tank and help the water drain more efficiently.
- Flush Until Clear: Let the water run until it runs clear. You may need to open and close the cold water supply valve periodically to stir up the sediment.
- Close the Drain Valve: Once the water is clear, close the drain valve.
- Remove the Hose: Disconnect the garden hose.
- Turn On the Cold Water Supply: Slowly turn on the cold water supply valve.
- Let the Tank Fill: Allow the tank to fill completely before turning the power or gas back on. You'll hear the tank filling up.
- Turn On the Power/Gas: For electric heaters, turn the breaker back on. For gas heaters, relight the pilot light according to the manufacturer's instructions.
Flushing the tank is a relatively simple task that can significantly extend the life of your water heater.
Step 5: Addressing Leaks
Leaks are a serious issue and should be addressed promptly.
- Identify the Source: Carefully inspect the water heater for any signs of leaks. Common leak locations include the pressure relief valve, the drain valve, and the tank itself.
- Small Leaks: If the leak is coming from a loose fitting, you might be able to tighten it with a wrench. However, do not overtighten, as this can damage the fitting.
- Pressure Relief Valve: If the pressure relief valve is leaking, it may be faulty or there may be excessive pressure in the tank. Do not attempt to repair the pressure relief valve yourself. Call a qualified plumber.
- Tank Leaks: If the tank itself is leaking, it usually means the tank is corroded and needs to be replaced. There is no safe or effective way to repair a leaking water heater tank. Call a qualified plumber.
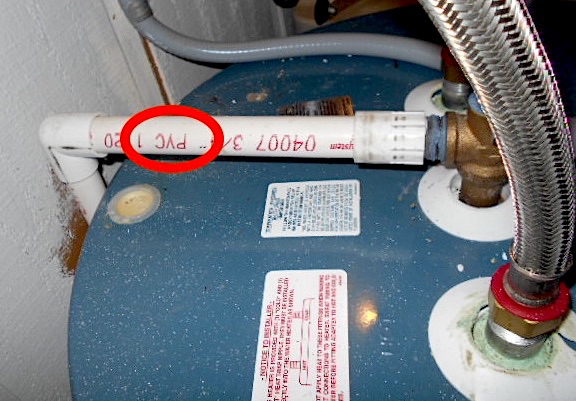
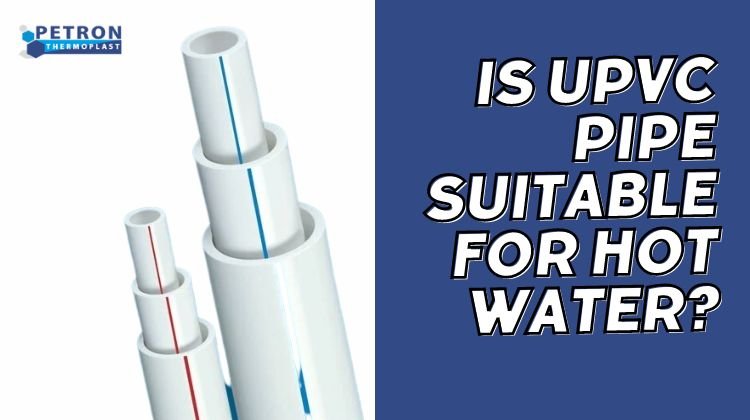
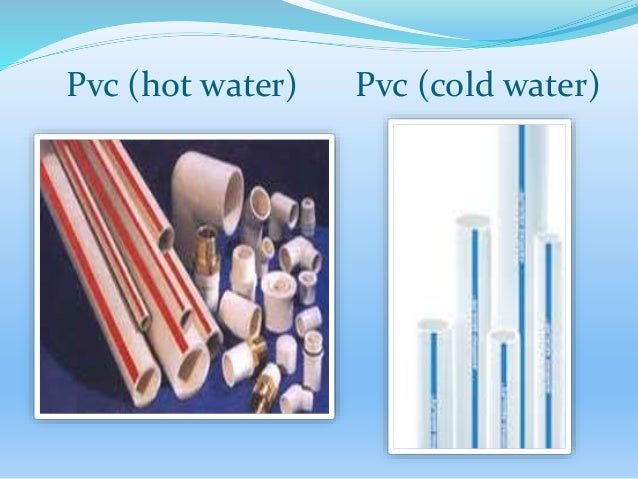
Important Considerations Regarding Plumbing Materials: Can You Use PVC for Hot Water?
This brings us to a critical point: plumbing materials. While PVC (Polyvinyl Chloride) is a common and cost-effective material for cold water lines, it is absolutely not suitable for hot water applications.
- PVC's Temperature Limitations: PVC is a thermoplastic material, meaning it softens and becomes pliable at relatively low temperatures. Hot water, typically above 120°F (49°C), can cause PVC to deform, sag, and eventually fail.
- Potential Health Hazards: When PVC is exposed to high temperatures, it can leach chemicals into the water, potentially posing health risks.
- Code Violations: Most building codes prohibit the use of PVC for hot water lines. Using PVC for hot water can result in fines and require costly repairs.
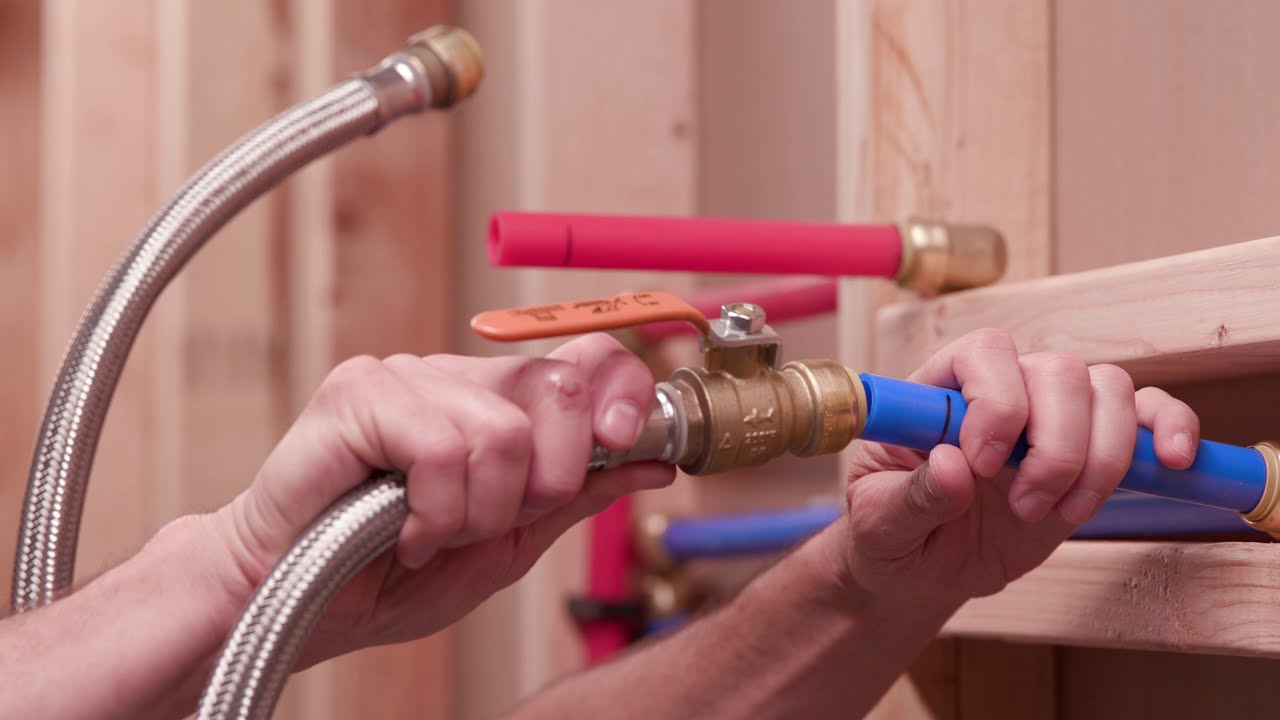
- Safe Alternatives: For hot water lines, use materials specifically designed for high-temperature applications, such as:
- CPVC (Chlorinated Polyvinyl Chloride): CPVC is a modified form of PVC that can withstand higher temperatures (up to 180°F/82°C) and is approved for hot water use in many areas. Always check local building codes to confirm.
- Copper: Copper is a traditional and reliable material for hot water lines. It is durable, heat-resistant, and does not leach harmful chemicals into the water.
- PEX (Cross-linked Polyethylene): PEX is a flexible plastic tubing that is becoming increasingly popular for plumbing applications, including hot water lines. It is heat-resistant, easy to install, and resistant to corrosion.
If you find PVC being used for hot water lines in your home, it's essential to have it replaced with a suitable material as soon as possible. Contact a qualified plumber for this repair.
When to Call a Professional
While many water heater problems can be resolved with simple DIY troubleshooting, there are situations where it's best to call a qualified professional:
- Gas Leaks: If you smell gas, immediately evacuate the area and call your gas company.
- Electrical Issues: If you are uncomfortable working with electricity, or if you suspect a serious electrical problem, call a qualified electrician.
- Tank Leaks: If the water heater tank itself is leaking, it needs to be replaced. Call a qualified plumber.
- Complex Repairs: If you are unsure about any of the steps involved in the troubleshooting process, or if you lack the necessary tools or skills, call a qualified plumber.
- Warranty Concerns: Attempting to repair a water heater yourself may void the warranty. Check your warranty information before attempting any repairs.
By following these troubleshooting steps, you can often diagnose and resolve common water heater problems yourself. Remember to always prioritize safety and when in doubt, call a qualified professional. Understanding the limitations of materials like PVC and choosing the right materials for the job is also crucial for the longevity and safety of your plumbing system.