Capacitor Repair For Air Conditioners

Air conditioners are vital for maintaining comfortable indoor temperatures, especially during hot weather. A crucial component ensuring your AC runs smoothly is the capacitor. This guide provides a comprehensive overview of capacitor repair for air conditioners, helping you understand the role of capacitors, identify potential issues, and determine the best course of action.
Understanding Capacitors in Air Conditioners
A capacitor is an electrical component that stores energy, much like a battery, but releases it much more quickly. In an air conditioner, capacitors primarily serve two critical functions:
- Starting Capacitors: These capacitors provide the high-voltage surge needed to start the AC's compressor and fan motors. Imagine them as giving the motors a powerful "push" to get going. Without a functioning starting capacitor, the motor might struggle or fail to start.
- Run Capacitors: These capacitors help keep the motors running smoothly and efficiently once they're started. They contribute to consistent motor speed and reduce energy consumption. Think of them as ensuring the motors maintain a steady pace after the initial "push."
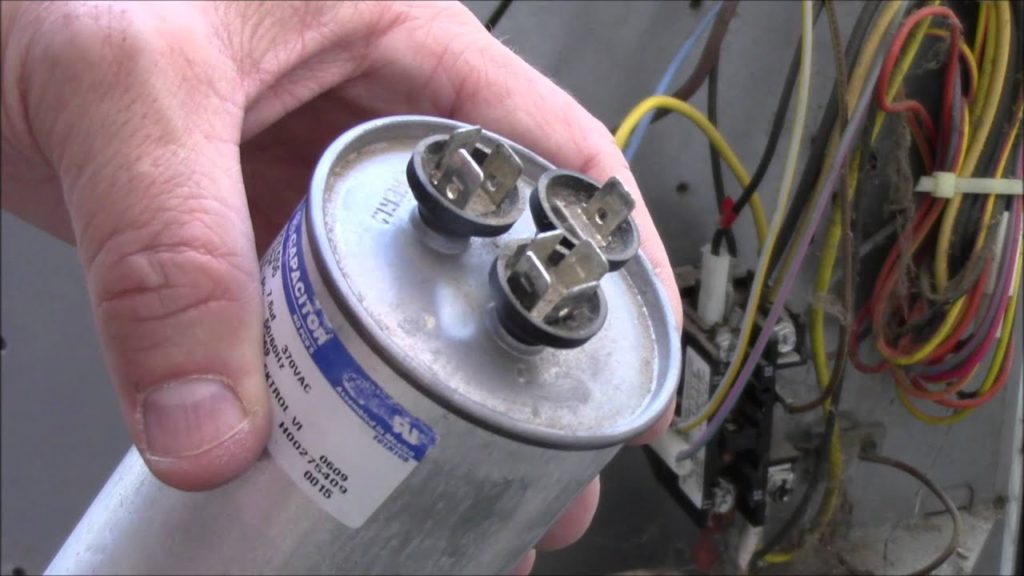
There are generally two types of capacitors found in AC units: dual capacitors, which handle both the compressor and fan motor starting and running functions in a single unit, and single capacitors, which handle only one motor.
Why Capacitors Fail
Capacitors are susceptible to failure over time due to several factors:
- Heat: Excessive heat, either from the environment or from the AC unit itself, can degrade the capacitor's internal components.
- Age: Like any electronic component, capacitors have a limited lifespan and will eventually wear out.
- Voltage Fluctuations: Power surges and inconsistent voltage can damage the capacitor.
- Physical Damage: Impact or vibration can cause internal damage.
- Manufacturing Defects: Occasionally, a capacitor may have a manufacturing defect that leads to premature failure.
Identifying Capacitor Problems
Recognizing the symptoms of a failing capacitor can help you address the issue promptly and prevent further damage to your AC unit.
Common signs of a failing capacitor include:
- AC Unit Not Starting: This is one of the most common symptoms. If the compressor or fan motor won't start, the starting capacitor is a likely culprit. You might hear a humming sound, indicating the motor is trying to start but lacking sufficient power.
- AC Unit Starts Then Shuts Off: The capacitor might be providing enough initial power to start the motor, but then failing to sustain it.
- AC Unit Runs But Not Efficiently: A failing run capacitor can cause the motor to run inefficiently, leading to reduced cooling capacity and higher energy bills.
- Humming Noise From the AC Unit: As mentioned earlier, this can indicate the motor is struggling to start due to a weak capacitor.
- Bulging or Leaking Capacitor: A visually damaged capacitor is a clear sign of failure. *Never touch a bulging or leaking capacitor; it may contain hazardous materials.*
How to Test a Capacitor (Advanced)
Warning: Working with electricity can be dangerous. If you are not comfortable working with electrical components, it is best to consult a qualified HVAC technician. Always disconnect power to the AC unit before testing or replacing any components.
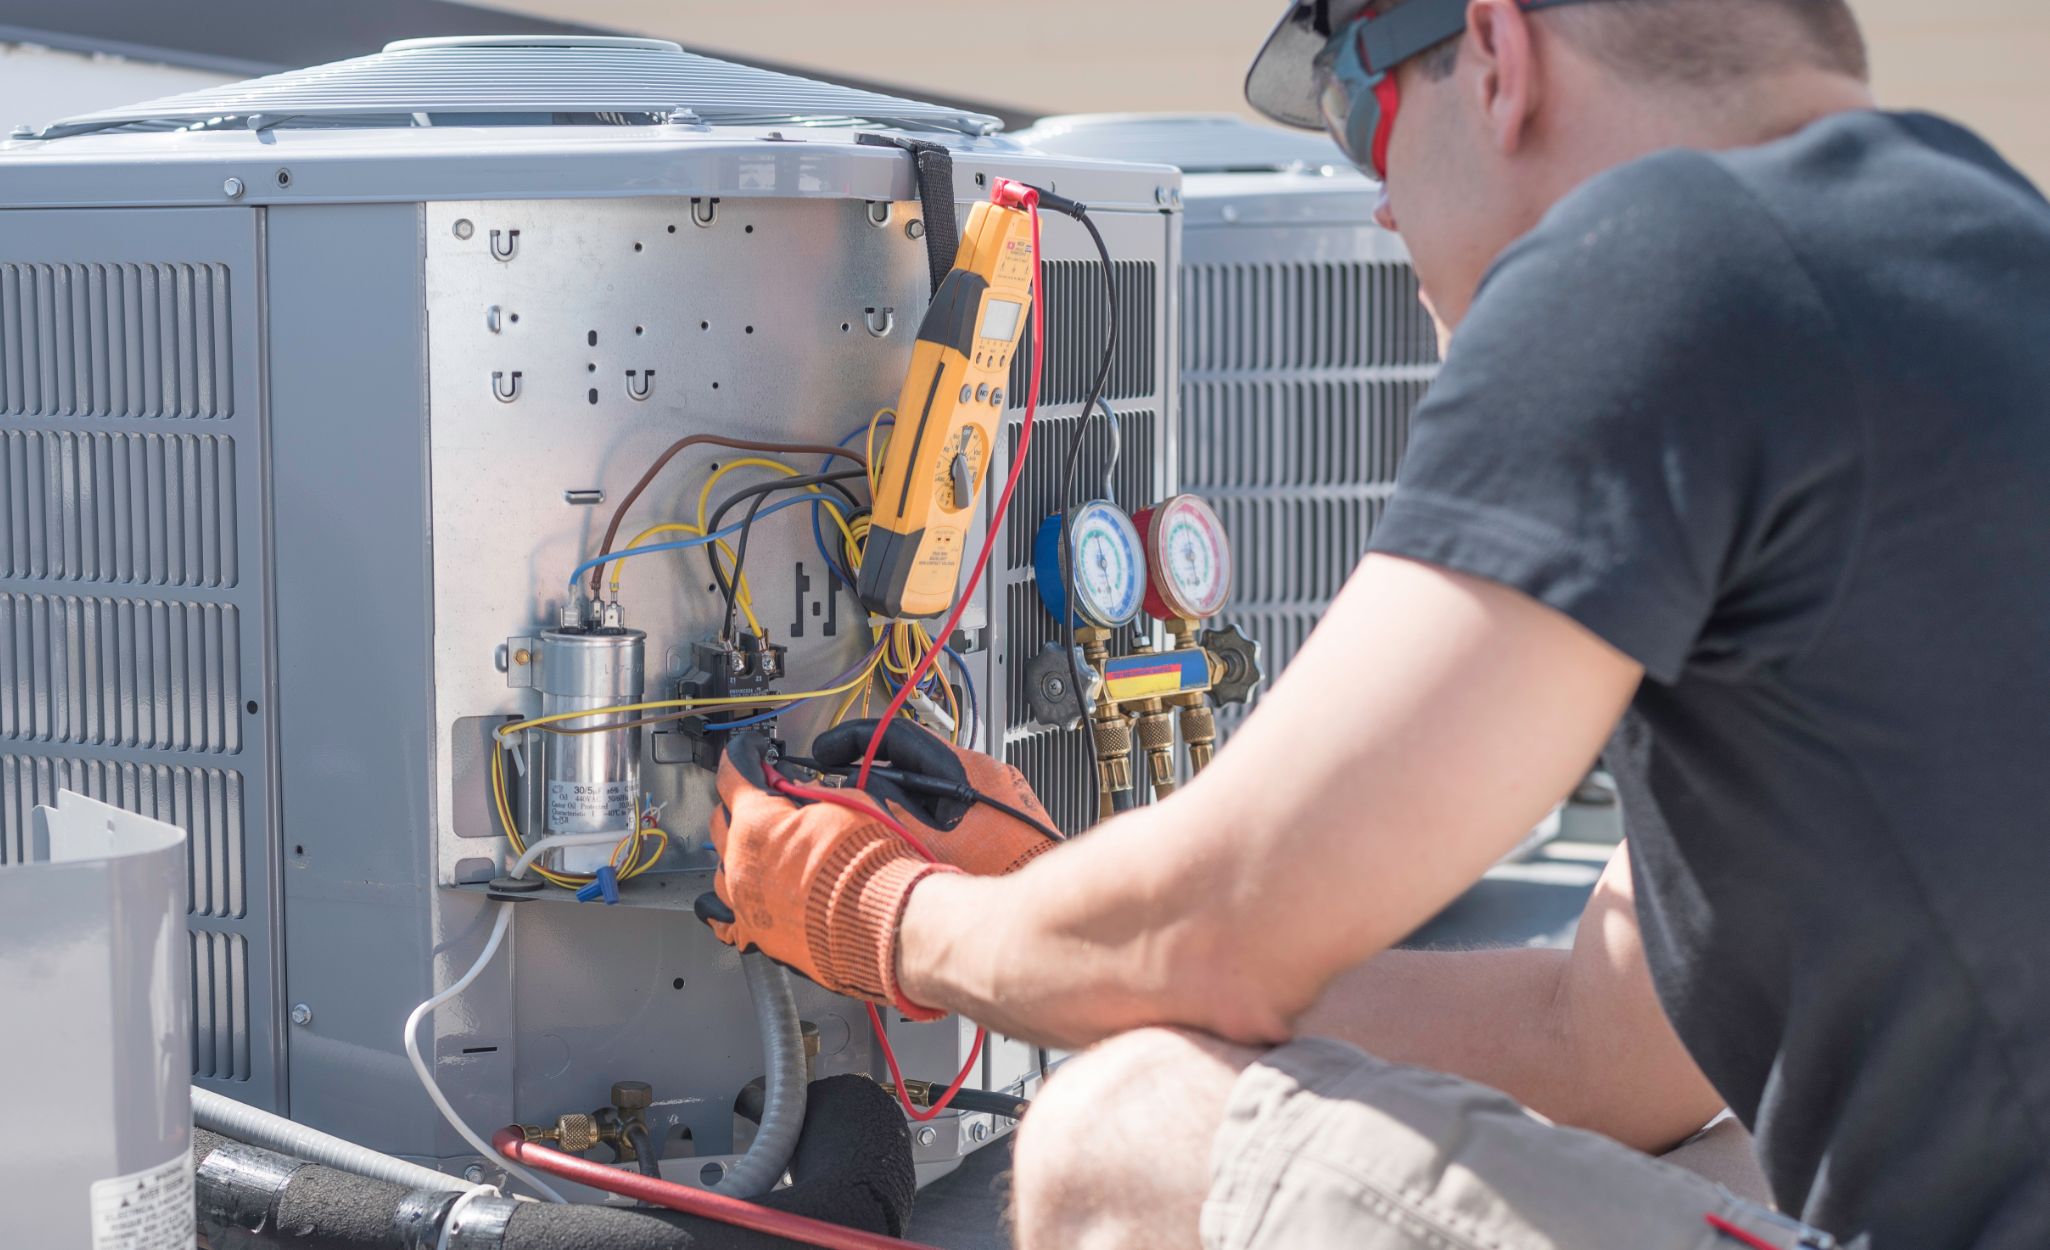
Testing a capacitor requires a multimeter that can measure capacitance (measured in microfarads, or µF). Here's a simplified overview of the process:
- Disconnect Power: Turn off the AC unit at the breaker box. This is crucial for your safety.
- Discharge the Capacitor: Use an insulated screwdriver to carefully short across the capacitor terminals to discharge any stored energy. Again, *be extremely careful.*
- Disconnect Wires: Disconnect the wires connected to the capacitor terminals. Note the original wiring configuration.
- Set the Multimeter: Set your multimeter to measure capacitance (µF).
- Test the Capacitor: Connect the multimeter leads to the capacitor terminals.
- Compare Readings: Compare the multimeter reading to the capacitor's rated capacitance (printed on the capacitor's label). A reading that is significantly lower (typically more than 10% below the rated value) indicates a failing capacitor.
Important Note: Some multimeters have a dedicated capacitor testing function. Consult your multimeter's manual for specific instructions.
Capacitor Repair vs. Replacement
In most cases, repairing a capacitor is not feasible. Capacitors are relatively inexpensive components, and attempting to repair them is usually more trouble than it's worth. The best course of action is typically to replace the faulty capacitor with a new one.
Choosing a Replacement Capacitor
Selecting the correct replacement capacitor is essential for ensuring proper AC operation and preventing future problems.
When choosing a replacement capacitor, consider the following:
- Capacitance (µF): The replacement capacitor must have the same capacitance rating as the original capacitor. This value is usually printed on the capacitor's label.
- Voltage (VAC): The replacement capacitor must have a voltage rating equal to or higher than the original capacitor.
- Physical Size: Ensure the replacement capacitor fits properly in the designated space within the AC unit.
- Type: If replacing a dual capacitor, ensure the replacement is also a dual capacitor with the correct capacitance values for both the compressor and fan motor.
It's best to purchase a replacement capacitor from a reputable supplier to ensure quality and reliability.
Replacing a Capacitor (DIY or Professional?)
Replacing a capacitor can be a relatively straightforward task for someone with basic electrical knowledge and experience. However, it's crucial to proceed with caution and prioritize safety.
Consider these factors when deciding whether to replace the capacitor yourself or hire a professional:
- Your Electrical Skills: Are you comfortable working with electrical components and following safety procedures?
- Your Experience: Have you worked on AC units or similar equipment before?
- Safety Concerns: Are you aware of the potential hazards of working with electricity and refrigerant?
- Time and Tools: Do you have the necessary tools (multimeter, screwdriver, wire strippers, etc.) and the time to complete the job?
If you are unsure about any of these factors, it's always best to hire a qualified HVAC technician. They have the expertise and equipment to safely and effectively replace the capacitor and diagnose any other potential issues with your AC unit.
Steps for Replacing a Capacitor (DIY - Proceed with Caution!)
Warning: These steps are for informational purposes only. If you are not qualified to work with electrical components, do not attempt to replace the capacitor yourself.
- Disconnect Power: Turn off the AC unit at the breaker box. *Double-check to ensure the power is off.*
- Discharge the Capacitor: Use an insulated screwdriver to carefully short across the capacitor terminals to discharge any stored energy. *Be extremely careful.*
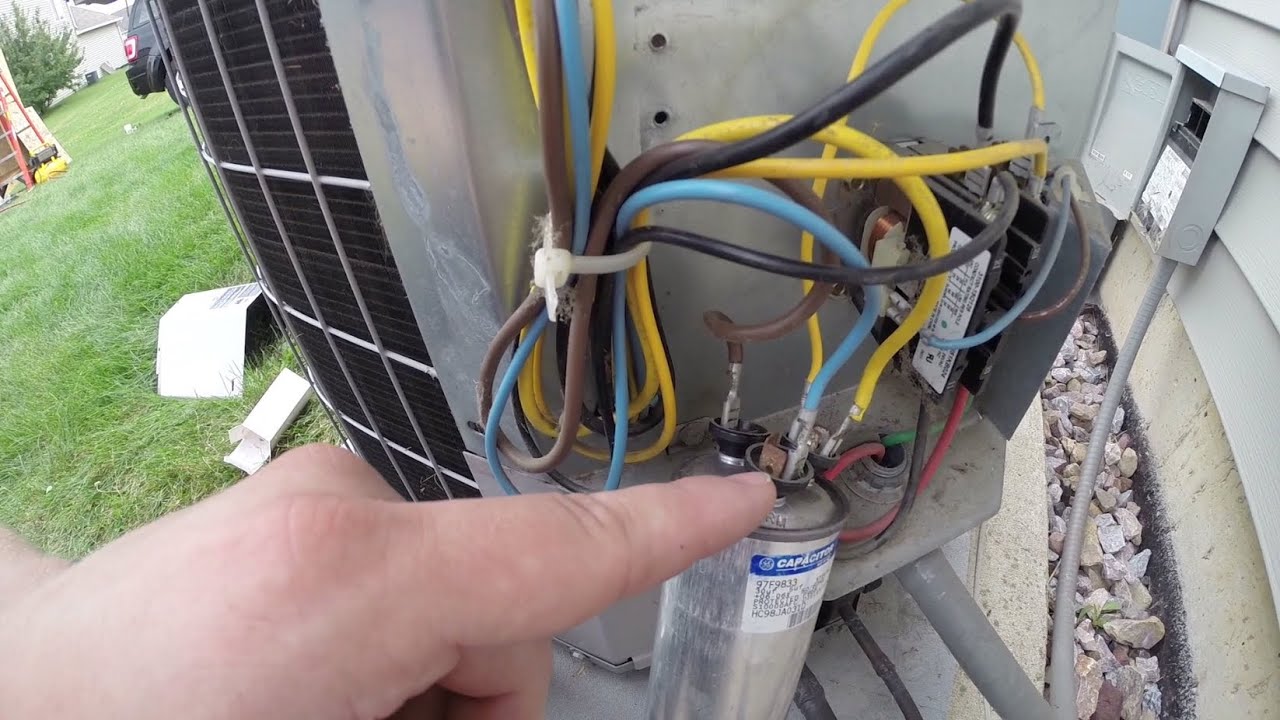
- Take a Photo: Take a picture of the existing capacitor and wiring configuration for reference. This will help you reconnect the wires correctly.
- Disconnect Wires: Disconnect the wires from the capacitor terminals. Label the wires if necessary.
- Remove the Old Capacitor: Remove the old capacitor from its mounting bracket.
- Install the New Capacitor: Install the new capacitor in the mounting bracket.
- Reconnect Wires: Reconnect the wires to the capacitor terminals, matching the original wiring configuration (refer to your photo).
- Verify Connections: Ensure all connections are secure and tight.
- Restore Power: Turn the AC unit back on at the breaker box.
- Test the AC Unit: Turn on the AC unit and observe its operation. Ensure the compressor and fan motor start smoothly and the unit is cooling properly.
Preventing Capacitor Failure
While capacitors will eventually fail, there are steps you can take to extend their lifespan and prevent premature failure:
- Regular AC Maintenance: Schedule regular maintenance for your AC unit, including cleaning the coils and checking the electrical components.
- Ensure Proper Ventilation: Make sure the AC unit has adequate ventilation to prevent overheating.
- Protect From Voltage Surges: Use a surge protector to protect the AC unit from voltage spikes.
- Avoid Overloading the System: Don't run the AC unit at excessively low temperatures for extended periods, as this can put extra strain on the components.
Cost of Capacitor Replacement
The cost of capacitor replacement can vary depending on several factors:
- Type of Capacitor: Dual capacitors are typically more expensive than single capacitors.
- AC Unit Model: Some AC unit models may require specialized capacitors that are more expensive.
- Labor Costs: If you hire a professional, labor costs will vary depending on the technician's hourly rate and the complexity of the job.
- Location: Prices can vary depending on your geographic location.
Generally, the cost of a replacement capacitor ranges from $20 to $100. Labor costs for professional installation can range from $100 to $300 or more, depending on the factors mentioned above. Getting quotes from multiple HVAC technicians can help you find the best price.
Conclusion
Understanding the role of capacitors in your air conditioner is crucial for maintaining its performance and preventing costly repairs. By recognizing the signs of a failing capacitor and taking appropriate action, you can ensure your AC unit operates efficiently and reliably. Whether you choose to replace the capacitor yourself or hire a professional, prioritizing safety and selecting the correct replacement component are essential for a successful outcome. Remember, when in doubt, consult with a qualified HVAC technician for expert advice and service. Ignoring capacitor issues can lead to bigger problems, including compressor failure. Think of the compressor as the 'heart' of your AC system; protecting it is paramount.