Capacitor Replacement Ac Unit

Is your air conditioner struggling to start, making strange humming noises, or simply not cooling your home effectively? One of the most common culprits behind these AC woes is a failing or failed capacitor. Thankfully, diagnosing and sometimes even replacing a capacitor is a task many homeowners can tackle themselves, saving on costly repair bills. However, it's crucial to understand when a DIY fix is appropriate and when calling a professional is the safest and most effective course of action. This guide will walk you through the process, step-by-step.
Understanding the Capacitor's Role
Before we dive into troubleshooting, let's quickly understand what a capacitor does. Think of it as a small battery within your AC unit. Its primary function is to provide the powerful jolt of electricity needed to start the compressor and fan motors. Without a functioning capacitor, these motors struggle to start, leading to the problems mentioned earlier.
Common Symptoms of a Failing Capacitor
Here are some telltale signs that your AC capacitor might be on its way out:
- AC unit humming but not starting: This is a classic symptom. The motor is trying to start, but lacking the necessary electrical boost from the capacitor, it can only hum.
- AC starts then quickly shuts off: The capacitor might be providing a weak charge, allowing the unit to start briefly before giving out.
- AC blows warm air: If the compressor motor isn't starting reliably, the refrigerant can't be compressed and circulated, leading to warm air.
- Increased energy bills: A struggling motor draws more power, potentially increasing your electricity bill.
- Visible bulging or leaking: A physically damaged capacitor is a clear sign of failure. Never touch a visibly damaged capacitor without proper precautions (see safety section below).
Safety First! Extremely Important
Working with electricity can be dangerous, even fatal. Before you begin any troubleshooting or repairs, follow these safety precautions meticulously:
- Turn off the power: Locate the circuit breaker that controls your outdoor AC unit and switch it to the "OFF" position. Then, double-check that the power is indeed off by using a non-contact voltage tester. Test the wires inside the AC unit. If the tester lights up, the power is still on! Find the correct breaker.
- Discharge the capacitor: Even with the power off, capacitors can store a dangerous electrical charge. You must discharge the capacitor before touching it. We'll explain how to do this safely in the next section.
- Wear safety glasses and gloves: Protect your eyes and hands from potential hazards.
- Work in a dry environment: Avoid working on your AC unit in wet or damp conditions.
- If you are uncomfortable with any of these steps, call a qualified HVAC technician. It's better to be safe than sorry.
Step-by-Step Diagnosis and Troubleshooting
Follow these steps to diagnose and potentially fix your AC capacitor issue:
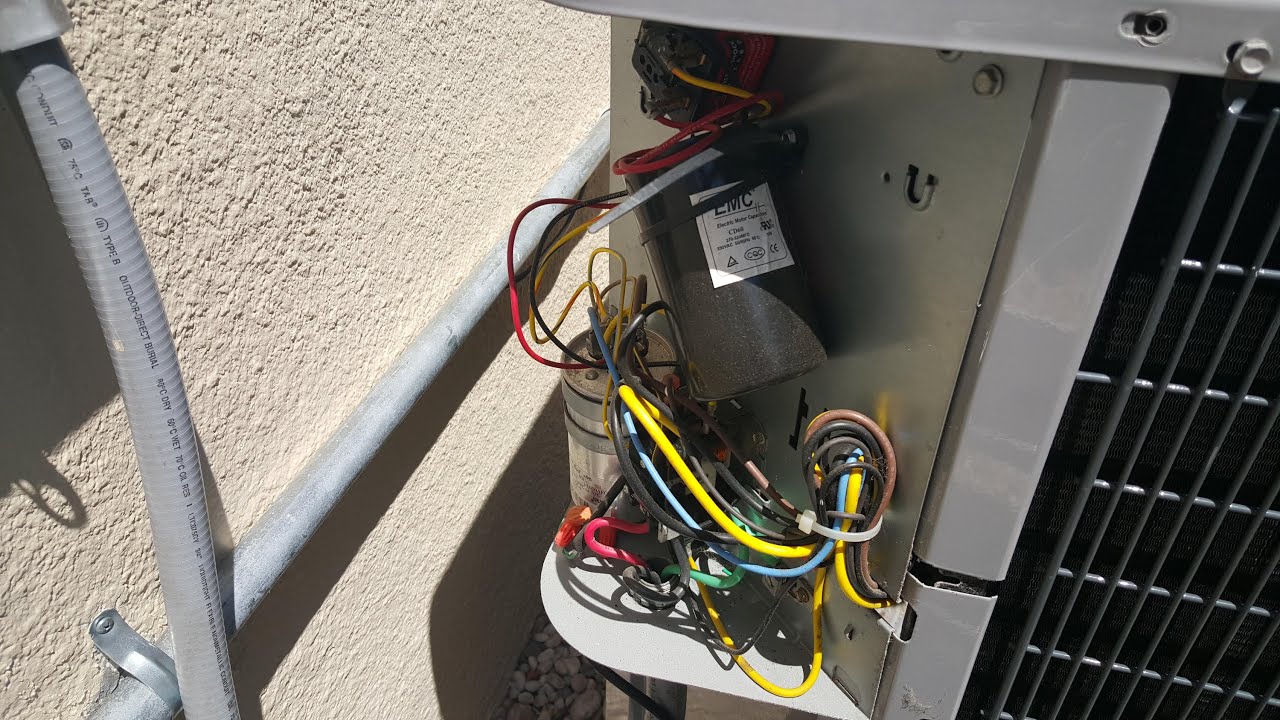
Step 1: Access the AC Unit
Locate your outdoor AC unit. Using a screwdriver or wrench (depending on the unit), remove the access panel. Be careful, as some panels can be sharp.
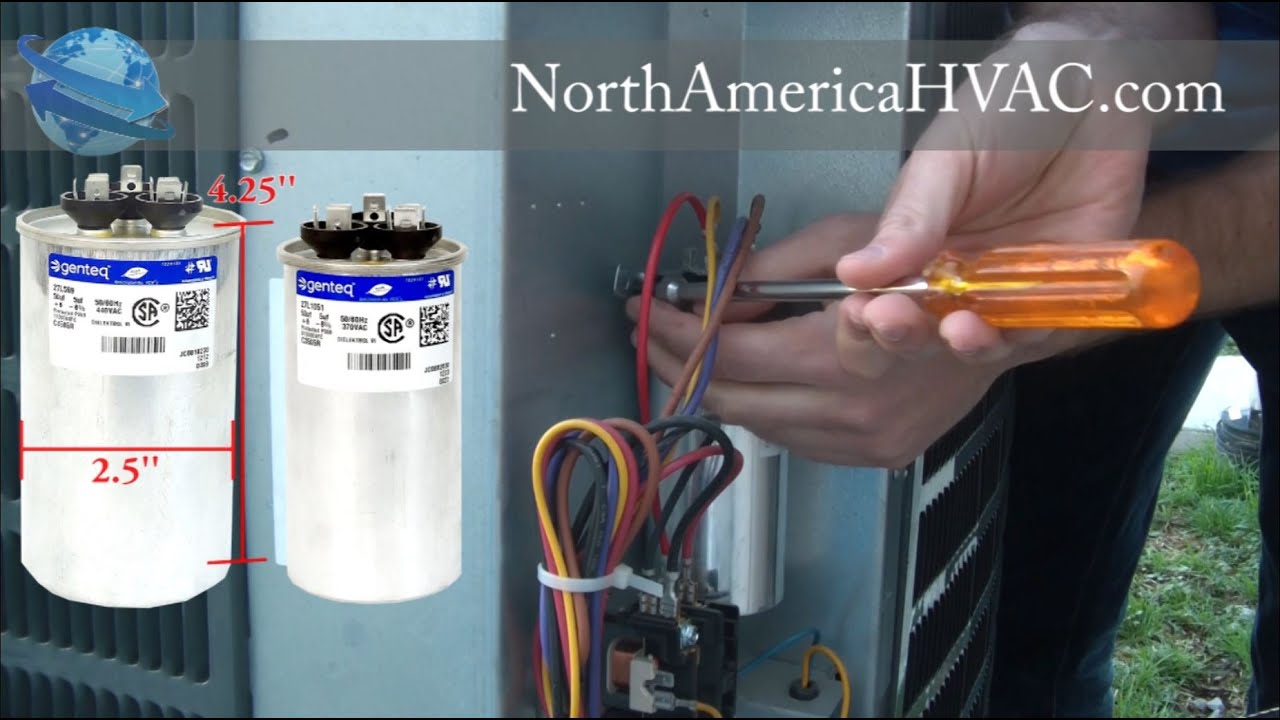
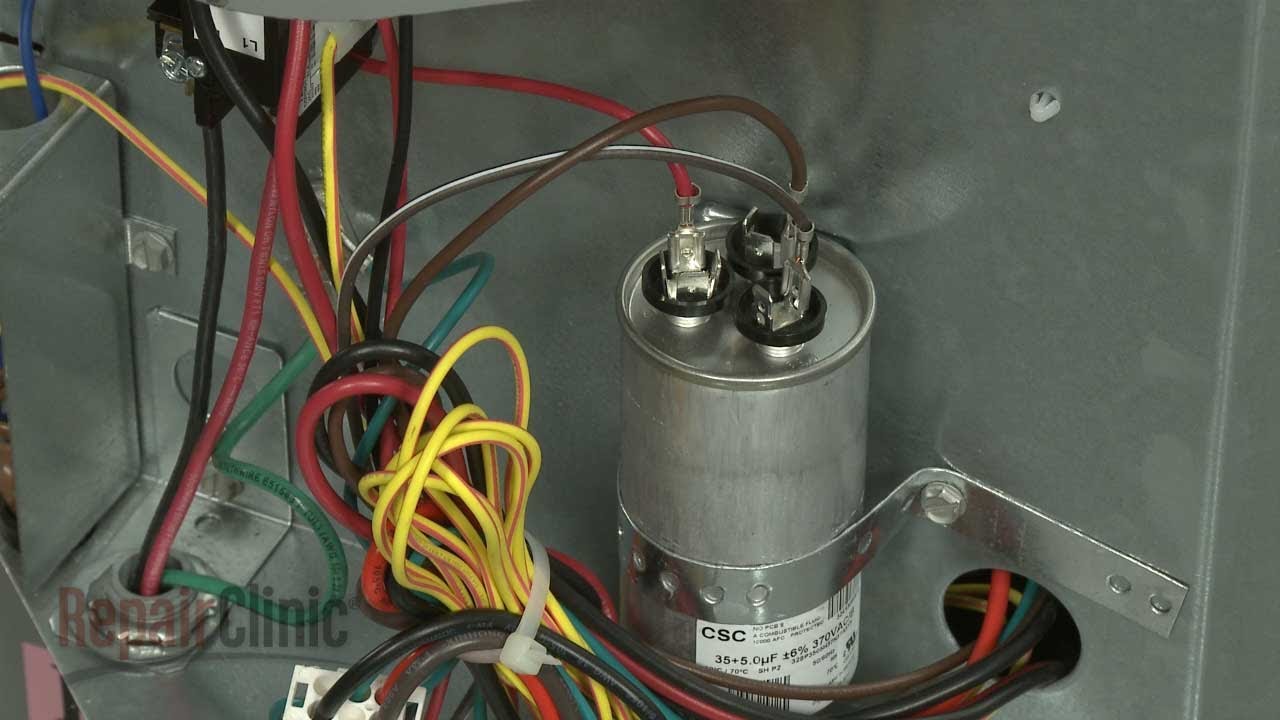
Step 2: Locate the Capacitor
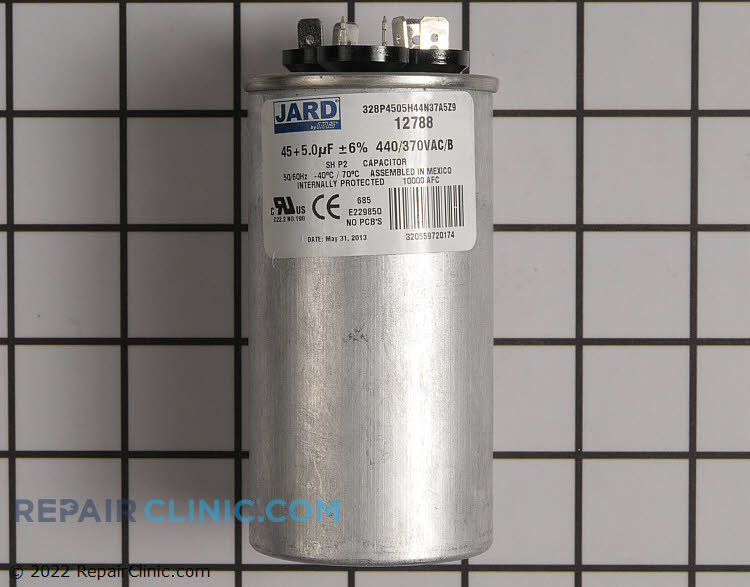
The capacitor is typically a cylindrical component, often silver or gray, located within the control panel of the AC unit. It's usually labeled with its capacitance (measured in microfarads, or µF) and voltage rating.
Step 3: Visual Inspection
Carefully examine the capacitor for any signs of physical damage, such as:
- Bulging: The top or sides of the capacitor might be swollen.
- Leaking: There might be signs of fluid leaking from the capacitor.
- Rust or corrosion: Check for rust or corrosion around the terminals.
If you see any of these signs, the capacitor is likely bad and needs to be replaced. Do not attempt to test a visibly damaged capacitor with a multimeter.
Step 4: Safely Discharge the Capacitor
This step is absolutely crucial. You will need a screwdriver with an insulated handle. Be 100% sure the breaker is off before doing this.
Carefully touch the screwdriver blade to both terminals of the capacitor simultaneously. This will create a short circuit and discharge any remaining electricity. You might see a small spark or hear a faint pop. Do this a few times to ensure the capacitor is fully discharged.
Alternative Discharge Method (Recommended for safety): Use a resistor. Purchase a 10,000 to 20,000 ohm, 5-watt resistor. Attach alligator clips to the leads of the resistor. Clip the alligator clips to the terminals of the capacitor. Leave it connected for several minutes to safely discharge the capacitor. This is a slower but much safer method than using a screwdriver.
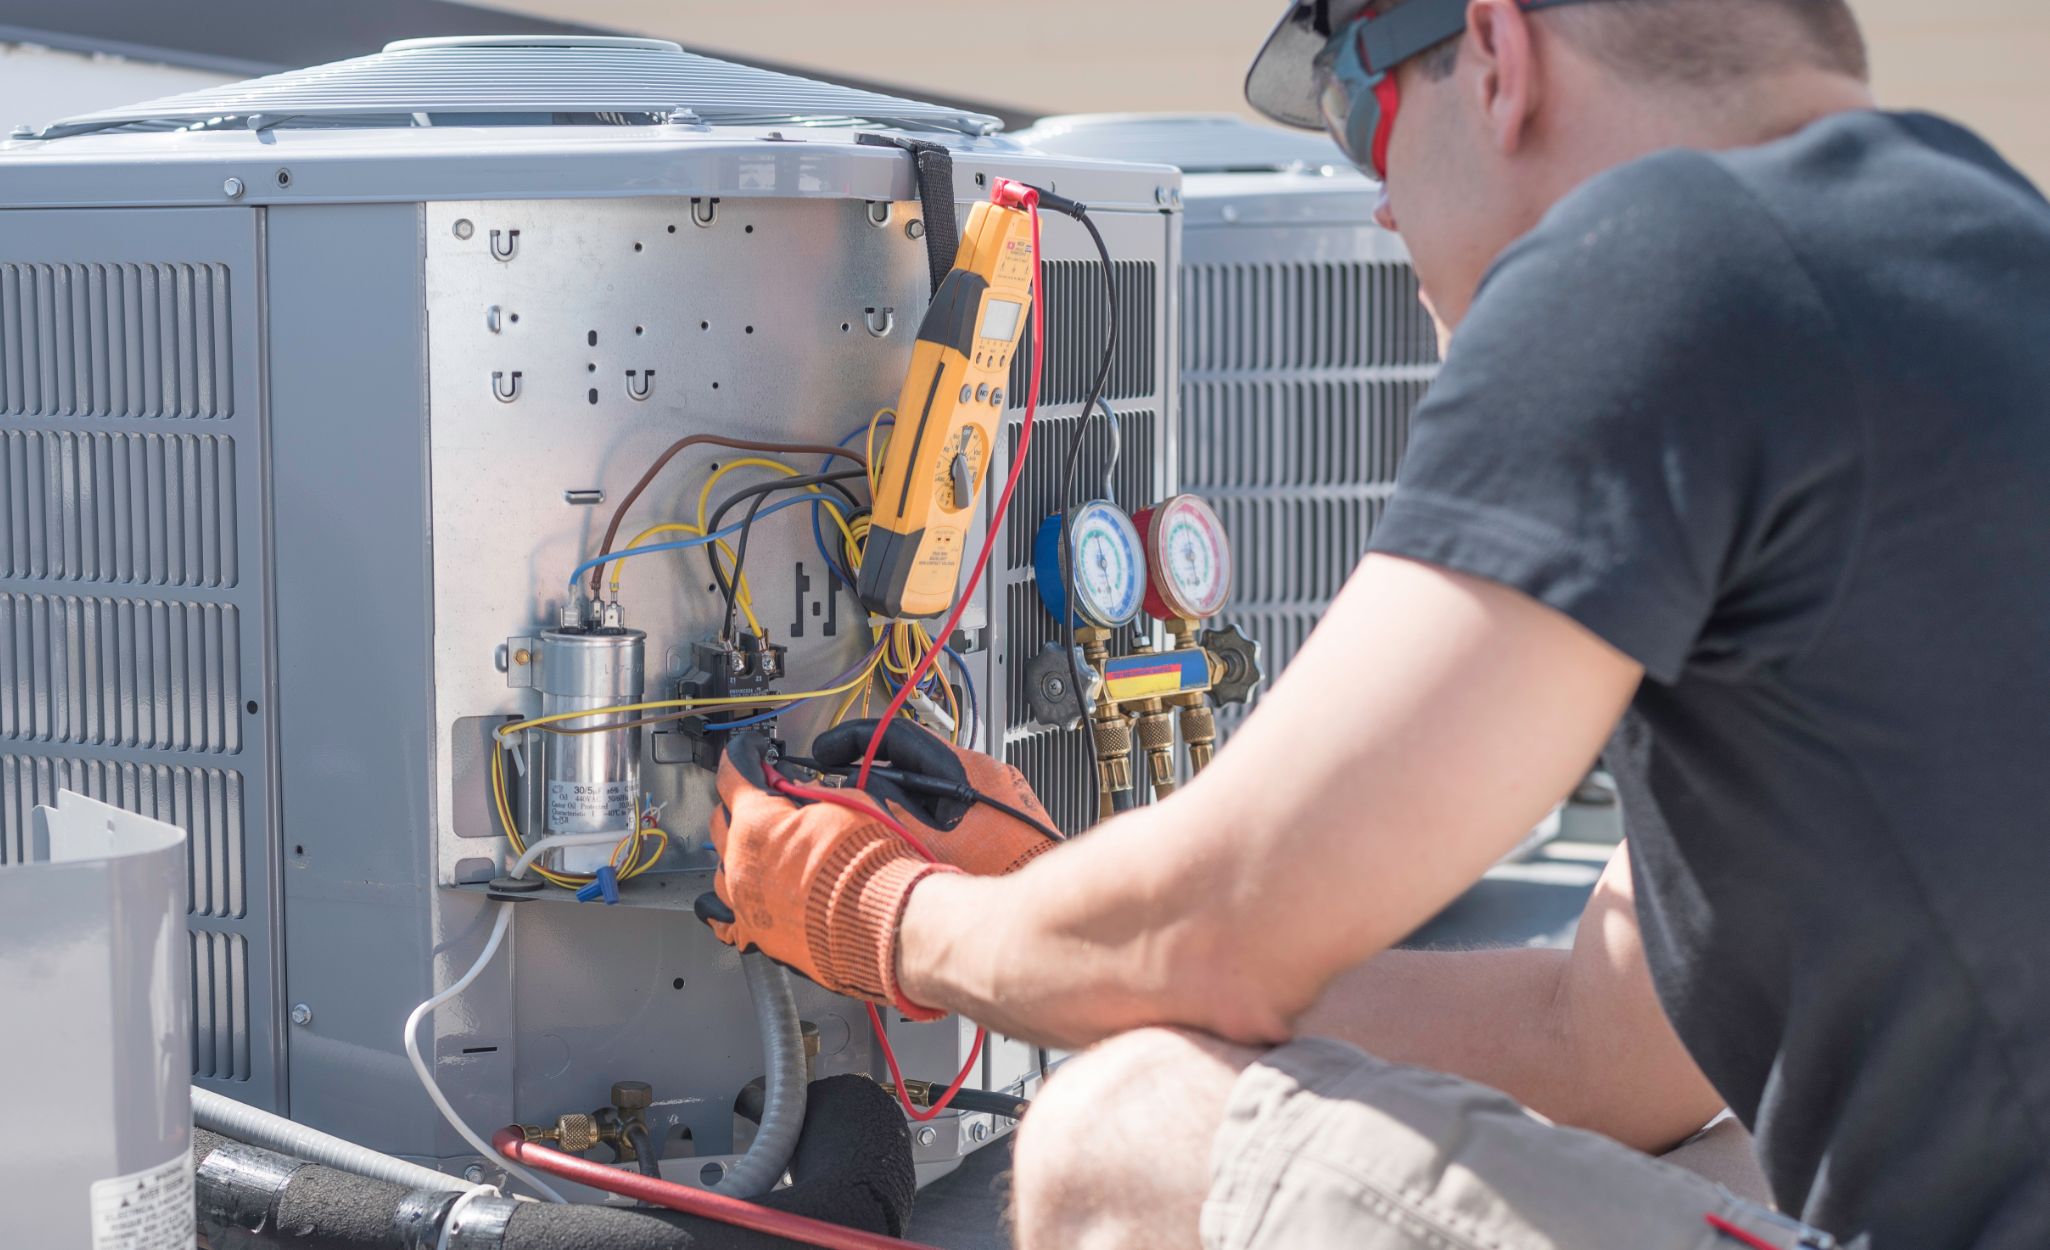
Step 5: Testing with a Multimeter (Optional, Requires Knowledge of Electrical Testing)
If you are not comfortable using a multimeter, skip this step and consult with an HVAC professional.
A multimeter can provide a more definitive assessment of the capacitor's health. Here's how to test it:
- Set the multimeter to capacitance mode (µF): Consult your multimeter's manual for instructions on how to do this.
- Disconnect the wires from the capacitor: Carefully note the position of each wire before disconnecting them. Take a picture or draw a diagram to ensure you reconnect them correctly later.
- Connect the multimeter probes to the capacitor terminals: It doesn't matter which probe goes to which terminal.
- Read the capacitance value: Compare the reading on the multimeter to the capacitance rating printed on the capacitor (e.g., 45/5 µF).
A capacitor is generally considered bad if its measured capacitance is more than 10% below its rated value. For example, if a 45 µF capacitor reads 40 µF or lower, it likely needs to be replaced.
Step 6: Capacitor Replacement (If Diagnosis Points to a Bad Capacitor)
Important Note: If you are at all unsure about replacing the capacitor yourself, it's best to call a professional. Incorrect installation can damage your AC unit or create a safety hazard.
- Purchase a Replacement Capacitor: This is extremely important. The replacement capacitor must have the exact same capacitance rating (µF) and equal or higher voltage rating as the original. Using the wrong capacitor can damage your AC unit. Take the old capacitor with you to the parts store or write down all the information on the label.
- Disconnect the Wires (If You Haven't Already): Again, carefully note the position of each wire. Take a picture or draw a diagram.
- Install the New Capacitor: Connect the wires to the new capacitor terminals, matching the original wiring configuration. Ensure the connections are secure.
- Secure the Capacitor: Make sure the new capacitor is properly secured in its bracket or holder.
Step 7: Reassemble the AC Unit
Replace the access panel, ensuring it is securely fastened.
Step 8: Restore Power
Turn the circuit breaker back to the "ON" position.
Step 9: Test the AC Unit
Turn on your AC unit and observe its performance. Listen for any unusual noises and check if it's cooling properly.
When to Call a Professional
While replacing a capacitor can be a DIY project, there are situations where calling a professional HVAC technician is the best course of action:
- You are uncomfortable with any of the steps: Your safety is paramount. If you feel unsure about any part of the process, don't hesitate to call a professional.
- You are unable to locate the capacitor: AC unit designs vary, and the capacitor might be located in a difficult-to-access area.
- You suspect other underlying problems: A failing capacitor can sometimes be a symptom of a larger issue, such as a failing compressor or motor. A professional can diagnose and address the root cause of the problem.
- You have already replaced the capacitor, but the AC unit still isn't working: This indicates a more complex problem that requires professional expertise.
- Your AC unit is still under warranty: Attempting DIY repairs might void the warranty.
- You're unsure of the correct replacement capacitor: Using the wrong capacitor can damage your unit. It's best to confirm with a professional.
- If you suspect the compressor is bad. A bad compressor should always be diagnosed and replaced by a professional.
Preventive Maintenance
To help prevent capacitor failures and extend the life of your AC unit, consider these preventive maintenance tips:
- Regularly clean the outdoor unit: Remove any debris, such as leaves, grass clippings, and dirt, that can restrict airflow and cause the unit to overheat.
- Replace the air filter regularly: A dirty air filter restricts airflow, making the AC unit work harder and potentially stressing the capacitor.
- Schedule annual maintenance: A professional HVAC technician can inspect your AC unit, clean the coils, check the refrigerant levels, and identify any potential problems before they become major issues.
Conclusion
Replacing an AC capacitor can be a straightforward DIY project if you follow the safety precautions and instructions carefully. However, it's essential to recognize your limitations and call a professional when necessary. By understanding the capacitor's role, recognizing the symptoms of a failing capacitor, and following these troubleshooting steps, you can save money on repair bills and keep your AC unit running smoothly for years to come. Remember, your safety is always the top priority. When in doubt, consult with a qualified HVAC technician.