Carrier 3.5 Ton Ac Coil Cr-cvpm-42 Price

One of the most frustrating experiences for a homeowner is when their Carrier 3.5 ton AC system, particularly the CR-CVPM-42 coil, starts underperforming or stops working altogether. Suddenly, your haven becomes uncomfortably warm, and you're left wondering what's gone wrong and how much it's going to cost to fix. Before panicking about the price of a new coil or expensive professional repairs, let's walk through some common issues and troubleshooting steps you can take yourself. This guide will help you diagnose the problem, attempt some safe DIY fixes, and, most importantly, recognize when it's time to call in a qualified HVAC technician.
Understanding the Common Problem: Reduced Cooling Efficiency
The most frequent complaint associated with the CR-CVPM-42 coil, and AC coils in general, is a noticeable decrease in cooling efficiency. You might notice the following:
- Your home isn't reaching the set temperature on your thermostat.
- The AC unit is running constantly.
- You're experiencing higher than usual energy bills.
- Weak airflow from your vents.
These symptoms often point to a problem with the coil's ability to effectively transfer heat. This can be due to several factors, which we will explore in the troubleshooting steps below.
Step-by-Step Troubleshooting Guide
Let's break down the troubleshooting process into manageable steps. Remember to always turn off the power to your AC unit at the breaker before attempting any repairs or inspections. Safety first!
Step 1: Check the Air Filter
A clogged air filter is the most common cause of reduced AC performance. A dirty filter restricts airflow, forcing the AC unit to work harder and reducing its ability to cool effectively. This increased strain can also lead to coil problems in the long run.
- Locate the air filter. It's usually found in the return air duct, often near the indoor unit (furnace or air handler).
- Remove the filter. Note the direction of airflow (usually indicated by an arrow on the filter frame).
- Inspect the filter. If it's visibly dirty or clogged, it needs to be replaced.
- Replace the filter. Use a filter of the same size and MERV (Minimum Efficiency Reporting Value) rating as the old one. A higher MERV rating generally means better filtration, but it can also restrict airflow if it's too high for your system. Consult your AC unit's manual or an HVAC professional if you're unsure.
- Run the AC unit and monitor its performance. Give it a few hours to see if the new filter improves cooling efficiency.
If replacing the air filter doesn't solve the problem, move on to the next step.
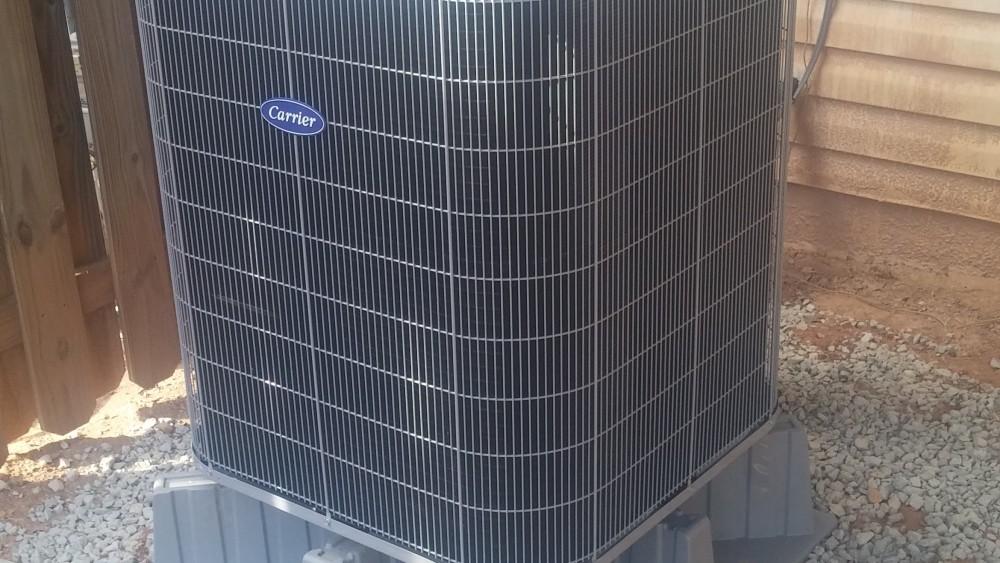
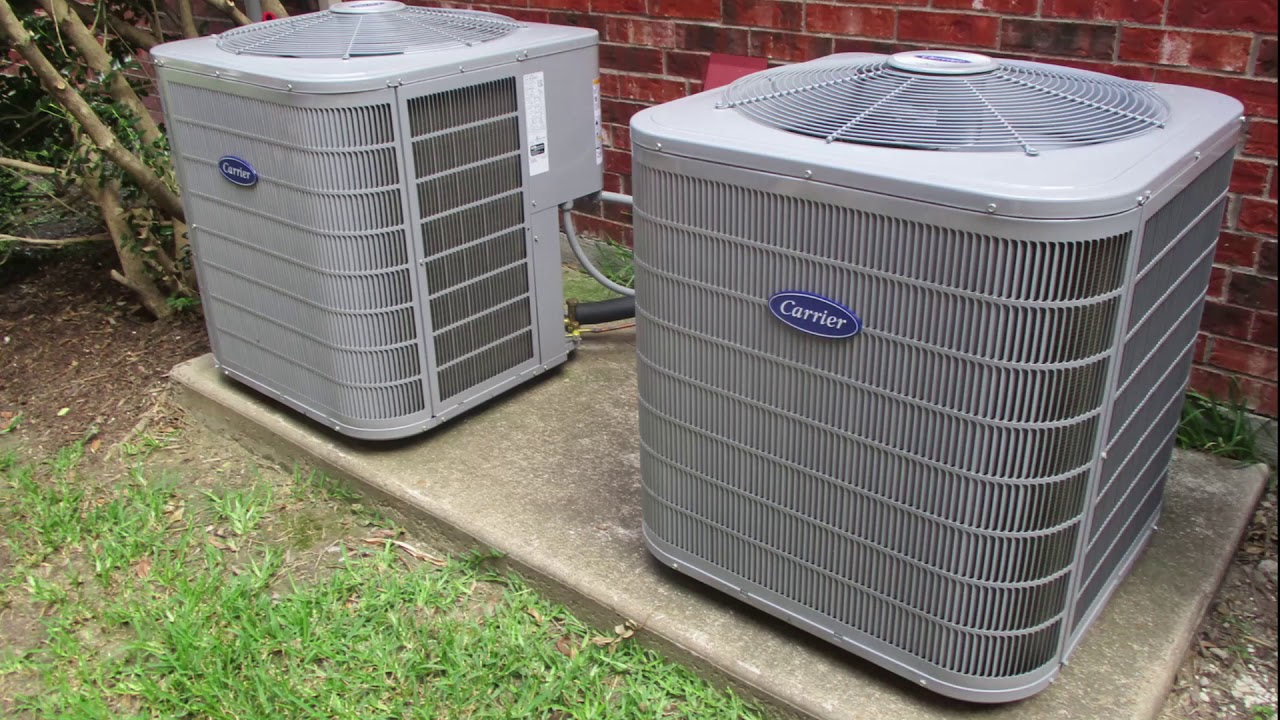
Step 2: Inspect the Outdoor Unit (Condenser)
The outdoor unit, also known as the condenser, plays a vital role in the cooling process. It houses the compressor and condenser coil, which release heat from the refrigerant. Obstructions around the condenser can significantly impact its performance.
- Turn off the power to the AC unit at the breaker.
- Visually inspect the condenser. Look for obstructions such as leaves, grass clippings, weeds, or even shrubs growing too close to the unit.
- Clear away any debris. Remove all obstructions within at least 2-3 feet around the condenser.
- Inspect the condenser fins. These are the thin metal fins that surround the coil. They can easily become bent or damaged, reducing airflow.
- Straighten bent fins. Use a fin comb (available at most hardware stores) to carefully straighten any bent fins. This is a delicate process, so be gentle.
- Clean the condenser coil. Over time, the coil can accumulate dirt and debris, reducing its ability to release heat. Use a garden hose with a gentle spray nozzle to clean the coil. Avoid using high pressure, as this can damage the fins. Spray from the inside out to flush out dirt and debris. Specialized coil cleaner can also be used, following the manufacturer's instructions carefully.
- Turn the power back on and monitor the AC unit's performance.
If cleaning the condenser doesn't improve cooling efficiency, continue to the next step.
Step 3: Inspect the Indoor Coil (Evaporator Coil - CR-CVPM-42)
The indoor coil, the CR-CVPM-42 in this case, is responsible for absorbing heat from the air inside your home. If it's dirty or frozen, it won't be able to cool effectively. This step may require more technical skill and caution. If you are not comfortable working with electrical components or handling refrigerant, it is best to call a professional.
- Turn off the power to the AC unit at the breaker.
- Locate the indoor coil. It's typically located inside the air handler or furnace. You may need to remove an access panel to see it.
- Visually inspect the coil. Look for signs of dirt, dust, mold, or ice buildup.
- If the coil is frozen:
- Turn off the AC unit and run only the fan. This will help to thaw the coil.
- Check for airflow restrictions. A frozen coil is often caused by restricted airflow due to a dirty air filter or a blocked return air duct.
- Inspect the blower motor. Ensure the blower motor is running properly. If it's not, it could be the cause of the frozen coil.
- If the coil continues to freeze, there may be a refrigerant leak or a more serious problem. Call a professional.
- If the coil is dirty:
- Clean the coil. Use a specialized coil cleaner (available at HVAC supply stores). Follow the manufacturer's instructions carefully. Be sure to protect surrounding components from overspray. Some coils can be carefully vacuumed with a soft brush attachment.
- Consider professional cleaning. A professional HVAC technician has the tools and expertise to thoroughly clean the coil without damaging it.
- Reassemble the access panel and turn the power back on. Monitor the AC unit's performance.
Working with the indoor coil can be tricky. If you are unsure about any step, it's best to call a professional.
Step 4: Check for Leaks in Ductwork
Even with a perfectly functioning AC unit, leaky ductwork can significantly reduce cooling efficiency. Leaks allow cool air to escape into unconditioned spaces (attics, crawl spaces), forcing the AC unit to work harder to maintain the desired temperature.
- Visually inspect the ductwork. Look for obvious signs of damage, such as tears, holes, or disconnected sections. Pay particular attention to joints and seams.
- Feel for air leaks. With the AC unit running, carefully feel around ductwork joints and seams for drafts.
- Seal any leaks. Use duct tape (specifically designed for ductwork, not regular tape) or duct sealant to seal any leaks you find. For larger holes or tears, you may need to use a patch of sheet metal or fiberglass mesh.
- Consider professional duct sealing. For significant leaks or hard-to-reach areas, a professional duct sealing service can be beneficial. They use specialized equipment to locate and seal leaks more effectively.
Addressing ductwork leaks can significantly improve your AC system's efficiency and lower your energy bills.
When to Call a Professional
While the steps above can address many common AC problems, there are certain situations where professional intervention is necessary. It's crucial to recognize these situations to avoid further damage to your AC unit and ensure your safety.
- Refrigerant Leaks: If you suspect a refrigerant leak (e.g., hissing sound near the unit, ice buildup on the coil that doesn't thaw, consistently poor cooling performance even after cleaning the coil), do not attempt to fix it yourself. Refrigerant is a hazardous substance, and handling it requires specialized training and equipment. A professional HVAC technician can locate and repair the leak and recharge the system with the proper amount of refrigerant.
- Compressor Problems: The compressor is the heart of the AC unit. If it's making unusual noises (e.g., loud banging, grinding) or not running at all, it's likely a serious problem that requires professional attention. Compressor replacement is a major repair.
- Electrical Issues: If you suspect an electrical problem (e.g., tripped breakers, burning smell, sparking), do not attempt to fix it yourself unless you are a qualified electrician. Electrical repairs can be dangerous and should only be performed by trained professionals.
- Persistent Problems: If you've tried the troubleshooting steps above and your AC unit is still not performing properly, it's time to call a professional. There may be a more complex underlying issue that requires specialized diagnostic tools and expertise.
- CR-CVPM-42 Coil Replacement: If the CR-CVPM-42 coil itself is damaged beyond repair (e.g., corroded, severely leaking), it will need to be replaced. While you might find the CR-CVPM-42 price online and be tempted to DIY the replacement, this is a complex task that requires specialized knowledge and tools. A professional HVAC technician can ensure the new coil is properly installed and that the system is functioning correctly. Improper installation can lead to further damage and void warranties. The refrigerant lines need to be disconnected and reconnected, which needs special equipment, and the refrigerant needs to be evacuated and refilled.
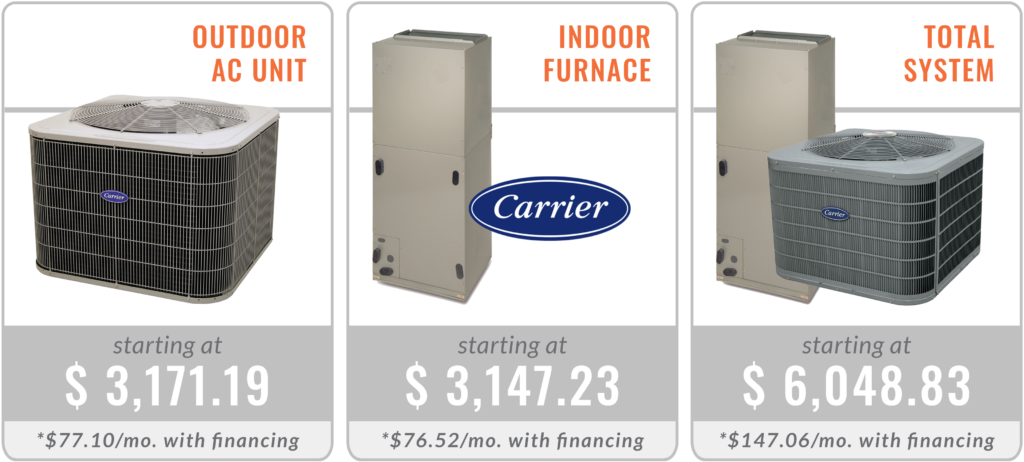
Understanding the CR-CVPM-42 Price
The CR-CVPM-42 price can vary depending on several factors, including the supplier, location, and whether you're purchasing it as a standalone replacement or as part of a larger system. It's always a good idea to get quotes from multiple HVAC contractors before making a decision. Be sure to ask for a breakdown of the costs, including the price of the coil, labor charges, and any additional fees. The contractor will need to determine the appropriate refrigerant to use and ensure proper charging, and have a leak test to confirm the install.
Remember that the cheapest option isn't always the best. Choose a reputable contractor with experience and a good track record. A quality installation can save you money in the long run by ensuring optimal performance and preventing future problems.
By following these troubleshooting steps and knowing when to call a professional, you can effectively address common AC problems and keep your Carrier 3.5 ton system running smoothly. Addressing minor issues promptly can prevent them from escalating into more costly repairs, and understanding the potential CR-CVPM-42 price will help you make informed decisions about your AC system.