Carrier Ac Model Numbers

Air conditioners, especially during peak summer months, are vital for home comfort. When your Carrier AC unit stops working, it's not just inconvenient – it can be downright unbearable. Before calling a professional, there are several basic troubleshooting steps you can take. This guide will help you diagnose and potentially fix common issues, saving you time and money. Remember, safety is paramount. If you're uncomfortable with any step, or if the issue involves electrical components, gas lines, or complex repairs, always call a qualified HVAC technician.
Understanding Carrier AC Model Numbers
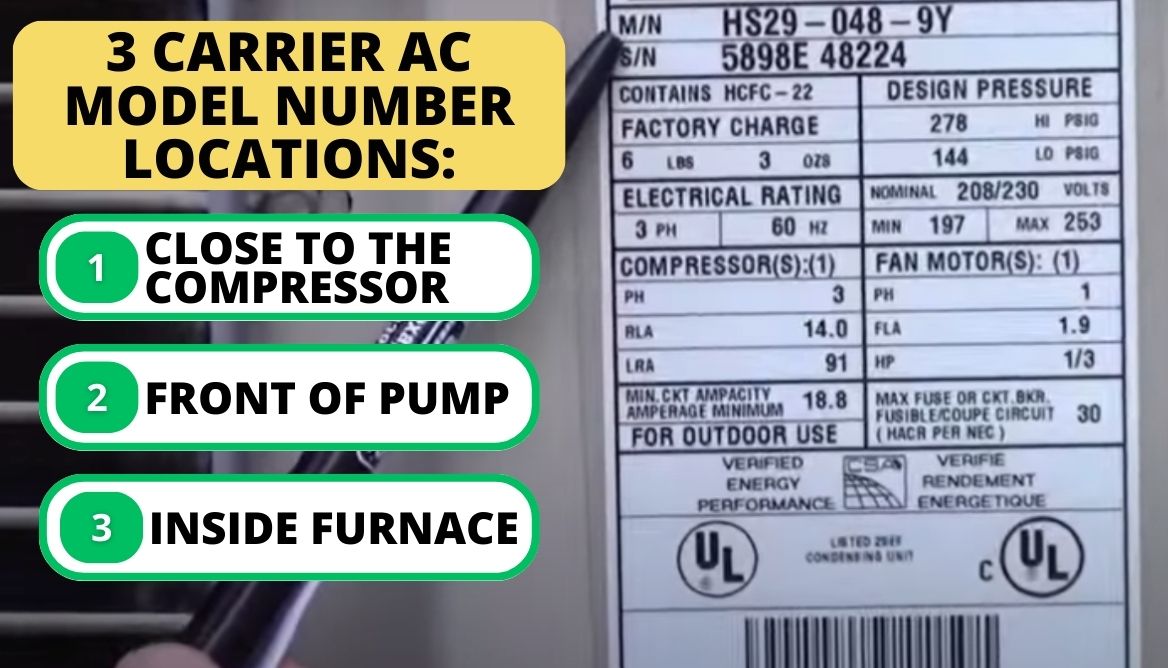
Your Carrier AC model number is crucial for identifying the specific unit you have and accessing relevant information like manuals, parts lists, and warranty details. You can typically find the model number on a sticker or plate located on the outdoor unit (condenser) or the indoor unit (air handler). Common locations include:
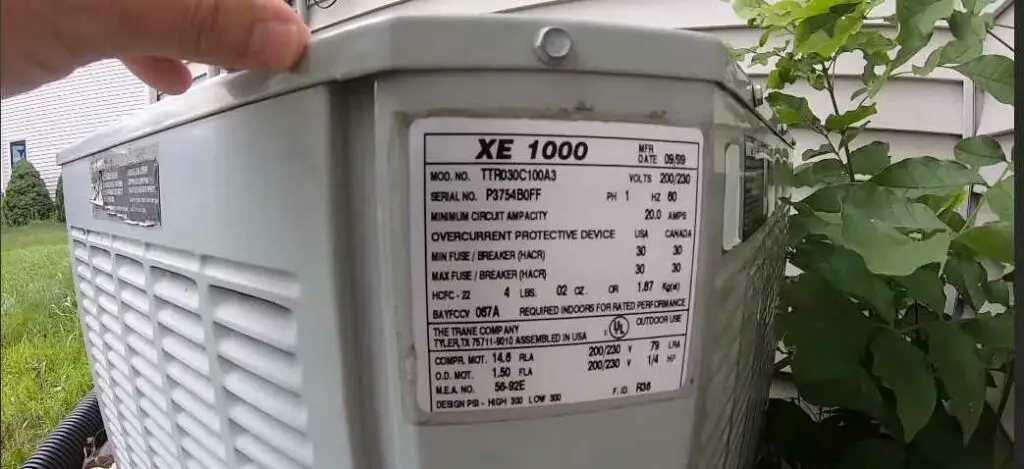
- On the side or back of the outdoor condenser unit.
- Inside the access panel of the air handler unit (you may need a screwdriver).
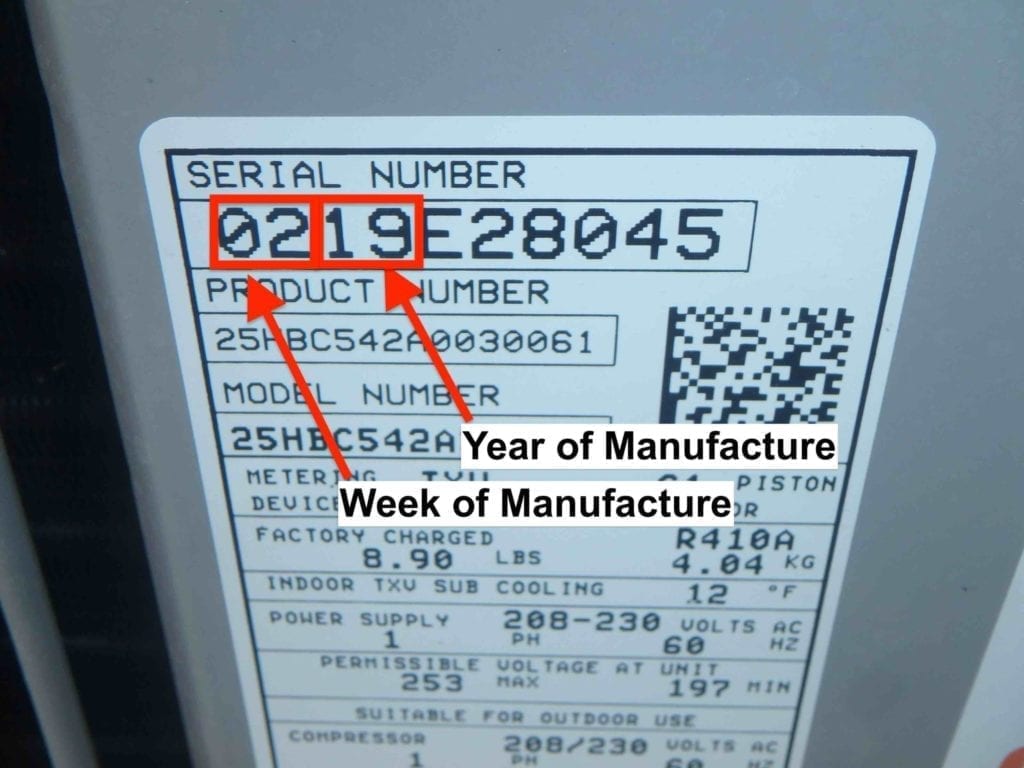
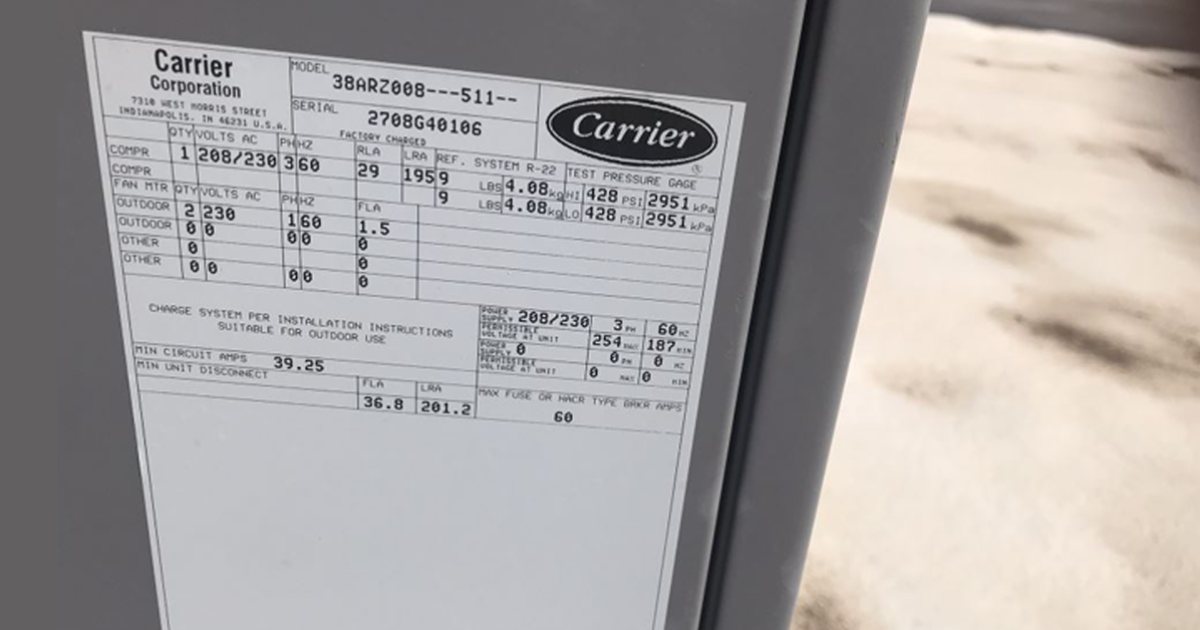
- On the unit's nameplate, often a metallic sticker with black lettering.
A typical Carrier model number might look something like this: 24ABC360A300. Each part of the number provides specific information about the unit. While the exact coding can vary depending on the model and year, generally:
- The first few digits/letters often indicate the series or type of unit (e.g., 24A for a specific air conditioner series).
- The next set of digits often relates to the unit's cooling capacity in BTUs (British Thermal Units). For instance, 360 might indicate 36,000 BTU, which is a 3-ton unit.
- The remaining letters/digits often specify the unit's voltage, efficiency, and specific features.
Once you have the model number, keep it handy when troubleshooting or contacting a technician. This will ensure you receive accurate advice and the correct replacement parts, if needed.
Common AC Problems and Initial Checks
Before diving into specifics, here's a rundown of typical AC issues:
- AC won't turn on: No cooling at all.
- AC blows warm air: The unit is running, but not cooling effectively.
- AC cycles on and off frequently (short cycling): The unit turns on and off rapidly.
- AC is noisy: Unusual sounds like buzzing, rattling, or grinding.
- AC leaks water: Water dripping from the indoor or outdoor unit.
Start with these basic checks:
- Thermostat setting: Ensure the thermostat is set to "Cool" and the temperature is set lower than the current room temperature. Make sure the fan is set to "Auto" instead of "On" if you want the fan to only run when cooling.
- Power: Check the circuit breaker for the AC unit. It might be labeled "AC," "HVAC," or have a specific amp rating (e.g., 30A, 40A). If the breaker is tripped (in the "off" or middle position), reset it by switching it fully to the "off" position and then back to the "on" position.
- Air filter: A dirty air filter is one of the most common causes of AC problems. A clogged filter restricts airflow, causing the unit to work harder, cool less efficiently, and potentially freeze up.
Step-by-Step Troubleshooting Guide
1. AC Won't Turn On
If your AC won't turn on at all, follow these steps:
- Verify Thermostat Settings: Double-check that the thermostat is set to "Cool" and the desired temperature is lower than the current room temperature. Ensure the batteries in the thermostat are working correctly. Replace them if necessary.
- Check the Breaker: Go to your electrical panel and locate the breaker for the AC unit. As mentioned before, reset it if tripped. If the breaker trips immediately again, do not keep resetting it. This could indicate a more serious electrical problem. Call a qualified electrician.
- Inspect the Disconnect Switch: Most AC units have a disconnect switch located near the outdoor condenser. It's usually a large, pull-out switch or a breaker in a weatherproof box. Ensure the switch is in the "on" position.
- Check the Condenser Fan Motor: Look at the outdoor condenser unit. Is the fan running? If not, and you've confirmed power to the unit, the fan motor may be faulty. This repair usually requires a professional.
- Capacitor Check (Advanced - Requires Caution!): Only attempt this if you have experience with electrical circuits and are comfortable working with potentially dangerous voltages. The capacitor is a cylindrical component inside the condenser unit that helps start the fan motor and compressor. A bulging or leaking capacitor is a sign of failure. *If you are not confident, call an HVAC technician.* To check it safely:
- Turn off the power at the disconnect switch and breaker!
- Wait several minutes for the capacitor to discharge.
- Carefully remove the access panel to the condenser unit.
- Visually inspect the capacitor. Look for bulging, leaking, or signs of damage.
- If the capacitor appears faulty, it needs to be replaced by a qualified technician.
2. AC Blows Warm Air
If your AC is running but blowing warm air, here's what to check:
- Change the Air Filter: A dirty air filter restricts airflow and can cause the evaporator coil (inside the air handler) to freeze up. Replace the filter with a new one of the correct size and MERV rating.
- Check for Frozen Coils: Inspect the evaporator coil. You may need to remove an access panel on the air handler. If the coil is covered in ice, turn off the AC unit and set the fan to "On" to help thaw the ice. This can take several hours. Once the coil is thawed, clean or replace the air filter and turn the AC back on. If the coil freezes up again quickly, there may be a refrigerant leak or another underlying issue requiring professional attention.
- Inspect the Outdoor Condenser: Make sure the outdoor unit is free from obstructions like bushes, leaves, or debris. Clear away any obstructions that might be blocking airflow.
- Check Refrigerant Lines: Inspect the refrigerant lines (copper pipes) running between the indoor and outdoor units. Look for signs of leaks, such as oily residue or ice formation. If you suspect a refrigerant leak, do not attempt to repair it yourself. Refrigerant handling requires specialized tools and training. Contact a qualified HVAC technician.
- Ductwork Leaks: Check your ductwork for any visible leaks or damage. Leaks in the ductwork can cause a significant loss of cooled air. Sealing ducts can improve efficiency. You can use duct tape or mastic sealant to seal small leaks. For larger issues, consider contacting a professional ductwork specialist.
3. AC Cycles On and Off Frequently (Short Cycling)
Short cycling is when the AC unit turns on and off rapidly, which is inefficient and can damage the unit. Common causes include:
- Dirty Air Filter: As mentioned before, a dirty filter can restrict airflow and cause the unit to overheat, leading to short cycling.
- Frozen Coils: Ice buildup on the evaporator coil can also cause short cycling. Follow the steps above to thaw the coil and address the underlying cause.
- Oversized AC Unit: If the AC unit is too large for the space it's cooling, it will cool the area too quickly and then shut off, leading to short cycling. This is a more complex issue that may require professional evaluation.
- Refrigerant Issues: Both low and high refrigerant levels can cause short cycling. This requires a professional HVAC technician to diagnose and repair.
- Faulty Thermostat: A malfunctioning thermostat can send incorrect signals to the AC unit, causing it to cycle on and off erratically. Try replacing the thermostat with a new one.
4. AC is Noisy
Unusual noises coming from your AC unit can indicate various problems:
- Rattling: Could be loose screws, debris inside the unit, or a failing fan blade. Try to locate the source of the rattle and tighten any loose screws. Carefully remove any debris from the unit. If the fan blade is damaged, it needs to be replaced.
- Buzzing: Could indicate a problem with the capacitor, a loose electrical connection, or a refrigerant leak. Check the capacitor (as described above, with extreme caution). Tighten any loose electrical connections (after turning off the power!). If you suspect a refrigerant leak, call a professional.
- Grinding: Usually indicates a problem with the compressor or fan motor. These are complex repairs that require a qualified technician. Turn off the unit to prevent further damage.
- Hissing: Could indicate a refrigerant leak. Contact a qualified HVAC technician immediately.
- Squealing: Often indicates a worn-out belt (in older units) or a failing fan motor bearing. Belts can be replaced relatively easily, but fan motor repairs are best left to professionals.
5. AC Leaks Water
Water leaks can be messy and potentially damaging. Common causes include:
- Clogged Condensate Drain Line: The condensate drain line removes water that condenses on the evaporator coil. If the drain line is clogged, water can back up and leak. Locate the drain line (usually a PVC pipe near the indoor unit) and try to clear it with a wet/dry vacuum, a stiff wire, or a specialized drain cleaner.
- Broken Condensate Pump: Some AC units use a condensate pump to pump water uphill to a drain. If the pump is broken, it can cause water to leak. Inspect the pump and replace it if necessary.
- Frozen Coils: As mentioned before, frozen coils can melt and overflow, causing a water leak. Follow the steps above to thaw the coil and address the underlying cause.
- Cracked Drain Pan: The drain pan under the evaporator coil can crack and leak. Inspect the drain pan for cracks and replace it if necessary.
When to Call a Professional
While this guide provides helpful troubleshooting steps, some repairs are best left to the professionals. Always call a qualified HVAC technician if:
- You suspect a refrigerant leak.
- You are uncomfortable working with electrical components.
- The problem involves the compressor, motor, or other complex parts.
- You are unsure about any step in the troubleshooting process.
- The AC unit is still under warranty.
Working with electricity or refrigerant can be dangerous. Prioritize your safety and don't hesitate to seek professional help when needed. Provide the technician with your Carrier AC model number to ensure they can quickly diagnose and repair the issue.
Preventative Maintenance Tips
Regular preventative maintenance can help keep your Carrier AC unit running smoothly and prevent costly repairs. Here are some tips:
- Change the air filter regularly (every 1-3 months, or more often if you have pets or allergies).
- Keep the outdoor condenser unit clean and free from obstructions.
- Schedule annual maintenance with a qualified HVAC technician. This includes cleaning the coils, checking the refrigerant levels, and inspecting the system for any potential problems.
- Consider a service contract with a reputable HVAC company. This can provide peace of mind and help you save money on repairs in the long run.
By following these troubleshooting steps and preventative maintenance tips, you can keep your Carrier AC unit running efficiently and comfortably for years to come.