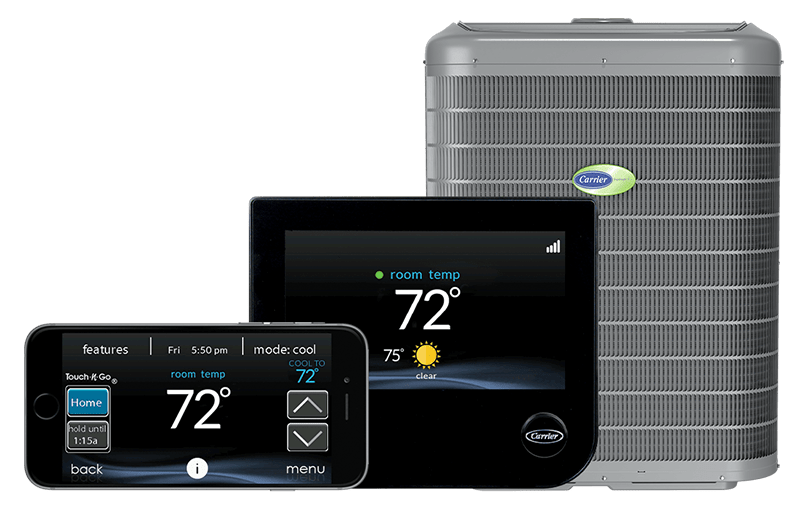
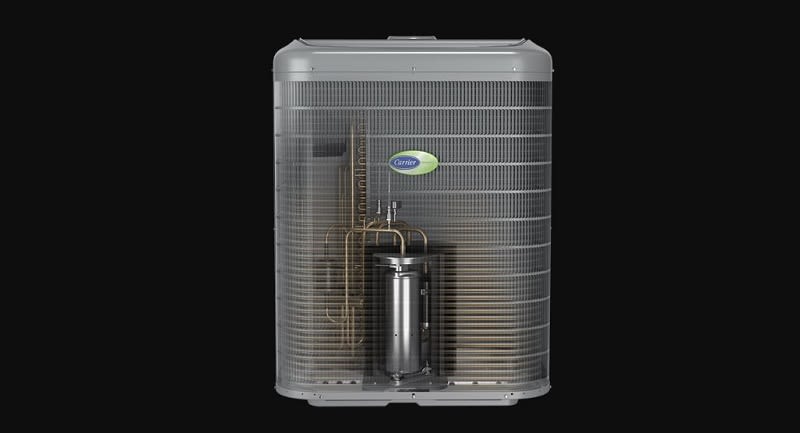
Carrier Infinity 26 Ac With Greenspeed Intelligence

The Carrier Infinity 26 AC with Greenspeed Intelligence is a sophisticated and efficient cooling system. However, even the most advanced technology can sometimes encounter problems. One of the most common issues homeowners face is inconsistent cooling or a complete lack of cooling. This can manifest as rooms being warmer than expected, the AC unit running constantly without effectively lowering the temperature, or the system not turning on at all. Before you call a technician, let's explore some troubleshooting steps you can take to diagnose and potentially resolve the issue yourself.
Step 1: Basic Checks and Thermostat Verification
Start with the simplest explanations. Often, the solution is surprisingly straightforward.
1.1. Verify Thermostat Settings
This might sound obvious, but it's crucial. Ensure your thermostat is set to COOL mode and that the desired temperature is lower than the current room temperature. Double-check the day and time settings, particularly if you have a programmed schedule. Sometimes, a scheduling error can prevent the AC from running when you expect it to.
Action: Manually lower the thermostat temperature significantly (5-10 degrees below the current room temperature) and listen to see if the outdoor unit (condenser) starts up.
1.2. Check the Thermostat Batteries
Low batteries can cause erratic thermostat behavior. Even with a wired connection, many smart thermostats rely on batteries for memory and advanced functions. Replacing the batteries is a quick and easy step.
Action: Replace the batteries in your thermostat with fresh ones. Wait a few minutes for the thermostat to reset and then re-check the settings.
1.3. Inspect the Air Filter
A dirty air filter is a very common culprit for cooling problems. A clogged filter restricts airflow, making the AC unit work harder and less efficiently. It can even cause the unit to overheat and shut down.
Action: Locate your air filter (usually in the indoor unit or at a return air vent). Remove the old filter and hold it up to the light. If you can't see much light through it, it's definitely time for a replacement. Replace it with a new filter of the correct size and type (check your unit's manual for specifications).
Step 2: Inspecting the Indoor Unit
The indoor unit (air handler) is responsible for circulating cool air throughout your home. Let's examine it for potential problems.
2.1. Check for Ice Buildup
Ice on the evaporator coil (inside the indoor unit) indicates a serious problem, often caused by restricted airflow, low refrigerant, or a malfunctioning blower motor.
Action: Turn off the AC and set the thermostat to FAN ONLY. This will allow the fan to run and help melt any ice that has formed on the coils. Do NOT try to chip or scrape off the ice. This can damage the delicate coils. Leave the fan running for several hours, or even overnight, until all the ice is melted. Once the ice is gone, replace the air filter (if you haven't already) and try turning the AC back on. If the problem recurs, call a professional.
2.2. Listen to the Blower Motor
The blower motor is responsible for circulating air. Listen for any unusual noises, such as squealing, grinding, or rattling. A failing blower motor can significantly reduce airflow.
Action: With the AC running in FAN ONLY mode, listen carefully to the blower motor. If you hear any unusual noises, or if the airflow seems weak, the blower motor may be failing. This is a repair that typically requires professional assistance.
2.3. Check for Leaks
Inspect the area around the indoor unit for any signs of water leaks. Leaks can indicate a clogged condensate drain or a more serious issue with the refrigerant lines.
Action: Look for water stains on the ceiling or floor around the indoor unit. If you find any, try to locate the condensate drain line (usually a PVC pipe). Check if it's clogged. You can try clearing it with a wet/dry vacuum or by carefully inserting a stiff wire or pipe cleaner. If you can't clear the clog or if the leak persists, call a professional.
Step 3: Examining the Outdoor Unit (Condenser)
The outdoor unit (condenser) is where the heat is removed from your home. Inspecting this unit is crucial for troubleshooting cooling problems.
Important Safety Note: Before working on the outdoor unit, always turn off the power at the outdoor disconnect switch. This is a small electrical box located near the unit. This is a crucial safety step to prevent electrical shock.
3.1. Check for Obstructions
Make sure the condenser unit is free from obstructions. Leaves, grass clippings, bushes, and other debris can restrict airflow and reduce the unit's efficiency.
Action: Carefully remove any debris that is blocking the airflow around the unit. Clear at least 2-3 feet of space around the condenser. Use a garden hose to gently spray off any dirt or debris on the coils. Avoid using a high-pressure washer, as this can damage the fins.
3.2. Inspect the Fan Blades
Check the fan blades for any damage or obstructions. Bent or broken fan blades can reduce airflow and cause the unit to overheat.
Action: With the power OFF, inspect the fan blades. If you find any damage, the fan motor or the entire condenser unit may need to be replaced. This is a job for a qualified technician.
3.3. Listen to the Compressor
The compressor is the heart of the AC system. Listen for any unusual noises, such as loud banging, hissing, or grinding. A failing compressor is a serious problem.
Action: With the power ON (after performing other inspections and ensuring it's safe), listen carefully to the compressor. If you hear any unusual noises, immediately turn off the power and call a professional. Compressor repairs are complex and require specialized tools and knowledge.
3.4. Check the Condenser Coils
The condenser coils are responsible for dissipating heat. They should be clean and free from debris. Over time, they can become dirty and reduce the unit's efficiency.
Action: With the power OFF, visually inspect the condenser coils. If they are visibly dirty, you can try cleaning them with a coil cleaner specifically designed for AC units. Follow the instructions on the cleaner carefully. Be gentle and avoid bending the fins.
Step 4: Resetting the System
Sometimes, a simple reset can resolve minor issues.
4.1. Reset the Breaker
Check the circuit breaker for the AC unit in your electrical panel. If the breaker has tripped, reset it. Wait a few minutes and then turn the AC back on.
Action: Locate the breaker for your AC unit in your electrical panel. If it is tripped (usually in the middle position), flip it all the way to the OFF position and then back to the ON position. If the breaker trips again immediately, there may be a short circuit or other electrical problem. Call a professional immediately.
4.2. Power Cycle the System
Turn off the power to the AC unit at both the breaker and the outdoor disconnect switch. Wait for 5-10 minutes, then turn the power back on. This can sometimes reset the system's electronics.
Action: Turn off the breaker and the outdoor disconnect switch. Wait 5-10 minutes, then turn both back on. This is a full system reset. Monitor the unit for normal operation.
When to Call a Professional
While these troubleshooting steps can resolve many common AC problems, some issues require the expertise of a qualified HVAC technician. Here are some situations where you should definitely call a professional:
- Refrigerant Leaks: Refrigerant is essential for cooling. If you suspect a leak (e.g., hissing sounds, ice buildup on coils even after melting, consistently poor cooling), do not attempt to repair it yourself. Refrigerant handling requires specialized equipment and certifications. Leaking refrigerant is also an environmental hazard.
- Electrical Problems: If you suspect any electrical problems, such as a tripped breaker that repeatedly trips, burning smells, or exposed wiring, do not attempt to repair it yourself. Electrical work is dangerous and should only be performed by a qualified electrician.
- Compressor Issues: The compressor is the most expensive component of the AC system. If you suspect a problem with the compressor (e.g., loud noises, failure to start), do not attempt to repair it yourself. Compressor repairs are complex and require specialized tools and knowledge.
- Blower Motor Failure: While you can visually inspect the blower motor, replacing it often requires specialized tools and knowledge. If you suspect a blower motor failure, it is best to call a professional.
- Icing Issues: If ice continues to form on the coils after performing the initial troubleshooting steps, this indicates a more serious underlying issue that requires professional diagnosis and repair.
- If you are uncomfortable performing any of these steps. Your safety is paramount.
The Carrier Infinity 26 AC with Greenspeed Intelligence is a sophisticated system. While these steps can help you troubleshoot common problems, remember that some repairs require specialized knowledge and equipment. When in doubt, always call a qualified HVAC technician. Regular maintenance, including annual inspections and filter replacements, can help prevent many of these problems and keep your AC system running efficiently for years to come.