Ceiling Vents That Open And Close

One of the most frustrating issues homeowners face is inconsistent heating or cooling throughout their house. You might find one room freezing while another is sweltering. Often, the culprit behind this imbalance lies in your ceiling vents – specifically, those that are designed to open and close.
These vents are intended to help direct airflow, ensuring each room receives the right amount of conditioned air. However, when they malfunction, they can drastically impact your home's comfort and energy efficiency. Let's walk through a systematic approach to troubleshooting these vents, empowering you to identify and potentially fix the problem yourself. Remember safety is the priority, if you are not comfortable with a step, call a professional.
Diagnosing the Problem: A Step-by-Step Approach
Before you start dismantling anything, let’s take a structured approach to pinpoint the source of the issue. This will save you time and prevent unnecessary repairs.
Step 1: Visual Inspection (No Tools Required)
Begin with a thorough visual inspection of all your ceiling vents. This is the simplest and often most revealing step.
- Check for Obvious Obstructions: Look for anything blocking the vent, both inside and outside. Common culprits include dust bunnies, debris, or even objects that have accidentally fallen into the duct.
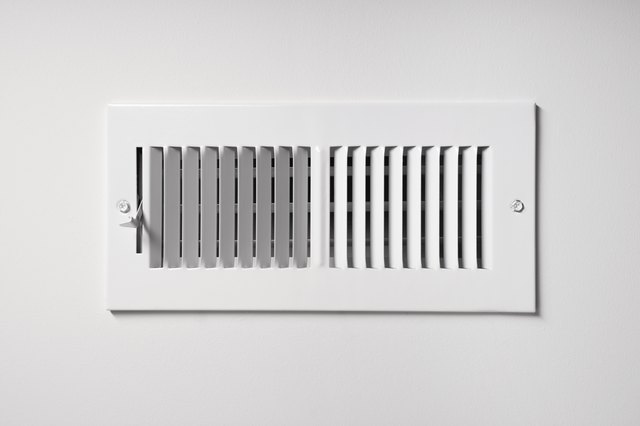
- Observe the Louvers: Pay close attention to the louvers (the slats that open and close). Are they bent, broken, or misaligned? Do they move freely when you try to adjust them manually?
- Inspect the Lever or Dial: If your vent has a lever or dial to control airflow, examine it carefully. Is it loose, broken, or stuck? Does it seem to be connected properly to the louvers?
- Look for Rust or Corrosion: Check for any signs of rust or corrosion, especially if you live in a humid environment. This can indicate a larger problem with your ductwork or the vent itself.
Step 2: Manual Operation Test (No Tools Required)
Next, test the manual operation of each vent. This will help determine if the problem is with the vent mechanism itself or with the airflow from your HVAC system.
- Attempt to Open and Close the Vent: Gently try to open and close the vent using the lever or dial (if present) or by manually moving the louvers. Note any resistance, sticking, or unusual noises.
- Compare to Other Vents: Compare the operation of the problematic vent to other vents in your home that are working correctly. This will give you a baseline for what “normal” operation feels like.
- Feel for Airflow: With the vent open, feel for airflow coming from the duct. If there’s little or no airflow, the problem may lie with your HVAC system rather than the vent itself. Try turning your system on full blast to check.
Step 3: Assessing Airflow from the HVAC System (Basic Equipment Needed)
If you suspect the issue might be with your HVAC system, you'll need to check the overall airflow. A simple anemometer (airflow meter) can be useful here, but you can also get a general sense without one.
- Check the Air Filter: A clogged air filter is a very common cause of reduced airflow. Replace it with a new one and re-test the vents.
- Inspect the Blower Fan: If possible, visually inspect the blower fan in your furnace or air handler. Look for any signs of damage or excessive dust buildup. Accessing the blower fan may require removing a panel, so proceed with caution and consult your HVAC system's manual.
- Check Ductwork Connections (If Accessible): If you have access to any exposed ductwork, inspect the connections for leaks or disconnections. Use foil tape to seal any minor leaks you find.
Step 4: Investigating Automatic Dampers (If Applicable)
Some homes have automatic dampers installed in their ductwork, controlled by a zoning system. These dampers automatically open and close to regulate airflow to different zones.
- Locate the Zone Control Panel: Find the zone control panel, which is typically located near your furnace or air handler.
- Check Zone Settings: Verify that the zone settings are correct and that the zone associated with the problematic vent is not set to "off" or a very low temperature.
- Listen for Damper Motor Activity: When you adjust the zone settings, listen for the sound of the damper motors opening and closing. If you don't hear anything, there may be a problem with the damper motor or the control panel. This is where it's best to consult a professional.
DIY Actions: Simple Fixes You Can Try
Once you’ve identified the problem, you may be able to resolve it with some simple DIY actions. Remember to always turn off the power to your HVAC system before performing any repairs.
Cleaning a Dirty Vent (No Tools Required)
If the vent is simply dirty or dusty, cleaning it can often restore proper airflow.
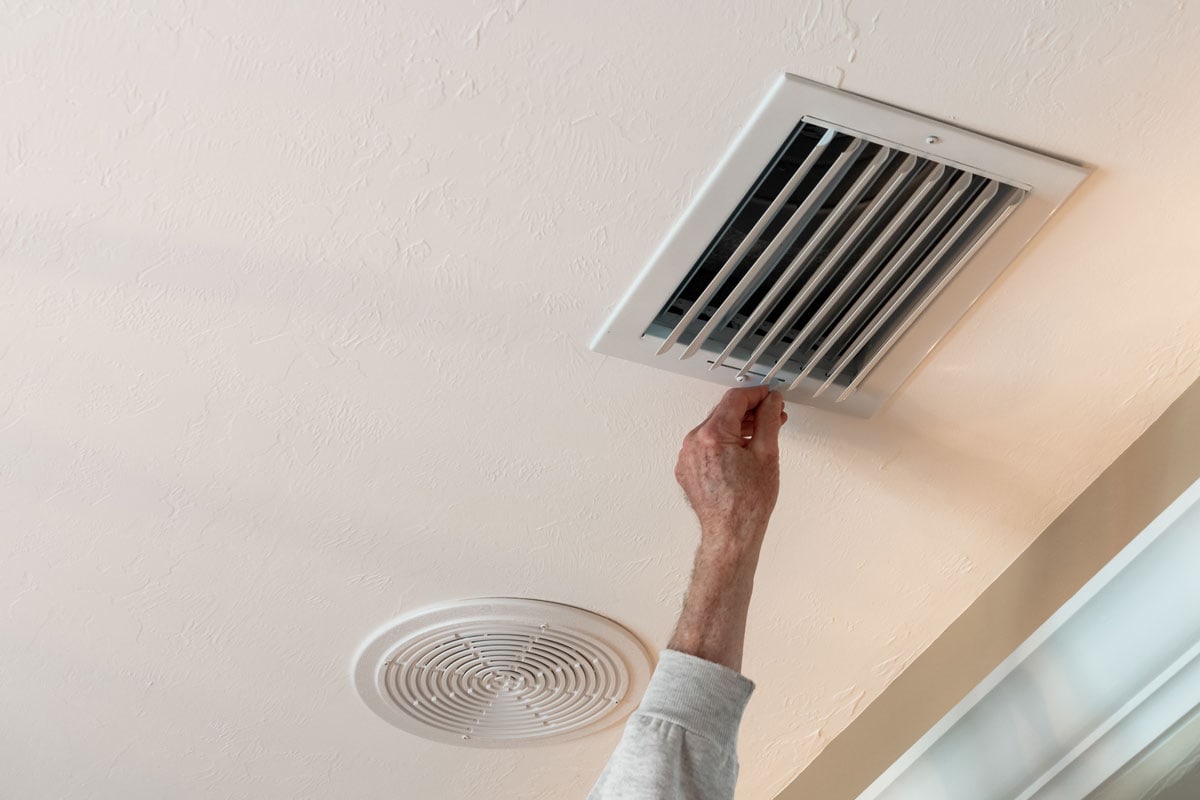
- Remove the Vent Cover: Carefully remove the vent cover from the ceiling. It may be held in place by screws or clips.
- Vacuum the Vent and Duct: Use a vacuum cleaner with a hose attachment to remove any dust, debris, or cobwebs from the vent and the visible portion of the duct.
- Wash the Vent Cover: Wash the vent cover with soap and water. Rinse thoroughly and allow it to dry completely before reattaching it.
Lubricating Sticking Louvers (Basic Equipment Needed)
If the louvers are sticking, lubricating them may help them move more freely.
- Apply Lubricant: Use a silicone-based lubricant (such as WD-40 Specialist Silicone Lubricant) to lubricate the hinges or pivot points of the louvers.
- Work the Louvers: Gently work the louvers back and forth to distribute the lubricant and loosen any sticking points.
- Wipe Away Excess Lubricant: Wipe away any excess lubricant with a clean cloth.
Adjusting the Lever or Dial (No Tools Required)
If the lever or dial is loose or misaligned, you may be able to adjust it to improve the vent's operation.
- Tighten Screws (If Applicable): If the lever or dial is held in place by screws, tighten them gently.
- Realign the Lever or Dial: If the lever or dial is misaligned, try to realign it so that it properly engages with the louvers. You may need to consult the vent's instructions or look for a diagram online.
Sealing Minor Duct Leaks (Basic Equipment Needed)
If you’ve identified minor duct leaks, sealing them can improve airflow and energy efficiency.
- Clean the Area: Clean the area around the leak with a damp cloth.
- Apply Foil Tape: Apply foil tape over the leak, making sure to create a tight seal.
- Smooth the Tape: Use your fingers to smooth the tape and ensure it adheres properly to the ductwork.
When to Call a Professional HVAC Technician
While many vent issues can be resolved with DIY solutions, some problems require the expertise of a qualified HVAC technician. It’s crucial to know your limits and avoid attempting repairs that are beyond your skill level.
- Complex Ductwork Issues: If you suspect a major problem with your ductwork, such as collapsed or severely damaged ducts, it’s best to call a professional.
- Refrigerant Leaks: If you suspect a refrigerant leak in your air conditioning system, do not attempt to repair it yourself. Refrigerant is a hazardous substance, and only a licensed technician can handle it safely.
- Electrical Problems: If you suspect an electrical problem with your HVAC system, such as a faulty motor or wiring, do not attempt to repair it yourself. Electricity can be dangerous, and only a qualified electrician should handle electrical repairs.
- Automatic Damper Issues: If you suspect a problem with the automatic dampers or the zone control system, it’s best to call a professional. These systems are complex and require specialized knowledge to diagnose and repair.
- If You're Unsure: If you’re ever unsure about how to proceed with a repair, it’s always best to err on the side of caution and call a professional. Attempting to fix a problem you don’t understand can lead to further damage and potentially dangerous situations.
Remember, your safety is paramount. If you are uncomfortable with any of these steps, please consult with a qualified HVAC professional. Taking the time to systematically troubleshoot your ceiling vents and addressing simple issues yourself can save you money and improve your home's comfort. However, knowing when to call a professional will ensure that more complex problems are handled safely and effectively.