Central Air Leaking Water Around Furnace

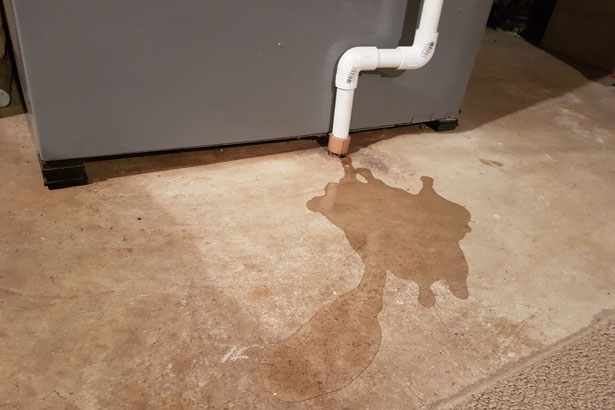
One of the most unsettling discoveries for a homeowner, especially during peak heating or cooling seasons, is finding a puddle of water around their furnace. While it might seem alarming, it's often a sign of a manageable problem with your central air conditioning system. This article will guide you through a step-by-step troubleshooting process, empowering you to identify the cause and, in many cases, resolve the issue yourself. However, we'll also clearly define when professional intervention is necessary to ensure safety and prevent further damage.
Understanding the Water Source
Before diving into the troubleshooting steps, it’s crucial to understand why your air conditioner can produce water. Air conditioners work by cooling air, and this process naturally removes humidity from the air. This condensation is collected and should drain away properly. The presence of water around your furnace typically indicates a problem with this drainage system.
Step-by-Step Troubleshooting Guide
Step 1: Initial Assessment (No Tools Required)
Start with a visual inspection. Safety first! Make sure to turn off the AC unit at the thermostat before poking around. Look for obvious signs of water. Note the location and extent of the leak. This will provide crucial clues.
- Check the Furnace Area: Examine the floor around the furnace. Is the water concentrated in one spot, or is it widespread?
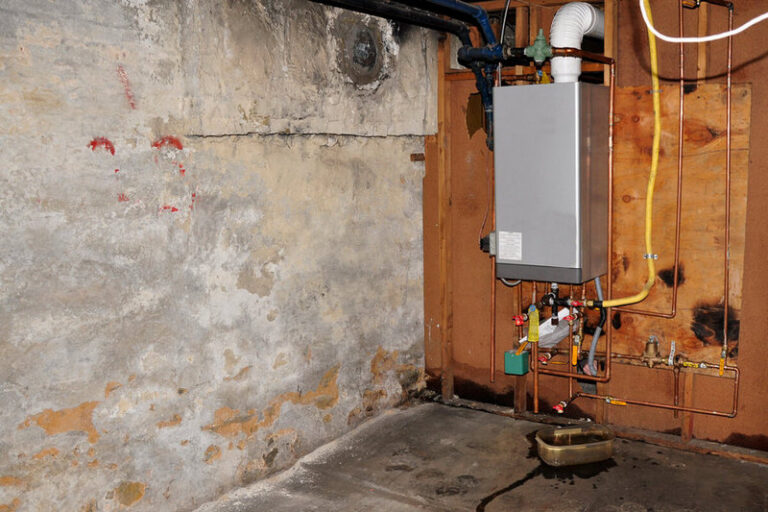
- Inspect the Drain Pan: Locate the drain pan, usually a shallow pan beneath the indoor AC unit (often within the furnace cabinet or adjacent to it). Is the pan overflowing?
- Look for Obvious Obstructions: Visually inspect the drain line (usually a PVC pipe) for any kinks, bends, or obvious blockages. Sometimes you can spot debris blocking the opening.
- Check for Ice: Inspect the evaporator coils (located inside the indoor AC unit, behind an access panel – see Step 2 for accessing this safely). If you see ice buildup, it could be restricting airflow and causing water to back up.
Step 2: Accessing the Indoor AC Unit (Basic Tools May Be Required - Proceed with Caution!)
Important Safety Note: Before proceeding, ensure the AC unit is turned off at the thermostat AND at the circuit breaker. Electricity and water are a dangerous combination. If you are uncomfortable working with electrical components, stop here and call a qualified HVAC technician.
Most indoor AC units have an access panel, usually secured by screws or clips. Use a screwdriver (Phillips or flathead, depending on the screw type) to remove the panel. Take a picture *before* removing any wires or components, so you can easily reassemble them later.
- Inspect the Evaporator Coils: Now you can get a better look at the evaporator coils. Confirm if they are indeed iced up. Even a small amount of ice can cause drainage problems.
- Check the Drain Pan Condition: With the access panel removed, examine the drain pan more closely. Look for cracks, rust, or other damage that could be causing leaks.
Step 3: Clearing the Condensate Drain Line (Basic Tools Required)
A clogged condensate drain line is the most common cause of water leaks around the furnace. Here are a few DIY methods to try:
- Wet/Dry Vacuum: This is often the most effective method. Disconnect the drain line from the AC unit (usually at a union or fitting). Attach a wet/dry vacuum to the open end of the drain line and try to suck out any clogs. Seal the connection with duct tape for a better seal. Run the vacuum for several minutes. You might be surprised at what comes out – algae, mold, and other debris are common culprits.
- Pouring Hot Water: If you don't have a wet/dry vacuum, try pouring hot (but not boiling) water down the drain line. This can help dissolve some clogs. Do not use boiling water as it can damage PVC pipes.
- Using a Stiff Wire or Pipe Cleaner: Gently insert a stiff wire (like a coat hanger) or a pipe cleaner into the drain line to break up any clogs. Be careful not to push the clog further in. Rotate the wire and gently pull out any debris.
- Vinegar Flush: Pour a cup of white vinegar down the drain line. Vinegar is a natural disinfectant and can help break down mold and algae buildup. Let it sit for 30 minutes, then flush with water.
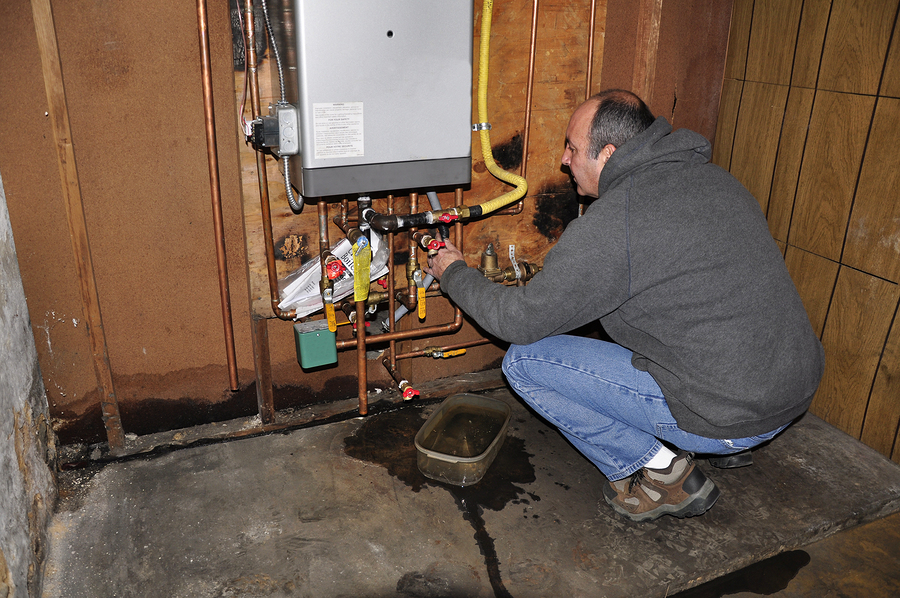
Step 4: Checking the Condensate Pump (If Applicable - Requires Identification)
Some AC systems, particularly those in basements or areas where gravity drainage isn't possible, use a condensate pump to remove the water. This pump is usually a small plastic unit near the furnace or AC unit.
- Locate the Pump: Identify the condensate pump. It will have a reservoir and a small pump that discharges water through a tube.
- Check the Pump Reservoir: See if the reservoir is full of water. If it is, and the pump isn't running, the pump may be faulty.
- Listen for the Pump: If the reservoir has water, try manually triggering the pump (there's usually a float switch that activates it). If the pump doesn't make any noise, it's likely dead and needs to be replaced.
- Inspect the Discharge Tube: Ensure the discharge tube from the pump is not blocked or kinked.
Step 5: Addressing Ice Buildup on Evaporator Coils
If you found ice buildup on the evaporator coils, the cause could be one of several things:
- Restricted Airflow: This is the most common cause. Check your air filter. A dirty air filter restricts airflow, causing the coils to freeze. Replace the filter immediately with a new, clean one. Also ensure that supply and return vents are not blocked by furniture or rugs.
- Low Refrigerant: If the airflow isn't the issue, low refrigerant could be the culprit. This is a more serious problem and requires a professional HVAC technician. Do not attempt to add refrigerant yourself.
- Faulty Blower Motor: The blower motor circulates air across the coils. If it's not working properly, the coils can freeze. This also requires professional diagnosis and repair.
To thaw the ice: Turn off the AC unit and set the thermostat to "Fan Only" to circulate air and melt the ice. This may take several hours. Once the ice has melted, try running the AC again. If the coils freeze up again quickly, call a professional.
When to Call a Professional HVAC Technician
While many water leaks around the furnace can be resolved with simple DIY troubleshooting, some situations require professional expertise. It's time to call an HVAC technician if:
- You suspect a refrigerant leak: Refrigerant leaks are harmful to the environment and require specialized equipment to repair.
- The evaporator coils freeze up repeatedly: This indicates a more serious underlying issue that needs professional diagnosis.
- You suspect a faulty blower motor: Blower motor repairs involve electrical work and specialized tools.
- The condensate pump is faulty: While you can replace the pump yourself, if you're unsure about the process, it's best to call a professional.
- You find cracks or damage to the evaporator coil or other major components.
- You are uncomfortable working with electrical components or dealing with water leaks. Your safety is paramount.
- You've tried all the DIY steps and the leak persists. This indicates a more complex problem that requires professional investigation.
Preventative Maintenance Tips
Preventing water leaks around the furnace is much easier than dealing with them. Here are a few preventative maintenance tips:
- Change your air filter regularly: This is the most important thing you can do to maintain your AC system. Check your filter monthly and replace it every 1-3 months, depending on the filter type and usage.
- Periodically flush the condensate drain line: Pour a cup of white vinegar down the drain line every few months to prevent buildup.
- Schedule annual HVAC maintenance: A professional HVAC technician can inspect your system, clean the coils, and identify potential problems before they become major issues.
- Keep the area around your furnace clean and free of debris: This will help prevent dust and debris from entering the system.
Conclusion
Finding water around your furnace can be concerning, but with a systematic approach, you can often diagnose and resolve the issue yourself. By following the steps outlined in this article, you can identify the cause of the leak and take appropriate action. Remember to prioritize safety and call a professional HVAC technician when necessary. Regular maintenance is key to preventing water leaks and ensuring the longevity of your central air conditioning system. With a little knowledge and effort, you can keep your home cool and dry all summer long.