Closest Hvac Supply House To My Location
When your HVAC system throws a curveball, whether it's a furnace refusing to ignite on a frigid winter night or an air conditioner sputtering and failing to cool during the dog days of summer, knowing where to find the closest HVAC supply house can be a lifesaver. This guide will help you navigate the world of HVAC parts and supplies, offering tips for DIY troubleshooting while emphasizing the importance of knowing when to call in a professional.
Finding Your Nearest HVAC Supply House
The first step is locating a reputable supply house near you. Here are several methods:
- Online Search: Use search engines like Google, Bing, or DuckDuckGo. Keywords like "HVAC supply near me," "HVAC parts [your city]," or "air conditioning supply house" will yield relevant results. Pay attention to online reviews and ratings.
- Phone Apps: Mobile apps such as Yelp, Yellow Pages, and Google Maps are excellent for locating local businesses, including HVAC suppliers.
- Referrals: Ask friends, neighbors, or other tradespeople (plumbers, electricians) for recommendations. They may have established relationships with reliable supply houses.
- HVAC Forums: Online HVAC forums and communities can be valuable resources. Members often share information about local suppliers and their experiences.
- Manufacturer Websites: Some HVAC manufacturers have online directories of authorized distributors. Check the manufacturer's website for your specific equipment brand.
Once you've identified a few potential suppliers, it's worth calling them to inquire about their inventory, hours of operation, and whether they sell to the general public. Not all supply houses cater to homeowners; some primarily serve licensed HVAC contractors.
Essential Tools and Parts for DIY HVAC Troubleshooting
Having a basic set of tools and spare parts can help you tackle minor HVAC issues. Here's a list of essentials:
Tools
- Multimeter: For testing electrical components (voltage, current, resistance).
- Screwdriver Set: Including Phillips head and flathead screwdrivers of various sizes.
- Nut Drivers: For tightening and loosening nuts and bolts.
- Pliers: Including needle-nose pliers and adjustable pliers.
- Wrench Set: Including open-end and adjustable wrenches.
- Voltage Tester: To ensure circuits are de-energized before working on them.
- HVAC Tape (Foil Tape): For sealing ductwork.
- Fin Comb: To straighten bent fins on air conditioning coils.
- Vacuum Pump (For AC work): For evacuating refrigerant lines (Note: Refrigerant work requires EPA certification!).
- Manifold Gauge Set (For AC work): For measuring refrigerant pressures (Note: Refrigerant work requires EPA certification!).
Common Parts
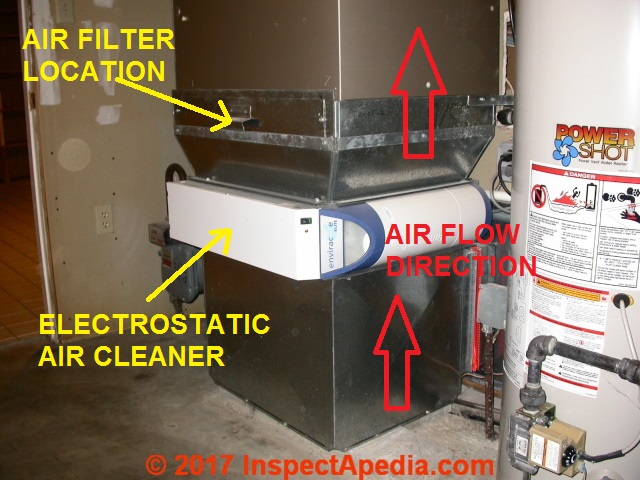
- Air Filters: Regularly replacing air filters is crucial for HVAC system efficiency and air quality.
- Capacitors: Start capacitors and run capacitors are common failure points in air conditioners and heat pumps.
- Contactors: Electrical switches that control the flow of power to the compressor and fan motors.
- Fuses: To protect the HVAC system from electrical overloads.
- Thermostat Batteries: Ensure your thermostat has fresh batteries for proper operation.
- Igniters/Flame Sensors (For Furnaces): Key components for furnace ignition.
- Thermocouples (For Furnaces): Safety devices that shut off the gas supply if the flame is not detected.
- Belt (For older furnace): Ensure correct fit and tension.
DIY Troubleshooting: A Step-by-Step Approach
Before diving into any DIY repairs, always prioritize safety. Turn off the power to the HVAC system at the breaker box. Wear appropriate safety glasses and gloves. If you're uncomfortable with electrical work or dealing with gas, call a qualified HVAC technician.
Air Conditioner Troubleshooting
- Check the Thermostat: Ensure the thermostat is set to "cool" and the temperature is lower than the room temperature. Verify the batteries are good.
- Inspect the Air Filter: A dirty air filter restricts airflow and can cause the system to overheat. Replace it with a new one.
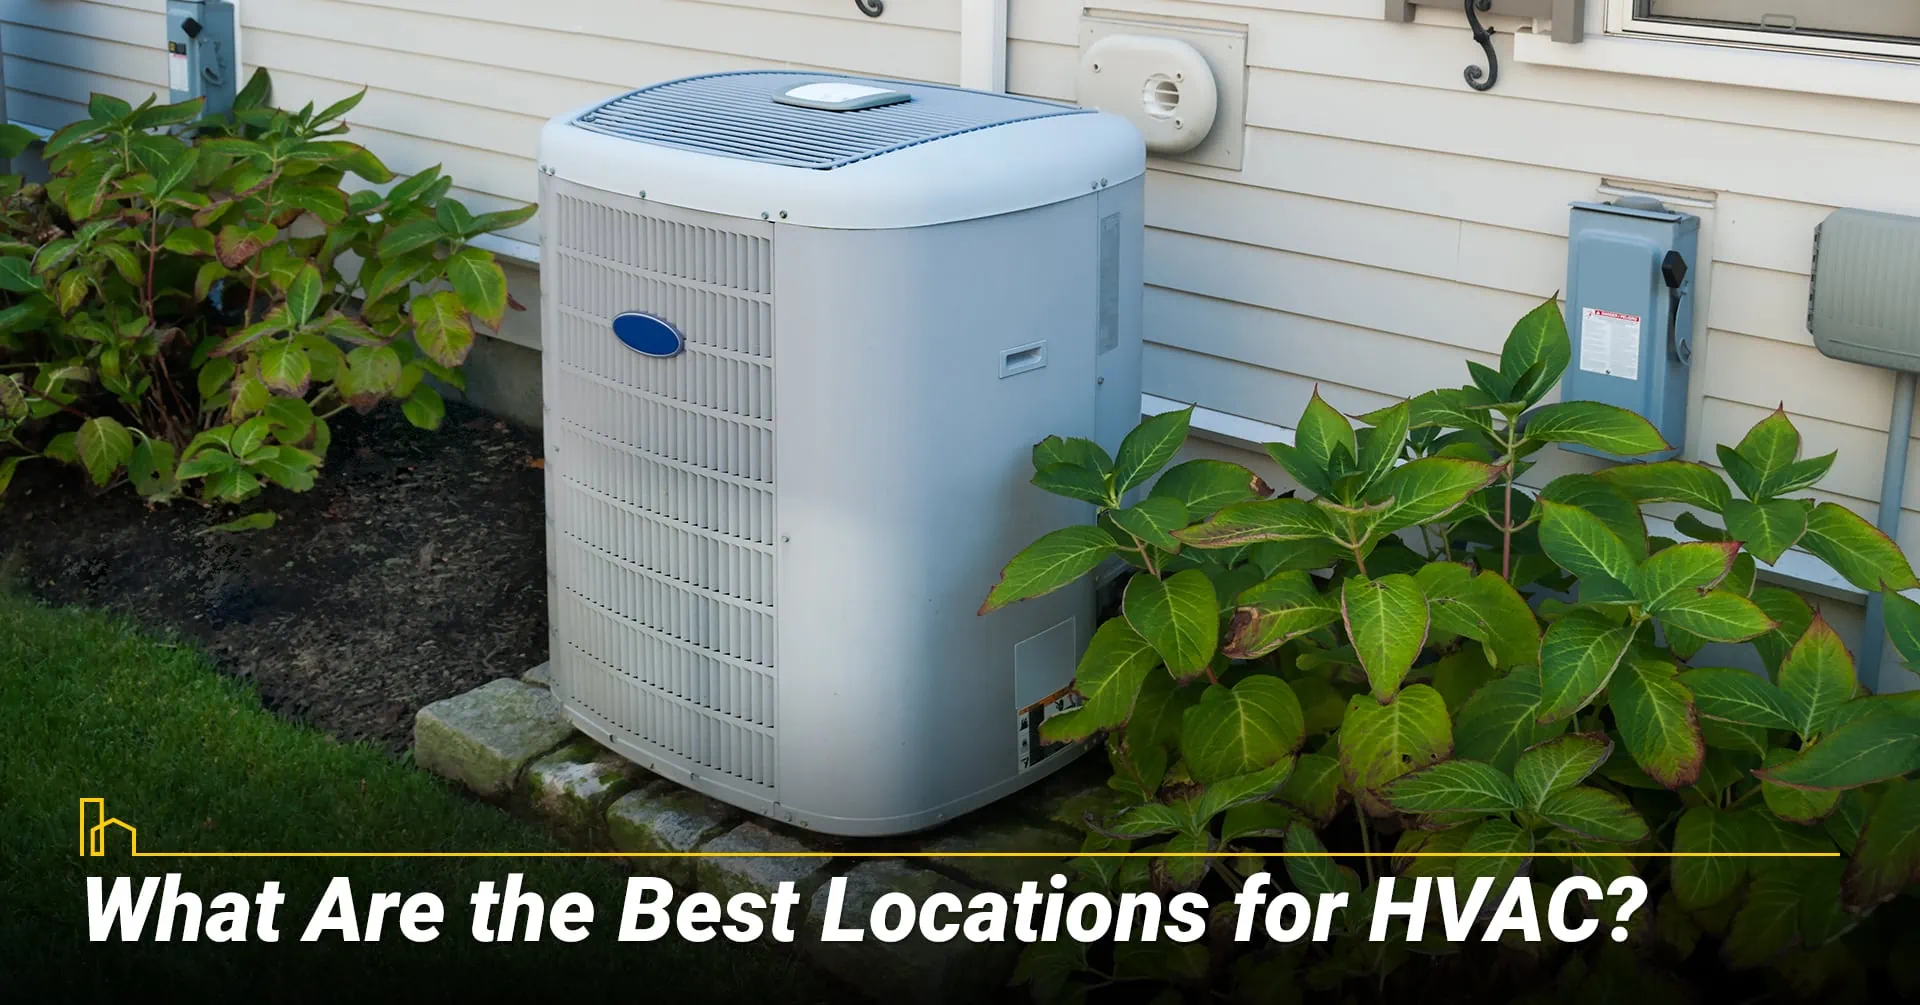
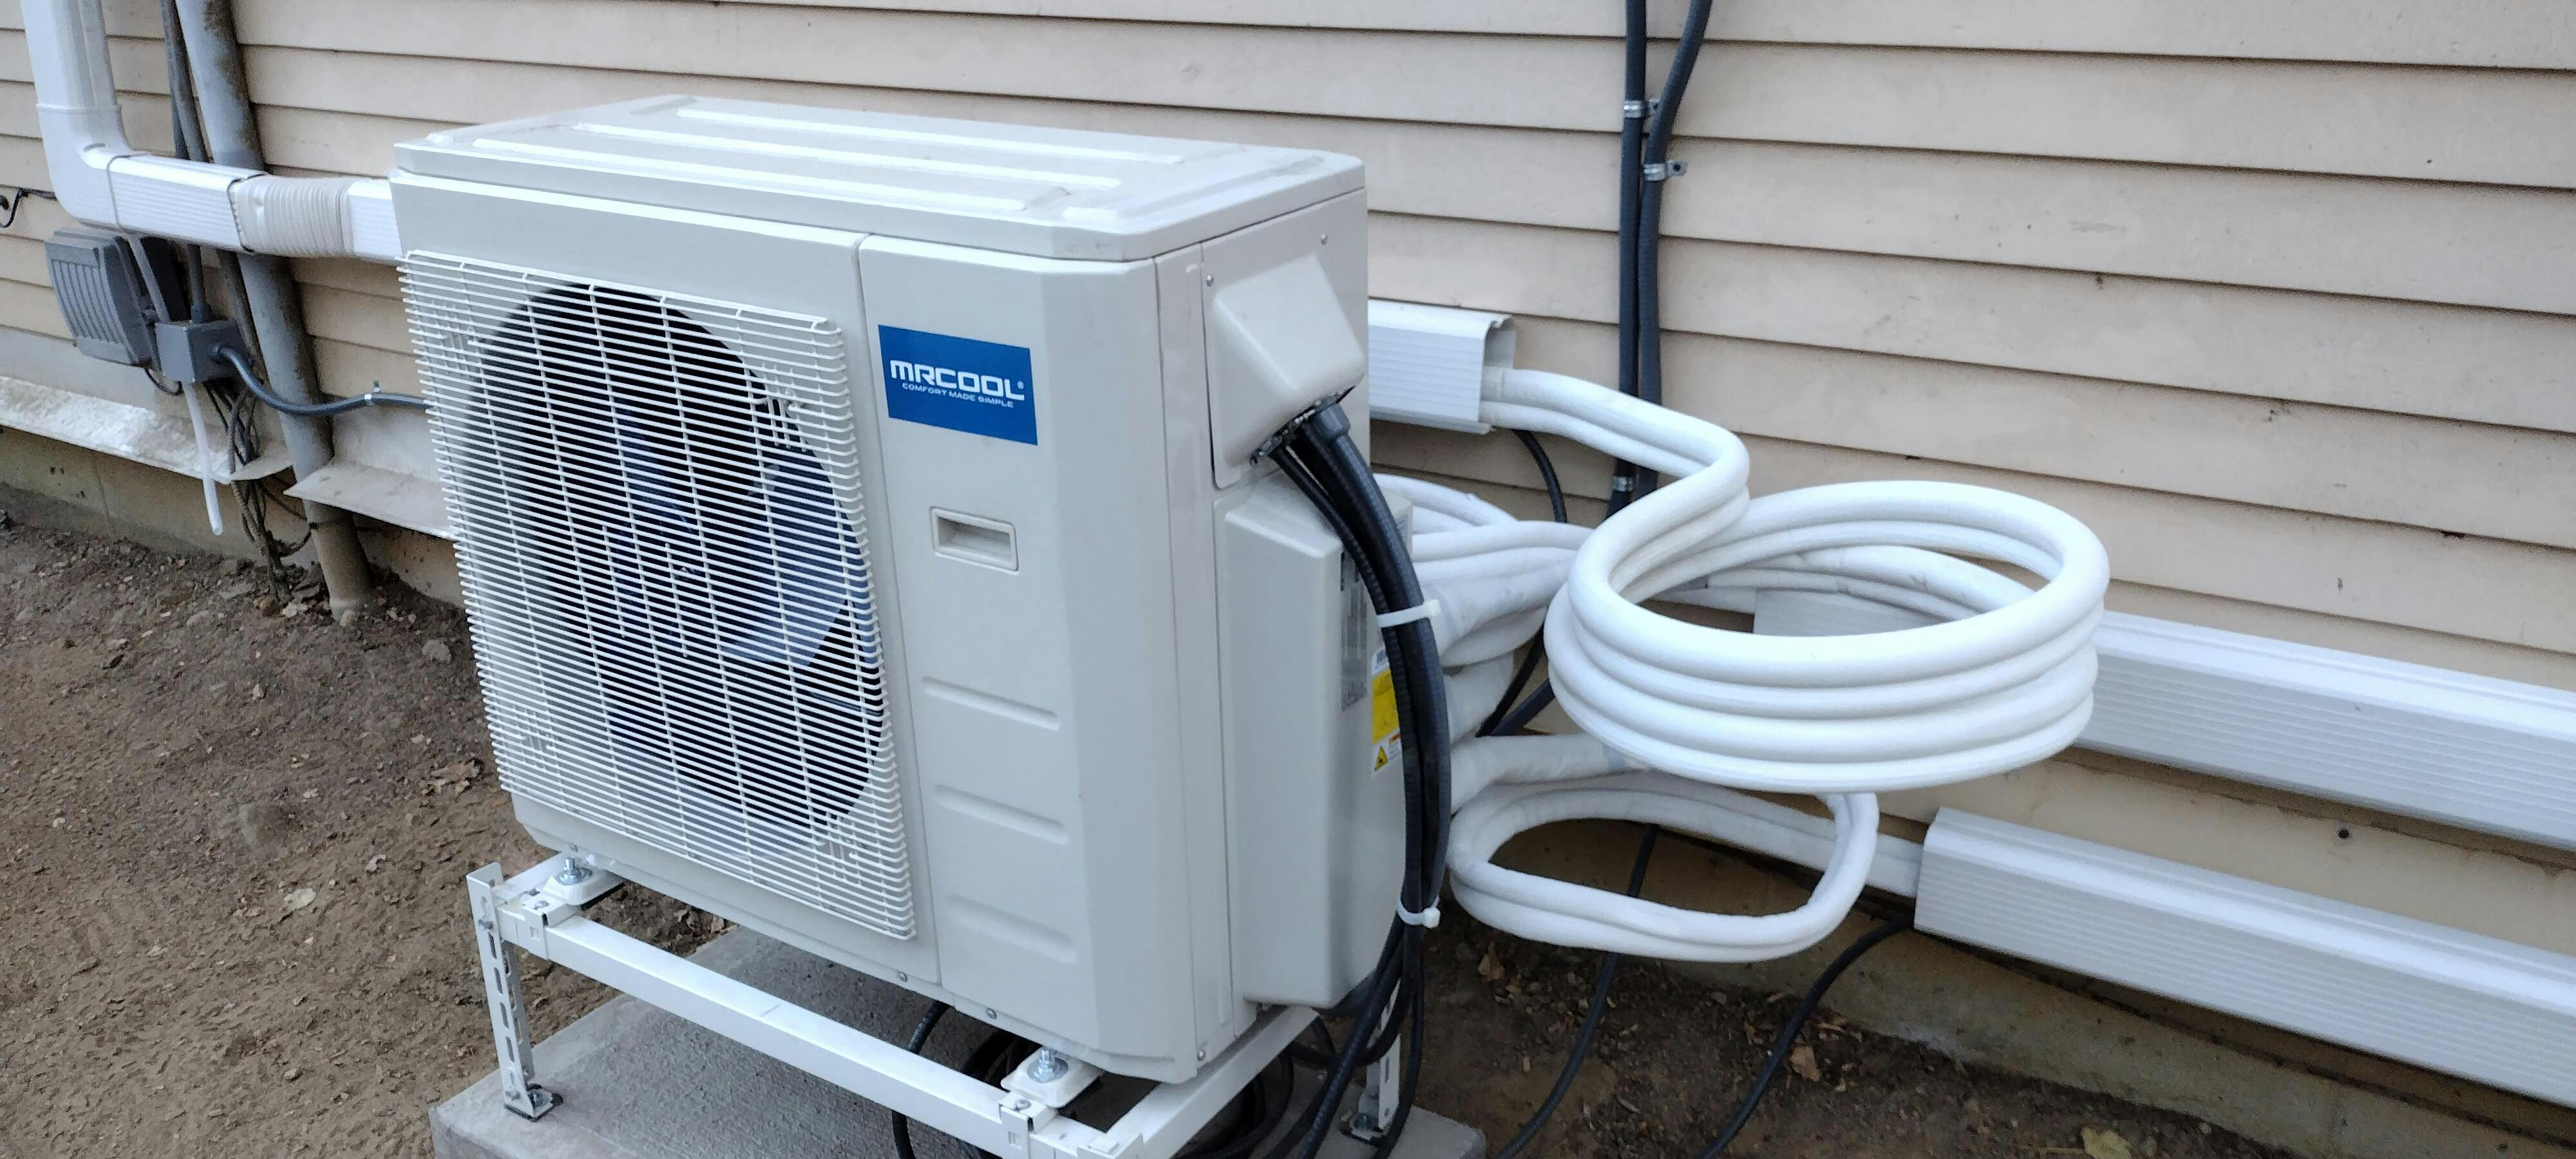
- Check the Outdoor Unit: Remove any debris (leaves, grass, branches) from around the outdoor unit. Ensure the fan blades are not obstructed.
- Inspect the Circuit Breaker: Check the circuit breaker for the air conditioner to see if it has tripped. If so, reset it. If it trips again immediately, there may be a more serious electrical problem.
- Check the Condensate Drain Line: A clogged condensate drain line can cause the system to shut down. Clear the drain line with a wet/dry vacuum or by flushing it with water.
- Check the Capacitor: A failing capacitor is a common cause of air conditioner problems. If you're comfortable and familiar with working with electricity, you can test the capacitor with a multimeter. Warning: Capacitors can store a dangerous electrical charge even after the power is turned off. Use caution and discharge the capacitor before handling it. If you are not comfortable, call a professional.
Furnace Troubleshooting
- Check the Thermostat: Ensure the thermostat is set to "heat" and the temperature is higher than the room temperature. Verify the batteries are good.
- Inspect the Air Filter: A dirty air filter restricts airflow and can cause the furnace to overheat. Replace it with a new one.
- Check the Circuit Breaker: Check the circuit breaker for the furnace to see if it has tripped. If so, reset it. If it trips again immediately, there may be a more serious electrical problem.
- Check the Gas Valve: Make sure the gas valve is turned on.
- Check the Igniter/Flame Sensor: If the furnace is not igniting, the igniter or flame sensor may be faulty. These components can be tested with a multimeter. Caution: Working with gas appliances can be dangerous. If you are not comfortable, call a professional.
- Check the Blower Motor: The blower motor circulates air throughout your home. If it's not working, the furnace may overheat. Listen for unusual noises coming from the blower motor.
Common HVAC Problems and Solutions
Here's a table summarizing common HVAC problems and potential solutions:
| Problem | Possible Cause | DIY Solution | When to Call a Pro |
|---|---|---|---|
| No Cooling | Dirty air filter, tripped breaker, thermostat issues, refrigerant leak | Replace air filter, reset breaker, check thermostat settings | Refrigerant leak, compressor failure, complex electrical issues |
| No Heating | Dirty air filter, tripped breaker, thermostat issues, gas valve off, faulty igniter | Replace air filter, reset breaker, check thermostat settings, turn on gas valve (if applicable) | Gas leak, faulty igniter/flame sensor, heat exchanger issues |
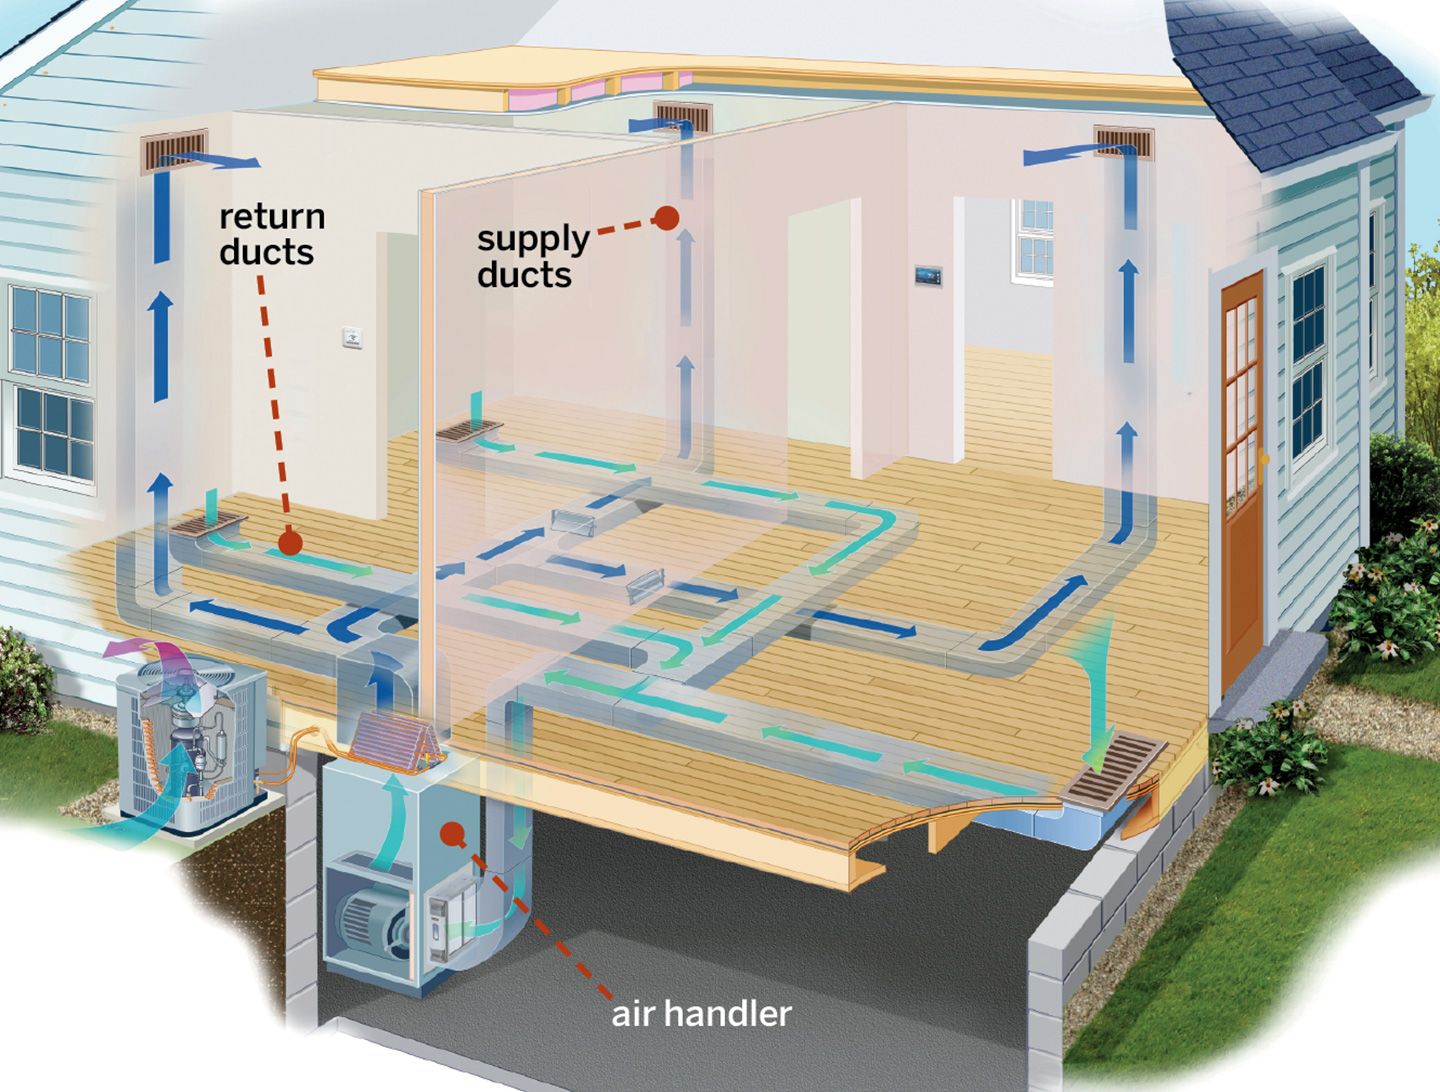
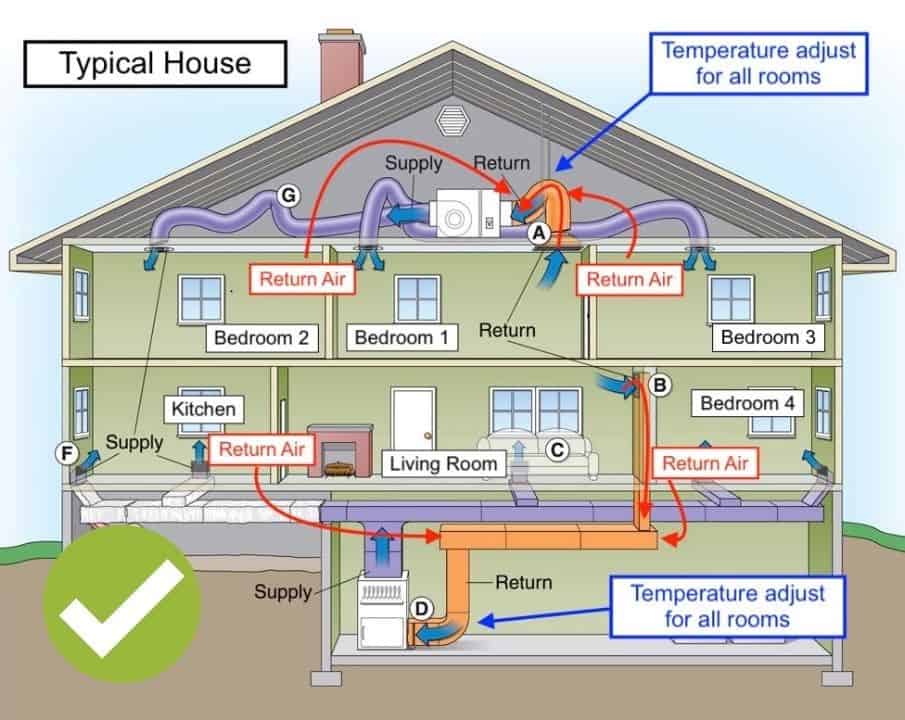
| Uneven Cooling/Heating | Blocked vents, leaky ductwork, insufficient insulation | Clear blocked vents, seal leaky ductwork with HVAC tape | Ductwork repairs, insulation upgrades, system sizing issues |
| Strange Noises | Loose parts, blower motor issues, refrigerant leaks | Tighten loose parts (if accessible and safe) | Blower motor replacement, refrigerant leak repair, compressor issues |
| High Energy Bills | Dirty air filter, leaky ductwork, old equipment, insufficient insulation | Replace air filter, seal leaky ductwork with HVAC tape | System replacement, insulation upgrades, energy audit |
Estimating HVAC Repair Costs
Repair costs can vary significantly depending on the type of repair, the cost of parts, and the labor rates in your area. Here are some general estimates:
- Air Filter Replacement: $10 - $30 (DIY)
- Capacitor Replacement: $100 - $300 (Professional)
- Contactor Replacement: $150 - $350 (Professional)
- Thermostat Replacement: $100 - $500 (Professional)
- Igniter/Flame Sensor Replacement: $150 - $400 (Professional)
- Refrigerant Recharge: $200 - $500 (Professional, requires EPA certification)
- Ductwork Repair: $100 - $1000+ (depending on the extent of the damage)
- Compressor Replacement: $1500 - $4000+ (Professional)
These are just estimates, and it's always best to get a quote from a qualified HVAC technician for an accurate assessment of the repair costs.
When to Call a Professional HVAC Technician
While some HVAC issues can be addressed with DIY troubleshooting, others require the expertise of a licensed and insured HVAC technician. Here are some situations where it's best to call a pro:
- Refrigerant Leaks: Refrigerant is a controlled substance, and handling it requires EPA certification.
- Gas Leaks: Gas leaks are dangerous and require immediate attention from a qualified professional.
- Electrical Problems: Complex electrical issues can be dangerous and require specialized knowledge.
- Compressor Failure: Compressor replacement is a major repair that requires specialized tools and expertise.
- Heat Exchanger Issues: A cracked heat exchanger can leak carbon monoxide, a deadly gas.
- If you're uncomfortable or unsure about any repair.
Remember, your safety and the proper functioning of your HVAC system are paramount. Don't hesitate to call a professional when needed. A qualified technician can diagnose the problem accurately and perform the necessary repairs safely and efficiently. Keep in mind proper maintenance is paramount, regular maintenance will prevent most issues from happening in the first place.