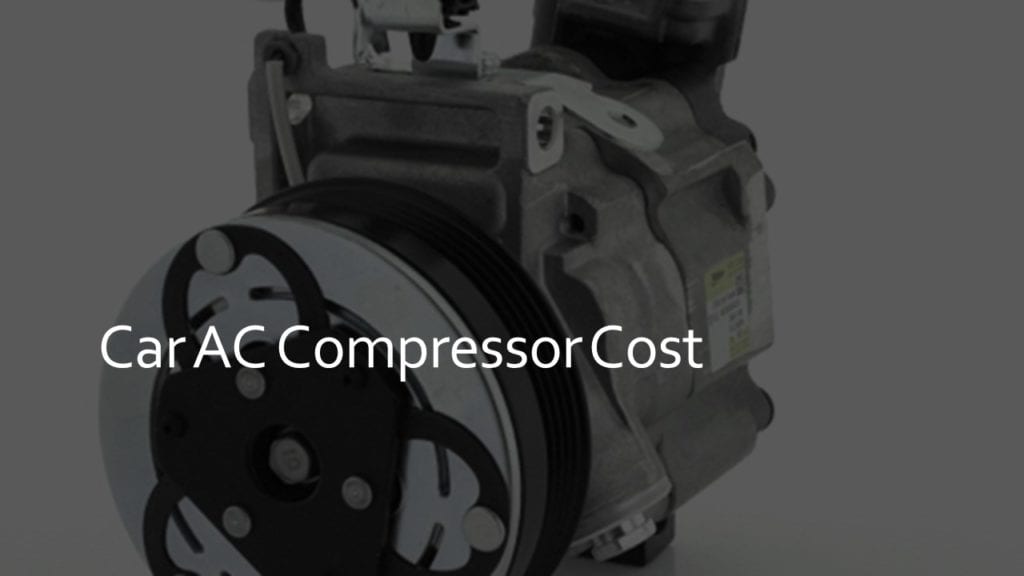
Cost Of Ac Compressor

Summer heat can be brutal, and a malfunctioning AC can quickly turn your comfortable home into a sweltering nightmare. One of the most common, and often most expensive, problems homeowners face is a failing or failed AC compressor. Understanding the potential causes, how to diagnose the issue, and when to call in the professionals can save you time, frustration, and a significant amount of money. This article will guide you through a practical troubleshooting process focused specifically on issues related to the cost of AC compressor repairs or replacements.
Understanding the AC Compressor and its Importance
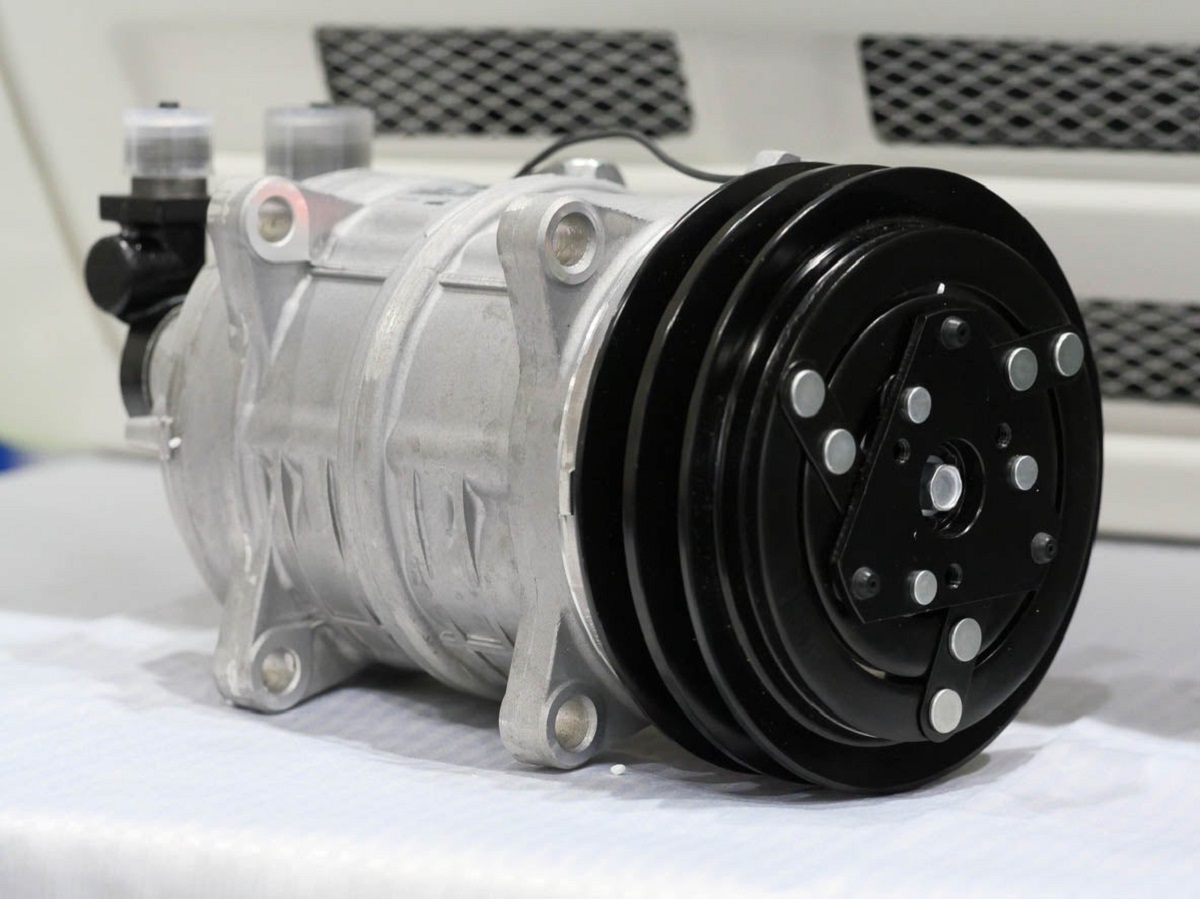
The AC compressor is essentially the heart of your air conditioning system. Its job is to compress the refrigerant, which then circulates through the system, absorbing heat from inside your home and releasing it outside. Without a functioning compressor, your AC system simply cannot cool your home effectively.
Because it's such a critical component, compressor repairs or replacements can be quite costly. The cost is affected by many factors like make and model of the unit, type of compressor, age of the system, and labor expenses. Before calling a repairman, lets evaluate if you can address the problem yourself.
Common Symptoms of a Failing AC Compressor
Recognizing the symptoms early can help you avoid more extensive damage and potentially save on repair costs. Here are some common signs that your AC compressor might be failing:
- Weak or No Cooling: This is the most obvious symptom. If your AC is running but not cooling your home effectively, the compressor may not be working correctly.
- Unusual Noises: Loud buzzing, grinding, clicking, or rattling sounds coming from the outdoor unit (where the compressor is located) are often a sign of a problem.
- Increased Energy Bills: A failing compressor has to work harder to do its job, which can lead to a noticeable increase in your energy bills.
- Circuit Breaker Tripping: If the circuit breaker that powers your AC unit is tripping frequently, it could be due to a failing compressor drawing too much power.
- Warm Air: If you feel warm air coming from your vents, the compressor may not be compressing the refrigerant properly.
- System Short Cycling: The air conditioner turns on and off rapidly, not completing a full cooling cycle.
Step-by-Step Troubleshooting Guide
Before assuming the worst, follow these steps to diagnose the problem and rule out simpler issues.
Step 1: Safety First!
Before you begin any troubleshooting, turn off the power to your AC unit at the circuit breaker. This is crucial to prevent electrical shock.
Step 2: Check the Thermostat
This might seem obvious, but it's often overlooked. Make sure your thermostat is set to "Cool" and the temperature is set lower than the current room temperature. Ensure the fan setting is on "Auto" or "On" (for continuous fan operation). Sometimes, a simple setting adjustment is all that's needed.
Step 3: Inspect the Air Filter
A clogged air filter can restrict airflow, causing the AC unit to work harder and potentially overheat the compressor. Remove the air filter and hold it up to the light. If you can't see through it easily, it needs to be replaced. Replace it with a new, clean filter. A clean filter can significantly improve your AC's efficiency and potentially prevent future compressor problems.
Step 4: Examine the Outdoor Unit (Condenser)
The outdoor unit houses the compressor. Inspect it for any obvious signs of damage, such as bent fins, debris buildup, or refrigerant leaks (look for oily residue). Clear away any leaves, grass, or other debris that may be blocking airflow around the unit. Use a garden hose (on a gentle setting) to carefully rinse the fins from the outside in. Avoid using a pressure washer, as this can damage the fins.
Step 5: Check the Contactor
The contactor is an electrical switch that sends power to the compressor. It's usually located inside the outdoor unit's electrical panel. *(Warning: This step involves working with electrical components. If you are not comfortable working with electricity, skip this step and call a qualified HVAC technician.)*
- Turn off the power to the unit at the breaker.
- Carefully remove the access panel to the electrical compartment.
- Use a non-contact voltage tester to ensure that the power is off.
- Inspect the contactor for any signs of damage, such as burnt or pitted contacts.
- If the contactor appears damaged, it will need to be replaced. *(This is generally a job for a professional, as it requires electrical knowledge and proper tools.)*
Step 6: Listen for the Compressor Start-Up
After checking the above and finding no obvious problems, restore power to the unit at the breaker. Listen carefully to the outdoor unit as it starts up. A healthy compressor should start smoothly without excessive noise. If you hear loud clicking, buzzing, or grinding noises that persist after the compressor starts, it's a strong indication of a compressor problem.
Step 7: Check the Refrigerant Lines
The refrigerant lines are the copper pipes that connect the outdoor unit to the indoor unit. Inspect these lines for any signs of leaks, such as oily residue or ice buildup. If you suspect a refrigerant leak, *do not attempt to repair it yourself.* Refrigerant is a hazardous substance, and handling it requires specialized equipment and training. Call a qualified HVAC technician to locate and repair the leak and recharge the system with refrigerant.
DIY Fixes (with Caution!)
While compressor issues often require professional help, there are a few simple DIY fixes you can try, *but only if you are comfortable and confident in your abilities. If not, call a professional.*
1. Capacitor Replacement
The capacitor is a small, cylindrical component that helps start the compressor motor. A weak or failing capacitor is a common cause of compressor problems. Symptoms include a humming sound from the outdoor unit that doesn't start, or the unit starting and stopping quickly.
*(Warning: Capacitors store an electrical charge, even after the power is turned off. You must discharge the capacitor before handling it to avoid a potentially dangerous shock.)*
How to Discharge a Capacitor:
- Turn off the power to the AC unit at the breaker.
- Locate the capacitor inside the outdoor unit's electrical panel.
- Use a screwdriver with an insulated handle to carefully short the terminals of the capacitor. (Touch the screwdriver blade to both terminals simultaneously.) You may see a small spark.
- Verify that the capacitor is discharged by touching the screwdriver blade to the terminals again. If there is no spark, the capacitor is discharged.
Replacing the Capacitor:
- Take a picture of the capacitor and its wiring connections before disconnecting anything. This will help you reconnect the wires correctly.
- Disconnect the wires from the old capacitor.
- Connect the wires to the new capacitor, matching the wiring configuration from the picture you took.
- Replace the access panel and restore power to the unit at the breaker.
Important Notes:
- Make sure the new capacitor has the same voltage and capacitance rating as the old one. This information is printed on the capacitor's label.
- Always use a capacitor specifically designed for AC units.
2. Hard Start Kit
A hard start kit can sometimes help a weak compressor start more easily. It's essentially a more powerful capacitor that provides an extra boost of energy to the compressor motor. This can be a temporary solution to prolong the life of a slightly failing compressor, but it's not a substitute for replacing a severely damaged compressor.
*(Installation of a hard start kit typically involves working with electrical components. If you are not comfortable with this, call a professional.)* The installation process will vary depending on the specific hard start kit, so carefully follow the instructions included with the kit.
When to Call a Professional
While the above steps can help you diagnose and potentially fix some minor compressor problems, there are many situations where it's essential to call a qualified HVAC technician.
- If you suspect a refrigerant leak. Refrigerant leaks require specialized equipment and training to repair safely and effectively.
- If you are not comfortable working with electricity. Electrical work can be dangerous, and it's best left to professionals if you are not experienced.
- If the compressor is making loud, persistent noises. This is often a sign of internal damage that requires professional attention.
- If the compressor has completely failed and is not running at all. Replacing a compressor is a complex and costly job that should be done by a professional.
- If you are unsure about any of the steps in this troubleshooting guide. It's always better to err on the side of caution and call a professional if you are not confident in your abilities.
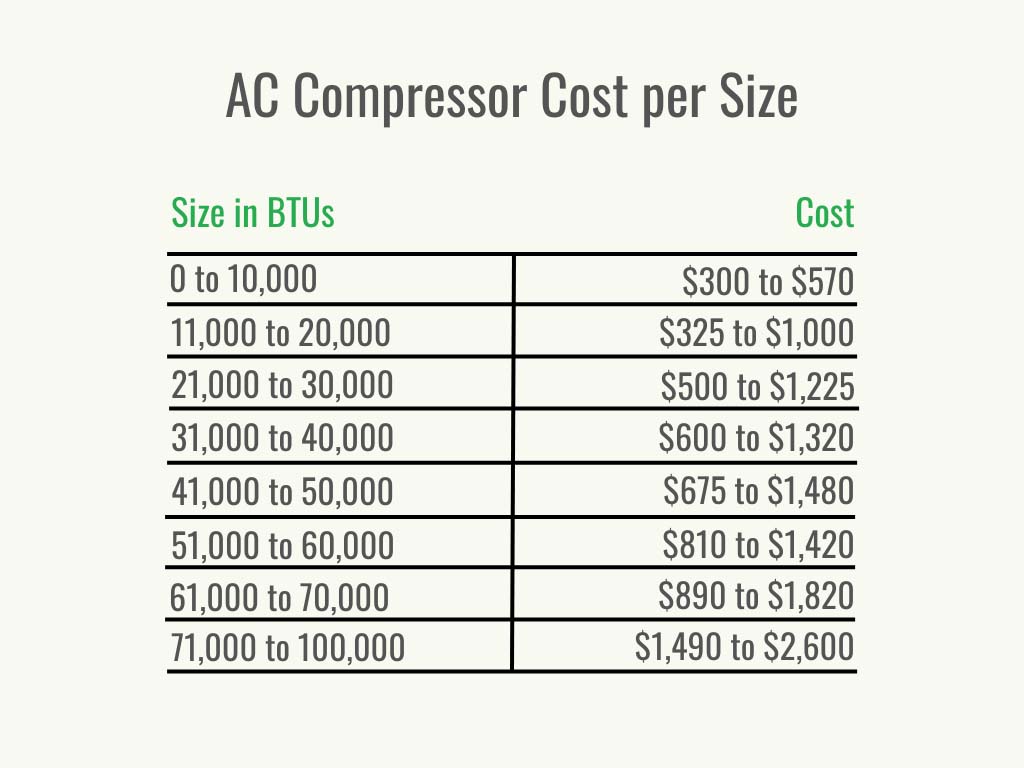
Understanding the Cost of Compressor Repair or Replacement
The cost of AC compressor repair or replacement can vary widely depending on several factors:
- Type of Compressor: Different types of compressors (e.g., reciprocating, scroll, rotary) have different costs.
- Size and Capacity of the AC Unit: Larger units typically have more expensive compressors.
- Brand and Model of the AC Unit: Some brands and models have more expensive parts than others.
- Labor Costs: Labor costs vary depending on your location and the HVAC technician's rates.
- Refrigerant Costs: If the system needs to be recharged with refrigerant, this will add to the cost.
- Warranty Coverage: If your AC unit is still under warranty, the compressor repair or replacement may be covered.
Generally, you can expect to pay anywhere from $500 to $2,500 or more for a compressor replacement, including parts and labor. Repairing a compressor is often not possible, and replacement is usually the only option. Because of the high cost, it is often advantageous to consider a full system replacement with a more modern and efficient unit, especially if your system is older than 10-15 years. This is because new units are much more energy efficient, and may save you money long term.
Getting an Accurate Estimate
To get an accurate estimate for compressor repair or replacement, it's essential to get quotes from multiple qualified HVAC technicians. Be sure to ask for a detailed breakdown of the costs, including parts, labor, and refrigerant. Also, ask about the warranty on the new compressor.
When getting an estimate, ask about:
- The total cost of the service - Be sure it is comprehensive.
- The length of the warranty on the new compressor - A good warranty is important for your peace of mind.
- What the technician recommends for the long-term health of the system - A good HVAC technician can give you suggestions on system lifespan and performance.
Prevention is Key
The best way to avoid costly compressor repairs is to properly maintain your AC system. This includes:
- Changing the air filter regularly (every 1-3 months).
- Cleaning the outdoor unit annually.
- Scheduling regular maintenance checks with a qualified HVAC technician.
Regular maintenance can help identify potential problems early on, before they turn into major repairs. It can also help extend the life of your AC system and improve its efficiency, saving you money on energy bills. Don't wait until your AC breaks down in the middle of summer. Taking proactive steps to maintain your system can save you time, money, and a lot of headaches in the long run.