Difference Between A Gate Valve And A Globe Valve

Let's face it, every homeowner eventually encounters a leaky or stuck valve. Understanding the type of valve you're dealing with is crucial before attempting any repairs. Two of the most common types are gate valves and globe valves. Misidentifying them can lead to incorrect troubleshooting and potential damage. This guide will walk you through the key differences and help you diagnose common problems.
Understanding the Problem: Low Water Pressure or Leaks
One common frustration for homeowners is a sudden drop in water pressure, or worse, a persistent leak. Often, these issues can be traced back to a malfunctioning valve. Before calling a plumber, let's investigate whether the problem stems from a gate valve or a globe valve.
Step 1: Identify the Valve Type - Gate Valve vs. Globe Valve
The first and most important step is to correctly identify the valve type. Here's how:
Visual Inspection: The Obvious Differences
Gate Valve:
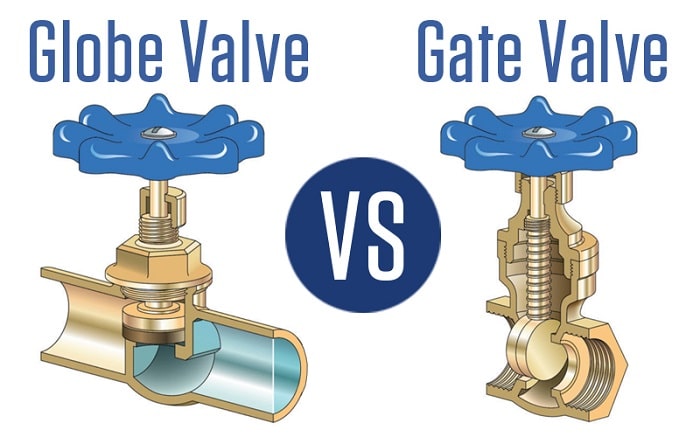
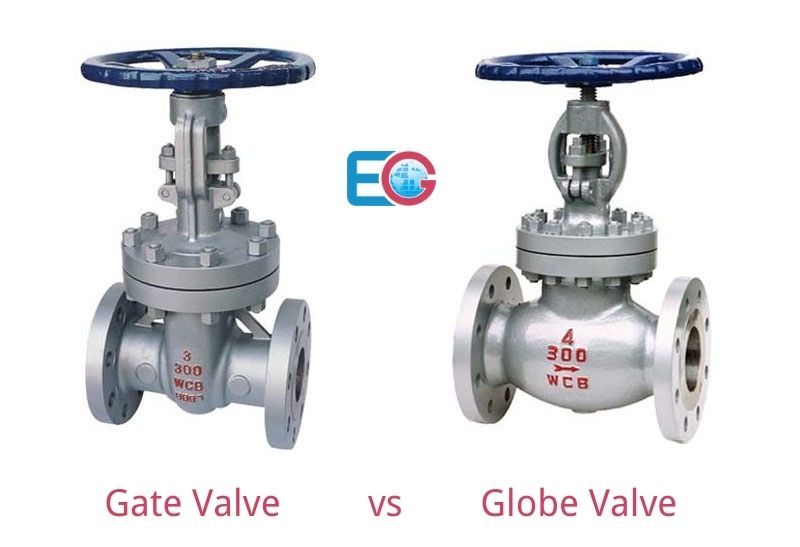
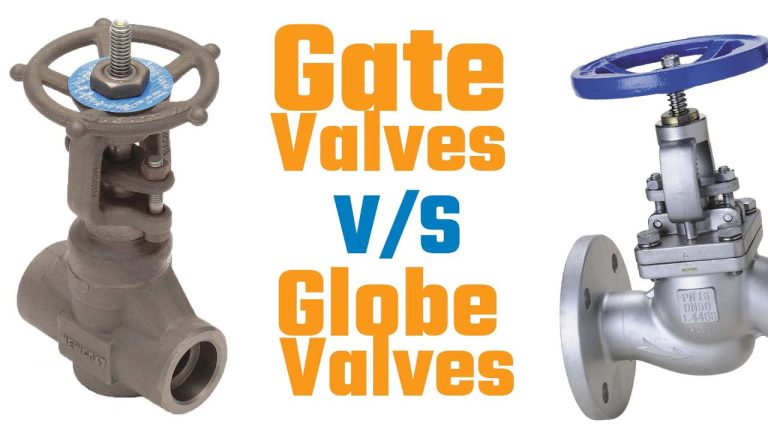
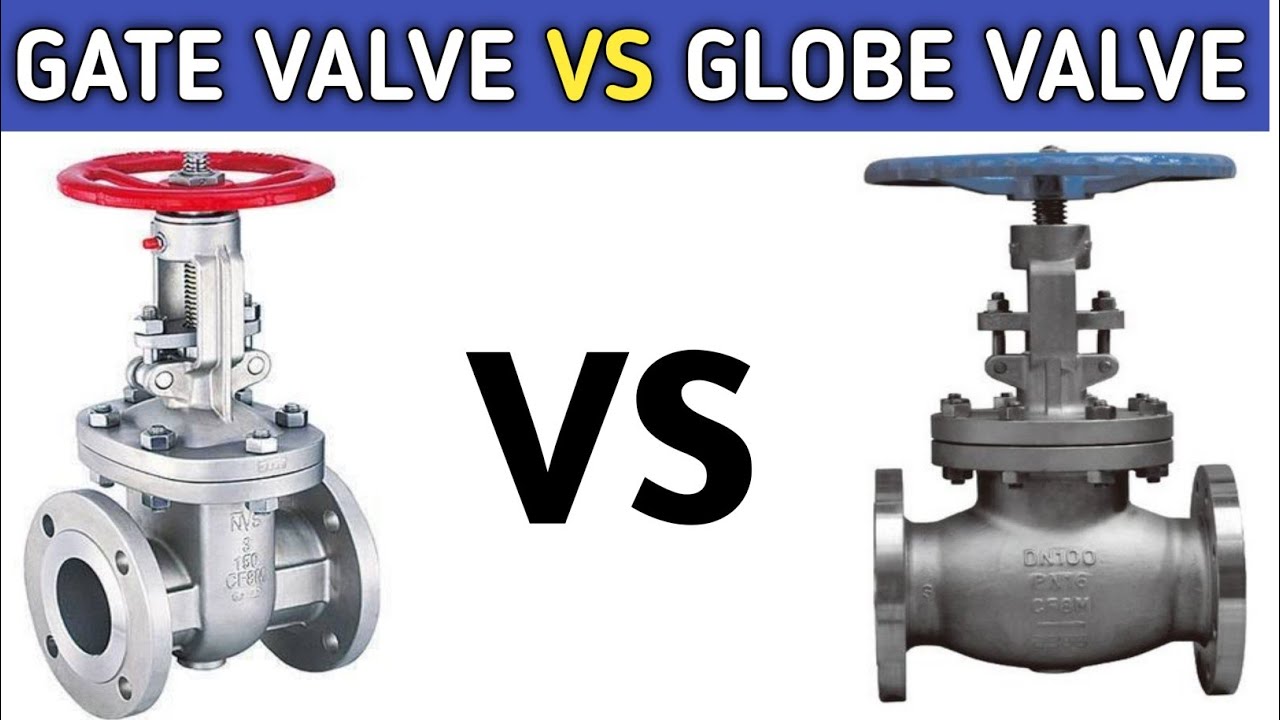
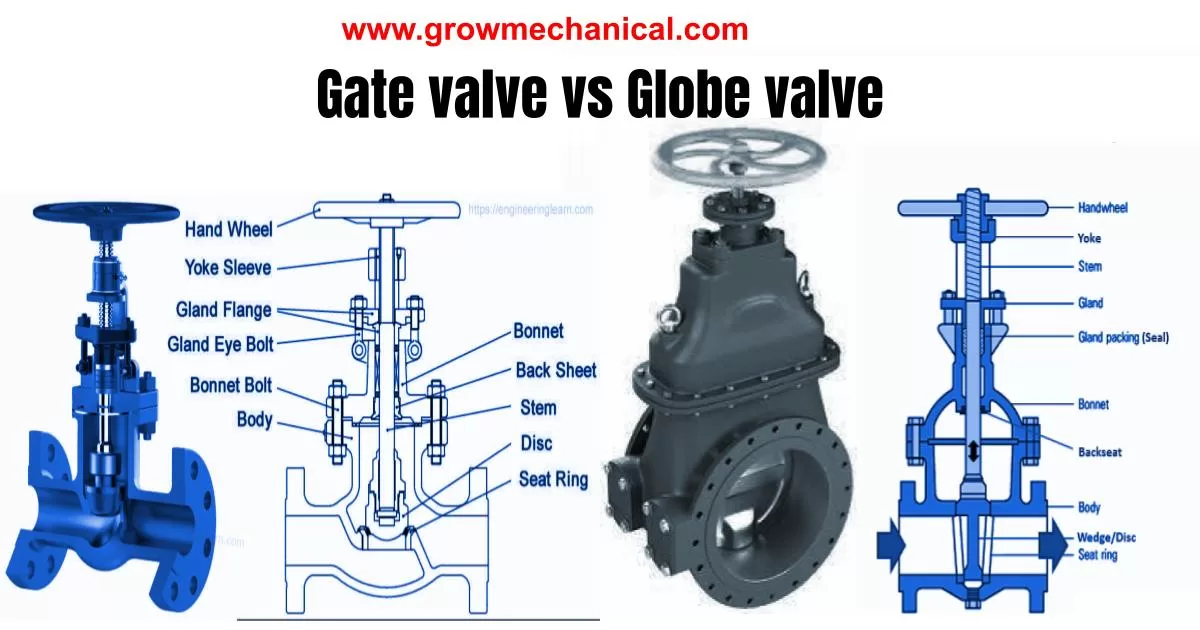
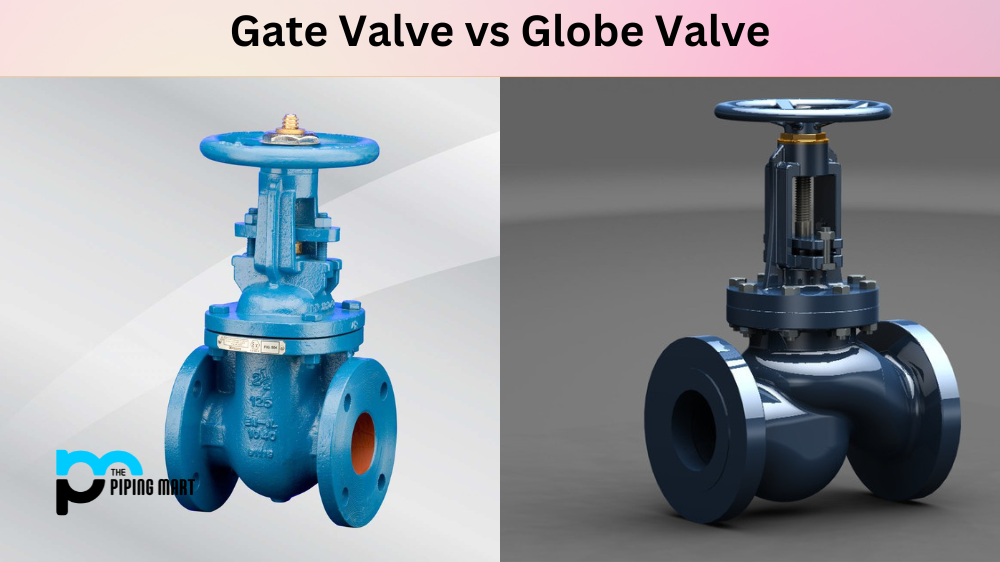
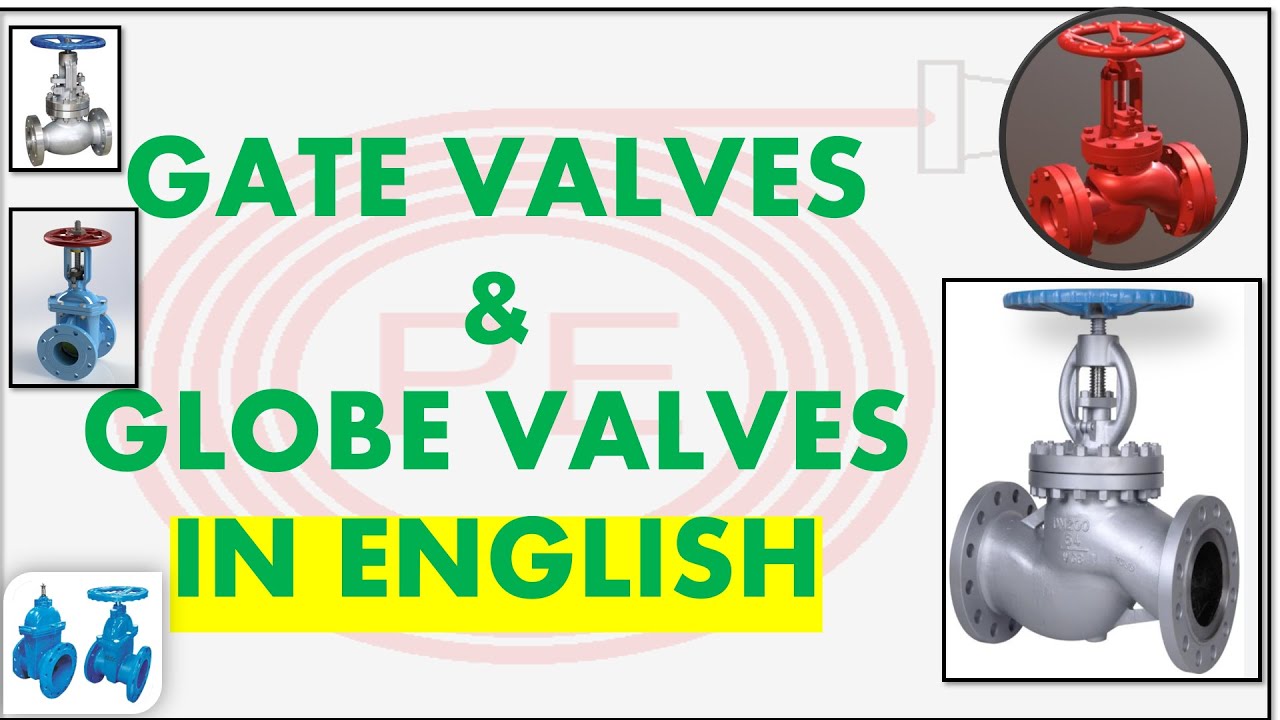
- Appearance: Gate valves typically have a straight-through design. The body appears relatively streamlined, with the pipe flowing in a straight line through the valve.
- Handle: The handle is usually a round wheel that you turn to raise or lower the gate inside.
- Stem: When you open the gate valve, the stem (the part connecting the handle to the internal gate) rises visibly. This rising stem is a key visual indicator.
- Function: Primarily designed for on/off control. They aren't great for throttling (partially opening) water flow.
Globe Valve:
- Appearance: Globe valves have a more rounded, bulbous body. The pipe enters and exits the valve in a line, but the internal mechanism forces the water to make an "S" shaped turn inside the valve body.
- Handle: Similar to gate valves, they often have a round wheel handle.
- Stem: The stem of a globe valve doesn't typically rise when you open the valve. It turns, but the external height of the stem remains largely the same.
- Function: Better suited for throttling or regulating flow than gate valves.
Key Takeaway: The rising stem on a gate valve is the easiest way to distinguish it from a globe valve. Globe valves will often have a more rounded body.
Location Matters: Where Are They Used?
Consider where the valve is located in your plumbing system. This can provide clues about its intended purpose and likely type.
- Gate Valves: Commonly found on main water lines entering your house, before water heaters, and on irrigation systems. They are used where infrequent on/off control is needed.
- Globe Valves: More likely to be found on faucets, hose bibs, and in situations where you need to control the water flow rate (e.g., adjusting the flow to a specific appliance).
Step 2: Diagnose the Problem
Once you've identified the valve type, it's time to pinpoint the issue.
Common Problems with Gate Valves:
- Leakage Around the Stem: This is a frequent problem, especially in older gate valves.
- Valve Stuck Open or Closed: The gate inside can become corroded or clogged with debris, preventing it from moving.
- Reduced Water Pressure: A partially blocked gate can restrict water flow.
Common Problems with Globe Valves:
- Dripping from the Valve Body: Corrosion or wear can cause leaks.
- Difficulty Turning the Handle: Internal parts may be seized or corroded.
- Reduced Water Flow Even When Fully Open: Sediment buildup can restrict flow.
Step 3: Simple DIY Fixes (Proceed with Caution!)
Important Safety Note: Before attempting any repairs, always turn off the water supply upstream of the valve you're working on. If you're not comfortable working with plumbing, call a licensed plumber.
Gate Valve Fixes:
1. Tightening the Packing Nut (for Stem Leaks):
- Locate the packing nut – it's the nut located around the stem where it exits the valve body.
- Using a wrench (usually an adjustable wrench), gently tighten the packing nut slightly. Avoid over-tightening, as this can damage the stem.
- Turn the water back on slowly and check for leaks. If the leak persists, tighten the nut a tiny bit more.
- If the leak still doesn't stop, the packing material inside the nut may be worn out and need replacement. This may require professional help, or you could try replacing the packing yourself, provided you have the right tools and the new packing material.
2. Loosening a Stuck Gate (Valve Stuck Open or Closed):
- Turn off the water supply.
- Apply a penetrating oil (like WD-40) to the stem and around the gate valve body. Let it sit for about 30 minutes.
- Using a wrench, gently try to turn the handle back and forth. Avoid forcing it. The goal is to loosen the gate.
- If it starts to move, gradually work it open and closed a few times to help dislodge any debris.
- Turn the water back on slowly and check the valve's function. If it's still stuck, further disassembly and cleaning might be necessary (best left to a professional).
Globe Valve Fixes:
1. Tightening Connections (for Body Leaks):
- Turn off the water supply.
- Inspect the connections where the valve body joins the pipes.
- If you see evidence of leaks (mineral deposits or water stains), carefully tighten the pipe connections using two wrenches – one to hold the valve body steady and the other to tighten the fitting.
- Turn the water back on slowly and check for leaks.
- If the leak persists, you may need to disconnect the valve and reapply pipe joint compound or Teflon tape to the threads.
2. Cleaning a Partially Blocked Valve (Reduced Water Flow):
- Turn off the water supply.
- Disconnect the valve from the plumbing.
- Inspect the inside of the valve body for sediment or debris.
- Use a small brush or pick to carefully remove any obstructions.
- Flush the valve with water to ensure it's clean.
- Reinstall the valve, using fresh pipe joint compound or Teflon tape on the threads.
- Turn the water back on slowly and check the valve's function.
Step 4: When to Call a Professional
While some valve problems can be addressed with simple DIY fixes, there are times when it's best to call a licensed plumber. Here are some warning signs:
- Severe Corrosion: If the valve body is heavily corroded or rusted, it's likely weakened and could fail completely. Replacement is the best option.
- Cracked or Broken Valve Body: Any cracks or breaks in the valve body indicate serious damage and require immediate replacement.
- Inability to Shut Off the Water Supply: If you can't shut off the water supply upstream of the valve, you won't be able to safely perform any repairs.
- Persistent Leaks After Trying DIY Fixes: If you've tried tightening connections or replacing packing material and the leak continues, it's time to call a professional.
- Complex Plumbing Systems: If you're dealing with a complex plumbing system or unsure about any aspect of the repair, it's always best to err on the side of caution and seek professional help.
- Frozen Pipes: Do not attempt to thaw frozen pipes yourself without professional assistance. Improper thawing can cause bursts, leading to significant water damage.
- Any doubt: When in doubt, seek the help of a professional. It is better to spend a bit of money than to cause significant damage to your home.
Replacing a valve, particularly a main shut-off valve, often requires specialized tools and knowledge of local plumbing codes. It's a job best left to a qualified plumber to ensure proper installation and prevent future problems.
Prevention is Key
To minimize valve problems in the future, consider these preventative measures:
- Exercise Valves Regularly: Periodically open and close valves to prevent them from becoming stuck or corroded.
- Insulate Pipes: Protect pipes from freezing temperatures to prevent damage to valves.
- Install Water Softeners: If you have hard water, a water softener can help reduce mineral buildup that can clog valves.
- Annual Plumbing Inspection: Have your plumbing system inspected annually by a licensed plumber to identify and address potential problems early on.
By understanding the differences between gate valves and globe valves, and by following these troubleshooting steps, you can confidently diagnose and address common valve problems. Remember to prioritize safety and call a professional when necessary. With a little knowledge and effort, you can keep your plumbing system running smoothly.