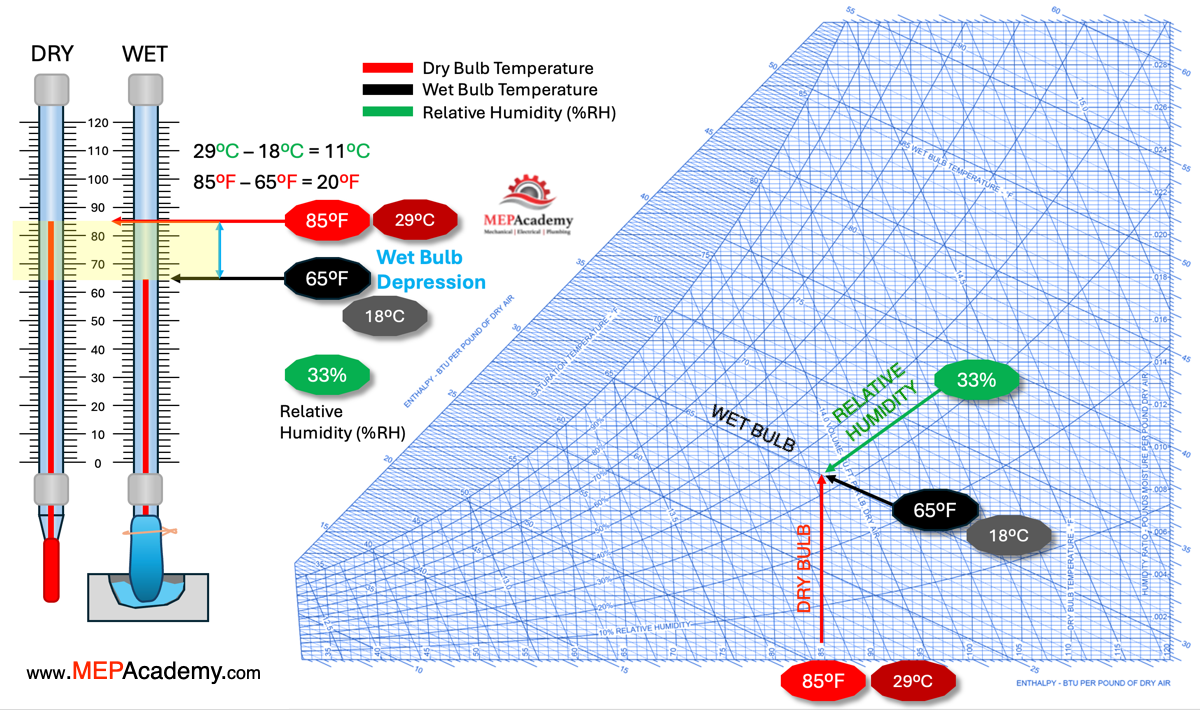
Difference Between Dry Bulb And Wet Bulb

Are you noticing your home isn't as comfortable as it should be, even with your AC running? Perhaps it feels humid and stuffy, or maybe it's bone-dry and you're constantly battling static electricity. A surprising culprit behind these comfort woes could be an imbalance between the dry bulb and wet bulb temperatures in your home. Understanding this difference is key to diagnosing and addressing many HVAC-related issues.
Understanding Dry Bulb and Wet Bulb Temperatures
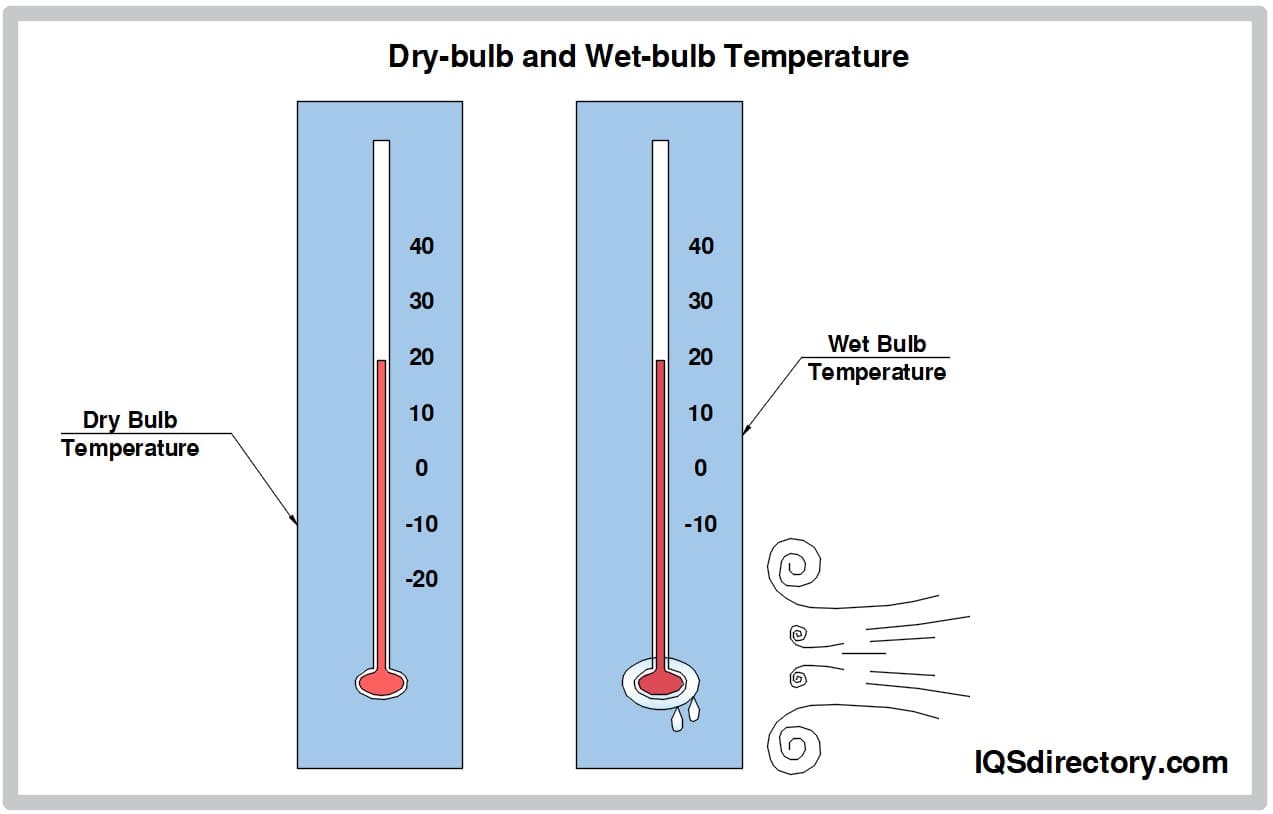
Let's start with the basics. Dry bulb temperature is simply the air temperature you read on a regular thermometer. It's the temperature most people are familiar with and what your thermostat displays. Think of it as the "sensible" heat in the air. It measures the *heat* you feel.
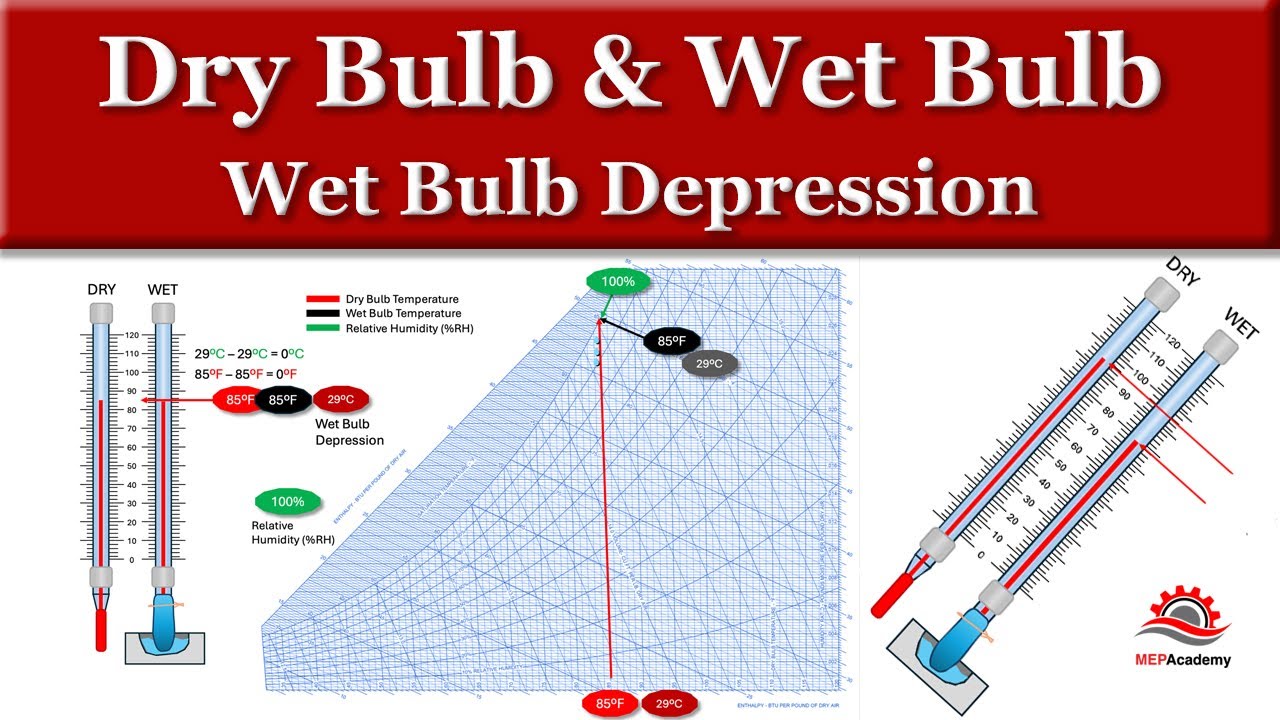
Wet bulb temperature, on the other hand, is a measure of both temperature and humidity. It's the temperature a parcel of air would have if it were cooled to saturation (100% relative humidity) by evaporating water into it. It's always equal to or lower than the dry bulb temperature. The *difference* between the dry bulb and wet bulb temperature indicates the humidity level: the smaller the difference, the higher the humidity.
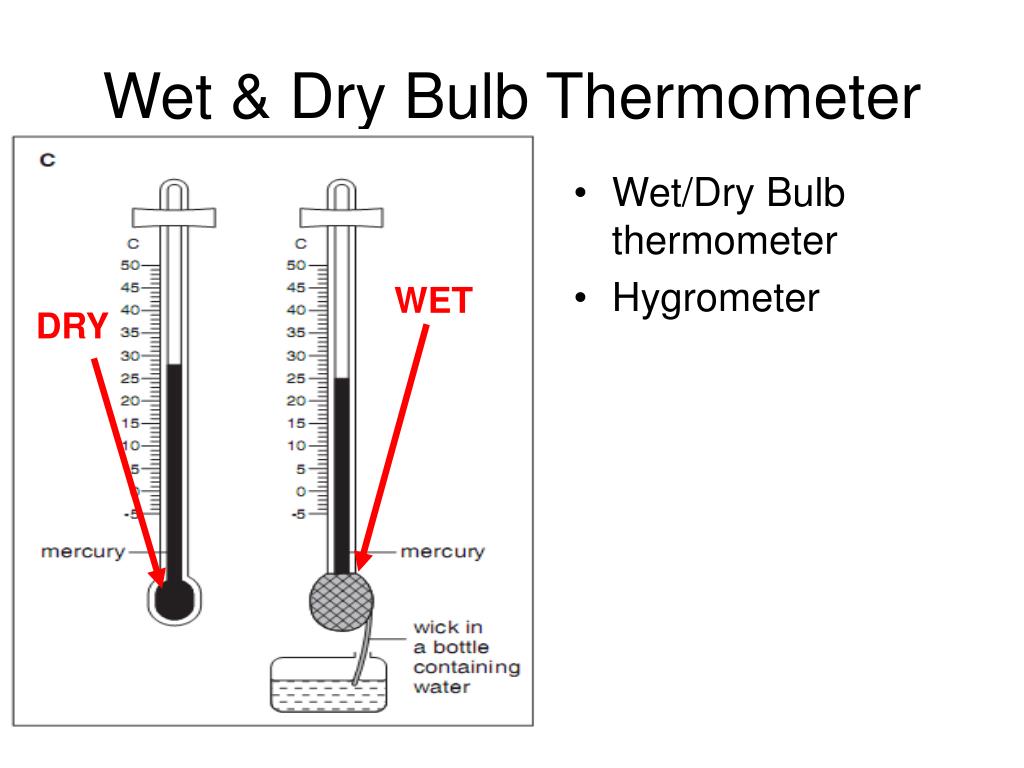
Imagine wrapping a wet cloth around the bulb of a thermometer and waving it in the air. The water evaporates, cooling the bulb. The temperature it settles at is the wet bulb temperature. The rate of evaporation, and therefore the cooling effect, depends on how much moisture is already in the air. In dry air, more water evaporates, leading to a lower wet bulb temperature. In humid air, less water evaporates, and the wet bulb temperature is closer to the dry bulb temperature. This is why a large difference between dry and wet bulb readings indicates dry air and a small difference indicates humid air. Measuring wet-bulb temperature requires a device called a psychrometer.
The Problem: An Uncomfortable Home Environment
An imbalance between dry and wet bulb temperatures can lead to several problems:
- Excessive Humidity: High humidity makes your home feel warmer than it actually is. It can lead to mold growth, musty odors, and discomfort. It also makes your AC work harder, increasing your energy bills.
- Excessive Dryness: Low humidity can cause dry skin, irritated sinuses, static electricity, and damage to wooden furniture. It can also make you feel colder than you should, even with the heat on.
- Inefficient HVAC System: Both high and low humidity can put a strain on your HVAC system, reducing its efficiency and lifespan.
Step-by-Step Diagnosis and DIY Fixes
Before calling a professional, let's try some simple troubleshooting steps. Keep in mind that accuracy in these measurements is paramount, so take your time and follow the instructions carefully.
Step 1: Gathering Your Tools
You'll need the following:
- Two Thermometers: Ideally, use digital thermometers for accuracy. If using analog thermometers, ensure they are calibrated.
- Clean Cloth or Wick: A piece of cotton cloth or a shoelace works well.
- Water: Distilled or purified water is best to avoid mineral deposits.
- Psychrometric Chart or Calculator: You can find these online (search for "psychrometric chart") or use a psychrometric calculator app on your smartphone.
Step 2: Measuring Dry Bulb Temperature
This is the easy part. Place one of your thermometers in the center of the room you're concerned about, away from direct sunlight or drafts. Let it sit for at least 5-10 minutes to get an accurate reading. Record the temperature. This is your dry bulb temperature.
Step 3: Measuring Wet Bulb Temperature
This requires a little more care.
- Prepare the Wick: Moisten the clean cloth or wick with water. Don't soak it; it should be damp, not dripping.
- Attach to Thermometer: Wrap the moistened cloth around the bulb of the other thermometer. Secure it in place with a rubber band or string if necessary. Ensure the cloth covers the entire bulb.
- Create Airflow: Now, you need to create airflow over the wet bulb. You can do this in a few ways:
- Swing the Thermometer: Gently swing the thermometer in a circular motion for 2-3 minutes.
- Use a Fan: Place the thermometer in front of a small fan, ensuring the airflow is consistent but not too strong.
- Record the Temperature: After 2-3 minutes, observe the thermometer reading. The temperature should start to drop as the water evaporates. Wait until the temperature stabilizes (stops decreasing significantly) and record the lowest temperature it reaches. This is your wet bulb temperature. It may take a few tries to get a stable reading.
Important: Make sure the cloth remains moist throughout the measurement process. If it dries out, re-wet it and repeat the process.
Step 4: Calculating Relative Humidity
Now that you have your dry bulb and wet bulb temperatures, you can calculate the relative humidity. Use a psychrometric chart or an online psychrometric calculator. Enter your dry bulb and wet bulb temperatures, and the calculator will provide the relative humidity. Alternatively, use a psychrometric chart by finding the intersection of your dry bulb and wet bulb temperatures to determine the humidity percentage.
Step 5: Interpreting the Results and DIY Fixes
Here's how to interpret your results and some DIY solutions:
- Relative Humidity Below 30%: This indicates very dry air.
- DIY Fix:
- Use a Humidifier: This is the most effective solution. Run a humidifier in the rooms where you experience dryness.
- Houseplants: Plants release moisture into the air through transpiration.
- Boil Water: Carefully boiling a pot of water (under supervision) can add moisture to the air.
- Check for Air Leaks: Seal any drafts or air leaks around windows and doors.
- DIY Fix:
- Relative Humidity Between 30% and 60%: This is generally considered the ideal range for indoor comfort.
- Relative Humidity Above 60%: This indicates high humidity.
- DIY Fix:
- Use a Dehumidifier: This is the most effective solution. Run a dehumidifier in areas with high humidity, such as basements.
- Improve Ventilation: Open windows and doors (when outdoor humidity is lower) to increase airflow. Use exhaust fans in bathrooms and kitchens.
- Fix Leaks: Repair any leaks in your roof, plumbing, or foundation.
- Air Conditioner Usage: Ensure your air conditioner is appropriately sized for your home. Over-sized units can cool the air quickly but not remove sufficient moisture. Also, maintain it properly to allow it to dehumidify the air properly.
- Check Gutters and Downspouts: Ensure that gutters and downspouts are channeling water away from your foundation.
- DIY Fix:
When to Call a Professional
While the above steps can address many common humidity issues, there are times when professional help is necessary. Call an HVAC technician if:
- You've tried the DIY fixes, but the humidity levels remain consistently high or low. This could indicate a more significant problem with your HVAC system or the building's structure.
- You suspect mold growth. Mold remediation requires specialized equipment and expertise.
- Your HVAC system is malfunctioning. If you notice strange noises, reduced airflow, or inconsistent temperatures, it's best to have a professional inspect your system.
- You have a complex HVAC system. If your home has a sophisticated HVAC system with zoning or advanced features, troubleshooting it yourself can be risky.
- You suspect a refrigerant leak. Refrigerant leaks can be harmful and require professional repair.
- Your home has significant structural issues causing moisture problems. This may require the services of a building contractor in addition to an HVAC professional. This can include things like unsealed crawl spaces, poor insulation, or foundation problems.
Preventative Measures
To maintain a comfortable and healthy home environment, consider these preventative measures:
- Regular HVAC Maintenance: Schedule annual maintenance for your HVAC system to ensure it's running efficiently.
- Change Air Filters Regularly: Clogged air filters restrict airflow and can impact humidity levels.
- Monitor Humidity Levels: Use a hygrometer (humidity meter) to regularly monitor humidity levels in your home.
- Proper Ventilation: Ensure adequate ventilation in your home, especially in bathrooms and kitchens.
- Address Water Leaks Promptly: Repair any water leaks immediately to prevent mold growth and high humidity.
- Proper Insulation: Good insulation helps to maintain consistent temperatures and humidity levels.
By understanding the difference between dry bulb and wet bulb temperatures and taking proactive steps to manage humidity levels, you can create a more comfortable and healthy living environment for yourself and your family. Remember to prioritize safety and call a professional when needed.