Do All Air Handlers Have Filters
Imagine this: It's a sweltering summer day, and your air conditioner suddenly decides to take a break. The house starts feeling stuffy, and you realize the air isn't circulating properly. Before you panic and call an HVAC technician, let's investigate a common culprit: the air handler and its filter.
The question we'll tackle is: Do All Air Handlers Have Filters? The short answer is, virtually always. Air filters are a critical component of any air handler system, designed to protect the unit and improve indoor air quality. However, sometimes they are overlooked. Let's explore what to do if you suspect a filter issue and how to troubleshoot it.
Troubleshooting Your Air Handler: The Filter Factor
This guide offers a step-by-step approach to diagnosing and addressing potential issues related to your air handler filter. Remember, safety is paramount. If at any point you feel uncomfortable or the task involves electrical work beyond your skill level, contact a qualified HVAC professional immediately.
Step 1: Is the Air Handler Actually Running?
Before delving into the filter, ensure the air handler itself is receiving power and attempting to operate. This sounds basic, but it's a crucial first step.
- Check the Thermostat: Is it set to "Cool" or "Heat" (depending on the season) and is the temperature set lower (or higher) than the current room temperature? A dead thermostat can prevent the air handler from even attempting to turn on. Try replacing the batteries.
- Inspect the Breaker: Locate the breaker in your electrical panel that corresponds to the air handler. It should be clearly labeled. If the breaker is tripped (in the "off" or middle position), reset it by flipping it fully to the "off" position and then back to the "on" position. If it trips again immediately, there's a serious electrical fault that requires professional attention. Do not repeatedly reset a tripping breaker.
- Examine the Disconnect Switch: Many air handlers have a dedicated disconnect switch located near the unit itself. It's typically a large on/off switch in a metal box. Ensure it's in the "on" position.
Step 2: Locating and Inspecting the Air Filter
Now that we know the air handler is *supposed* to be running, let's find that filter. The location can vary depending on your system's design.
- Common Locations:
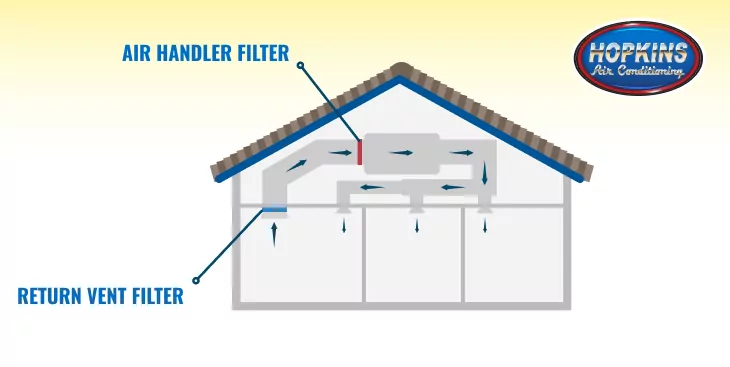
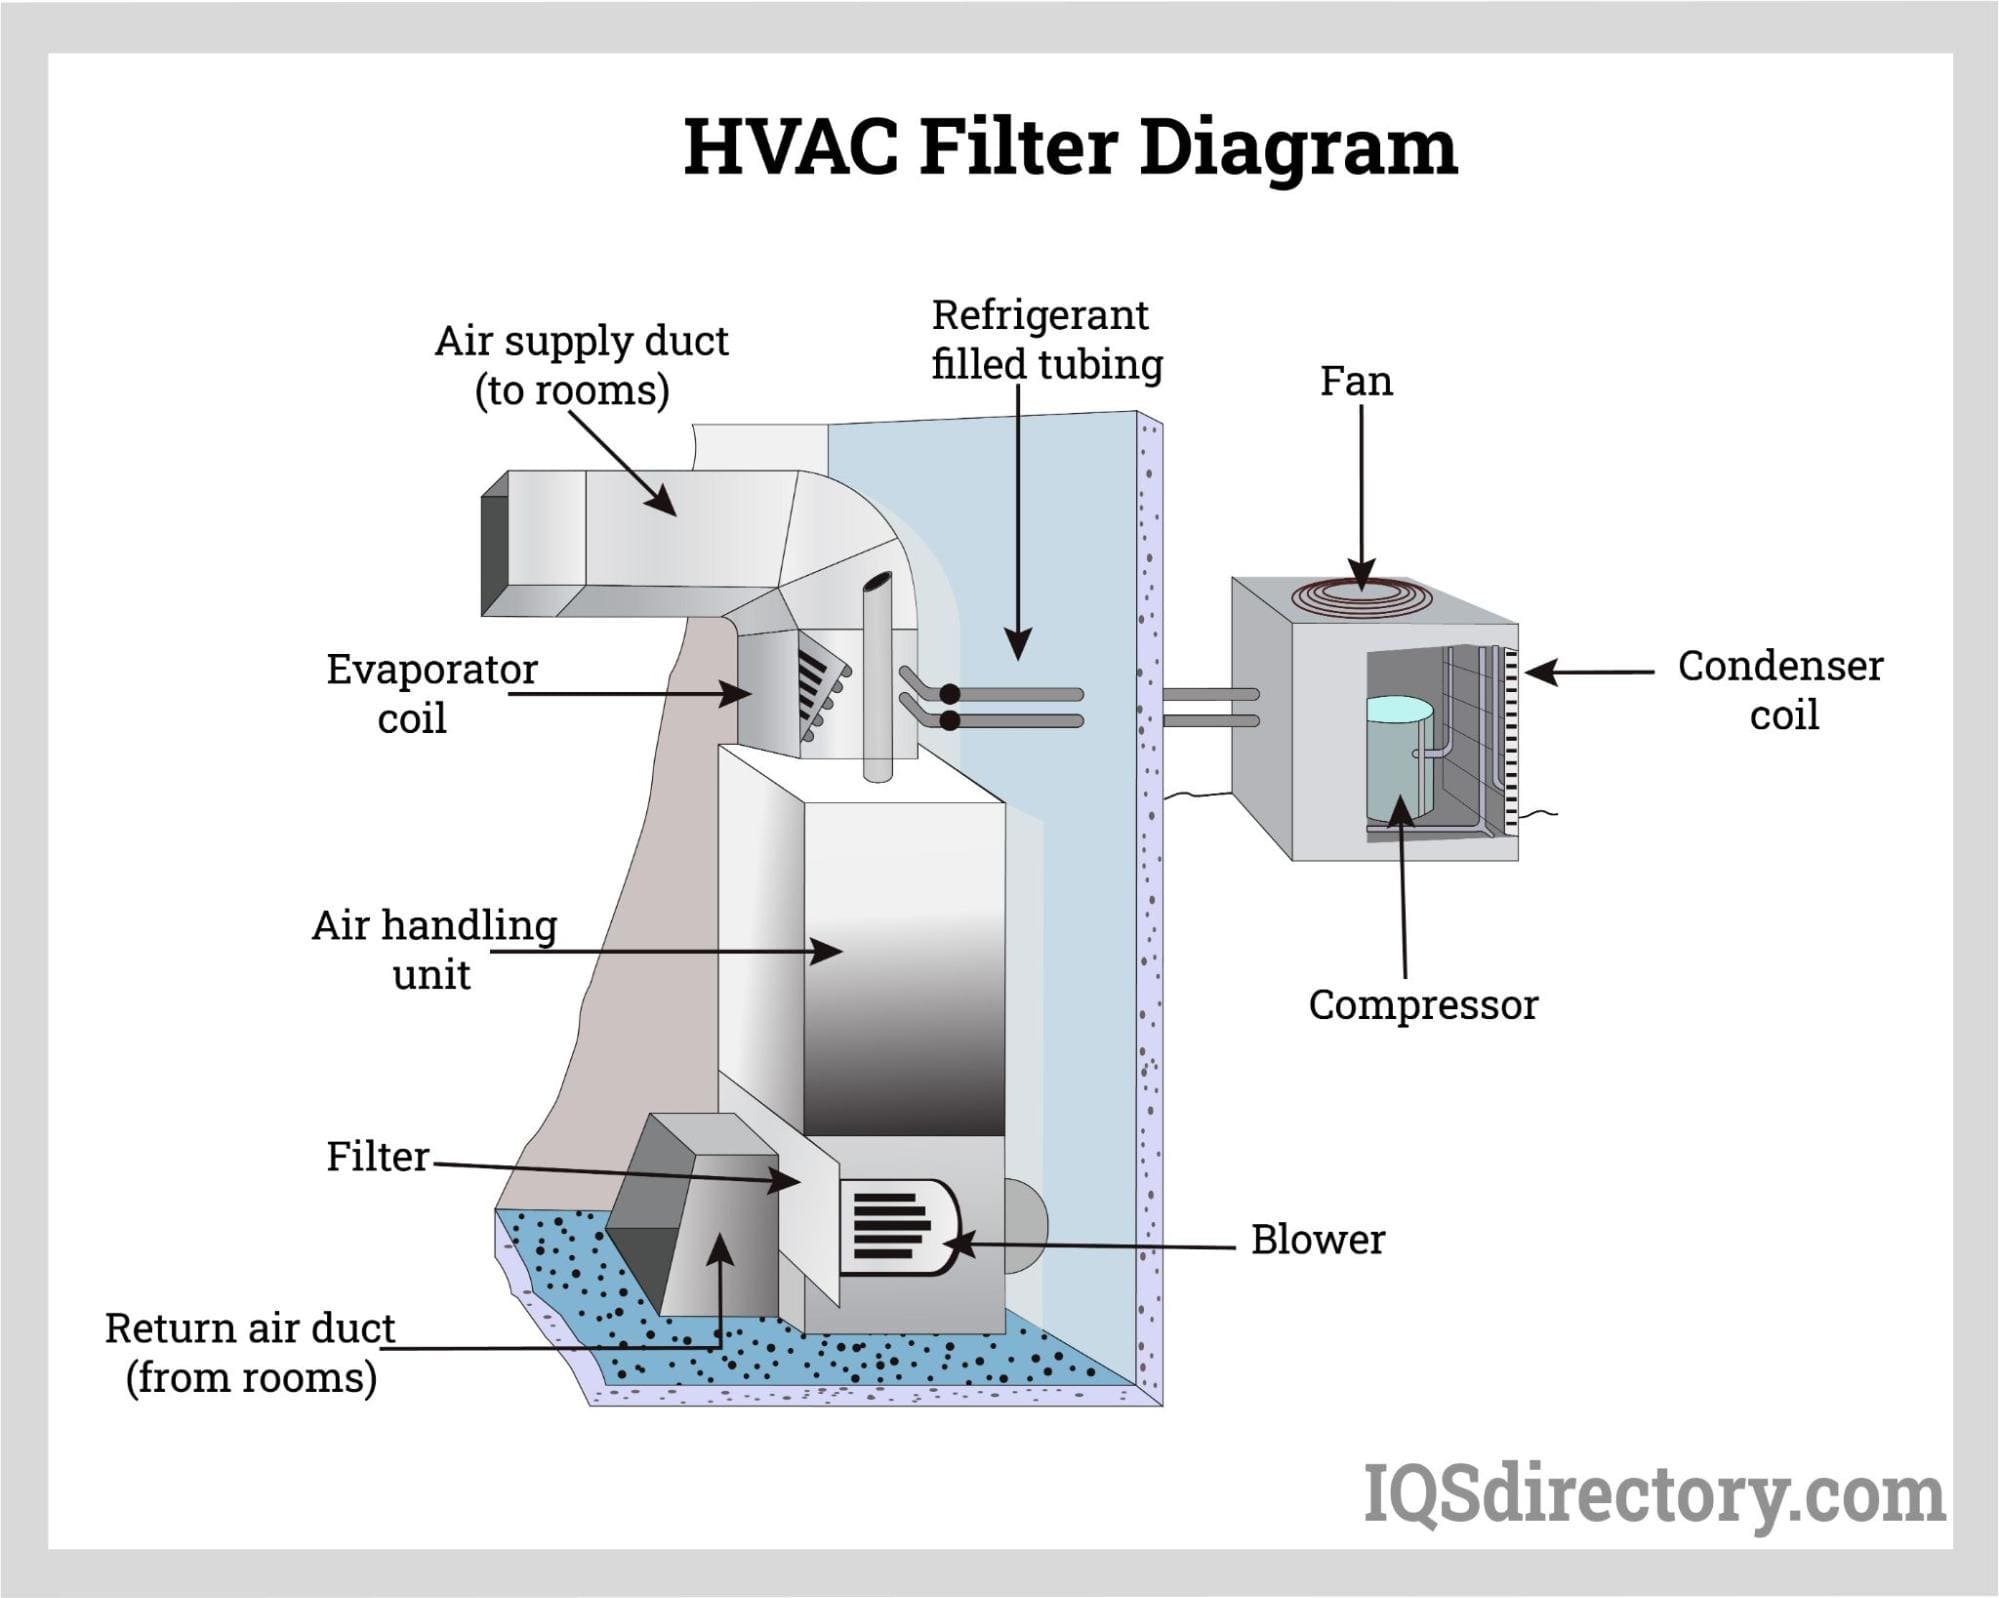
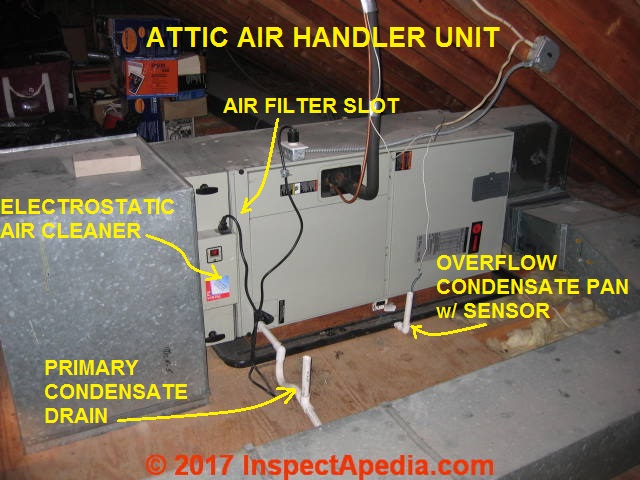
- Inside the Air Handler Unit: This is the most common location. Look for a removable panel or door on the unit itself.
- At the Return Air Vent: Sometimes, the filter is located behind the return air vent grille in a wall or ceiling.
- Behind the Furnace: In systems with a combined furnace and air handler, the filter may be located near the furnace blower.
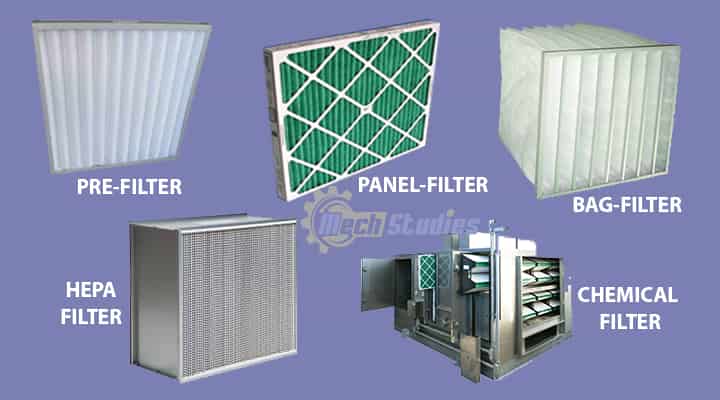
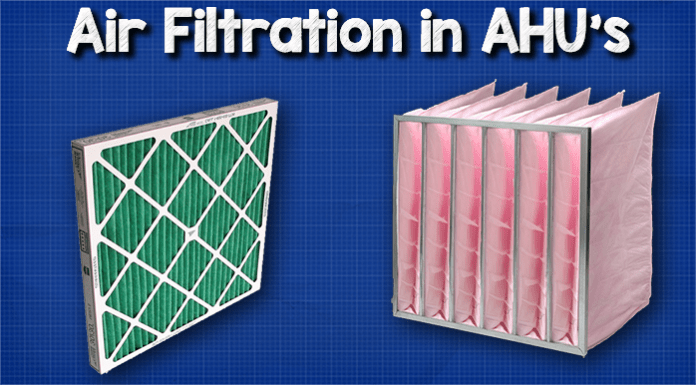
- Finding the Filter: Once you've located a potential spot, look for a slot or opening that's designed to hold a rectangular filter. It will usually have some sort of frame or retaining clips to keep the filter in place.
- Inspecting the Filter: Once you've located and removed the filter, carefully inspect it.
- Is it Dirty? A clogged filter is a major cause of air handler problems. If it's covered in dust, debris, and pet hair, it needs to be cleaned or replaced.
- Is it Damaged? Look for tears, holes, or a collapsed frame. A damaged filter won't properly filter the air and may allow debris to enter the air handler.
- Is it the Correct Size? The filter should fit snugly in its designated slot. If it's too small, air will bypass the filter. The size is usually printed on the filter frame.
Step 3: Cleaning or Replacing the Air Filter
Depending on the type of filter you have, you can either clean it or replace it.
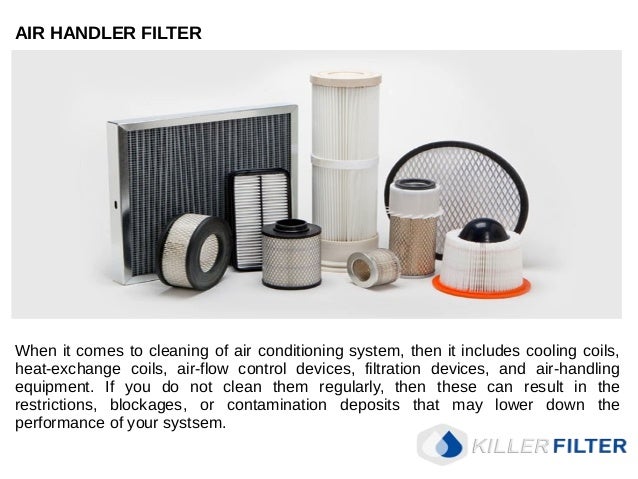
- Disposable Filters: These are the most common type and are designed to be replaced. Do not attempt to wash or reuse disposable filters. Simply purchase a new filter of the same size and MERV rating (explained below).
- Washable Filters: Some filters are designed to be washed and reused. If you have a washable filter, follow these steps:
- Remove the filter.
- Rinse the filter with a gentle stream of water from a garden hose or sink. Always rinse from the *clean* side to the *dirty* side, pushing the debris out.
- Allow the filter to dry completely before reinstalling it. A damp filter can promote mold growth.
- Installing a New Filter:
- Direction Matters! Most filters have an arrow printed on the frame indicating the direction of airflow. Make sure the arrow points towards the air handler. This ensures the filter is installed correctly.
- Secure the Filter: Ensure the filter is properly seated in its slot and secured by any retaining clips or frames.
Step 4: Understanding MERV Ratings
When replacing your air filter, you'll encounter MERV ratings. MERV (Minimum Efficiency Reporting Value) indicates the filter's ability to capture particles of different sizes.
- Higher MERV = Better Filtration: A higher MERV rating means the filter can capture smaller particles, such as pollen, mold spores, and even some viruses.
- Consider Your System: While a higher MERV rating seems ideal, it can also restrict airflow. Using a filter with too high of a MERV rating can put a strain on your air handler and reduce its efficiency.
- Typical Recommendations: For most residential systems, a MERV rating of 8-12 is a good balance between filtration and airflow. Consult your air handler's manual or an HVAC professional for recommendations specific to your system.
Step 5: Checking for Other Obstructions
Even with a clean filter, other obstructions can impede airflow and cause problems.
- Return Air Vents: Ensure that your return air vents are not blocked by furniture, rugs, or other objects.
- Supply Air Vents: Similarly, check that your supply air vents (the ones that blow air into the room) are not obstructed.
- Ductwork: While you likely won't be able to inspect the entire ductwork system, visually inspect any accessible sections. Look for obvious signs of damage or collapse. If you suspect a problem within the ductwork, it's best to call a professional.
Step 6: Addressing Common Issues and When to Call a Pro
Here's a summary of common issues and when DIY solutions are appropriate versus when you need professional help:
- Problem: Air handler not turning on.
- DIY: Check thermostat settings, breaker, and disconnect switch.
- Pro: If the breaker trips repeatedly, or if you suspect an electrical issue within the air handler.
- Problem: Reduced airflow.
- DIY: Clean or replace the air filter, check for obstructions in vents.
- Pro: If the airflow is still poor after cleaning/replacing the filter, or if you suspect a problem with the blower motor or ductwork.
- Problem: Unusual noises coming from the air handler.
- DIY: Try to identify the source of the noise. A loose panel can sometimes be tightened.
- Pro: If the noise is a grinding, squealing, or rattling sound, it could indicate a problem with the blower motor, bearings, or other internal components.
- Problem: Air handler is leaking water.
- DIY: Check the condensate drain line for clogs. You may be able to clear a simple clog with a wet/dry vacuum.
- Pro: If the leak is significant or if you can't clear the clog, it could indicate a more serious problem with the condensate drain pan or coil.
- Problem: Icing on the air conditioner coils.
- DIY: A dirty air filter is a common cause. Replace if dirty, let the ice thaw, then try again with the new filter.
- Pro: Low refrigerant is a common cause of icing. Call a professional to diagnose and repair the refrigerant leak.
Important Safety Reminders
- Turn off the power: Always turn off the power to the air handler at the breaker before performing any maintenance.
- Don't touch electrical components: Unless you are a qualified electrician, avoid touching any electrical components inside the air handler.
- Use caution with chemicals: If you are cleaning any parts of the air handler, use appropriate cleaning solutions and follow the manufacturer's instructions.
- Know your limits: If a repair seems too complex or involves electrical work, gas lines, or refrigerant, call a professional.
Conclusion
Maintaining a clean air filter is crucial for the health and efficiency of your air handler. By following these steps, you can diagnose and address many common filter-related issues, saving you time and money. Remember to prioritize safety and call a qualified HVAC professional when needed. Addressing simple issues yourself not only saves money, but it also gives you a better understanding of your home's HVAC system, empowering you to maintain a comfortable and healthy living environment.