Do It Yourself Dryer Vent Cleaning
DIY Dryer Vent Cleaning: A Homeowner's Guide to Energy Savings and Safety
A clogged dryer vent is more than just an inconvenience; it's a significant energy drain, a potential fire hazard, and a silent thief of your hard-earned money. Performing routine DIY dryer vent cleaning is a simple yet impactful task that can dramatically improve your dryer's efficiency, extend its lifespan, and ensure the safety of your home. This comprehensive guide will walk you through the process, highlight the benefits, and explore how it integrates with broader energy efficiency strategies.
Why Clean Your Dryer Vent? The Undeniable Advantages
The primary function of a dryer vent is to exhaust hot, moist air and lint produced during the drying cycle. When this vent becomes clogged with lint, several problems arise:
- Reduced Drying Efficiency: A clogged vent restricts airflow, forcing your dryer to work harder and longer to dry your clothes. This translates directly to higher energy consumption and increased utility bills. According to the U.S. Fire Administration, failure to clean dryer vents is a leading cause of home fires.
- Increased Energy Costs: Longer drying times mean more electricity or gas usage. Studies show that a clogged vent can increase drying time by 25-30%, leading to a corresponding increase in energy bills. A typical family could save $18-24 per month just by cleaning the dryer vent.
- Fire Hazard: Lint is highly flammable. A buildup of lint in the vent creates a significant fire risk. The National Fire Protection Association (NFPA) reports that dryers cause approximately 15,970 home fires annually, with lint buildup being a major contributing factor.
- Dryer Overheating: Restricted airflow can cause the dryer's internal components to overheat, potentially leading to premature failure of the appliance. This can lead to costly repairs or the need for a complete dryer replacement.
- Mold and Mildew Growth: Trapped moisture in the vent can create a breeding ground for mold and mildew, which can spread into your home and pose health risks, especially for individuals with allergies or respiratory conditions.
Tools and Materials You'll Need
Before you begin, gather the following tools and materials:
- Dryer Vent Cleaning Kit: These kits typically include a flexible brush and extension rods designed to reach deep into the vent. Look for kits with a variety of brush attachments for different vent configurations.
- Vacuum Cleaner: A vacuum cleaner with a hose attachment is essential for removing loose lint from the vent openings and the surrounding area. A shop vac works best for this purpose.
- Screwdriver: You'll need a screwdriver to disconnect the vent from the dryer and the exterior wall.
- Duct Tape or Aluminum Foil Tape: Use duct tape or aluminum foil tape to reseal the vent connections after cleaning. Avoid using standard cloth duct tape, as it can degrade over time.
- Work Gloves and Mask: Protect yourself from dust, lint, and potential irritants by wearing work gloves and a dust mask.
- Lint Trap Brush: For cleaning the dryer's lint trap housing.
- Inspection Mirror (Optional): A small inspection mirror can help you visualize the inside of the vent and identify areas that need extra attention.
Step-by-Step Guide to Cleaning Your Dryer Vent
Follow these steps carefully to ensure a thorough and safe dryer vent cleaning:
- Safety First: Disconnect the dryer from the power outlet to prevent electric shock. Also, turn off the gas supply to a gas dryer.
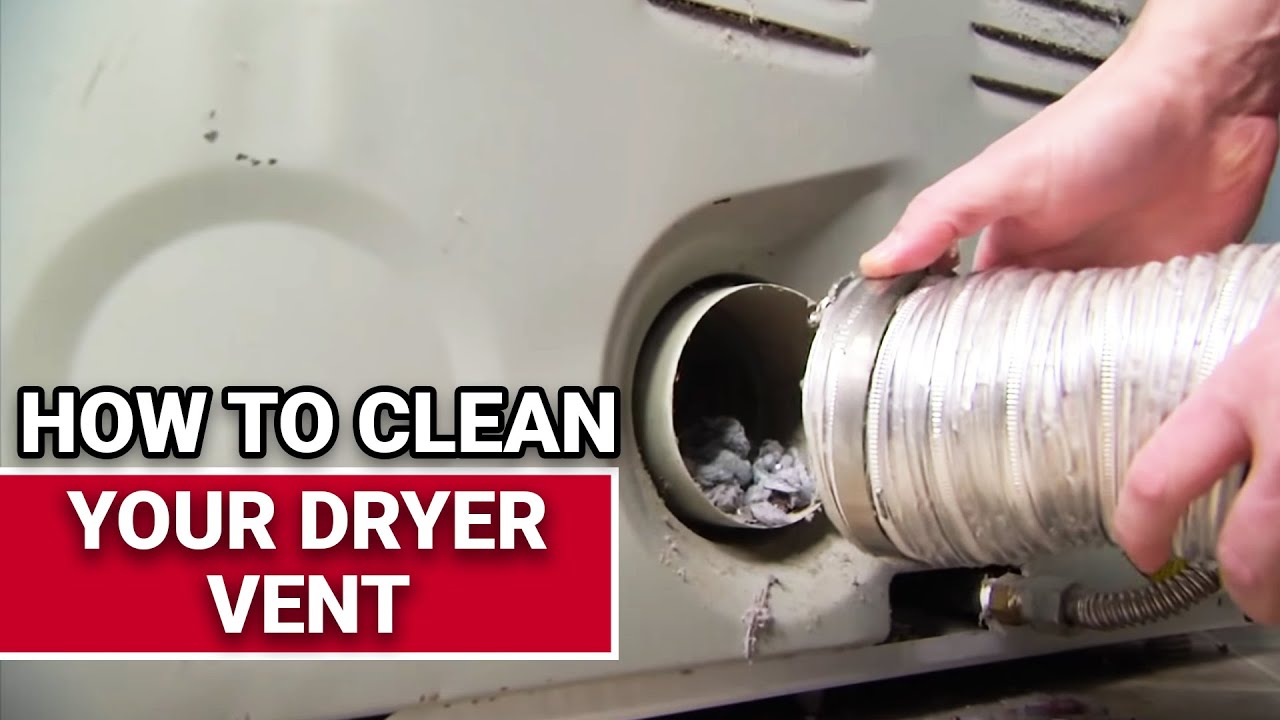
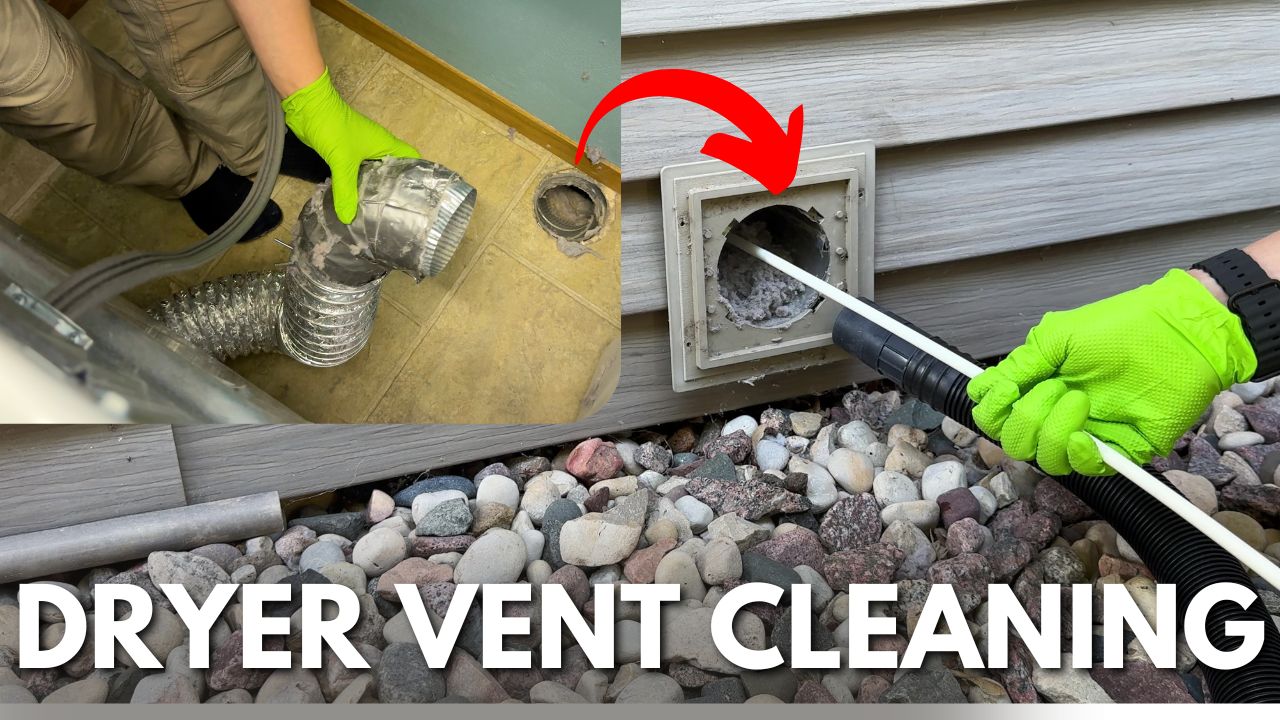
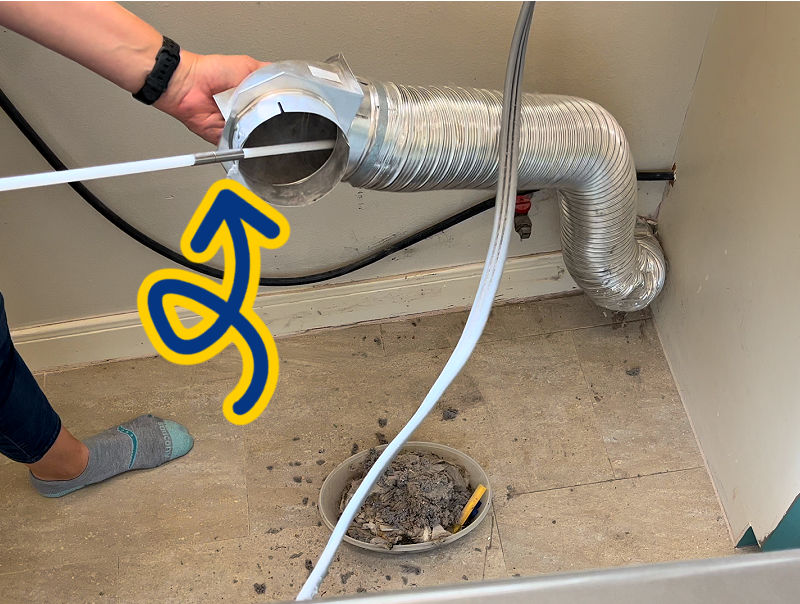
- Disconnect the Vent: Carefully pull the dryer away from the wall to access the vent connection. Use a screwdriver to loosen the clamp or screws holding the vent to the dryer and the wall. Gently detach the vent.
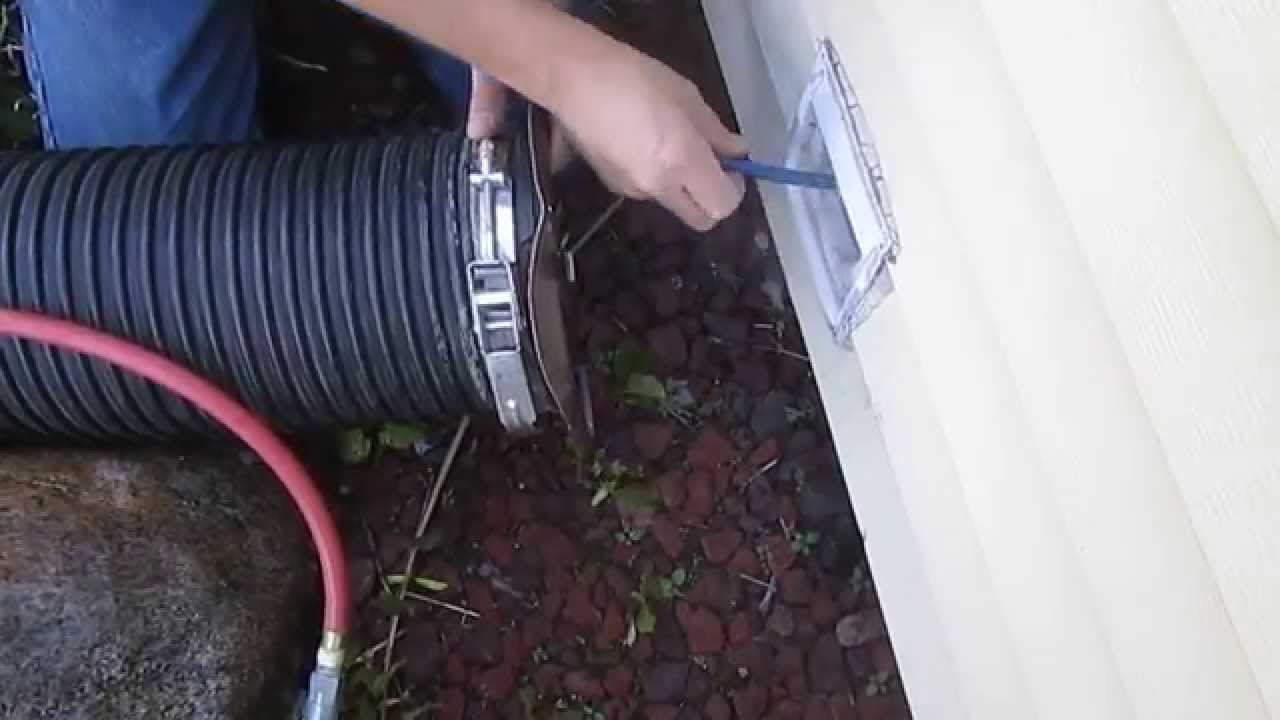
- Vacuum the Vent Openings: Use the vacuum cleaner's hose attachment to remove loose lint and debris from both the dryer vent opening and the exterior vent opening.
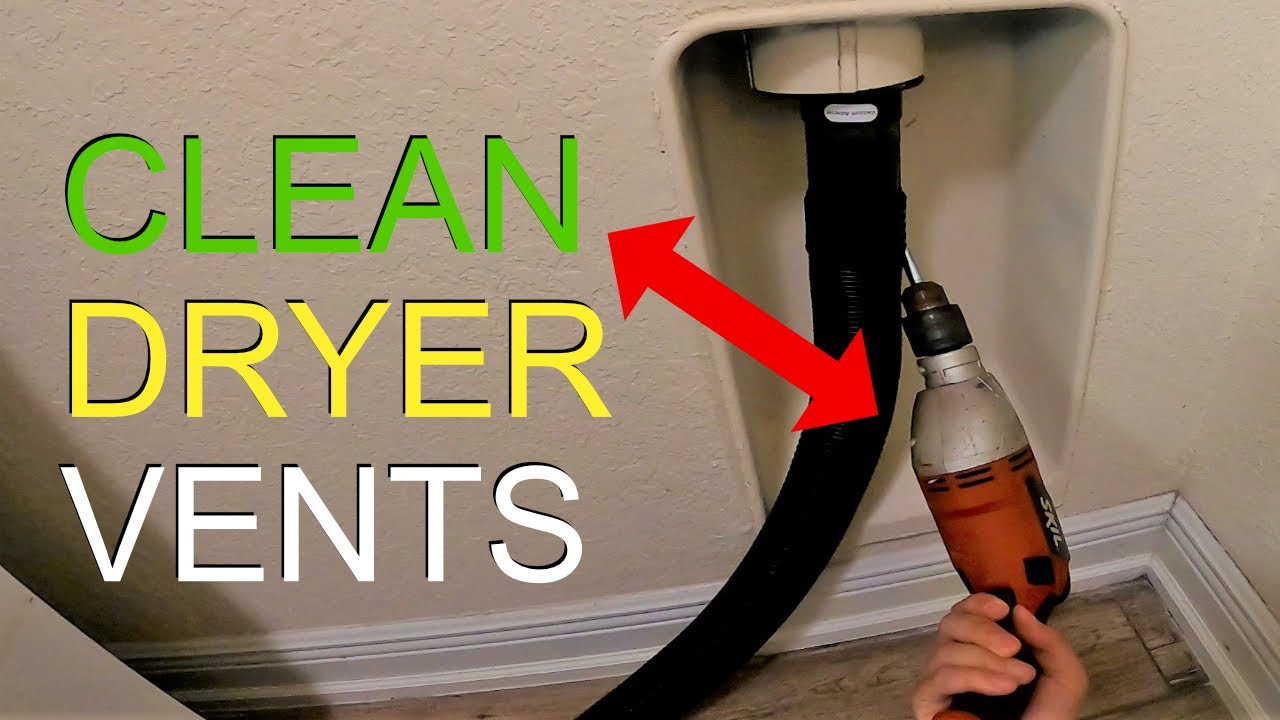
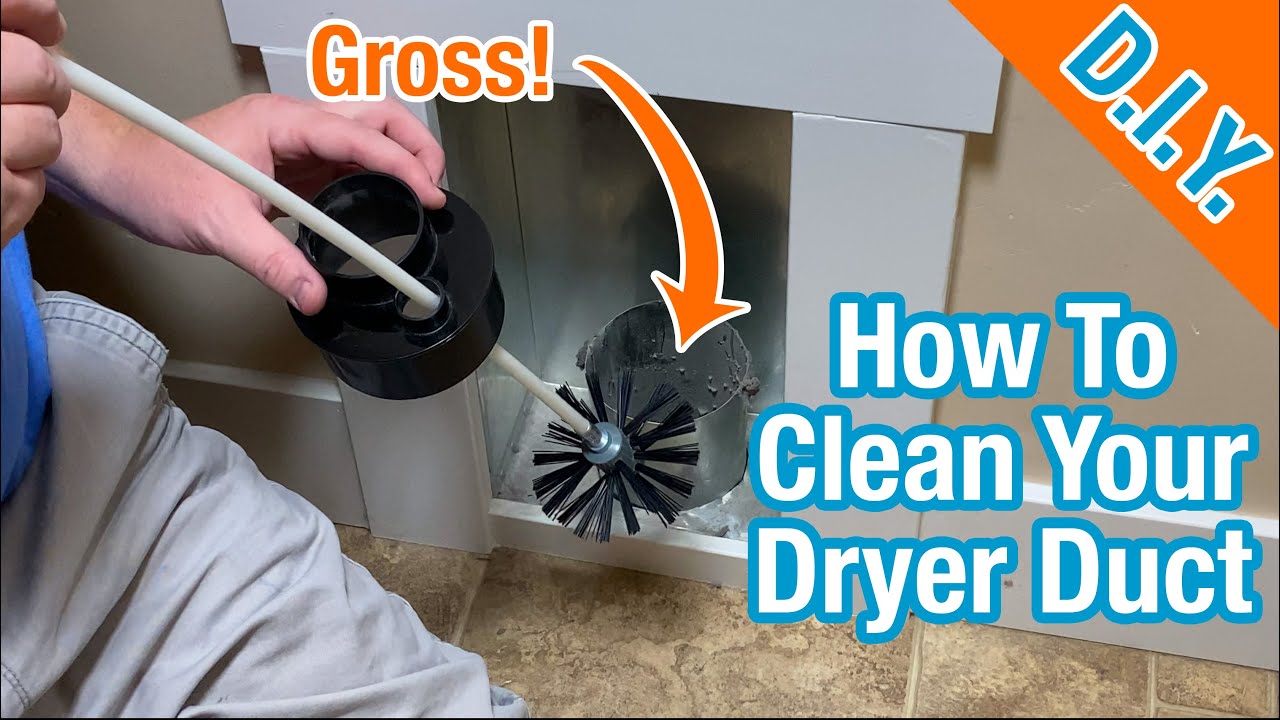
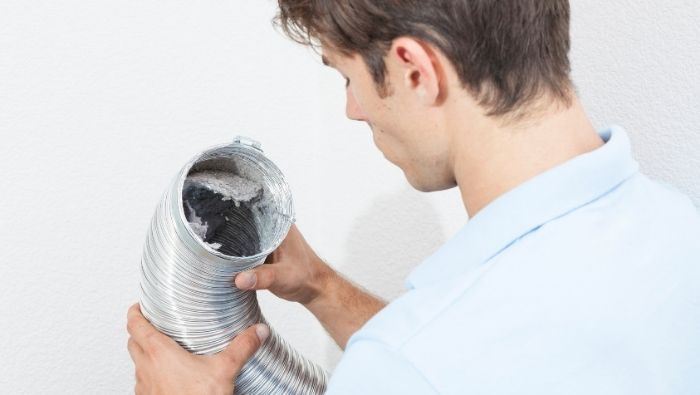
- Clean the Vent with the Brush: Insert the dryer vent cleaning brush into the vent, working it back and forth to dislodge lint. Gradually extend the brush further into the vent using the extension rods. Rotate the brush as you move it to ensure thorough cleaning.
- Remove the Lint: As you clean, periodically pull the brush out of the vent to remove accumulated lint. Dispose of the lint properly in a trash bag.
- Repeat the Process: Continue cleaning the vent until you can no longer extract significant amounts of lint. Use the inspection mirror to verify that the vent is clean.
- Clean the Lint Trap Housing: Remove the lint trap and use a lint trap brush or vacuum cleaner to clean the housing where the trap sits. A surprising amount of lint can accumulate in this area.
- Reassemble the Vent: Reconnect the vent to the dryer and the wall, ensuring a secure and airtight seal. Use duct tape or aluminum foil tape to reinforce the connections.
- Test the Dryer: Plug the dryer back into the power outlet and turn on the gas supply (if applicable). Run a short drying cycle to test the dryer's performance and ensure that air is flowing freely through the vent.
How Often Should You Clean Your Dryer Vent?
The frequency of dryer vent cleaning depends on several factors, including the size of your household, the amount of laundry you do, and the type of materials you typically dry. As a general guideline, clean your dryer vent at least once a year. However, if you notice any of the following signs, it's time to clean your vent more frequently:
- Clothes take longer than usual to dry.
- Clothes are hot to the touch after drying.
- The dryer feels hot during operation.
- There's a burning smell in the laundry room.
- Excessive lint buildup in the lint trap.
Beyond DIY: When to Call a Professional
While DIY dryer vent cleaning is a valuable skill, there are situations where it's best to call a professional HVAC technician. Consider professional cleaning if:
- Your dryer vent is long or complex with multiple bends.
- You're uncomfortable working with tools or heights.
- You suspect a significant blockage that you can't remove yourself.
- You haven't cleaned your vent in several years.
Professional technicians have specialized tools and equipment to thoroughly clean even the most challenging dryer vent systems. They can also identify and address any underlying issues that may be contributing to lint buildup.
Integrating Dryer Vent Cleaning with Smart Home Energy Management
Smart home technology offers new ways to monitor and optimize your dryer's performance. Consider these integrations:
- Smart Dryer Sensors: These sensors attach to your dryer and monitor temperature, humidity, and drying time. They can send alerts to your smartphone when the dryer is running inefficiently, indicating a potential vent blockage. Some sensors even integrate with smart thermostats to automatically adjust the thermostat setting during dryer operation.
- Smart Outlets: Use a smart outlet to monitor your dryer's energy consumption in real-time. This data can help you identify patterns and optimize your drying habits.
- Smart Thermostats: Smart thermostats, like those certified by Energy Star, can learn your energy use patterns and automatically adjust the temperature to save energy. While they don't directly monitor dryer vents, they contribute to overall home energy efficiency.
The ROI of Dryer Vent Cleaning
The return on investment (ROI) for DIY dryer vent cleaning is significant. The cost of a dryer vent cleaning kit is typically less than $50, and the process takes only about an hour. However, the savings in energy costs, reduced fire risk, and extended dryer lifespan far outweigh the initial investment. Regular vent cleaning can also qualify you for energy efficiency rebates offered by some utility companies.
Conclusion: A Simple Act with a Big Impact
DIY dryer vent cleaning is a simple yet powerful way to improve your home's energy efficiency, reduce your utility bills, and protect your family from fire hazards. By following the steps outlined in this guide, you can ensure that your dryer operates safely and efficiently for years to come. Embrace this task as part of a broader commitment to sustainable living and enjoy the peace of mind that comes with a clean and well-maintained home.