Dryer Vent Location On Back Of Dryer
Are you noticing your dryer taking longer and longer to dry clothes? Or perhaps your laundry room is feeling unusually warm and humid after each cycle? These are common signs that your dryer vent system might be experiencing issues, and often, the culprit lies right behind your dryer: the dryer vent location on the back of the appliance. Let's walk through how to troubleshoot this problem methodically and safely.
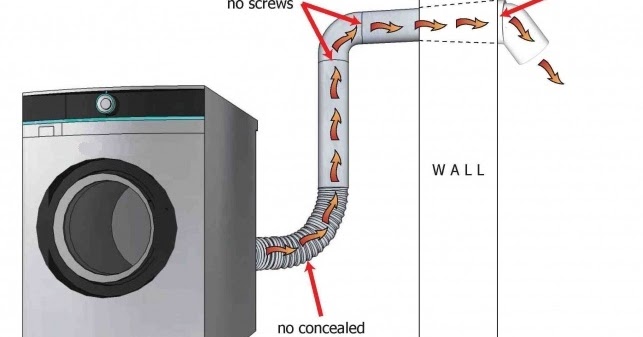
Step 1: Understanding the Dryer Vent System
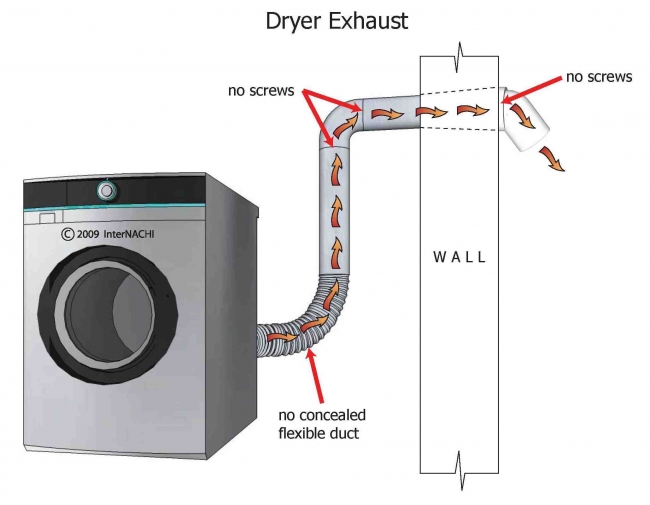
Before diving into troubleshooting, it's crucial to understand the basic anatomy of your dryer vent system. It consists of:
- The dryer vent outlet on the back of your dryer.
- The transition duct, which connects the dryer to the wall vent.
- The wall vent, where the duct passes through the wall.
- The exterior vent cover, located on the outside of your house.
- The ductwork running within the walls, leading to the exterior vent.
A blockage at any point in this system can significantly impact your dryer's performance and even pose a fire hazard. We'll focus initially on the components directly connected to the back of the dryer.
Step 2: Visual Inspection (No Tools Required)
The first step is always a visual inspection. This requires no tools and can often reveal obvious problems.
1. Accessing the Area: Carefully pull your dryer away from the wall. Unplug the dryer first! Safety is paramount. Also, disconnect the gas line if it's a gas dryer. (If you're not comfortable disconnecting the gas line, skip this and call a professional. Gas leaks are dangerous.)
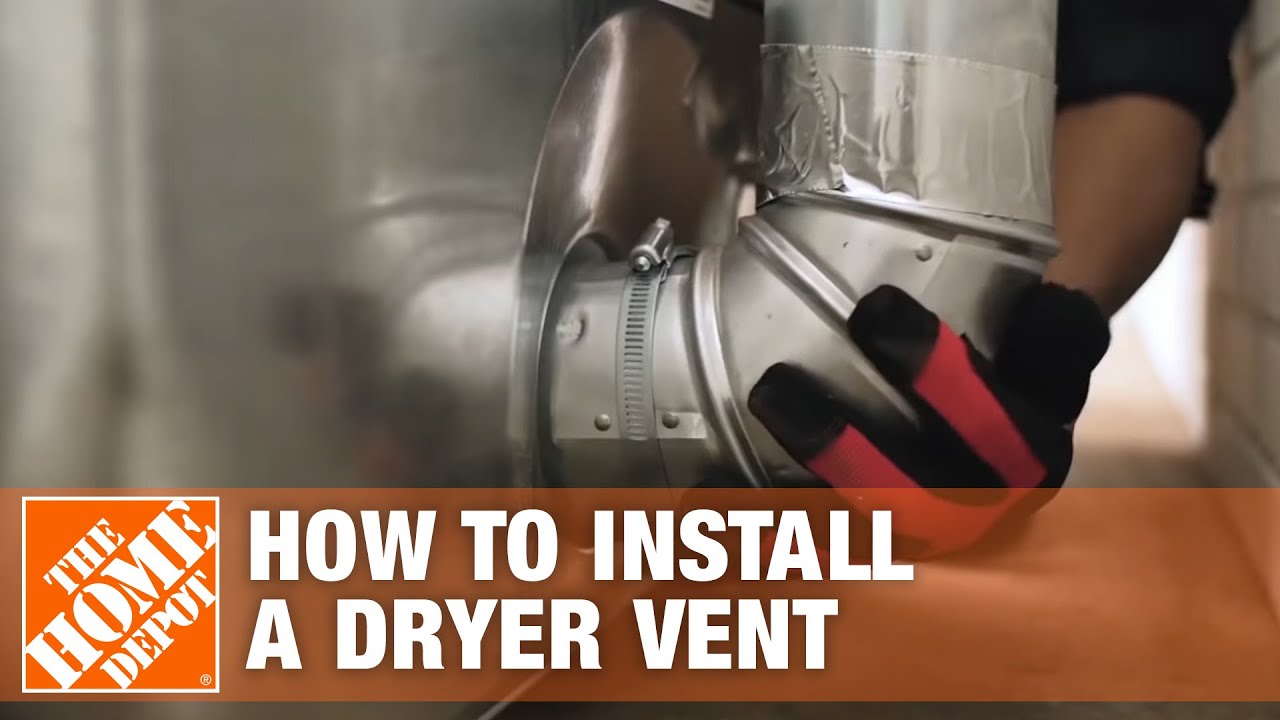
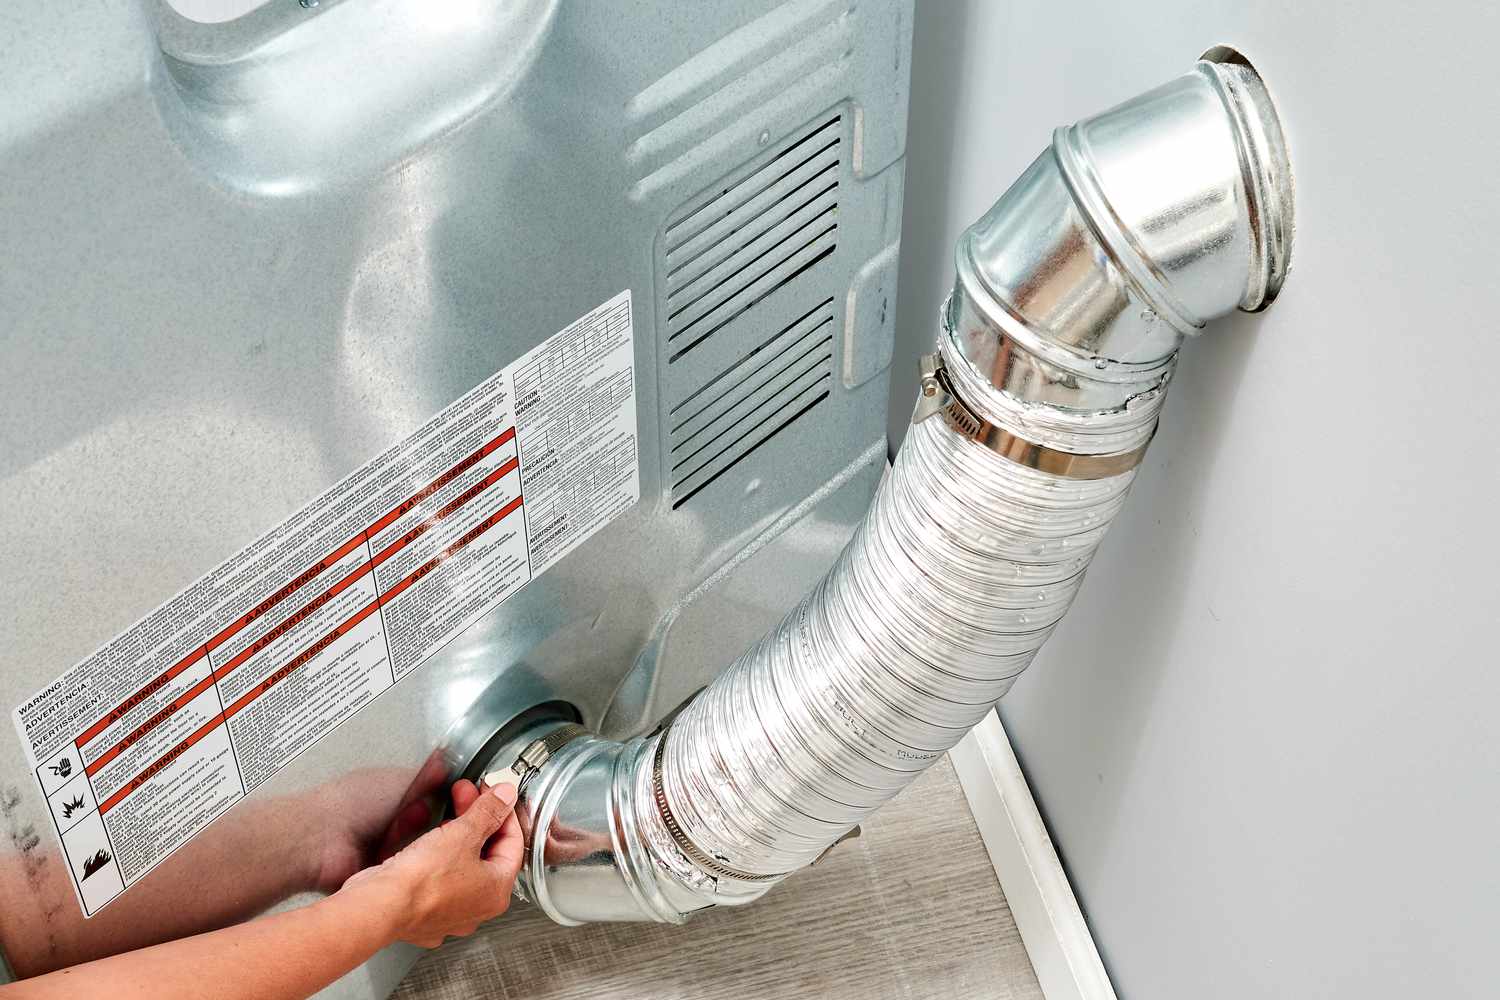
2. Checking the Dryer Vent Outlet: Examine the dryer vent outlet on the back of the machine. Is it visibly clogged with lint? Is the connection secure?
3. Inspecting the Transition Duct: Take a close look at the transition duct (the flexible duct connecting the dryer to the wall). Is it kinked, crushed, or torn? Are there any visible signs of lint buildup at the connections?
4. Wall Vent Connection: Check where the transition duct connects to the wall vent. Is the connection secure? Is there any excessive lint accumulation around the opening?
What to look for:
- Excessive Lint: This is the most common culprit. Lint buildup restricts airflow, causing the dryer to work harder and longer.
- Kinks or Crushes: These significantly reduce airflow.
- Loose Connections: These allow hot, moist air and lint to escape into your laundry room.
- Damaged Ductwork: Tears or holes in the ductwork create leaks and reduce efficiency.
Step 3: Basic Cleaning and Adjustments (Minimal Tools Required)
If your visual inspection reveals easily fixable problems, you can attempt these basic cleaning and adjustments. You'll need:
- A lint brush or vacuum attachment.
- A screwdriver (possibly, depending on the type of clamps).
- Duct tape (for temporary repairs only - replace damaged ductwork properly!).
1. Cleaning the Dryer Vent Outlet: Use the lint brush or vacuum attachment to remove any visible lint from the dryer vent outlet on the back of the machine.
2. Straightening and Adjusting the Transition Duct: If the transition duct is kinked, gently try to straighten it. Make sure it's not crushed behind the dryer. If it’s a flexible foil or plastic duct, consider replacing it with a rigid or semi-rigid metal duct for better airflow and fire safety.
3. Tightening Connections: If the connections between the transition duct and the dryer or wall vent are loose, tighten the clamps or screws holding them in place. Ensure a snug fit.
4. Short Transition Duct: Ideally, the transition duct should be as short and straight as possible. Excess length reduces airflow. If possible, shorten the duct or reposition the dryer to minimize the distance to the wall vent.
Important Considerations:
- Never use plastic or foil ducts for long distances or inside walls. These are fire hazards.
- Use metal duct tape for sealing connections, not regular duct tape. Metal duct tape is heat-resistant.
- Ensure proper ventilation while cleaning. Lint can be irritating to the respiratory system.
Step 4: Deeper Inspection (Tools May Be Needed)
If the simple cleaning and adjustments haven't solved the problem, you might need to dig a little deeper. This involves inspecting the ductwork beyond the transition duct.
1. Accessing the Wall Vent: Carefully remove the exterior vent cover on the outside of your house. Be aware of potential hazards like birds' nests, insects, or other debris.
2. Inspecting the Wall Vent and Ductwork: Use a flashlight to examine the wall vent and the beginning of the ductwork leading into the wall. Look for:
- Heavy Lint Buildup: Significant lint accumulation in the wall vent indicates a larger problem within the ductwork.
- Obstructions: Birds' nests, rodent nests, or other debris can completely block the vent.
3. Using a Dryer Vent Cleaning Kit: For moderate lint buildup, you can try using a dryer vent cleaning kit. These kits typically include a flexible brush that attaches to a drill, allowing you to reach further into the ductwork.
Safety Precautions:
- Wear safety glasses and a dust mask when cleaning the vent and ductwork.
- Be careful when using a drill – follow the manufacturer's instructions for the cleaning kit.
- Avoid pushing debris further into the ductwork. The goal is to remove the lint, not relocate it.
Step 5: When to Call a Professional
While many dryer vent problems can be resolved with DIY efforts, some situations require the expertise of a qualified HVAC technician.
Call a professional if:
- You are uncomfortable working with gas lines. Gas leaks are extremely dangerous.
- The ductwork is long, complex, or runs through difficult-to-access areas. Cleaning long or convoluted ductwork requires specialized equipment and knowledge.
- You suspect a significant blockage deep within the ductwork. A professional has the tools and experience to locate and remove stubborn blockages.
- You find evidence of rodent infestation or other damage to the ductwork. Rodent-damaged ductwork needs to be repaired or replaced properly.
- You have tried cleaning the vent and ductwork yourself, but the problem persists. This indicates a more serious issue that requires professional diagnosis.
- You notice a burning smell when the dryer is running. This is a serious fire hazard and should be addressed immediately by a professional.
- Your dryer is still taking excessively long to dry clothes after cleaning the vent. This could indicate a problem with the dryer itself, such as a faulty heating element or thermostat.
Signs of Dryer Issues (Unrelated to Venting):
- Dryer is making unusual noises (squealing, grinding).
- Clothes are excessively hot or scorched after drying.
- Dryer isn't heating at all.
- Dryer is tripping the circuit breaker.
These issues often point to problems with the dryer's internal components, and a qualified appliance repair technician should be consulted.
Step 6: Preventing Future Problems
Prevention is key to keeping your dryer vent system running smoothly and safely.
Here are some tips to prevent future problems:
- Clean the lint trap after every load. This is the simplest and most effective way to prevent lint buildup in the dryer vent system.
- Regularly inspect the dryer vent system. Check for signs of lint buildup, kinks, or damage.
- Schedule professional dryer vent cleaning at least once a year. This will ensure that the entire ductwork is thoroughly cleaned and free of obstructions.
- Use rigid or semi-rigid metal ductwork for the transition duct. These materials are more durable and less likely to kink or crush than flexible foil or plastic ducts.
- Ensure proper airflow around the dryer. Don't overcrowd the laundry room, and make sure the dryer has adequate ventilation.
Conclusion
By following these steps, you can effectively troubleshoot common dryer vent problems and keep your dryer running efficiently and safely. Remember to prioritize safety and call a professional when needed. Addressing dryer vent issues promptly not only improves drying performance but also reduces the risk of fire and extends the lifespan of your appliance. A little preventative maintenance goes a long way!
:max_bytes(150000):strip_icc()/dryer-vent-installation-2718616-04-97e52eff49f34242bfd0972ea92f03a1.jpg)
:no_upscale()/cdn.vox-cdn.com/uploads/chorus_asset/file/21866462/vent_illo.jpg)

:max_bytes(150000):strip_icc()/dryer-vent-installation-2718616-01-d122e18b1c6c4d92b9ac5c2d0452cfef.jpg)
:max_bytes(150000):strip_icc()/IMG_4888-56a4a28b5f9b58b7d0d7eee6.JPG)
:max_bytes(150000):strip_icc()/dryer-vent-installation-2718616-03-d8cb3b657d524dbb94cf38b545d2b410.jpg)