Duct Cleaning Process Step By Step
Is your home feeling a little stuffy? Are you noticing more dust than usual, even after cleaning? Or perhaps you're experiencing unexplained allergy flare-ups? The problem might not be your cleaning skills; it could be your ductwork. Dirty ducts can significantly impact indoor air quality and the efficiency of your HVAC system. While a complete professional duct cleaning is sometimes necessary, there are steps you can take to diagnose the problem and perform some basic cleaning yourself.
Diagnosing the Problem: Is Duct Cleaning Necessary?
Before you jump into cleaning, let's determine if your ducts are actually the culprit. Here's a step-by-step diagnostic process:
Step 1: The Visual Inspection – A Dust Detective
This is the most basic and often the most telling step. Grab a flashlight and a screwdriver. We're going to peek inside your vents.
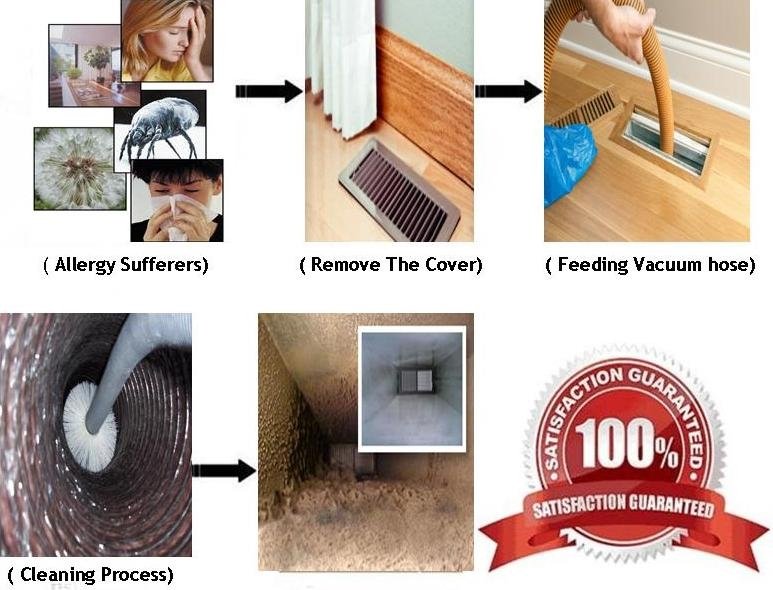
1. Choose a Vent: Select a supply vent (the ones that blow air into the room). Remove the vent cover using the screwdriver. Note how it was attached – you'll need to put it back on!
2. Shine the Light: Shine the flashlight into the duct as far as you can see.
3. Observe: What do you see? Is there a thin layer of dust? That's normal. But are there thick clumps of dust, visible mold growth (black or green spots), or debris like rodent droppings or insect carcasses? These are signs of a significant problem.
4. Repeat: Repeat this process for several vents in different areas of your house. This gives you a representative sample of the ductwork's condition.
Important Note: If you have asbestos concerns (especially in older homes), *do not* disturb the ductwork. Asbestos-containing materials should only be handled by trained professionals.
Step 2: The "Dust Test" – A Simple Air Quality Check
This test helps assess how much dust your system is circulating.
1. Clean the Area: Thoroughly clean a hard surface near a supply vent (a table or shelf works well).
2. Cover with Dark Paper: Cover the cleaned surface with a piece of dark-colored construction paper or cardboard.
3. Run the System: Run your HVAC system (either heating or cooling) for about an hour.
4. Inspect the Paper: After an hour, carefully remove the paper and examine what has collected on it. Is it a light dusting, or a significant accumulation of dust and debris? A significant accumulation suggests a ductwork problem.
Step 3: Allergy and Health Symptoms – Listen to Your Body
Pay attention to any changes in your health. Have you noticed an increase in:
- Allergy symptoms: Sneezing, coughing, runny nose, itchy eyes
- Asthma symptoms: Wheezing, shortness of breath, chest tightness
- Respiratory irritation: Sore throat, dry cough
If these symptoms worsen when your HVAC system is running, dirty ducts could be a contributing factor.
Step 4: Check Your Filters – The First Line of Defense
A dirty air filter is a common culprit for poor air quality and can contribute to dirty ducts.
1. Locate the Filter: Find the filter compartment in your furnace or air handler.
2. Inspect the Filter: Remove the filter and hold it up to the light. If you can barely see through it, it's definitely time to replace it. Note the filter size and type (usually printed on the filter frame) so you can buy a replacement.
3. Replace Regularly: Aim to replace your air filter every 1-3 months, or more often if you have pets or allergies.
DIY Cleaning: What You Can Safely Handle
If your visual inspection reveals only a light layer of dust, and your allergy symptoms aren't severe, you can attempt some basic DIY duct cleaning. *However, if you find significant mold growth, rodent droppings, or suspect asbestos, STOP and call a professional immediately.*
Step 1: Surface Cleaning of Vents and Registers
This is the easiest and most accessible part of duct cleaning.
1. Gather Your Supplies: You'll need a screwdriver, vacuum cleaner with hose attachment, damp cloth, and a mild all-purpose cleaner.
2. Remove the Vents: Use the screwdriver to remove all the supply and return vent covers. Note how they are attached so you can easily reattach them later.
3. Vacuum the Vents: Use the vacuum hose attachment to thoroughly vacuum the inside of the vent covers, removing all dust and debris. Consider using a brush attachment to loosen stubborn dirt.
4. Wash the Vents: Wipe down the vent covers with a damp cloth and mild all-purpose cleaner. Rinse with clean water and allow them to dry completely before reattaching.
5. Vacuum the Duct Opening: Carefully vacuum as far into the duct opening as you can reach with the vacuum hose. Be gentle and avoid dislodging any large pieces of debris that might fall deeper into the system.
Step 2: Cleaning Accessible Ductwork (Limited Scope)
This step requires a bit more caution and is only suitable for short, easily accessible sections of ductwork.
1. Safety First: Wear a dust mask and gloves to protect yourself from dust and allergens.
2. Choose Your Weapon: You'll need a vacuum cleaner with a long hose attachment and a flexible brush (some duct cleaning kits include these). A shop vacuum is ideal for this.
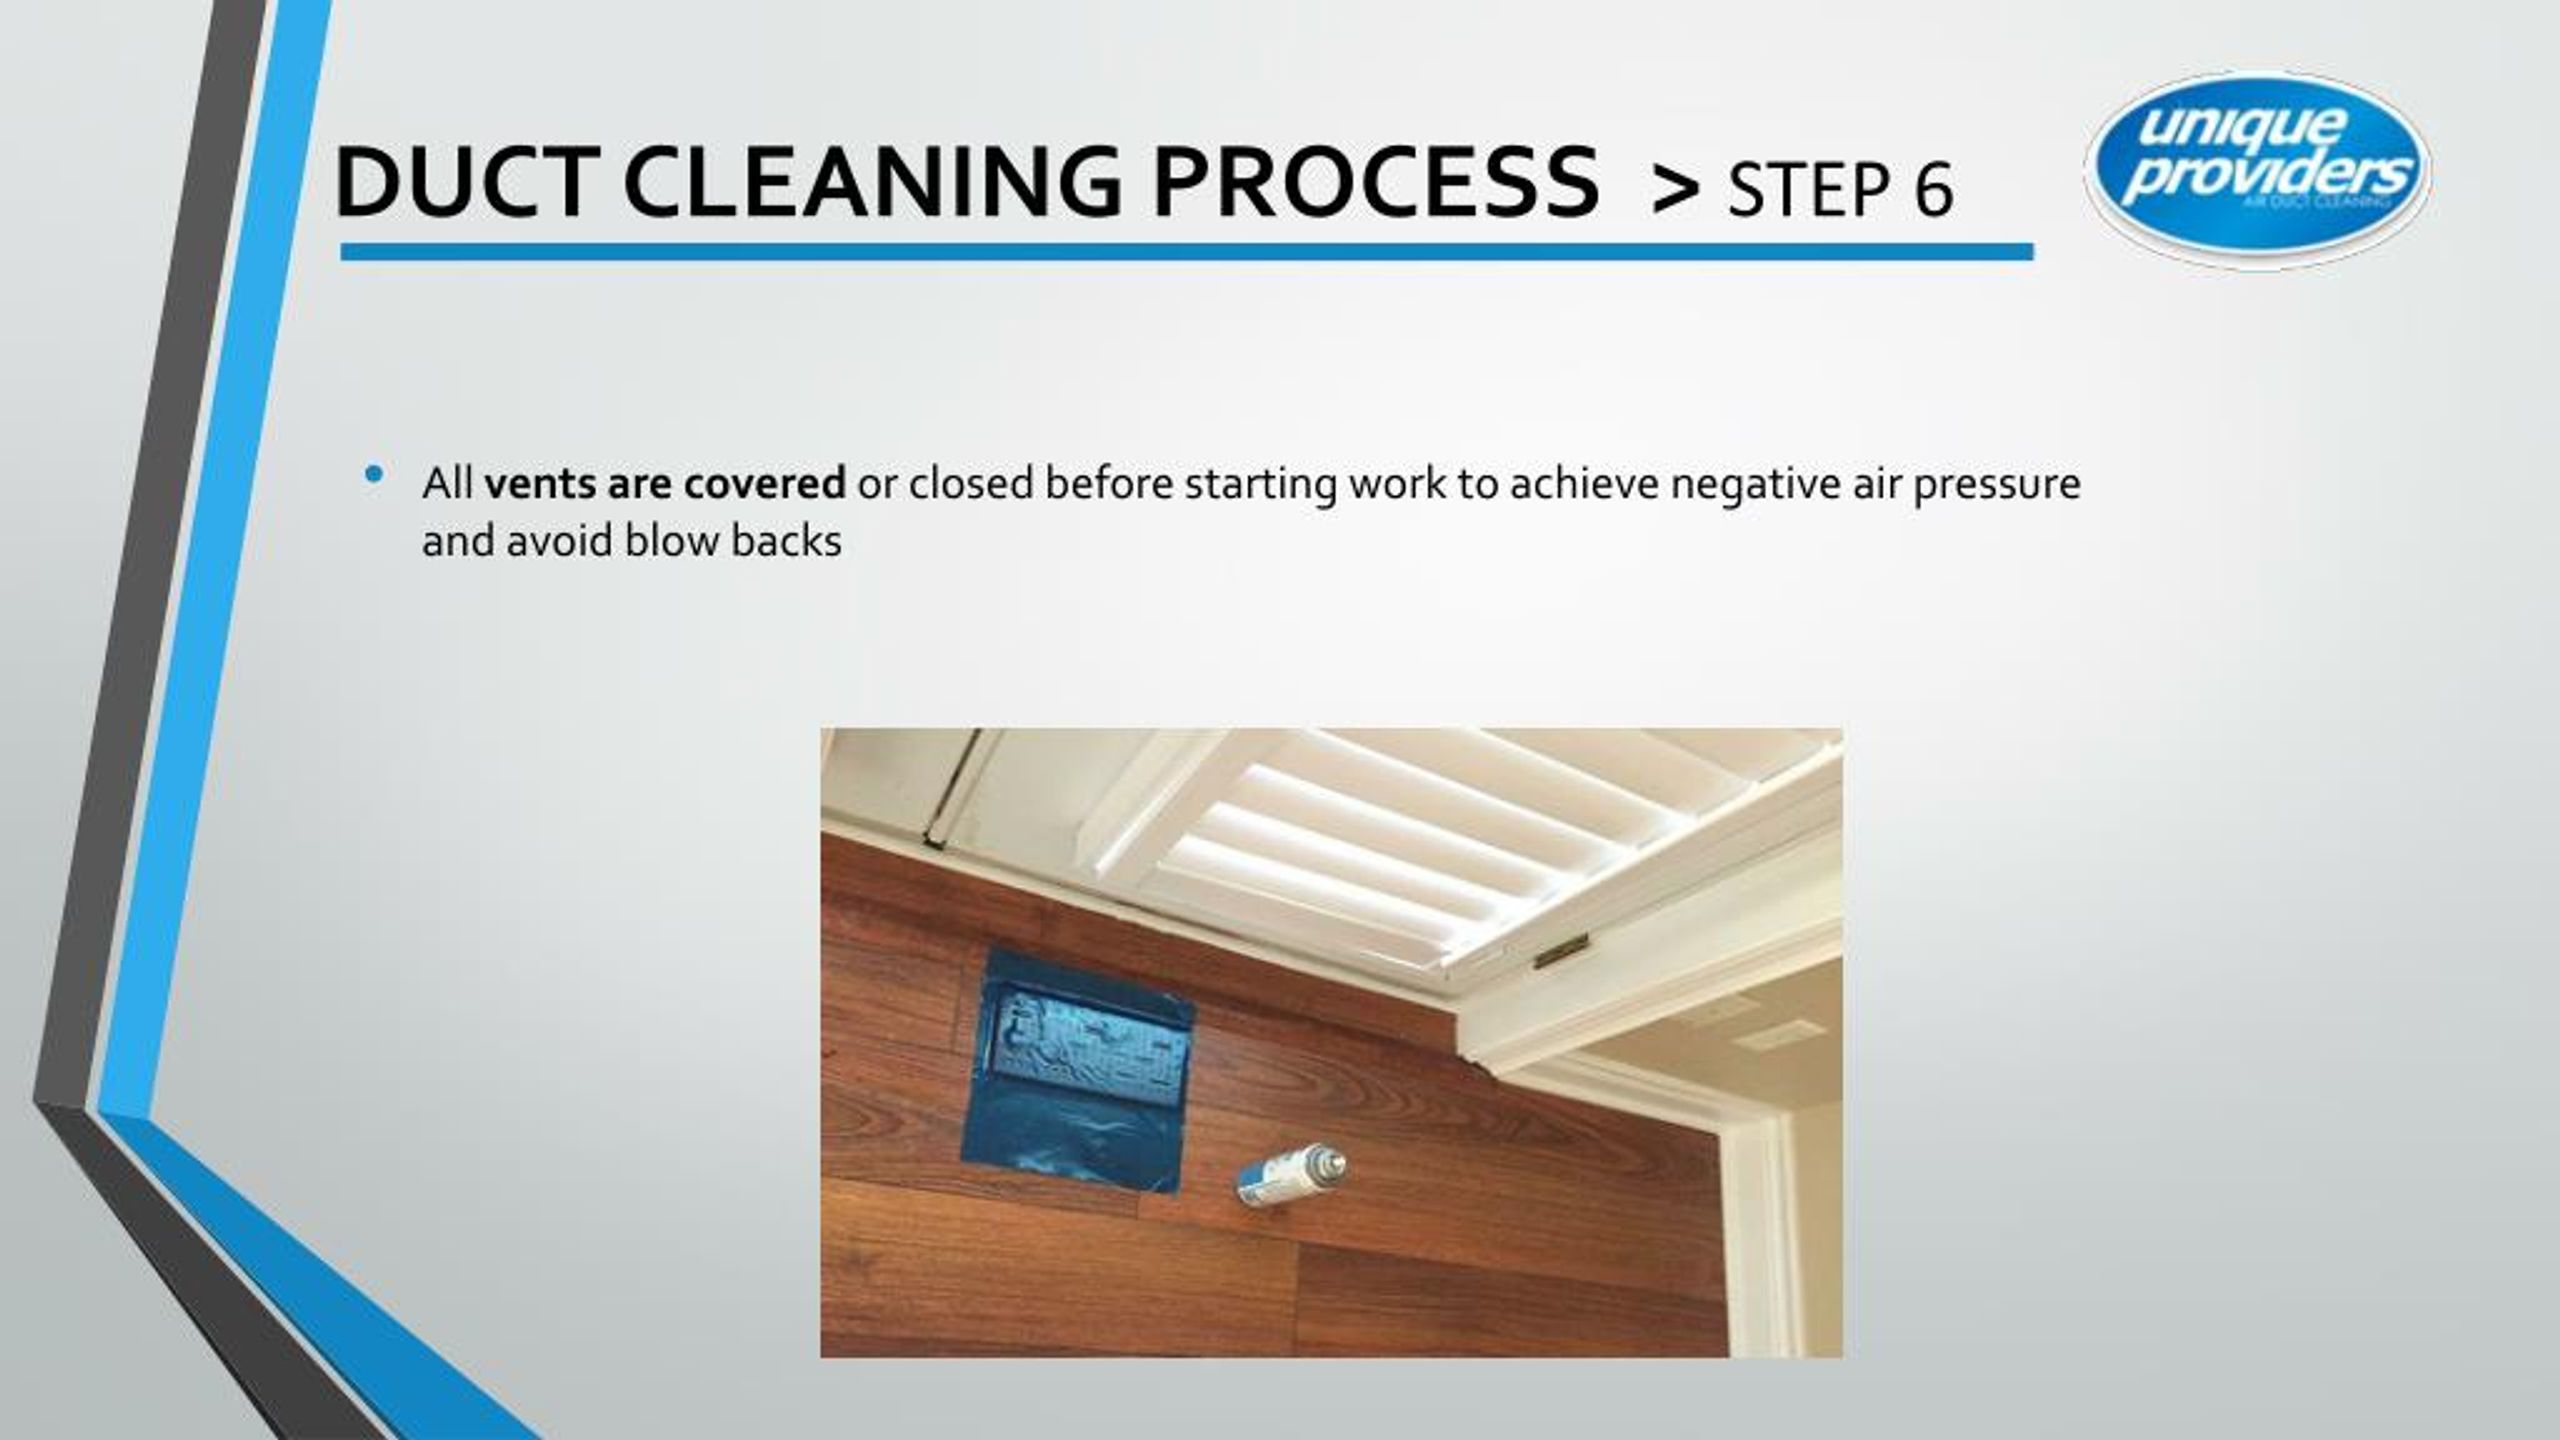
3. Section Off the Area: Close the vents in the rooms you're *not* cleaning to prevent dust from spreading.
4. Vacuum and Brush: Insert the vacuum hose and the flexible brush into the duct opening. Gently agitate the dust and debris with the brush while simultaneously vacuuming it up. Work in short sections, moving the brush and hose further into the duct as you go.
5. Limit Your Reach: *Do not* attempt to clean deep into the ductwork. You risk damaging the ducts or getting your brush stuck. Only clean as far as you can comfortably reach and see.
6. Repeat: Repeat this process for other accessible duct openings.
Step 3: Replace or Clean Registers and Diffusers
Registers and diffusers are the parts of the vent that direct airflow. They can accumulate a lot of dust.
1. Remove the Registers/Diffusers: Carefully remove these from the vent openings. They may be attached with screws or clips.
2. Clean Thoroughly: Wash them with soap and water, scrubbing away any accumulated dust and grime. A small brush may be helpful for getting into crevices.
3. Dry and Reinstall: Allow them to dry completely before reinstalling.
When to Call a Professional: Red Flags and Limitations
While DIY cleaning can address minor dust issues, there are situations where professional duct cleaning is essential. Here are some red flags:
- Visible Mold Growth: If you see any signs of mold inside your ducts, *do not* attempt to clean it yourself. Mold can be hazardous to your health, and improper cleaning can spread the spores throughout your home. A professional with specialized equipment and training is needed to safely remove mold.
- Rodent or Insect Infestation: If you find evidence of rodents or insects in your ductwork (droppings, nests, carcasses), a professional can properly clean and sanitize the ducts to eliminate the infestation and prevent future problems.
- Asbestos Concerns: As mentioned earlier, if you suspect your ductwork contains asbestos (common in older homes), *do not* disturb it. Call a qualified asbestos abatement contractor to assess the situation and safely remove the asbestos-containing materials.
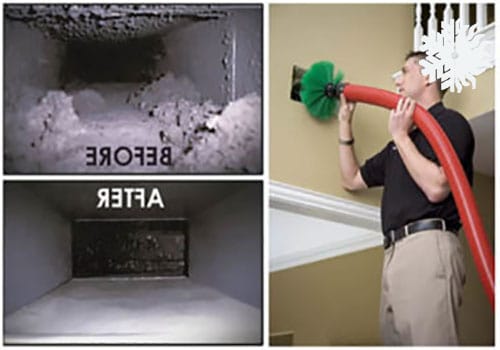
- Extensive Dust and Debris: If your visual inspection reveals a thick layer of dust and debris throughout the ductwork, DIY cleaning will likely be ineffective. A professional has the powerful equipment needed to thoroughly clean the entire system.
- Persistent Allergy Symptoms: If you've tried DIY cleaning and your allergy symptoms persist, it's time to consult a professional. They can identify and address any underlying issues that may be contributing to your symptoms.
- Inefficient HVAC System: If your HVAC system is running longer than usual, not heating or cooling properly, or your energy bills are unusually high, dirty ducts could be a contributing factor. A professional can clean the ducts and improve the system's efficiency.
- You Have No Idea Where the Ducts Go: Seriously. Modern ductwork can be complex. If you can only access a few vents, you're not going to be able to adequately clean the system.
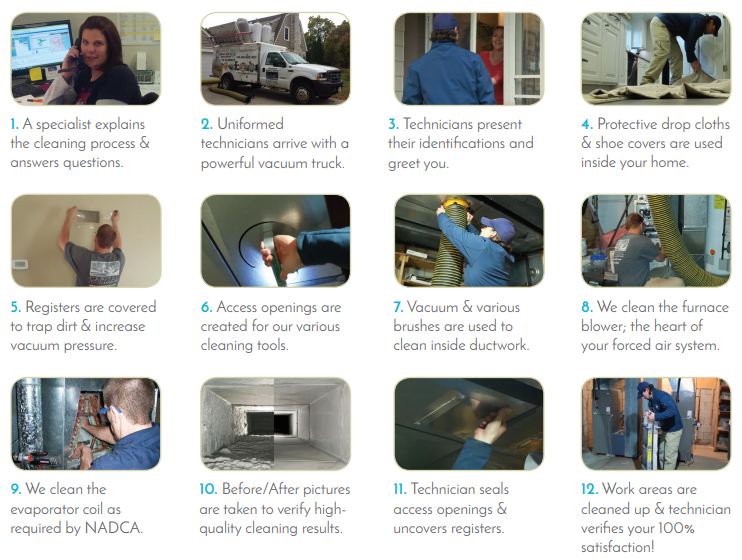
What Professional Duct Cleaners Do:
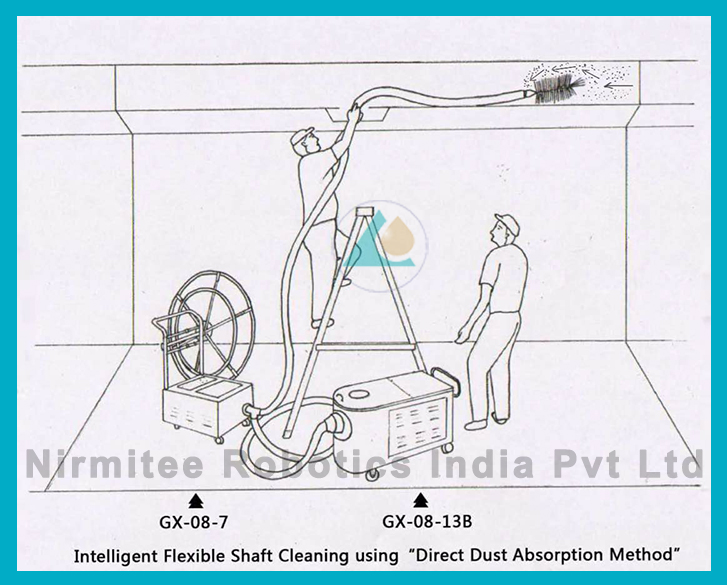
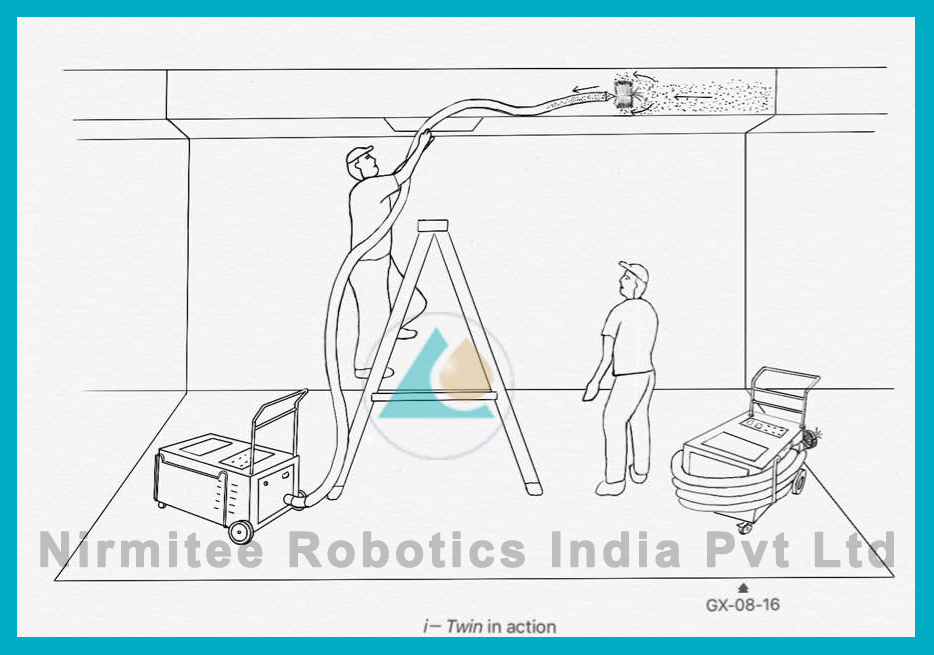
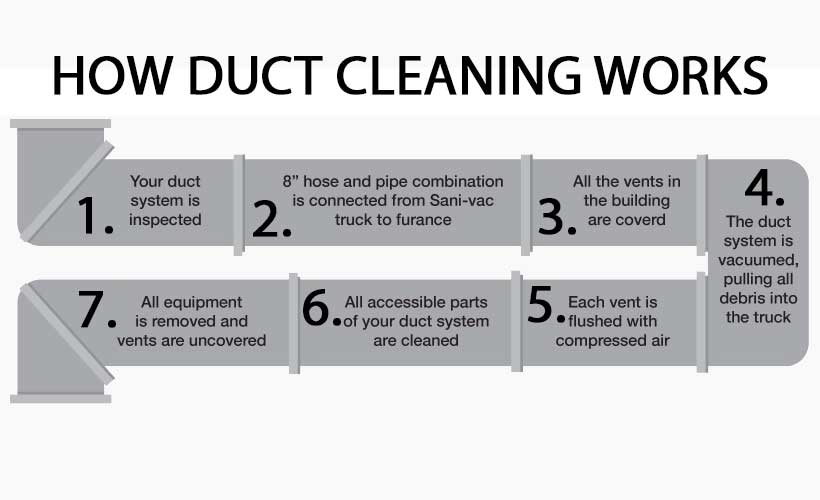
Professional duct cleaners use specialized equipment, including:
- Powerful Vacuum Systems: These vacuums are much stronger than household vacuums and can effectively remove even the most stubborn dust and debris.
- Rotary Brushes: These brushes are designed to scrub the inside of the ducts, loosening dirt and debris.
- Air Whips: These devices use compressed air to dislodge debris from the duct walls.
- Video Inspection Systems: These systems allow the technician to inspect the entire ductwork, identifying any problem areas.
- Sanitizers and Disinfectants: After cleaning, professionals may apply sanitizers or disinfectants to kill any remaining bacteria or mold spores.
Finding a Reputable Duct Cleaning Service
When choosing a duct cleaning service, be sure to:
- Get Recommendations: Ask friends, family, or neighbors for referrals.
- Check Online Reviews: Read reviews on sites like Yelp, Google, and the Better Business Bureau.
- Verify Licensing and Insurance: Ensure the company is licensed and insured to operate in your area.
- Ask About Their Process: Ask the company to explain their cleaning process in detail.
- Get a Written Estimate: Obtain a written estimate before any work begins.
- Beware of Low-Price Scams: Be wary of companies that offer extremely low prices. These companies may cut corners or use substandard equipment.
Maintenance Tips for Cleaner Ducts
Once your ducts are clean (whether by your own efforts or a professional's), here are some tips to keep them that way:
- Change Air Filters Regularly: As mentioned earlier, this is the most important step.
- Seal Duct Leaks: Leaky ducts allow dust and debris to enter the system. Seal any visible leaks with duct tape or mastic sealant. A professional can also perform a duct sealing service.
- Keep Your Home Clean: Regular cleaning and dusting will reduce the amount of dust that enters your ductwork.
- Control Humidity: High humidity can promote mold growth in your ducts. Use a dehumidifier if necessary.
- Consider Air Purifiers: Air purifiers can help remove dust, pollen, and other allergens from the air, reducing the amount that enters your ductwork.
By following these steps, you can diagnose and address ductwork problems, improve your indoor air quality, and keep your home healthy and comfortable. Remember to prioritize safety and know when to call in the professionals. A little knowledge and effort can go a long way in maintaining a clean and efficient HVAC system.