Geothermal Vs Air Source Heat Pump
Imagine this: It's a sweltering summer day or a frigid winter night, and your home isn't reaching the thermostat setting. You're left wondering why your geothermal or air source heat pump is struggling to keep you comfortable. Before you panic and call for expensive repairs, let's walk through some basic troubleshooting steps. We'll cover common issues, simple checks you can perform yourself, and when it's definitely time to call in a professional HVAC technician.
Understanding the Systems: A Quick Refresher
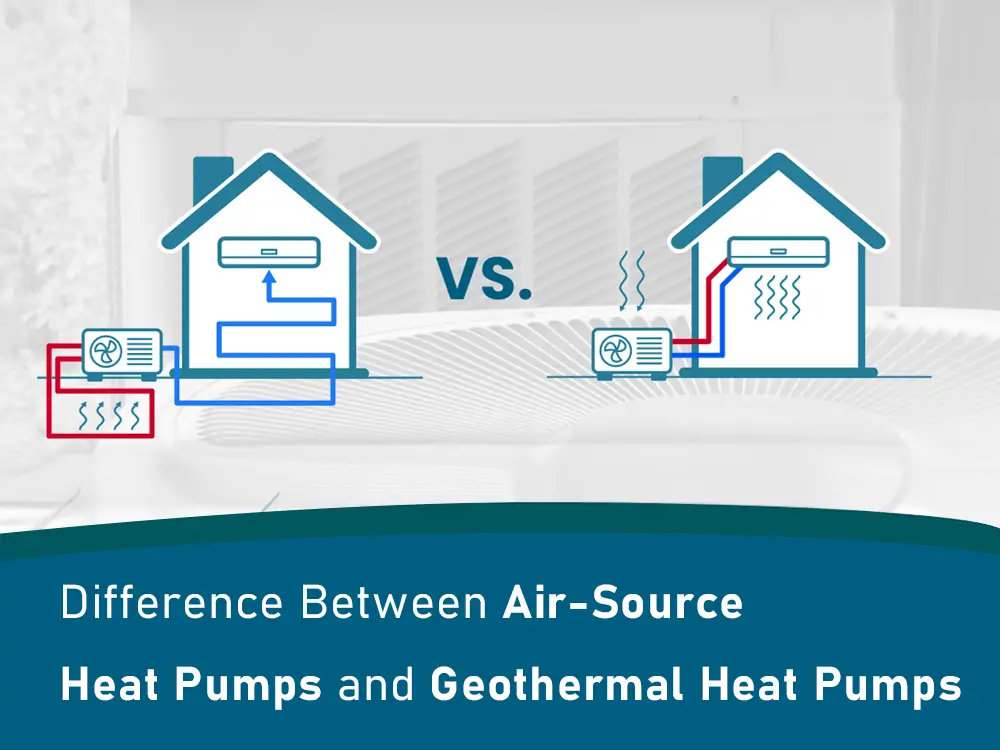
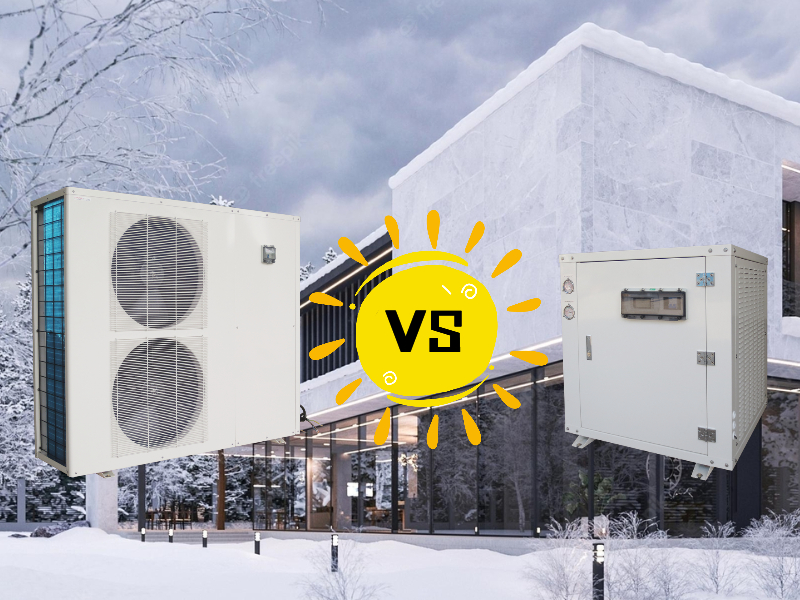
Both geothermal and air source heat pumps work by transferring heat rather than generating it. The key difference lies in where they extract heat from:
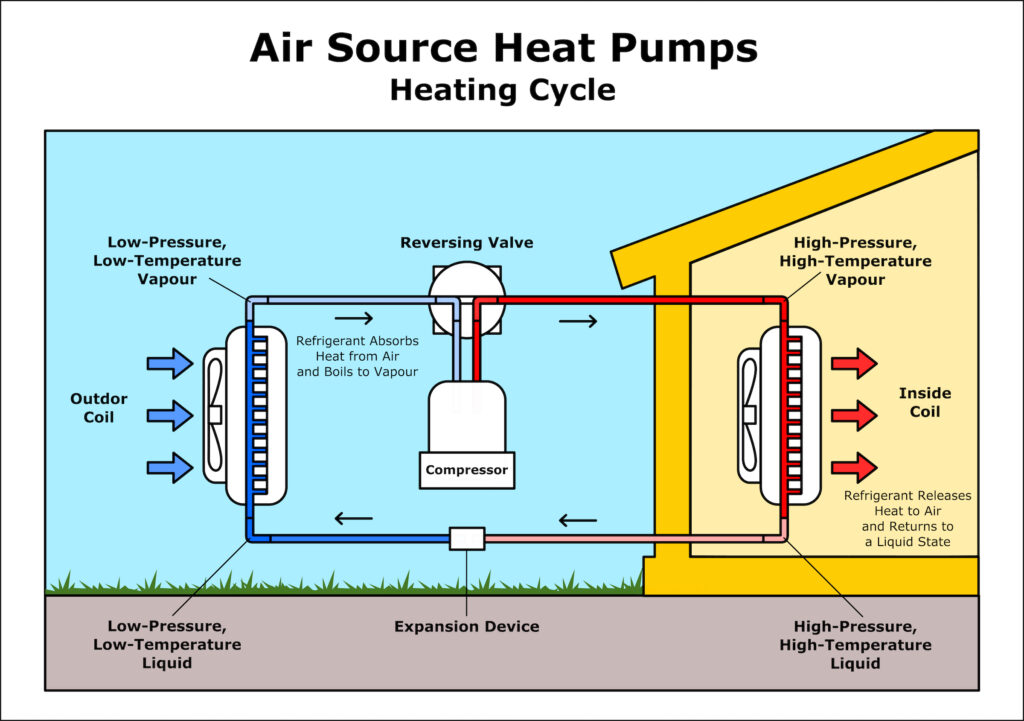
- Air Source Heat Pumps: Draw heat from the outside air (even in cold weather) to heat your home, and release heat into the outside air to cool your home.
- Geothermal Heat Pumps: Utilize the relatively constant temperature of the earth (underground) as a heat source in winter and a heat sink in summer. This makes them generally more efficient and consistent than air source models, but also more complex to install and repair.
Knowing the basics of your system will help you pinpoint potential problems more effectively.
Scenario: Insufficient Heating or Cooling
Let's focus on a very common problem: Your home isn't getting warm enough in winter or cool enough in summer, despite the thermostat being set appropriately.
Step 1: The Obvious Checks (No Tools Required)
Before diving into technical details, let's rule out the simple culprits.
- Thermostat Setting: Sounds basic, but double-check! Is the thermostat set to "Heat" or "Cool" mode? Is the temperature setting higher (for heat) or lower (for cooling) than the current room temperature? Ensure the thermostat is not in "auto" mode if you want manual control.
- Thermostat Batteries: Low or dead batteries can cause erratic behavior. Replace them with fresh ones.
- Air Vents: Are all air vents open and unobstructed in the rooms you're trying to heat or cool? Blocked vents restrict airflow and reduce the system's effectiveness. Check for furniture, rugs, or curtains blocking vents.
- Air Filter: A dirty air filter is the *most common* cause of reduced heating/cooling performance in *both* air source and geothermal systems. A clogged filter restricts airflow, forcing the system to work harder and less efficiently. This is your first DIY action.
DIY Action: Locate your air filter (usually near the indoor unit). Remove it and hold it up to the light. If you can't easily see through it, it's time for a replacement. Use the correct size and type recommended by your manufacturer. Mark the date on the new filter as a reminder for future changes (every 1-3 months is a good starting point). Changing your filter is one of the easiest and most important maintenance tasks you can perform.
Step 2: Basic Visual Inspection (Still No Tools)
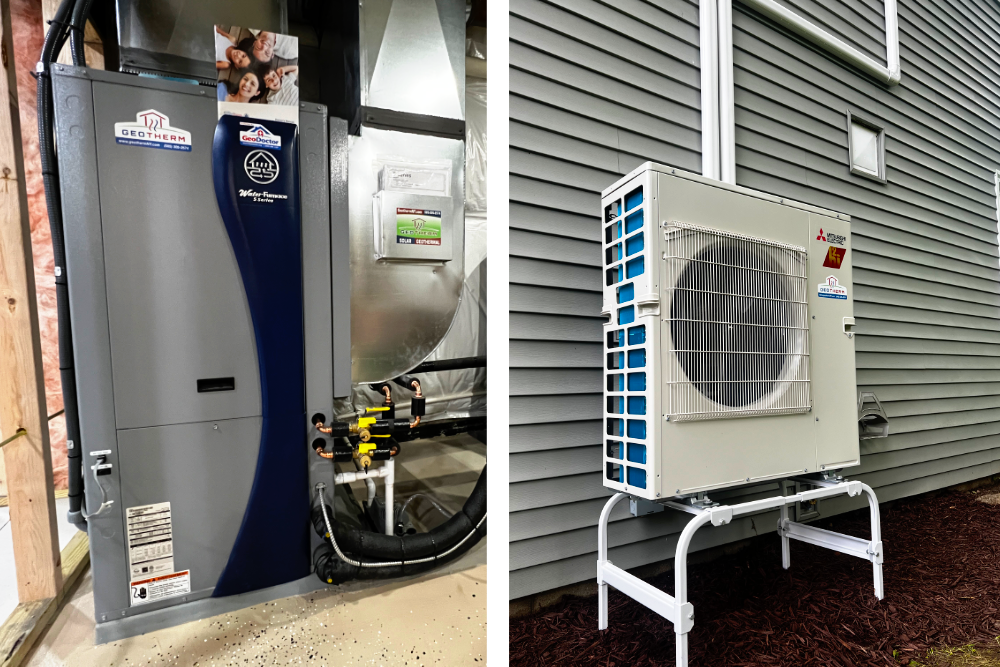
Now, let's take a closer look at the indoor and outdoor (or ground loop components for geothermal) units.
- Indoor Unit (Air Handler): Look for any signs of ice buildup on the coils (especially in winter). Excessive ice indicates a potential refrigerant leak or airflow problem. If you see ice, turn the system off and let it thaw completely before proceeding.
- Outdoor Unit (Air Source Only): Check for debris (leaves, twigs, snow) blocking the unit. Clear away any obstructions to ensure proper airflow. Is the fan spinning freely when the system is running? Listen for unusual noises (grinding, squealing) that could indicate a motor problem. DO NOT insert anything into the unit while it's running.
- Geothermal Ground Loop (If accessible): This is often underground, but if you have visible piping or a well head, inspect for leaks, corrosion, or damage. Leaks in the ground loop are a serious issue requiring professional attention.
- Ductwork (If accessible): Inspect any visible ductwork for leaks or disconnections. Sealing leaky ducts can significantly improve system efficiency. Look for gaps at the joints of rectangular ducts and gaps around where the ducts connect to registers.
DIY Action: Clear any debris around the outdoor unit (air source) and seal any easily accessible ductwork leaks with duct tape (a temporary fix – foil tape is better for long-term repairs). Ensure that all outside vents are open and have no blockage.
Step 3: More Detailed Checks (Requires Basic Equipment)
For these steps, you'll need a few basic tools:
- Multimeter: To check voltage.
- Screwdrivers (various sizes): For removing access panels.
- Voltage Tester (Non-Contact): To confirm power is off before working on electrical components.
Safety First: Before working on any electrical components, always turn off the power to the unit at the circuit breaker. Use a non-contact voltage tester to confirm that the power is off before proceeding.
- Check the Circuit Breaker: Make sure the circuit breaker for the heat pump hasn't tripped. If it has, reset it. If it trips again immediately, there's likely a short circuit, and you'll need a professional.
- Inspect the Capacitor (Air Source Only): The capacitor provides the electrical surge needed to start the compressor motor. With the power OFF, carefully remove the access panel to the outdoor unit. DO NOT touch any components inside without verifying the power is off. Look for a cylindrical component (the capacitor) that's bulging, leaking, or corroded. A faulty capacitor is a common cause of heat pump failure. Replacing a capacitor can be dangerous due to stored electrical charge. Only attempt this if you have experience working with electrical components and know how to safely discharge a capacitor. If you're unsure, call a professional.
- Check Blower Motor (Indoor Unit): Again, with the power OFF, access the blower motor. Inspect the motor and fan blades for dirt and debris. Try to manually turn the fan blades (power off!). They should spin freely. If they're stiff or making noise, the motor may be failing.
DIY Action (with caution and electrical safety knowledge): If you're comfortable working with electrical components, you *might* be able to replace a capacitor, but this is generally recommended for experienced DIYers only. *Otherwise, call a professional*. Clean the blower motor and fan blades with a brush and vacuum if needed.
Step 4: Geothermal Specific Issues
Geothermal systems, while more efficient, have some unique potential problems:
- Ground Loop Issues: These are the hardest to diagnose without specialized equipment. A decrease in performance can indicate a leak in the ground loop, reduced flow rate, or a problem with the circulating pump. These problems require a professional.
- Circulating Pump: This pump circulates the fluid through the ground loop. Check the pump for proper operation. Listen for unusual noises or vibration. Ensure the pump is receiving power. A failed pump will prevent heat transfer.
- Desuperheater Malfunction (if equipped): Some geothermal systems have a desuperheater that preheats domestic hot water using excess heat from the heat pump. If your hot water isn't as hot as usual, the desuperheater may be malfunctioning.
DIY Action: Check the circulating pump for power and listen for unusual noises. Beyond that, geothermal issues generally require professional diagnosis and repair.
When to Call a Professional
There are many situations where attempting DIY repairs can be risky or ineffective. Always call a qualified HVAC technician if:
- You suspect a refrigerant leak. Handling refrigerants requires specialized equipment and training.
- You're uncomfortable working with electrical components.
- You suspect a major component failure (compressor, motor).
- You have a geothermal system with ground loop issues.
- The problem persists after you've performed the basic troubleshooting steps.
- You smell gas. Immediately evacuate the premises and call the gas company.
In general, any repair that involves opening the sealed refrigerant system or dealing with high-voltage electrical components should be left to a professional.
Preventive Maintenance
The best way to avoid heating and cooling problems is to perform regular preventive maintenance. Here are some key tasks:
- Change air filters regularly (every 1-3 months).
- Schedule annual professional maintenance for your system. A technician will inspect and clean the system, check refrigerant levels, lubricate moving parts, and identify potential problems before they become major issues.
- Keep the outdoor unit (air source) clean and free of debris.
- Trim vegetation away from the outdoor unit.
- Inspect ductwork for leaks and seal them as needed.
By following these troubleshooting steps and performing regular maintenance, you can keep your geothermal or air source heat pump running efficiently and comfortably for years to come. Don't hesitate to call a professional when needed – it's often the safest and most cost-effective solution in the long run.