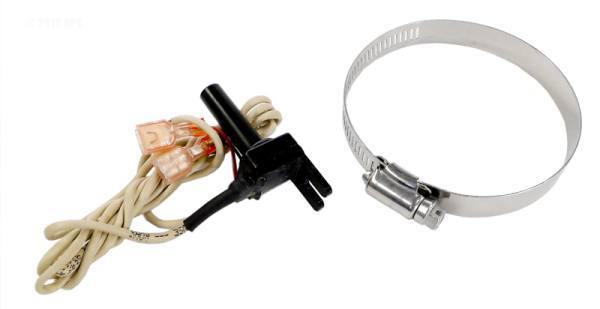
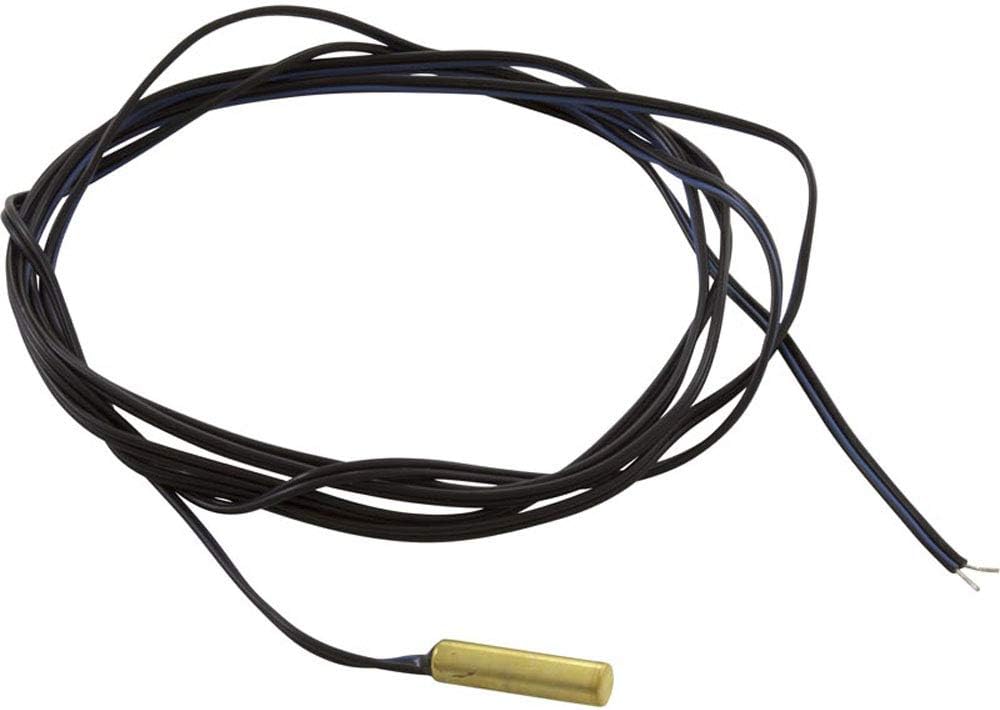
Hayward H400 Temperature Sensor

If your pool or spa isn't heating correctly, or if you're seeing error codes related to temperature on your Hayward H400 heater, the temperature sensor might be the culprit. This article will guide you through troubleshooting and potentially replacing this vital component. Remember, working with gas and electricity can be dangerous. If you're uncomfortable at any point, call a qualified HVAC or pool technician.
Understanding the Hayward H400 Temperature Sensor
The temperature sensor, also known as a thermistor, is a critical part of your Hayward H400 heater. It constantly monitors the water temperature and sends this data to the heater's control board. The control board uses this information to regulate the gas valve, ensuring the water heats to your desired temperature. A faulty sensor can lead to:
- Inaccurate temperature readings
- Heater not turning on
- Heater overheating
- Error codes on the display panel (e.g., HL, FLO)
- Short cycling (heater turning on and off frequently)
Safety First!
Before starting any work on your Hayward H400 heater, take these precautions:
- Turn off the power to the heater at the breaker. Double-check with a multimeter to ensure the power is off.
- Turn off the gas supply to the heater. Locate the gas shut-off valve (usually a quarter-turn valve) on the gas line leading to the heater and turn it to the "off" position.
- Allow the heater to cool down completely. Avoid working on the heater immediately after it has been running.
- Work in a well-ventilated area.
- Wear safety glasses to protect your eyes.
Warning: Working with gas and electricity can be extremely dangerous. If you are not comfortable performing these steps, contact a qualified professional. Improper repairs can lead to gas leaks, fire hazards, or electrical shock.
Tools and Materials You'll Need
Here's a list of tools and materials you'll likely need for troubleshooting and replacing the temperature sensor:
- Multimeter
- Screwdrivers (Phillips and flathead)
- Wrench (size will vary depending on your heater model)
- Needle-nose pliers
- New Hayward H400 temperature sensor (verify the correct part number for your specific model)
- Wire strippers/crimpers
- Wire connectors (butt connectors or similar)
- Teflon tape (for sealing threaded connections)
- Bucket and towels (for catching any water spills)
- Digital camera or smartphone (to take pictures of wiring before disconnecting)
Troubleshooting the Temperature Sensor
Before replacing the sensor, let's try some troubleshooting steps to determine if it's actually faulty.
1. Visual Inspection
Start by visually inspecting the sensor and its wiring:
- Check for any signs of physical damage to the sensor itself. Look for cracks, breaks, or corrosion.
- Examine the wiring for any loose connections, frayed wires, or signs of rodent damage.
- Ensure the sensor is properly seated in its well.
2. Checking Resistance with a Multimeter
This is the most common method for testing a temperature sensor. You'll need to know the expected resistance range of the sensor at different temperatures. Refer to your Hayward H400 heater's service manual or the sensor's specifications for this information. A typical thermistor will decrease in resistance as the temperature increases.
- Disconnect the sensor wires from the control board. Make sure the power is off!
- Set your multimeter to the "Ohms" setting (resistance measurement).
- Touch the multimeter probes to the sensor's terminals.
- Compare the resistance reading on the multimeter to the expected value at the current water temperature. A significant deviation indicates a faulty sensor.
Example: Let's say the manual states the sensor should read 10,000 Ohms at 77°F (25°C). If your multimeter reads significantly higher or lower than that, the sensor is likely bad.
3. Checking for Continuity
While less precise than measuring resistance, you can also check for continuity. Set your multimeter to the continuity setting (often indicated by a sound wave symbol). If the multimeter doesn't beep when you touch the probes to the sensor terminals, there's a break in the circuit, indicating a faulty sensor.
Replacing the Temperature Sensor
If the troubleshooting steps indicate a faulty temperature sensor, here's how to replace it:
- Turn off the power and gas to the heater (as described in the "Safety First!" section).
- Drain the heater. Locate the drain plug at the bottom of the heater and remove it to drain the water. Use a bucket to catch the water.
- Disconnect the wiring. Carefully disconnect the wires from the old sensor. Take pictures before disconnecting to ensure you reconnect the wires correctly.
- Remove the old sensor. The sensor may be threaded into a well or secured with a clip. Use a wrench or pliers to carefully remove the old sensor. If it's threaded, use Teflon tape on the new sensor's threads to ensure a watertight seal.
- Install the new sensor. Install the new sensor in the same way the old one was removed. If it's threaded, tighten it securely but avoid overtightening, which could damage the threads.
- Reconnect the wiring. Reconnect the wires to the new sensor, matching the wiring configuration you documented with your pictures. Use wire connectors to ensure secure connections.
- Replace the drain plug. Reinstall and tighten the drain plug.
- Turn on the water supply. Allow the heater to fill with water. Check for leaks around the sensor and drain plug. Tighten the connections if necessary.
- Turn on the gas supply.
- Turn on the power.
- Test the heater. Turn on the heater and monitor its operation. Ensure it heats the water to the desired temperature and that no error codes are displayed.
Common Issues After Replacement
Even after replacing the sensor, you might encounter some issues:
- Error codes persist: Double-check the wiring connections and ensure the new sensor is the correct part number for your heater model. The control board might need to be reset after replacing the sensor. Refer to your heater's manual for instructions.
- Water leaks: Ensure the sensor and drain plug are properly sealed with Teflon tape. Tighten the connections if necessary.
- Heater still not heating correctly: Other components, such as the gas valve, igniter, or control board, might be faulty. Further troubleshooting or professional assistance may be required.
When to Call a Professional
While replacing the temperature sensor is a relatively straightforward DIY task, there are times when it's best to call a qualified HVAC or pool technician:
- You're not comfortable working with gas or electricity.
- You're unable to diagnose the problem.
- The heater requires more complex repairs beyond replacing the temperature sensor.
- You suspect a gas leak.
Estimate of Professional Repair Cost: A professional Hayward H400 temperature sensor replacement typically costs between $150 and $350, depending on the technician's labor rate and the cost of the sensor. This price includes diagnosis, part replacement, and testing.
Preventative Maintenance
To prolong the life of your Hayward H400 temperature sensor and heater, consider these preventative maintenance tips:
- Regularly inspect the heater for signs of corrosion, leaks, or damage.
- Keep the area around the heater clean and free of debris.
- Ensure proper ventilation around the heater.
- Have the heater professionally inspected and serviced annually.
By following these guidelines, you can troubleshoot and potentially repair a faulty Hayward H400 temperature sensor, saving you time and money. Remember to prioritize safety and call a professional when needed.