Heat Pump Air Flow Direction

Is your heat pump blowing cold air when it should be warm, or warm air when you're expecting cool relief? One of the most common, and frustrating, issues homeowners face with their heat pump systems is incorrect airflow direction. This leads to uncomfortable temperatures, inefficient operation, and higher energy bills. Let's walk through a systematic troubleshooting process to get your heat pump blowing air in the right direction, restoring comfort and efficiency to your home.
Understanding Normal Airflow
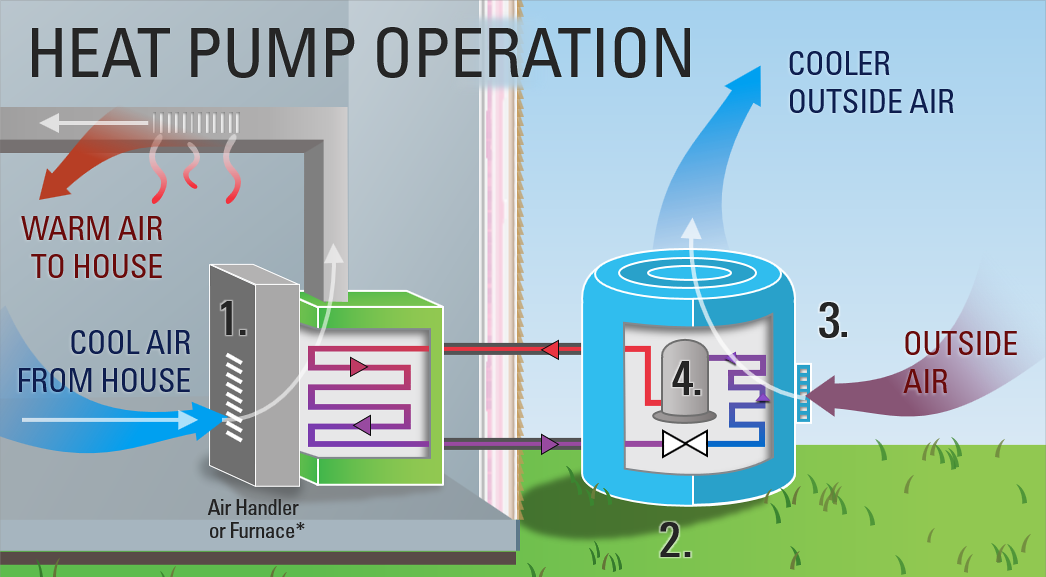
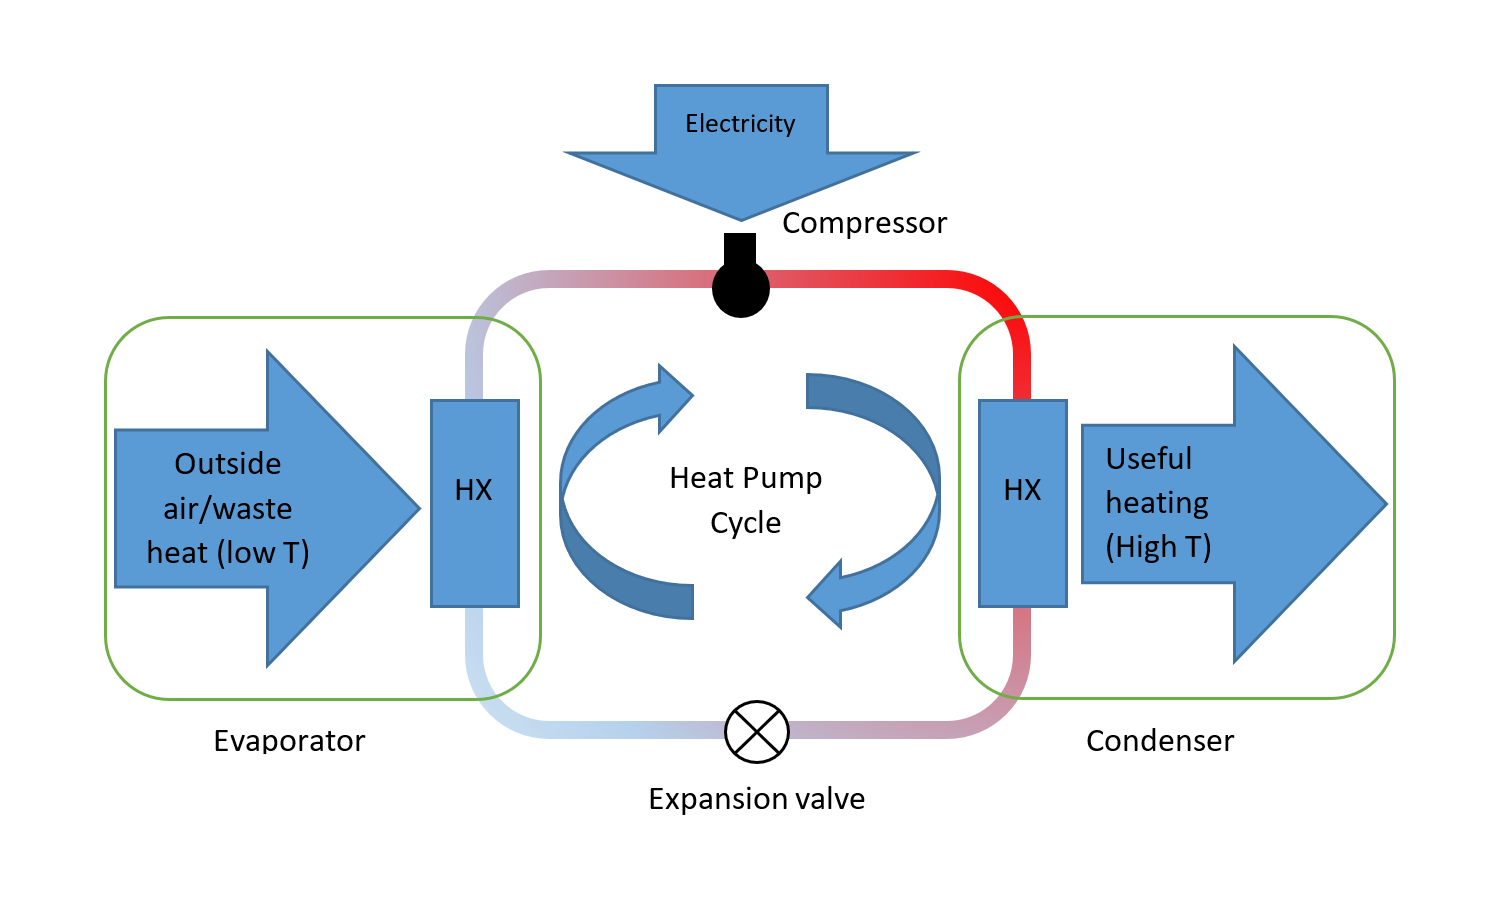
Before diving into troubleshooting, it’s essential to understand how a heat pump *should* function. In the heating mode, your heat pump extracts heat from the outside air (even when it’s cold!) and transfers it inside, blowing warm air through your vents. In the cooling mode, the process is reversed – heat is extracted from inside your home and released outside, resulting in cool air blowing from your vents.
It's important to note that even in heating mode, the air coming from the vents might not feel scorching hot like a traditional furnace. Heat pumps provide a gentler, more consistent heat.
Initial Checks (No Tools Required)
Let’s start with the simplest things you can check, requiring no tools whatsoever.
1. Thermostat Setting
This sounds obvious, but it's the most common culprit. Double-check that your thermostat is set to the correct mode: "Heat" for warming your home and "Cool" for air conditioning. Ensure the desired temperature is set higher than the current room temperature for heating and lower for cooling. Sometimes, a simple accidental button press can cause the issue.
Also, check the "fan" setting on your thermostat. If it's set to "On," the fan will run continuously, even when the heat pump isn't actively heating or cooling. This can cause drafts and make it feel like the system isn't working correctly. Set it to "Auto" so the fan only runs when the heat pump is actively heating or cooling.
2. Air Filter
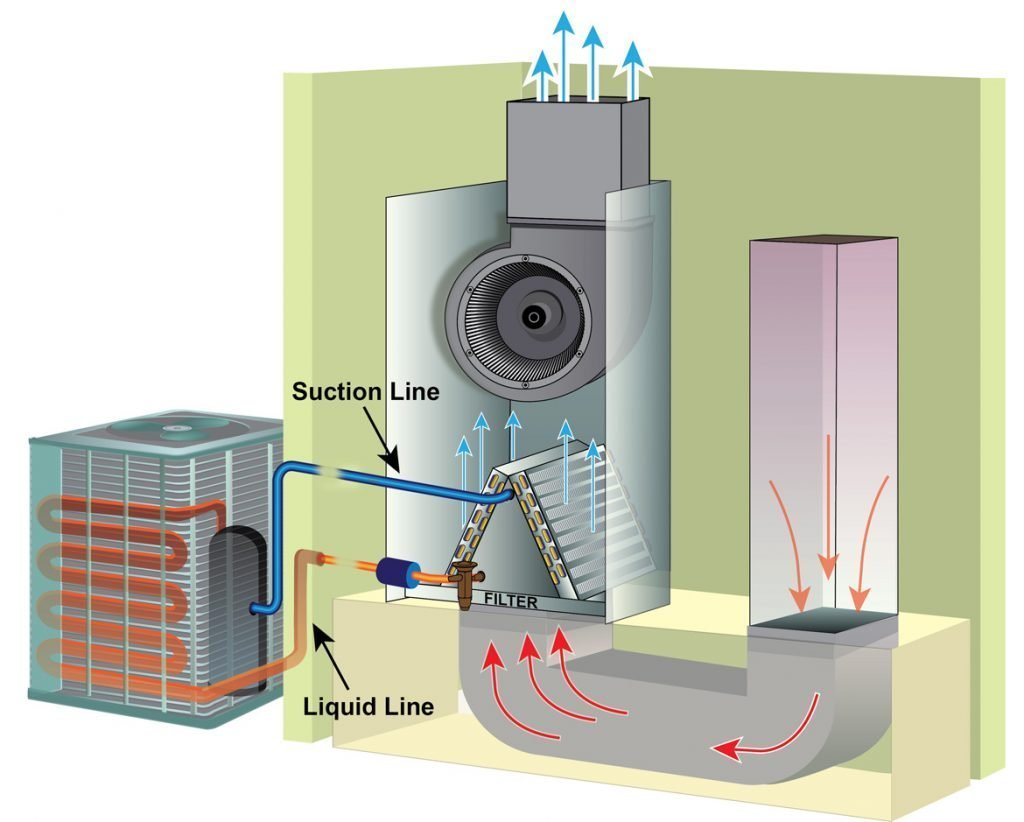
A dirty air filter is a major restriction to airflow. It forces your heat pump to work harder, reduces efficiency, and can even cause the system to overheat or freeze up. A clogged filter can significantly impact the temperature of the air being delivered. Locate your air filter (usually in the indoor unit or a return air vent) and inspect it. If it’s visibly dirty, replace it immediately.
A good rule of thumb is to replace your air filter every 1-3 months, depending on usage and the type of filter.
3. Supply and Return Vents
Ensure that all supply and return vents are open and unobstructed. Furniture, rugs, or curtains blocking vents can significantly reduce airflow. Make sure nothing is physically blocking the flow of air into or out of the vents. Walk through your house and verify this for every vent.
4. Outdoor Unit
Take a quick look at your outdoor heat pump unit. Are there any obvious obstructions like snow, ice, leaves, or debris blocking the unit? Clear away any visible obstructions. Do NOT attempt to remove ice buildup on the coils yourself, as you could damage the unit. If you see excessive ice, that could point to a different problem that requires professional attention.
More Advanced Diagnosis (Requires Basic Tools)
If the initial checks didn't solve the problem, it's time to dig a little deeper. These steps may require some simple tools and a bit more technical knowledge.
1. Check for Ice Buildup on the Outdoor Unit
In heating mode, it's normal for some frost to form on the outdoor unit. However, excessive ice buildup (covering a significant portion of the coils) indicates a problem. This could be due to a refrigerant leak, a malfunctioning defrost cycle, or a faulty reversing valve. This is generally a job for a professional HVAC technician.
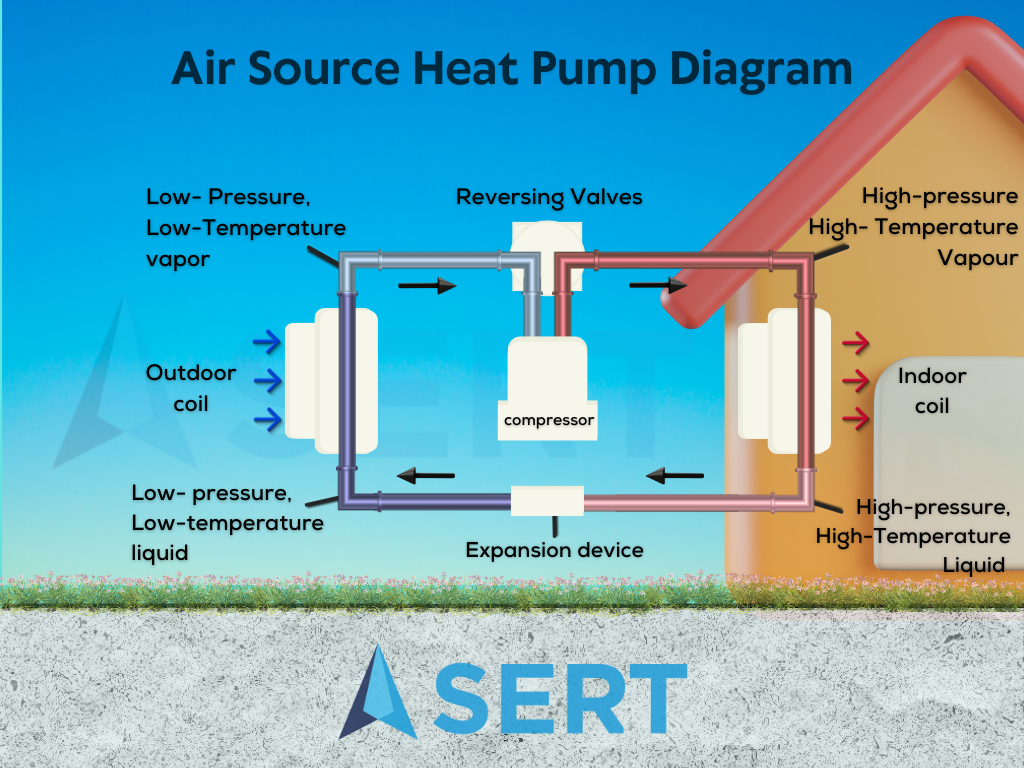
2. Test the Reversing Valve (Requires a Multimeter - proceed with caution!)
The reversing valve is the component that switches the heat pump between heating and cooling modes. If it's stuck, your heat pump might be blowing cool air in heating mode or warm air in cooling mode. This test requires a multimeter and some electrical knowledge. If you are not comfortable working with electricity, DO NOT attempt this step and call a professional.
Here's a simplified overview:
* Safety First: Turn off the power to the heat pump at the breaker box. * Locate the reversing valve on the outdoor unit (it's usually a cylindrical component with several refrigerant lines connected to it). * Use your multimeter to check the voltage to the reversing valve solenoid. You should see a voltage reading when the system is calling for the opposite mode (e.g., if the system is set to heat, you should see voltage when the unit tries to switch to cool). Consult your heat pump's wiring diagram for specific voltage requirements. * If there's no voltage, the problem could be a faulty thermostat, wiring issue, or control board problem. This needs professional diagnosis and repair. * If there *is* voltage but the reversing valve isn't switching, the valve itself may be faulty and need replacement. This is also a job for a qualified HVAC technician.3. Check for Leaks in Ductwork
Leaky ductwork can significantly reduce the efficiency of your heat pump system and contribute to airflow problems. You can visually inspect accessible ductwork (in attics, basements, or crawl spaces) for any obvious holes, tears, or disconnections. Use duct tape or mastic sealant to seal any minor leaks you find. However, if the leaks are extensive or difficult to reach, it's best to have a professional inspect and seal the ductwork.
Feel around the seams of ductwork while the heat pump is running. If you feel air escaping, that indicates a leak.
4. Assess Blower Motor Operation
The blower motor is responsible for circulating air through your home. If it's not functioning correctly, you'll experience weak airflow. To assess the blower motor:
* Listen to the indoor unit: Is the blower motor running? Does it sound unusually noisy or weak? * Check the blower motor capacitor: The capacitor provides the initial "kick" to start the motor. A failing capacitor is a common cause of blower motor problems. *This requires disconnecting power and using a multimeter to test the capacitor. **If you're not comfortable working with electrical components, call a professional.*** * If the blower motor is not running or sounds faulty, it likely needs replacement. This is best left to a qualified HVAC technician.When to Call a Professional
While many airflow problems can be addressed with simple troubleshooting steps, some issues require the expertise of a qualified HVAC technician. Call a professional immediately if you encounter any of the following:
- Refrigerant Leaks: Low refrigerant levels can cause ice buildup, inefficient operation, and damage to the compressor. Refrigerant handling requires specialized equipment and certifications.
- Electrical Problems: If you suspect any electrical issues, such as faulty wiring, blown fuses, or malfunctioning control boards, do not attempt to repair them yourself. Electrical work can be dangerous and requires specialized knowledge.
- Compressor Problems: The compressor is the heart of the heat pump. If it's failing, you'll likely hear unusual noises or experience a complete lack of heating or cooling. Compressor repairs are complex and expensive.
- Reversing Valve Issues: Replacing a faulty reversing valve requires specialized tools and knowledge of refrigerant handling.
- Extensive Ductwork Damage: Significant leaks or damage to your ductwork can be difficult to repair yourself and may require professional assessment and replacement.
- You are Uncomfortable or Unsure: If at any point you feel uncomfortable or unsure about any of the troubleshooting steps, it's always best to err on the side of caution and call a professional.
By following these troubleshooting steps, you can often diagnose and resolve common heat pump airflow problems yourself. Remember to prioritize safety and call a professional when necessary. With a little patience and effort, you can restore comfort and efficiency to your home!
Always remember to turn off the power to your heat pump before performing any maintenance or repairs.