High Pressure Switch On Ac Compressor

Imagine this: It's a sweltering summer day, and you're looking forward to the cool relief of your air conditioning. You switch it on, but instead of a refreshing breeze, you're met with... nothing. Or, worse, a weak, barely-there airflow that does little to combat the heat. While there could be several reasons for this, a common culprit, especially in your car's AC system, is a faulty high-pressure switch on the AC compressor.
This article will guide you through a step-by-step troubleshooting process to identify if the high-pressure switch is the issue and explore some basic DIY fixes you can attempt. Remember, safety is paramount. If you're uncomfortable with any step, or if the problem involves complex electrical or refrigerant work, always consult a qualified HVAC technician or mechanic.
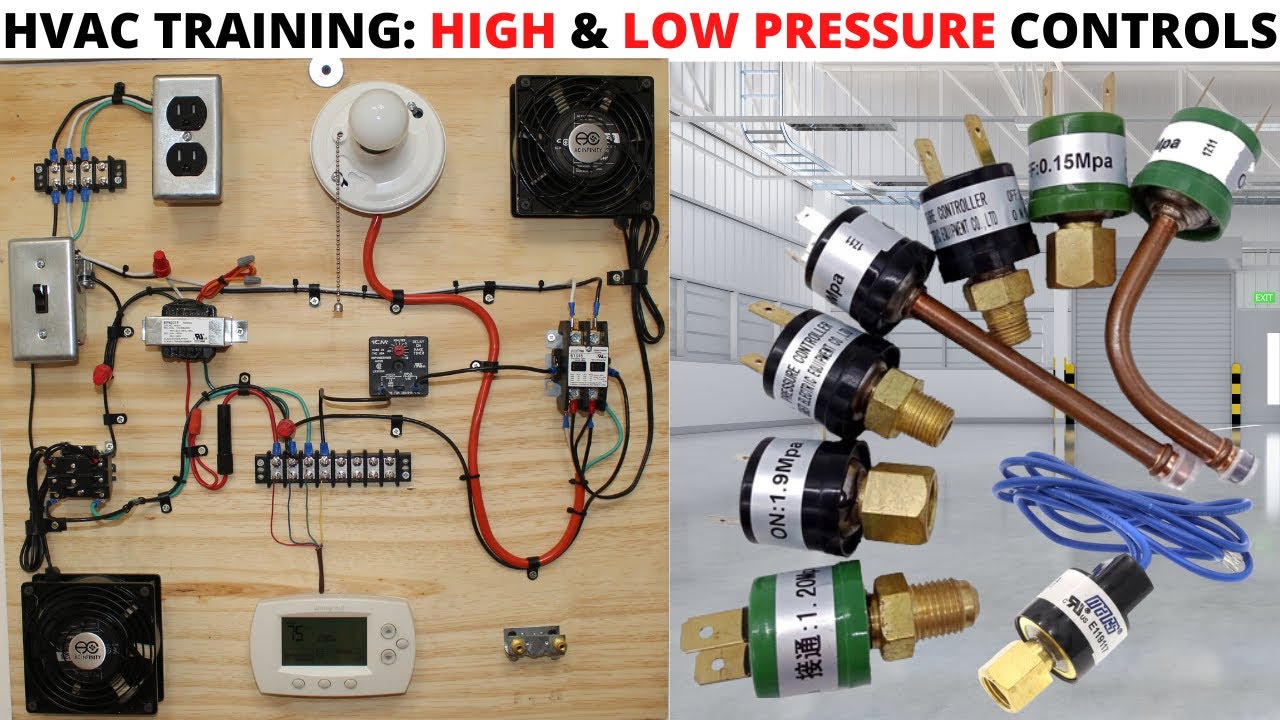
Understanding the High-Pressure Switch
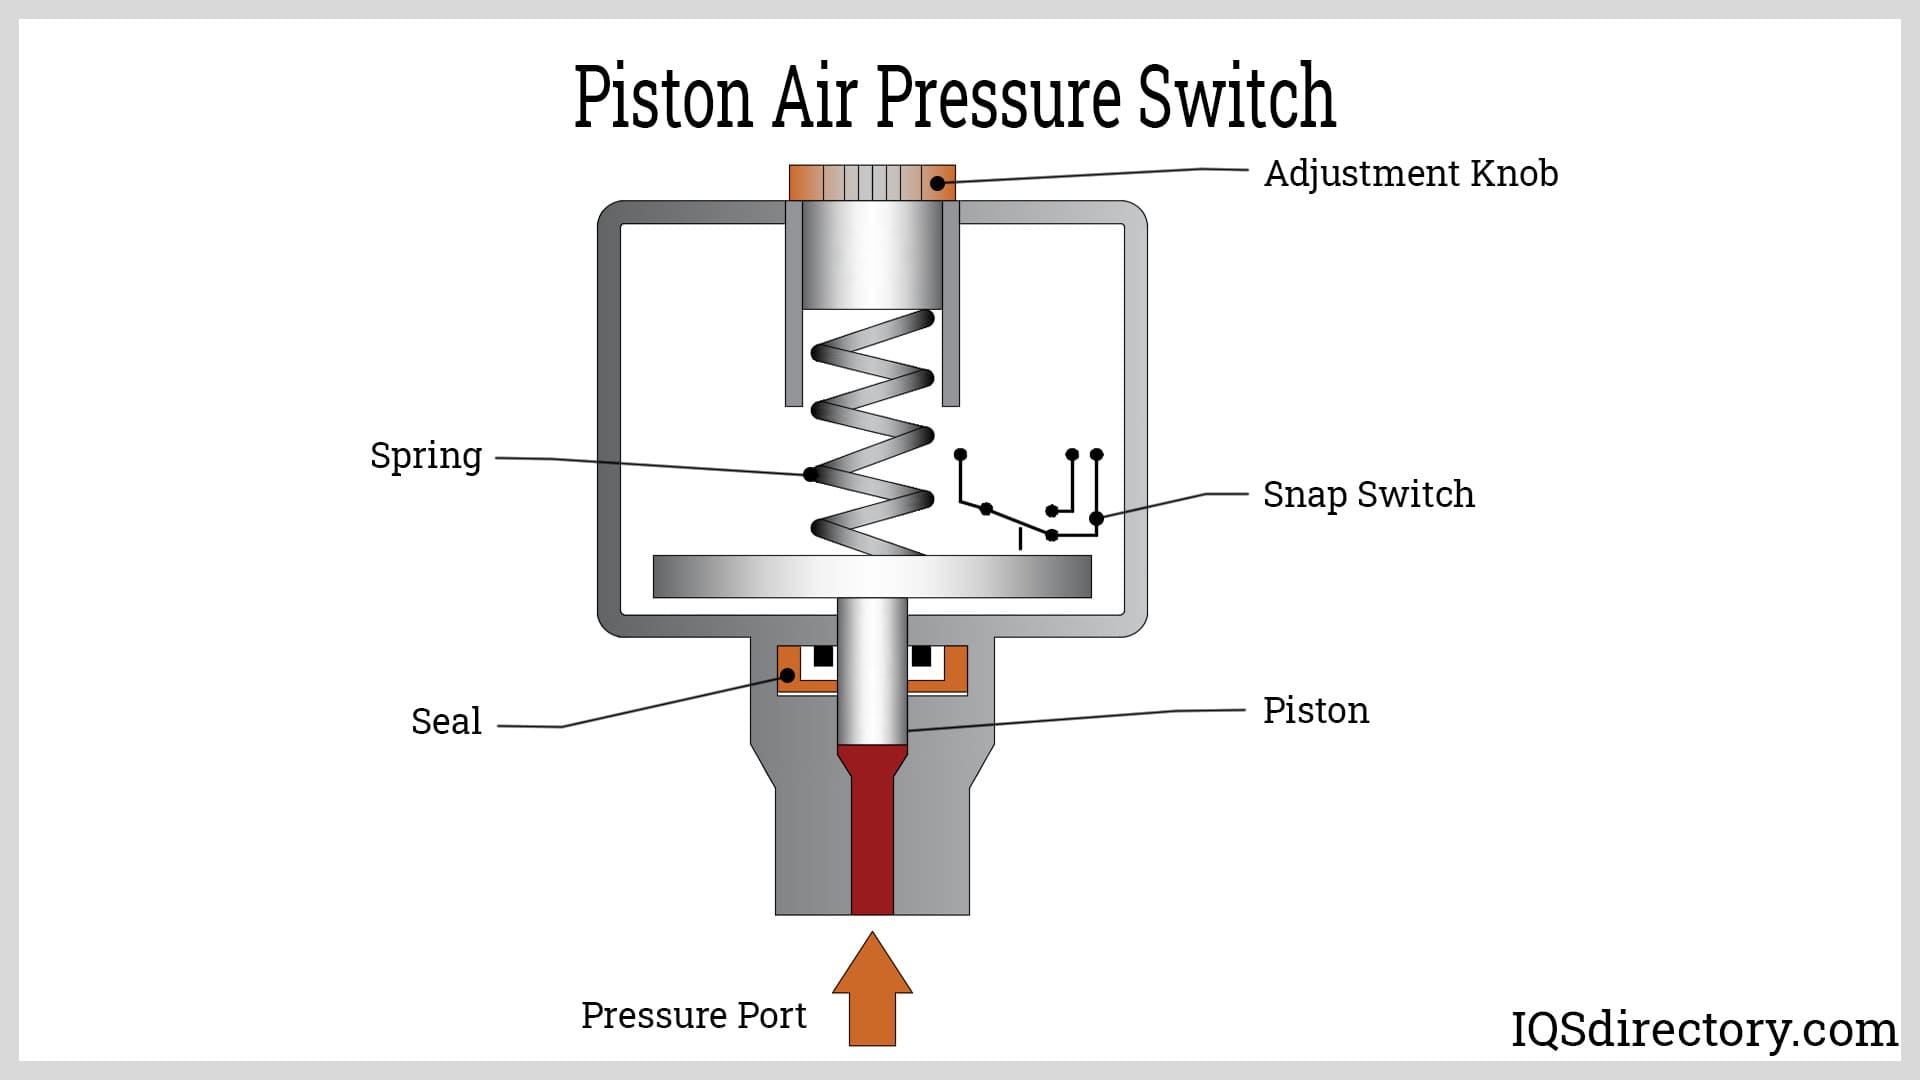
Before we dive into troubleshooting, let's understand what the high-pressure switch does. It's a safety device designed to protect your AC compressor from damage. The AC system relies on refrigerant, which cycles between a low-pressure and high-pressure state. If the pressure on the high-pressure side gets too high, due to a blockage, overcharging of refrigerant, a failing condenser fan, or other issues, the switch trips, cutting power to the compressor. This prevents the compressor from potentially exploding or sustaining serious damage.
Symptoms of a Faulty High-Pressure Switch
Here are some common symptoms that might indicate a problem with the high-pressure switch:
- AC compressor not engaging: This is the most common symptom. The compressor simply won't turn on, and you'll get no cold air.
- AC compressor cycles on and off rapidly: The switch might be intermittently tripping and resetting, causing the compressor to cycle erratically.
- AC works intermittently: Similar to the above, but the periods of functionality might be longer.
- Dashboard warning lights: In some vehicles, a faulty high-pressure switch can trigger a check engine light or other warning lights related to the AC system.
Troubleshooting the High-Pressure Switch: A Step-by-Step Guide
Follow these steps to diagnose the problem. Always prioritize safety and disconnect power where applicable before working on any electrical components.
Step 1: Basic Checks - Is it REALLY the AC?
Before you assume the worst, let's rule out some simpler issues:
- Check the thermostat/AC controls: Ensure the thermostat is set to "cool" and the temperature is set low enough to trigger the AC. Make sure the fan is set to "auto" or "on."
- Check the blower fan: Is the blower fan blowing air at all? If not, the problem might be a faulty blower motor, resistor, or a blown fuse in the blower circuit, rather than the AC compressor.
- Check for obvious obstructions: Look for anything blocking the vents inside the car. Check the outside condenser coil (the part that looks like a radiator) for debris like leaves, grass, or dirt. Clear away any obstructions to ensure proper airflow.
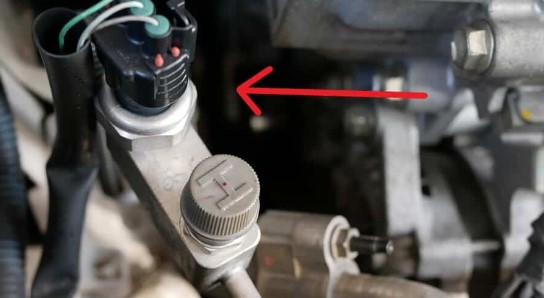
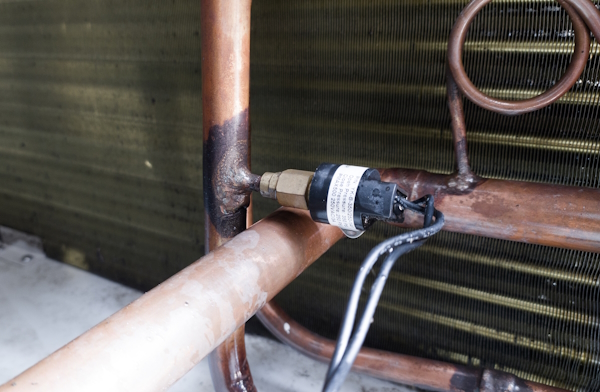
Step 2: Locate the High-Pressure Switch
The high-pressure switch is usually located on the high-pressure side of the AC system, typically on a refrigerant line near the condenser or receiver-drier. Refer to your vehicle's repair manual or online resources for the exact location of the switch in your specific model. Caution: Do not attempt to disconnect any refrigerant lines! This requires specialized equipment and training due to the risk of releasing harmful refrigerant into the atmosphere.
Step 3: Visual Inspection
Carefully inspect the high-pressure switch and its wiring. Look for:
- Damaged wiring: Check for frayed, cut, or corroded wires.
- Loose connections: Ensure the electrical connector is securely attached to the switch.
- Visible damage to the switch: Look for cracks, leaks, or other signs of physical damage.
Step 4: Checking Power to the Switch (Use Caution!)
This step involves working with electricity. If you are not comfortable doing so, consult a qualified technician.
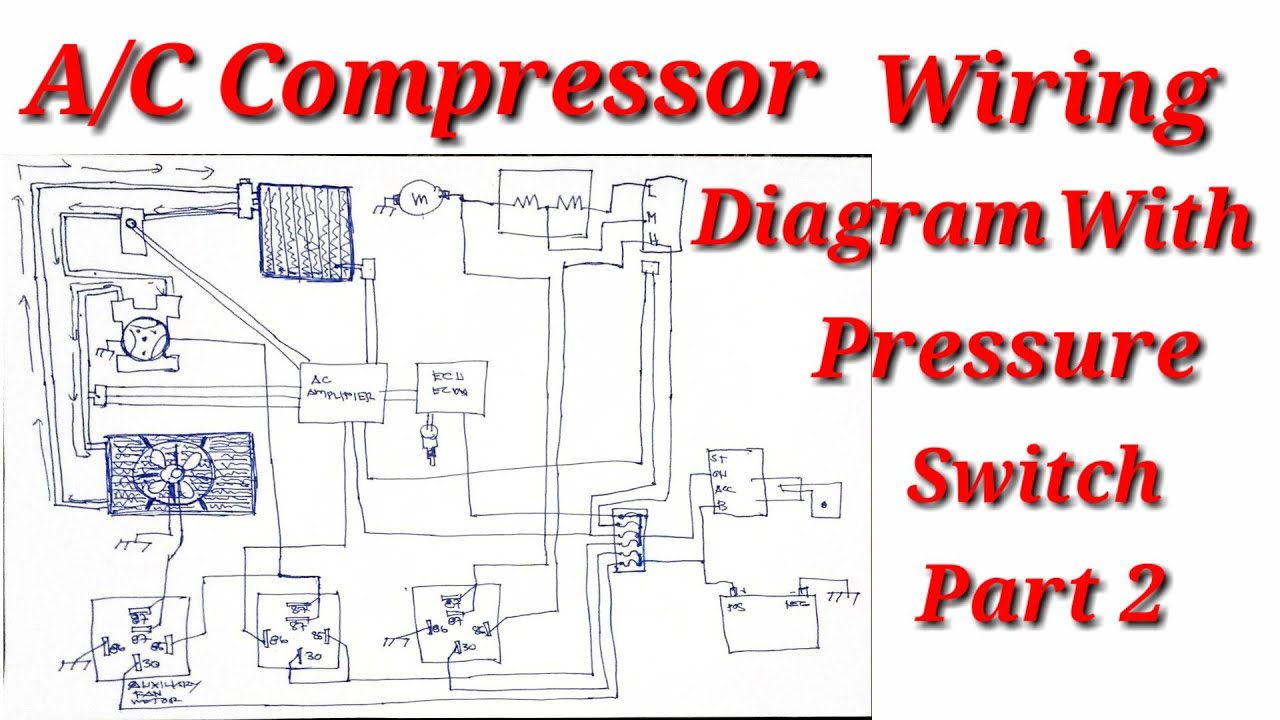
Using a multimeter, check for voltage at the high-pressure switch connector. You will need to consult your vehicle's wiring diagram to determine which wires to test. With the AC system turned on, you should typically see 12V DC between the power wire and ground. If there's no power, the problem lies upstream, possibly in a fuse, relay, or wiring harness.
Step 5: Checking the Switch's Continuity (With Power Off!)
Before proceeding, disconnect the electrical connector from the high-pressure switch and turn off the AC. Using a multimeter set to continuity mode (often indicated by a sound wave symbol), check for continuity across the switch terminals.
- Normal Operation (Low Pressure): The switch should show continuity (a beep or a reading of 0 ohms) when the pressure is within the normal operating range. This indicates that the switch is closed, allowing current to flow.
- High Pressure or Faulty Switch: The switch should show no continuity (no beep or a very high resistance reading) when it has tripped due to high pressure or when it is faulty.
Important Note: Some high-pressure switches are normally closed (continuity when pressure is normal) and some are normally open (no continuity when pressure is normal). Refer to your vehicle's service manual to determine the correct behavior of your specific switch.
Step 6: Bypassing the High-Pressure Switch (For Testing Purposes ONLY!)
This step is for diagnostic purposes only and should never be used as a permanent fix. Bypassing the high-pressure switch can lead to serious damage to your AC compressor if there is an actual high-pressure condition.
To bypass the switch, use a jumper wire to connect the two terminals of the disconnected electrical connector. This completes the circuit as if the switch were closed. Turn on the AC. If the compressor now engages, it strongly suggests that the high-pressure switch is faulty or that there is a genuine high-pressure problem in the system that needs to be addressed by a professional. Immediately remove the jumper wire and consult a professional.
Step 7: Checking the Low-Pressure Switch
Many AC systems also have a low-pressure switch. A very low level of refrigerant can also prevent the compressor from engaging. Similar to the high-pressure switch, you can check the low-pressure switch for continuity. If the low-pressure switch shows no continuity, it could indicate low refrigerant, a faulty low-pressure switch, or a leak in the system. Refrigerant issues require professional diagnosis and repair.
DIY Fixes You Can Attempt (With Caution!)
Based on your troubleshooting, here are a few basic fixes you might be able to try:
- Replacing the High-Pressure Switch: If you've confirmed that the switch is faulty, you can replace it. Before replacing, carefully bleed the pressure from the system using the correct tools. If you do not have the tools or know how, do not do this step. Disconnect the electrical connector, unscrew the old switch, and screw in the new one. Reconnect the electrical connector.
Important: Some switches can be replaced without bleeding down the system. Check the specification for your car model. - Cleaning Electrical Connections: If you found corroded or loose connections, clean them with electrical contact cleaner and ensure they are securely reconnected.
- Replacing Fuses and Relays: If you discovered a blown fuse or a faulty relay in the AC compressor circuit, replace it with a new one of the correct rating.
When to Call a Professional
There are several situations where you should always consult a qualified HVAC technician or mechanic:
- Refrigerant Leaks: If you suspect a refrigerant leak, do not attempt to repair it yourself. Refrigerant is harmful to the environment, and its handling requires specialized equipment and training.
- High-Pressure Problems: If bypassing the high-pressure switch engages the compressor, but there's likely a real high-pressure condition. This could be due to a blockage in the system, a faulty expansion valve, or other complex issues that require professional diagnosis and repair.
- Complex Electrical Problems: If you're not comfortable working with electricity, or if you suspect a wiring problem that you can't easily trace, seek professional help.
- Compressor Issues: If you suspect the compressor itself is faulty, it's best left to a professional. Compressor replacement is a complex and expensive repair.
- Vacuum and Recharge: After opening the refrigerant circuit (like replacing the high pressure switch), you need to pull a vacuum on the system to remove any air or moisture, and then recharge the system with the correct amount of refrigerant. This requires specialized equipment and knowledge.
Safety First!
Working with AC systems involves potential hazards. Always follow these safety precautions:
- Disconnect Power: Whenever working on electrical components, disconnect the power supply to the AC system.
- Wear Safety Glasses: Protect your eyes from debris and potential splashes.
- Work in a Well-Ventilated Area: If there's any chance of refrigerant leakage, work in a well-ventilated area.
- Never Disconnect Refrigerant Lines Yourself: This requires specialized equipment and training.
- Dispose of Refrigerant Properly: If you need to dispose of refrigerant, take it to a certified recycling center.
Conclusion
Troubleshooting a high-pressure switch issue can seem daunting, but by following these steps, you can often identify the problem and potentially fix it yourself. Remember to prioritize safety, and don't hesitate to call a professional when needed. With a little knowledge and caution, you can often get your AC system back up and running, restoring comfort to your car or home.