Honeywell Mercury Thermostat Adjustment
One of the most frustrating household appliance failures is a malfunctioning heating and cooling system. When your Honeywell mercury thermostat isn't working correctly, it can lead to uncomfortable temperatures, wasted energy, and sky-high utility bills. While modern digital thermostats have largely replaced mercury models, many homes still use them. This guide provides a step-by-step troubleshooting process for adjusting and potentially fixing a Honeywell mercury thermostat. Remember, always prioritize your safety. If you are uncomfortable working with electricity or gas, or if you suspect a more complex problem, call a qualified HVAC technician.
Understanding Your Honeywell Mercury Thermostat
Before diving into troubleshooting, it's important to understand how a mercury thermostat works. These thermostats are relatively simple. A bimetallic strip coils or uncoils based on temperature changes. This movement tilts a sealed glass vial containing liquid mercury, completing an electrical circuit that signals your furnace or air conditioner to turn on or off. The accuracy of this system relies on the proper leveling and cleanliness of the components.
Common Issues with Mercury Thermostats:
- Inaccurate Temperature Readings: The thermostat displays a temperature that doesn't match the actual room temperature.
- System Not Turning On: The furnace or air conditioner fails to activate when the thermostat is set to a calling temperature.
- System Not Turning Off: The furnace or air conditioner runs continuously, even after the room reaches the set temperature.
- Uneven Heating/Cooling: Some rooms are warmer or cooler than others. While this can have multiple causes, a poorly calibrated thermostat can contribute.
- Dust and Debris: Accumulation of dust or debris inside the thermostat can interfere with its operation.
Troubleshooting Your Honeywell Mercury Thermostat: A Step-by-Step Guide
Follow these steps in order. Remember to turn off the power to your furnace or air conditioner at the breaker box before performing any work on the thermostat.
Step 1: Ensure Proper Power Supply
While mercury thermostats don't typically require batteries, they are connected to your home's electrical system. Ensure the system is receiving power.
- Check the Breaker: Go to your electrical panel and locate the breaker for your furnace or air conditioner. Ensure it's switched on. If it's tripped (in the middle position), switch it off completely and then back on.
- Confirm Power at the Furnace/AC Unit: Locate the disconnect switch near your furnace or air conditioner. This is usually a simple on/off switch or a pull-out fuse block. Make sure it's in the "on" position.
- Check for Blown Fuses (Older Systems): Some older systems use fuses instead of breakers. Locate the fuse box near the furnace/AC unit and inspect the fuses. Replace any that are blown. Always replace a fuse with one of the same amperage rating.
If the power supply is the issue, restoring it might solve the problem. If not, proceed to the next step.
Step 2: Visual Inspection and Cleaning
Dirt and debris can interfere with the thermostat's mechanism. A careful cleaning might be all that's needed.
- Turn Off the Power: This is crucial before opening the thermostat housing. Go to the breaker box and switch off the breaker for the HVAC system.
- Remove the Thermostat Cover: Most Honeywell mercury thermostats have a cover that can be gently pulled off. Some may have small screws holding it in place. If screws are present, carefully remove them and store them safely.
- Inspect the Interior: Look for any obvious signs of damage, such as broken wires, corrosion, or excessive dust.
- Clean the Thermostat: Use a soft brush or a can of compressed air to gently remove dust and debris from the interior components. Avoid touching the mercury vial directly.
- Clean the Bimetallic Strip: If the bimetallic strip is visibly dirty, use a cotton swab lightly dampened with isopropyl alcohol to carefully clean it.
- Check Wire Connections: Make sure all wires are securely connected to their terminals. Gently tug on each wire to ensure it's not loose. If a wire is loose, carefully tighten the screw on the terminal.
Once you've cleaned and inspected the thermostat, reassemble it (replace the cover and any screws) and restore power to the system. Test the thermostat to see if the problem is resolved.
Step 3: Leveling the Thermostat
The mercury switch relies on being perfectly level to function correctly. If the thermostat is not level, it can cause inaccurate temperature readings or prevent the system from turning on or off.
- Use a Level: Place a small level on top of the thermostat housing.
- Adjust the Mounting: If the thermostat is not level, you'll need to adjust its mounting. This might involve loosening the screws that hold the thermostat to the wall and carefully shimming it until it's level. Use small pieces of cardboard or plastic as shims.
- Retighten Screws: Once the thermostat is level, carefully retighten the mounting screws.
Recheck the leveling after tightening the screws. If the thermostat is still not level, repeat the process. After leveling, restore power and test the thermostat.
Step 4: Calibrating the Thermostat (Proceed with Caution!)
Some Honeywell mercury thermostats have a small adjustment dial or screw that allows you to calibrate the temperature reading. This is a delicate process, and it's easy to make the problem worse if you're not careful. Only attempt this if you're comfortable working with small adjustments.
- Compare to a Reliable Thermometer: Place a reliable digital thermometer near the thermostat and let it sit for several hours to stabilize.
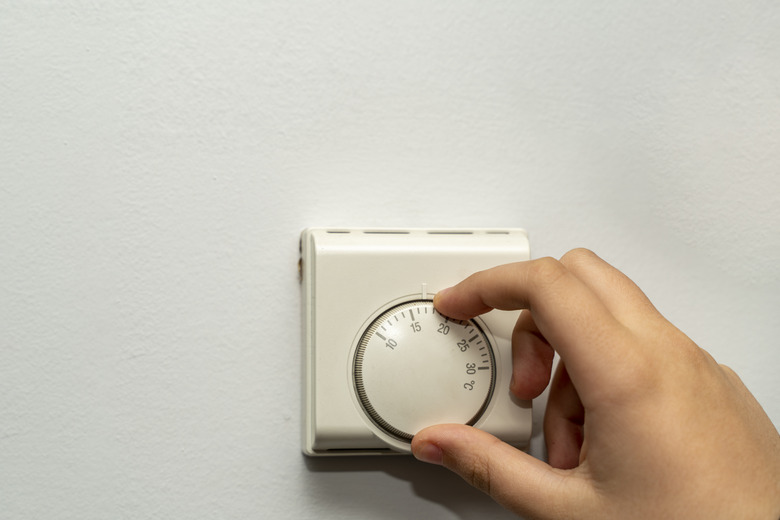
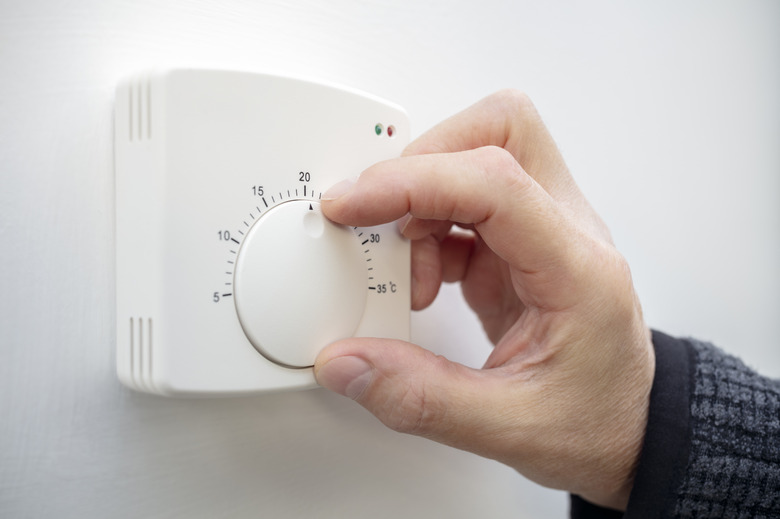
- Identify the Calibration Adjustment: Look for a small dial or screw on the front or side of the thermostat. The location and appearance of this adjustment vary depending on the specific model.
- Make Small Adjustments: Use a small screwdriver to make very small adjustments to the calibration screw. Turn the screw slightly in one direction and then wait a few hours to see if the temperature reading on the thermostat matches the digital thermometer.
- Repeat as Needed: Continue making small adjustments until the thermostat's temperature reading is accurate.
Be patient and make only small adjustments at a time. Over-adjusting the calibration can lead to even more inaccurate readings. If you're not able to achieve accurate readings after several attempts, it's best to consult with a professional.
Step 5: Checking Wire Connections (Detailed)
Loose or corroded wire connections can disrupt the flow of electricity and cause thermostat problems. This step requires careful attention to detail.
- Turn Off the Power: Ensure the power to the HVAC system is turned off at the breaker box.
- Carefully Disconnect Wires (One at a Time!): Use a small screwdriver to loosen the screws on the thermostat terminals and carefully disconnect each wire. It is extremely important to label each wire as you disconnect it. Use masking tape and a pen to label each wire with its corresponding terminal designation (e.g., R, W, Y, G). Taking a picture before disconnecting the wires is also a great idea.
- Inspect Wire Ends: Check the ends of each wire for corrosion or damage. If the wire ends are corroded, use a wire stripper to carefully cut off the corroded portion and expose fresh wire.
- Clean Terminals: Use a small wire brush or a cotton swab dipped in isopropyl alcohol to clean the thermostat terminals.
- Reconnect Wires Securely: Carefully reconnect each wire to its corresponding terminal, making sure the screw is tightened securely. Double-check your labels to ensure you're connecting the wires to the correct terminals.
- Gently Tug on Wires: After reconnecting the wires, gently tug on each wire to make sure it's securely fastened to the terminal.
Once you've checked and tightened all the wire connections, reassemble the thermostat, restore power, and test the system.
When to Call a Professional
While many thermostat issues can be resolved with basic troubleshooting, some problems require the expertise of a qualified HVAC technician. Do not attempt to repair anything that feels beyond your skill level. Call a professional if:
- You suspect a gas leak: If you smell gas near the furnace or thermostat, immediately evacuate the building and call your gas company or 911. Gas leaks are extremely dangerous and should only be handled by trained professionals.
- You encounter exposed wiring or electrical sparks: If you see exposed wiring or notice any sparks, do not touch anything. Turn off the power to the HVAC system at the breaker box and call a qualified electrician or HVAC technician.
- The thermostat is damaged: If the thermostat is physically damaged (e.g., cracked housing, broken mercury vial), it needs to be replaced. Proper disposal of mercury is crucial. Contact your local hazardous waste disposal facility for instructions.
- You're uncomfortable working with electricity: If you feel uneasy about working with electrical components, it's always best to err on the side of caution and call a professional.
- You've tried all the troubleshooting steps and the problem persists: If you've followed all the steps in this guide and your thermostat is still not working correctly, it's likely that there's a more complex problem that requires professional diagnosis and repair. This may involve problems with the furnace or air conditioner itself, which you should not attempt to fix yourself.
- Replacing an old mercury thermostat: If you're upgrading to a digital thermostat, be sure to properly dispose of the mercury thermostat. Mercury is a hazardous material.
Safety should always be your top priority. If you're unsure about anything, it's always best to call a professional.
Final Thoughts
Troubleshooting a Honeywell mercury thermostat can seem daunting, but by following these steps and exercising caution, you can often resolve common issues and restore your heating and cooling system to proper working order. Remember to prioritize safety, and don't hesitate to call a professional if you encounter any problems you're not comfortable handling. A little patience and attention to detail can save you money and keep your home comfortable.