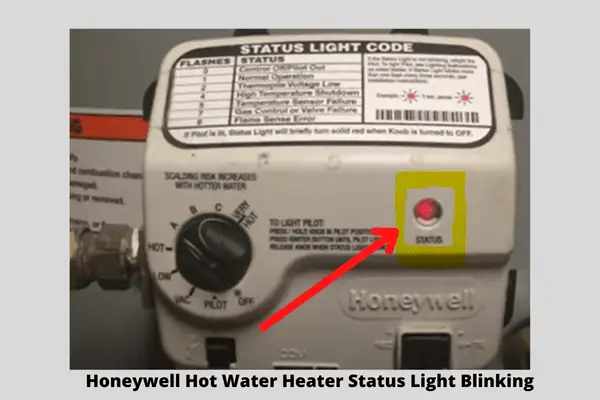
Honeywell Water Heater Status Light Not Blinking
One of the most frustrating experiences for a homeowner is discovering they have no hot water. Often, a quick glance at the Honeywell water heater reveals a seemingly simple problem: the status light isn't blinking. This little light is crucial because it communicates the operational status of your heater. A non-blinking light usually signals a problem, but don't panic! This guide provides a methodical approach to troubleshoot the issue before calling a professional.
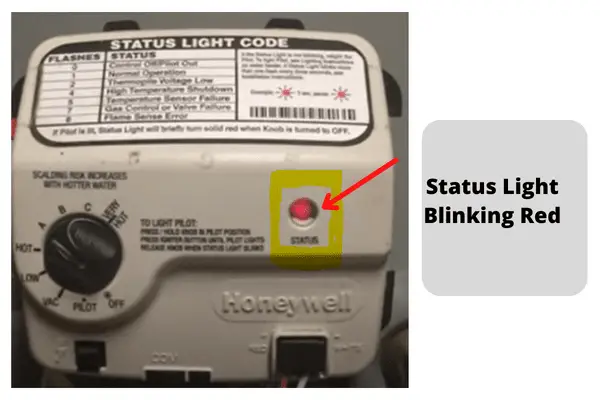
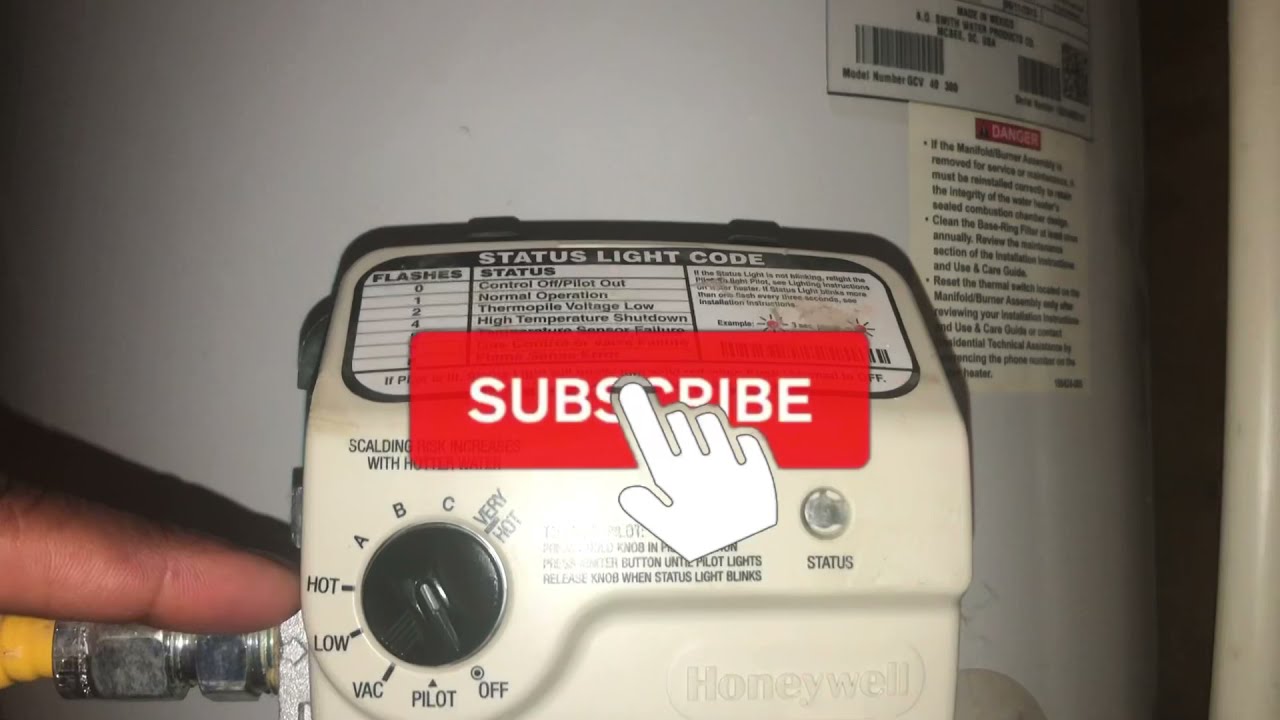
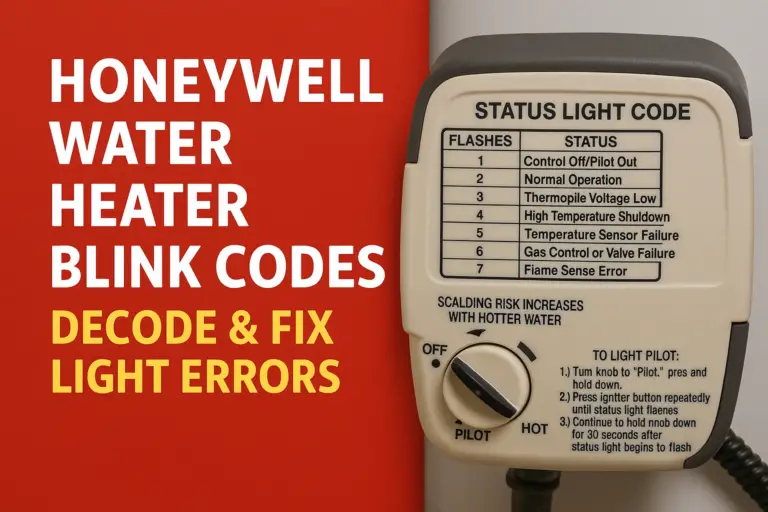
Understanding the Honeywell Status Light
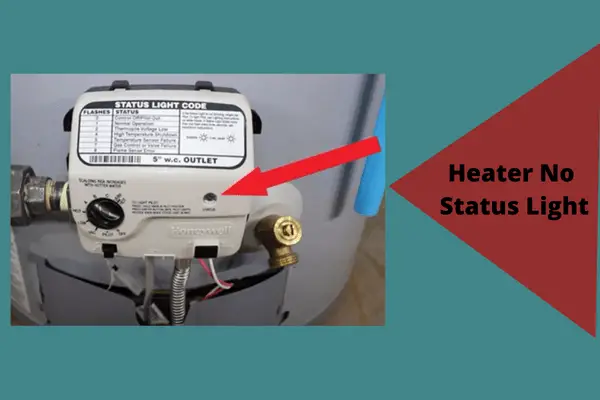
The Honeywell control system is designed to monitor various parameters of your water heater's operation. The status light, through its blinking patterns, communicates these parameters. A solid light, no light, or a specific sequence of blinks all point to different potential problems. When the light is simply off, it usually indicates a loss of power or a more significant issue preventing the control system from functioning. Before diving into troubleshooting, it’s helpful to know the typical behavior and what the absence of it means.
Step-by-Step Troubleshooting Guide
Step 1: Confirm Power Supply
The most common cause of a non-blinking status light is a simple loss of power. Start with the obvious:
- Check the Circuit Breaker: Go to your electrical panel and locate the breaker that controls the water heater circuit. It should be labeled. Ensure the breaker is in the "ON" position. If it's tripped (in the "OFF" or middle position), switch it fully to the "OFF" position, wait a few seconds, and then switch it back to the "ON" position.
- Inspect the Power Cord (for electric heaters): If your electric water heater is plugged into an outlet, make sure the cord is securely plugged in. Sometimes, a loose connection can interrupt the power supply.
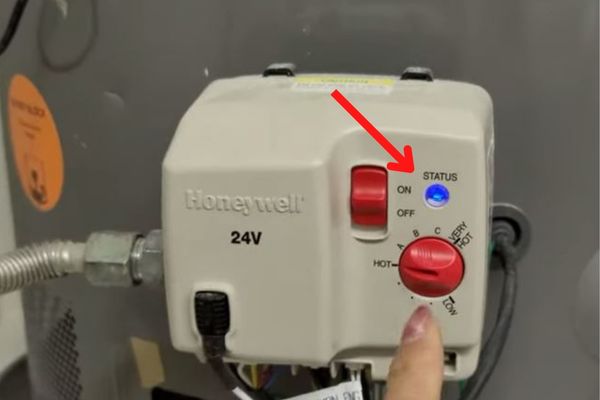
- Check the On/Off Switch (if applicable): Some water heaters have an on/off switch located near the unit. Ensure this switch is in the "ON" position.
If the breaker tripped and continues to trip after resetting, do not keep resetting it. This indicates a short circuit or overload, which requires professional electrical assistance.
Step 2: Examine the Gas Supply (for gas heaters)
For gas-powered water heaters, a disruption in the gas supply can prevent the Honeywell control system from activating. Perform these checks:
- Check the Main Gas Valve: Ensure the main gas valve supplying gas to your home is open. This valve is typically located near your gas meter.
- Inspect the Water Heater Gas Valve: Locate the gas valve on the water heater itself. It should be in the "ON" position. The valve typically has a handle that is parallel with the gas pipe when open and perpendicular when closed.
- Check for Other Gas Appliances: Verify that other gas appliances in your home (like your stove or furnace) are functioning correctly. If none of your gas appliances are working, there might be a problem with the gas supply from your provider. Contact your gas company immediately.
Step 3: Inspect the Water Heater's Reset Button (If Applicable)
Some Honeywell control systems have a reset button, typically located near the thermostat. If the water heater has overheated, the high limit switch might have tripped, cutting off power to the unit.
- Locate the Reset Button: Look for a small, usually red or blue, button, often covered by a small plate.
- Press the Reset Button: Use a pen or a small screwdriver to gently press the reset button. You might hear a click.
- Monitor the Status Light: After pressing the reset button, wait a few minutes to see if the status light starts blinking.
Caution: If the reset button trips frequently, it indicates a more serious problem, such as overheating, and requires professional attention. Continuing to reset the button without addressing the underlying issue could damage the water heater or create a safety hazard.
Step 4: Check the Thermocouple/Flame Sensor (for gas heaters)
The thermocouple (or flame sensor in newer models) is a safety device that detects the presence of a pilot flame (or burner flame) in a gas water heater. If the thermocouple is faulty, it won't sense the flame, and the gas valve will shut off, preventing the water heater from operating. This could cause the status light to remain off.
- Locate the Thermocouple: The thermocouple is a thin, copper rod located near the pilot light assembly.
- Visually Inspect the Thermocouple: Look for any signs of damage, such as corrosion, cracks, or bends.
- Clean the Thermocouple (If Possible): If the thermocouple is dirty, gently clean it with a fine-grit sandpaper or steel wool. Be careful not to damage the thermocouple.
Replacing the Thermocouple: Replacing a thermocouple is a relatively simple DIY task, but only proceed if you are comfortable working with gas appliances. Turn off the gas supply to the water heater before attempting any repairs. You can purchase a replacement thermocouple at most hardware stores. Follow the manufacturer's instructions for installation.
Step 5: Inspect the Igniter (for gas heaters with electronic ignition)
Newer gas water heaters use an electronic igniter instead of a pilot light. The igniter creates a spark to ignite the gas burner. If the igniter fails, the burner won't light, and the status light may not blink.
- Visually Inspect the Igniter: Look for any signs of damage to the igniter, such as cracks or breaks.
- Listen for the Clicking Sound: When the water heater attempts to ignite, you should hear a clicking sound from the igniter. If you don't hear a clicking sound, the igniter may be faulty.
Replacing the Igniter: Replacing an igniter is more complex than replacing a thermocouple. If you are not comfortable working with electrical components and gas appliances, it is best to call a qualified technician.
Step 6: Check the Wiring
Loose or corroded wiring can disrupt the flow of electricity to the Honeywell control system, preventing the status light from illuminating. This step requires careful attention to safety.
- Turn Off the Power: Before inspecting any wiring, turn off the power to the water heater at the circuit breaker.
- Locate the Wiring Connections: Open the access panel to the control system. You will see various wires connected to the control module and other components.
- Inspect the Wiring: Look for any loose, corroded, or damaged wires. Gently tug on each wire to ensure it is securely connected.
- Clean Corroded Connections: If you find any corroded connections, clean them with a wire brush or sandpaper.
- Reconnect Loose Wires: Reconnect any loose wires, ensuring they are properly seated in their terminals.
Caution: If you are not comfortable working with electrical wiring, it is best to call a qualified electrician.
Step 7: Check the Air Intake (For Condensing Models)
High-efficiency, condensing water heaters have an air intake that needs to be clear for proper combustion. A blocked air intake can cause the system to shut down, preventing the status light from blinking.
- Locate the Air Intake: The air intake is usually located on the side or bottom of the water heater. It may be a pipe or a vent.
- Inspect the Air Intake: Check for any obstructions, such as dust, debris, or insect nests.
- Clean the Air Intake: Use a vacuum cleaner or brush to remove any obstructions from the air intake.
Step 8: Consider Condensation Issues
Condensation can sometimes interfere with the operation of the control system, particularly in high-efficiency models. Ensure proper venting and drainage.
- Check the Venting: Make sure the venting system is properly installed and free from obstructions.
- Inspect the Condensate Drain: Ensure the condensate drain is clear and allowing water to drain freely. A clogged drain can cause water to back up and potentially damage the control system.
When to Call a Professional
While these steps can resolve many common issues, there are times when professional help is necessary. Do not attempt repairs beyond your comfort level. Contact a qualified plumber or HVAC technician if:
- The Circuit Breaker Continues to Trip: This indicates a serious electrical problem that requires professional attention.
- You Smell Gas: If you smell gas, evacuate your home immediately and call your gas company from a safe location.
- You Are Uncomfortable Working with Gas or Electricity: Safety should always be your top priority.
- The Problem Persists After Trying These Steps: If you have followed these steps and the status light still doesn't blink, there may be a more complex issue that requires specialized knowledge and equipment.
- You Suspect a Faulty Honeywell Control System: If you suspect the control system itself is malfunctioning, it's best to have it diagnosed by a professional. Replacing the control system is usually a job for a trained technician.
Preventative Maintenance
Regular maintenance can help prevent many of the issues that cause the status light to stop blinking. Consider these preventative measures:
- Flush the Water Heater Annually: Flushing the water heater removes sediment buildup, which can reduce efficiency and damage components.
- Inspect the Anode Rod: The anode rod protects the water heater tank from corrosion. It should be inspected and replaced every few years.
- Have Your Water Heater Professionally Inspected: A professional inspection can identify potential problems before they become major issues.
By following this troubleshooting guide and performing regular maintenance, you can keep your Honeywell water heater running smoothly and ensure a steady supply of hot water for your home. Remember, safety is paramount, and when in doubt, always consult a qualified professional.