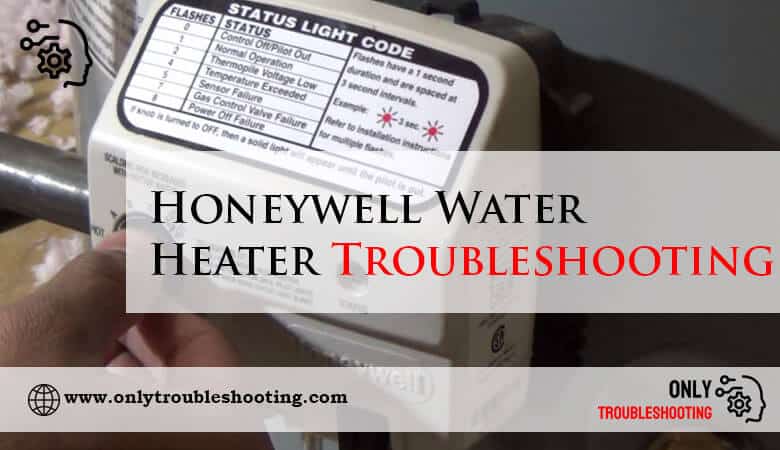
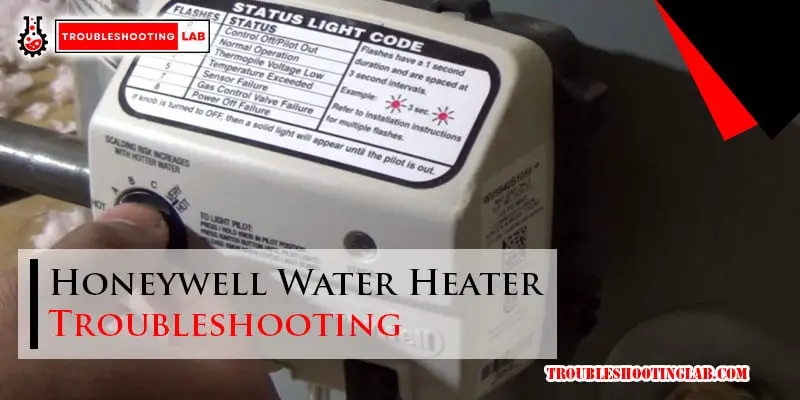
Honeywell Water Heater Troubleshooting
A cold shower is often the first sign that something's amiss with your water heater. While a malfunctioning water heater can be frustrating, many common issues can be diagnosed and sometimes even resolved with a little know-how. This guide focuses specifically on troubleshooting Honeywell water heaters, equipping you with a safe and systematic approach to identify and potentially fix the problem. Remember, your safety is paramount. When in doubt, always call a qualified professional.
Understanding Common Water Heater Issues
Before diving into troubleshooting, let's outline typical water heater problems:
- No Hot Water: This is the most common complaint, indicating a potential issue with the power supply, heating element (electric), gas valve (gas), or thermostat.
- Not Enough Hot Water: You get some hot water, but it runs out quickly. This could be due to sediment buildup, a faulty heating element, or an undersized water heater for your household needs.
- Water is Too Hot: This signals a potential problem with the thermostat, which may be set too high or malfunctioning.
- Water is Lukewarm: Similar to not enough hot water, but the water never reaches a desirable temperature.
- Discolored Water: Rusty or brown water often indicates corrosion inside the tank.
- Smelly Water: A rotten egg smell typically points to bacterial growth within the tank.
- Leaks: Water leaking from the tank or connections can be a serious issue requiring immediate attention.
- Noisy Water Heater: Banging, popping, or hissing sounds usually indicate sediment buildup or overheating.
Safety First!
Before you begin any troubleshooting steps, take these crucial safety precautions:
- Turn Off the Power (Electric Heaters): Locate the circuit breaker for the water heater in your electrical panel and switch it to the "Off" position. Double-check with a non-contact voltage tester to ensure the power is indeed off at the water heater.
- Turn Off the Gas (Gas Heaters): Locate the gas shut-off valve on the gas supply line to the water heater. Turn the valve to the "Off" position.
- Allow the Water to Cool: If the water heater has recently been running, allow the water to cool down before draining any water to prevent scalding.
- Wear Safety Glasses and Gloves: Protect your eyes and hands from potential splashes or sharp edges.
- Never work on the water heater if you are not comfortable or confident. If you are unsure about any step, call a qualified professional.
Troubleshooting: No Hot Water
This is the most common issue. Here's a step-by-step approach:
Step 1: Check the Power Supply (Electric Heaters)
The first step is to ensure the water heater is receiving power.
- Check the Circuit Breaker: Go to your electrical panel and make sure the circuit breaker for the water heater is in the "On" position. If it's tripped (in the "Off" or middle position), reset it by first switching it completely to the "Off" position and then back to "On." If it trips again immediately, there's likely a short circuit that requires professional attention.
- Test the Voltage: If the breaker isn't tripped, use a non-contact voltage tester to confirm that voltage is present at the water heater's wiring connections. If there's no voltage, you may have a problem with the wiring, the breaker itself, or the electrical panel. Consult an electrician.
Step 1: Check the Gas Supply (Gas Heaters)
For gas water heaters, ensure the gas supply is on.
- Check the Gas Shut-Off Valve: Make sure the gas shut-off valve on the gas supply line to the water heater is in the "On" position. The valve handle should be parallel to the gas pipe.
- Check the Pilot Light (Older Models): Some older gas water heaters have a pilot light that needs to be lit manually. Follow the manufacturer's instructions to relight the pilot light. If the pilot light won't stay lit, the thermocouple may be faulty (see below).
- Listen for the Burner: When you turn on a hot water tap, you should hear the burner igniting in the water heater (if it's not a tankless model). If you don't hear anything, there may be a problem with the gas valve or igniter.
Step 2: Check the Thermostat
The thermostat controls the water temperature. It might be set incorrectly or faulty.
- Locate the Thermostat(s): Most electric water heaters have two thermostats (upper and lower), while gas heaters usually have one. Refer to your owner's manual to locate the thermostat(s).
- Adjust the Temperature: Ensure the thermostat is set to a reasonable temperature (typically between 120°F and 140°F). Avoid setting it too high, as this can increase the risk of scalding.
- Check for Reset Button (Electric Heaters): Some electric water heaters have a reset button on the high-limit thermostat. Press the reset button once. If it trips again quickly, there's a deeper problem, possibly a shorted heating element. Do not repeatedly reset the button.
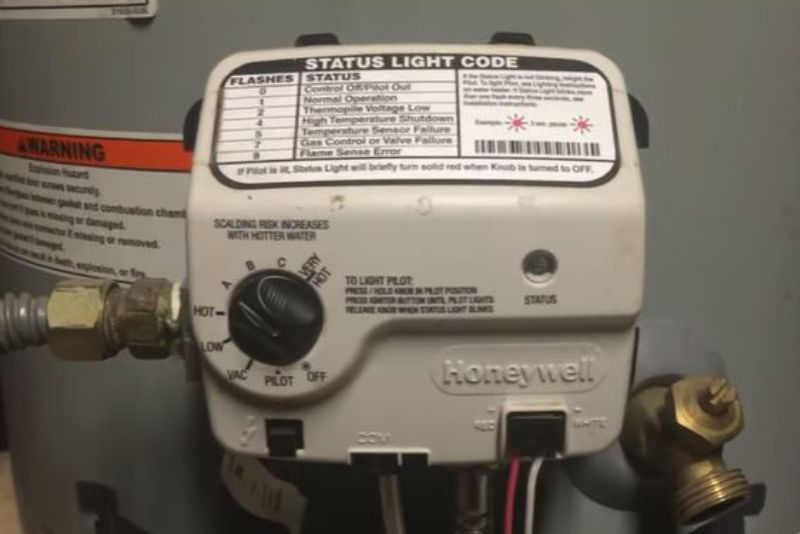
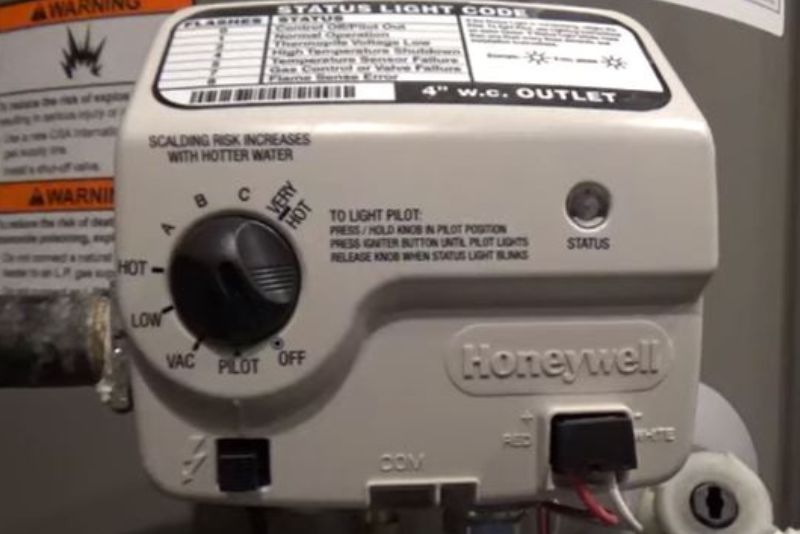
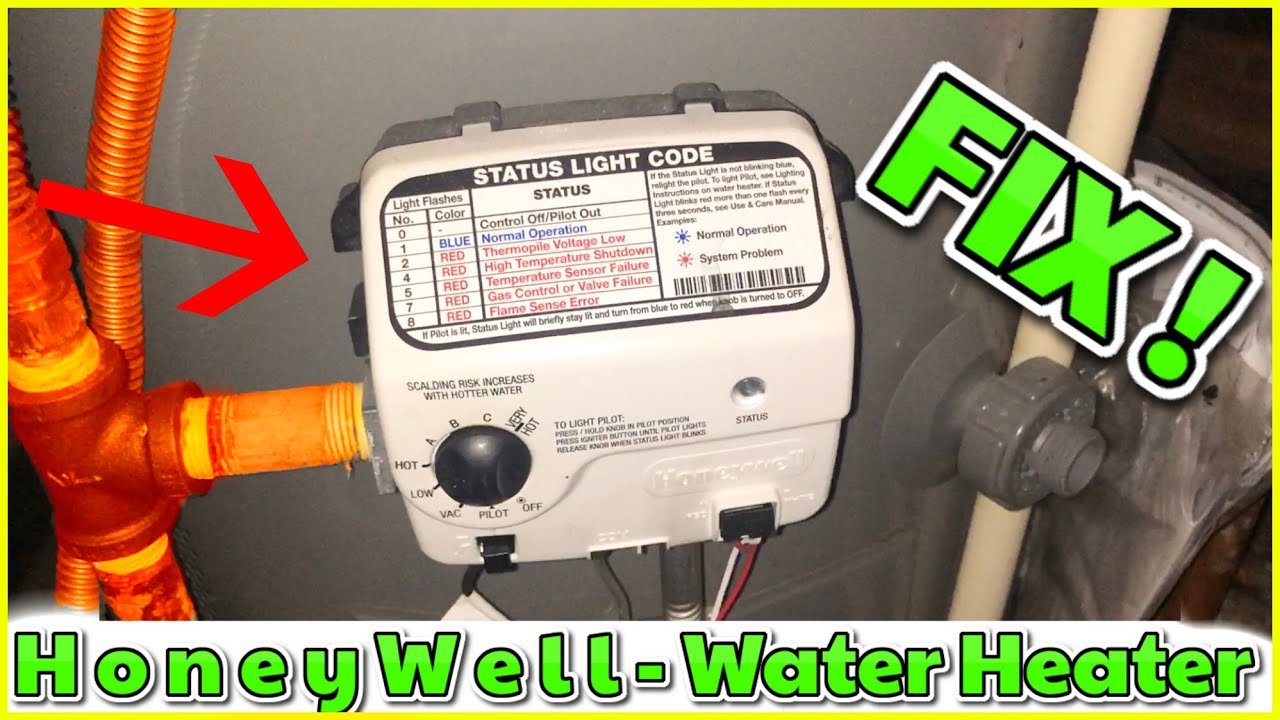
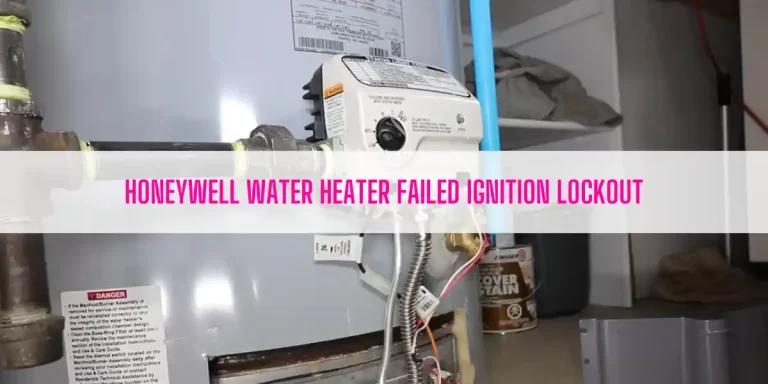
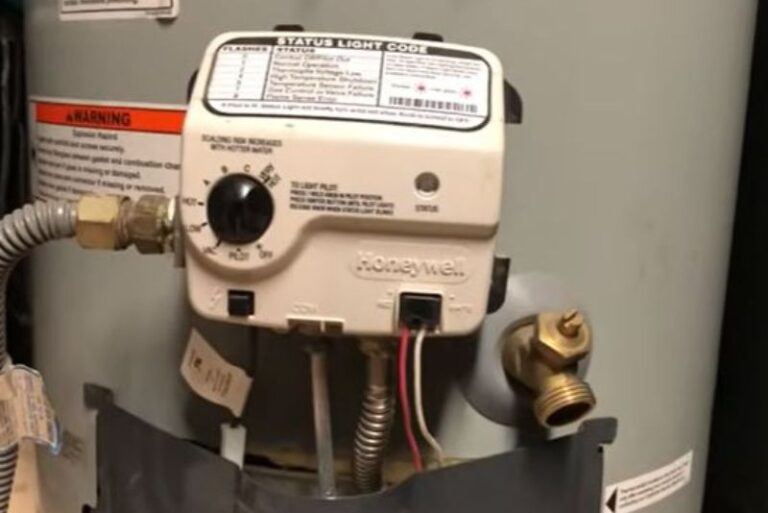
Step 3: Check the Honeywell Gas Valve (Gas Heaters)
Honeywell gas valves are common in many gas water heaters. They control the flow of gas to the burner.
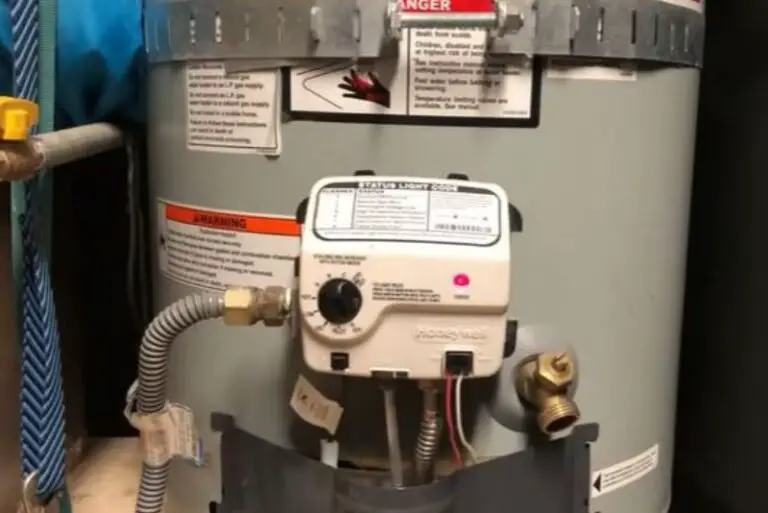
- Inspect the Gas Valve: Visually inspect the Honeywell gas valve for any signs of damage or corrosion.
- Check the Thermocouple (Older Models): The thermocouple is a safety device that shuts off the gas supply if the pilot light goes out. If the pilot light won't stay lit, the thermocouple may be faulty. You can test the thermocouple with a multimeter to check its output voltage. A faulty thermocouple needs to be replaced. This repair is best left to a professional.
- Check the Igniter (Newer Models): Newer gas water heaters use an electronic igniter instead of a pilot light. If the igniter is not working, the gas valve will not open. The igniter can be tested with a multimeter. A faulty igniter needs to be replaced. This repair is best left to a professional.
Step 4: Check the Heating Elements (Electric Heaters)
Electric water heaters have one or two heating elements that heat the water.
- Turn Off the Power: Make absolutely sure the power is off at the circuit breaker before proceeding.
- Drain the Tank (Partially): Drain a small amount of water from the tank to expose the heating elements. (About 6 inches below the element is fine.)
- Remove the Access Panel: Locate the access panel(s) for the heating element(s) and remove it.
- Insulate Yourself: Wear rubber gloves.
- Test the Heating Elements: Use a multimeter to test the resistance of the heating element(s). A heating element with low resistance is faulty and needs to be replaced. If you are uncomfortable using a multimeter, call a professional.
- Check for Visible Damage: Look for any signs of physical damage to the heating elements, such as bulges or cracks.
Troubleshooting: Not Enough Hot Water
If you're not getting enough hot water, consider these potential causes:
Sediment Buildup
Sediment accumulates at the bottom of the tank, reducing its capacity and insulating the heating elements.
- Flush the Tank: Carefully flush the water heater to remove sediment. Connect a garden hose to the drain valve at the bottom of the tank. Run the hose to a safe drainage area. Open the drain valve and let the water run until it clears. Be cautious of hot water when starting.
Faulty Heating Element(s) (Electric Heaters)
A heating element may not be heating efficiently or at all.
- Test the Heating Elements: As described in the "No Hot Water" section, test the heating elements with a multimeter. Replace any faulty elements.
Undersized Water Heater
The water heater may simply be too small for your household's needs.
- Assess Your Needs: Consider the number of people in your household and your typical hot water usage. Research the appropriate size water heater for your needs. This may require replacement with a larger unit, typically requiring a professional plumber and/or electrician.
Diptube Failure
The dip tube directs cold water to the bottom of the tank. A broken dip tube can cause cold water to mix with hot water as it exits the tank.
- This repair is best left to a professional.
Troubleshooting: Water is Too Hot
If your water is scalding, the thermostat is likely the culprit.
- Check the Thermostat Setting: Make sure the thermostat is set to a safe and comfortable temperature (120°F to 140°F).
- Replace the Thermostat: If the thermostat is faulty, it needs to be replaced. This repair is best left to a professional if you're not comfortable working with electricity.
Troubleshooting: Discolored or Smelly Water
These issues often indicate internal tank problems.
Discolored Water (Rusty or Brown)
- Flush the Tank: As described earlier, flush the tank to remove sediment and rust.
- Check the Anode Rod: The anode rod protects the tank from corrosion. If it's corroded, it needs to be replaced. This repair is recommended to be performed by a professional.
- Consider Tank Replacement: If the tank is severely corroded, it may need to be replaced.
Smelly Water (Rotten Egg Smell)
- Flush the Tank: Flush the tank to remove sediment and bacteria.
- Chlorinate the Tank: In some cases, chlorinating the tank can kill the bacteria. Follow the manufacturer's instructions carefully. This is a somewhat involved process and should be done with caution and potentially under the guidance of a professional.
- Replace the Anode Rod: A magnesium anode rod can sometimes contribute to the rotten egg smell. Replacing it with an aluminum anode rod may resolve the issue. This repair is recommended to be performed by a professional.
Troubleshooting: Leaks
Leaks can be serious and require immediate attention.
- Turn Off the Water Supply: Immediately turn off the water supply to the water heater.
- Identify the Source of the Leak: Determine where the leak is coming from. Common leak locations include the tank, connections, temperature and pressure (T&P) relief valve, and drain valve.
- Tighten Connections: If the leak is coming from a connection, try tightening the fitting.
- Replace Leaking Parts: If a part is leaking, such as the T&P valve or drain valve, it needs to be replaced. This may require professional assistance.
- Consider Tank Replacement: If the tank itself is leaking, it needs to be replaced. Tank replacement should always be performed by a qualified plumber.
Troubleshooting: Noisy Water Heater
Unusual noises often indicate sediment buildup or overheating.
- Flush the Tank: Flush the tank to remove sediment.
- Check the Thermostat: Make sure the thermostat is set to a reasonable temperature.
- Check the Heating Elements (Electric Heaters): Faulty heating elements can cause overheating and noises.
When to Call a Professional
While this guide provides steps for basic troubleshooting, some repairs are best left to the professionals. Call a qualified plumber or electrician if:
- You are uncomfortable working with electricity or gas.
- You suspect a gas leak.
- The problem persists after attempting the DIY fixes.
- The repair involves complex parts, such as the gas valve, thermocouple, or heating elements (if you're not comfortable testing them).
- The water heater tank is leaking.
- You are unsure about any step in the troubleshooting process.
Remember, safety is always the top priority. Working with water heaters involves potential hazards, and it's always better to err on the side of caution. A qualified professional has the expertise and tools to diagnose and repair water heater problems safely and effectively.
Preventative Maintenance
To prolong the life of your Honeywell water heater and prevent problems, perform regular maintenance:
- Flush the Tank Annually: This removes sediment buildup and helps maintain efficiency.
- Check the Anode Rod Every Few Years: Replace the anode rod as needed to prevent tank corrosion.
- Inspect the T&P Valve Regularly: Ensure the T&P valve is functioning properly.
By following these troubleshooting steps and preventative maintenance tips, you can keep your Honeywell water heater running smoothly and avoid those unwelcome cold showers. Good luck!