How Do Apartment Hvac Systems Work
It's the middle of summer, and suddenly your apartment's HVAC system is blowing warm air. Or, perhaps it's winter, and instead of cozy warmth, you're feeling a chilly breeze. A malfunctioning HVAC system is a common frustration for apartment dwellers, but often, the problem isn't as complex as it seems. This guide will help you troubleshoot common apartment HVAC issues, providing a step-by-step approach to diagnosis and offering simple, safe DIY fixes. We'll also clearly outline when it's time to call in a professional.
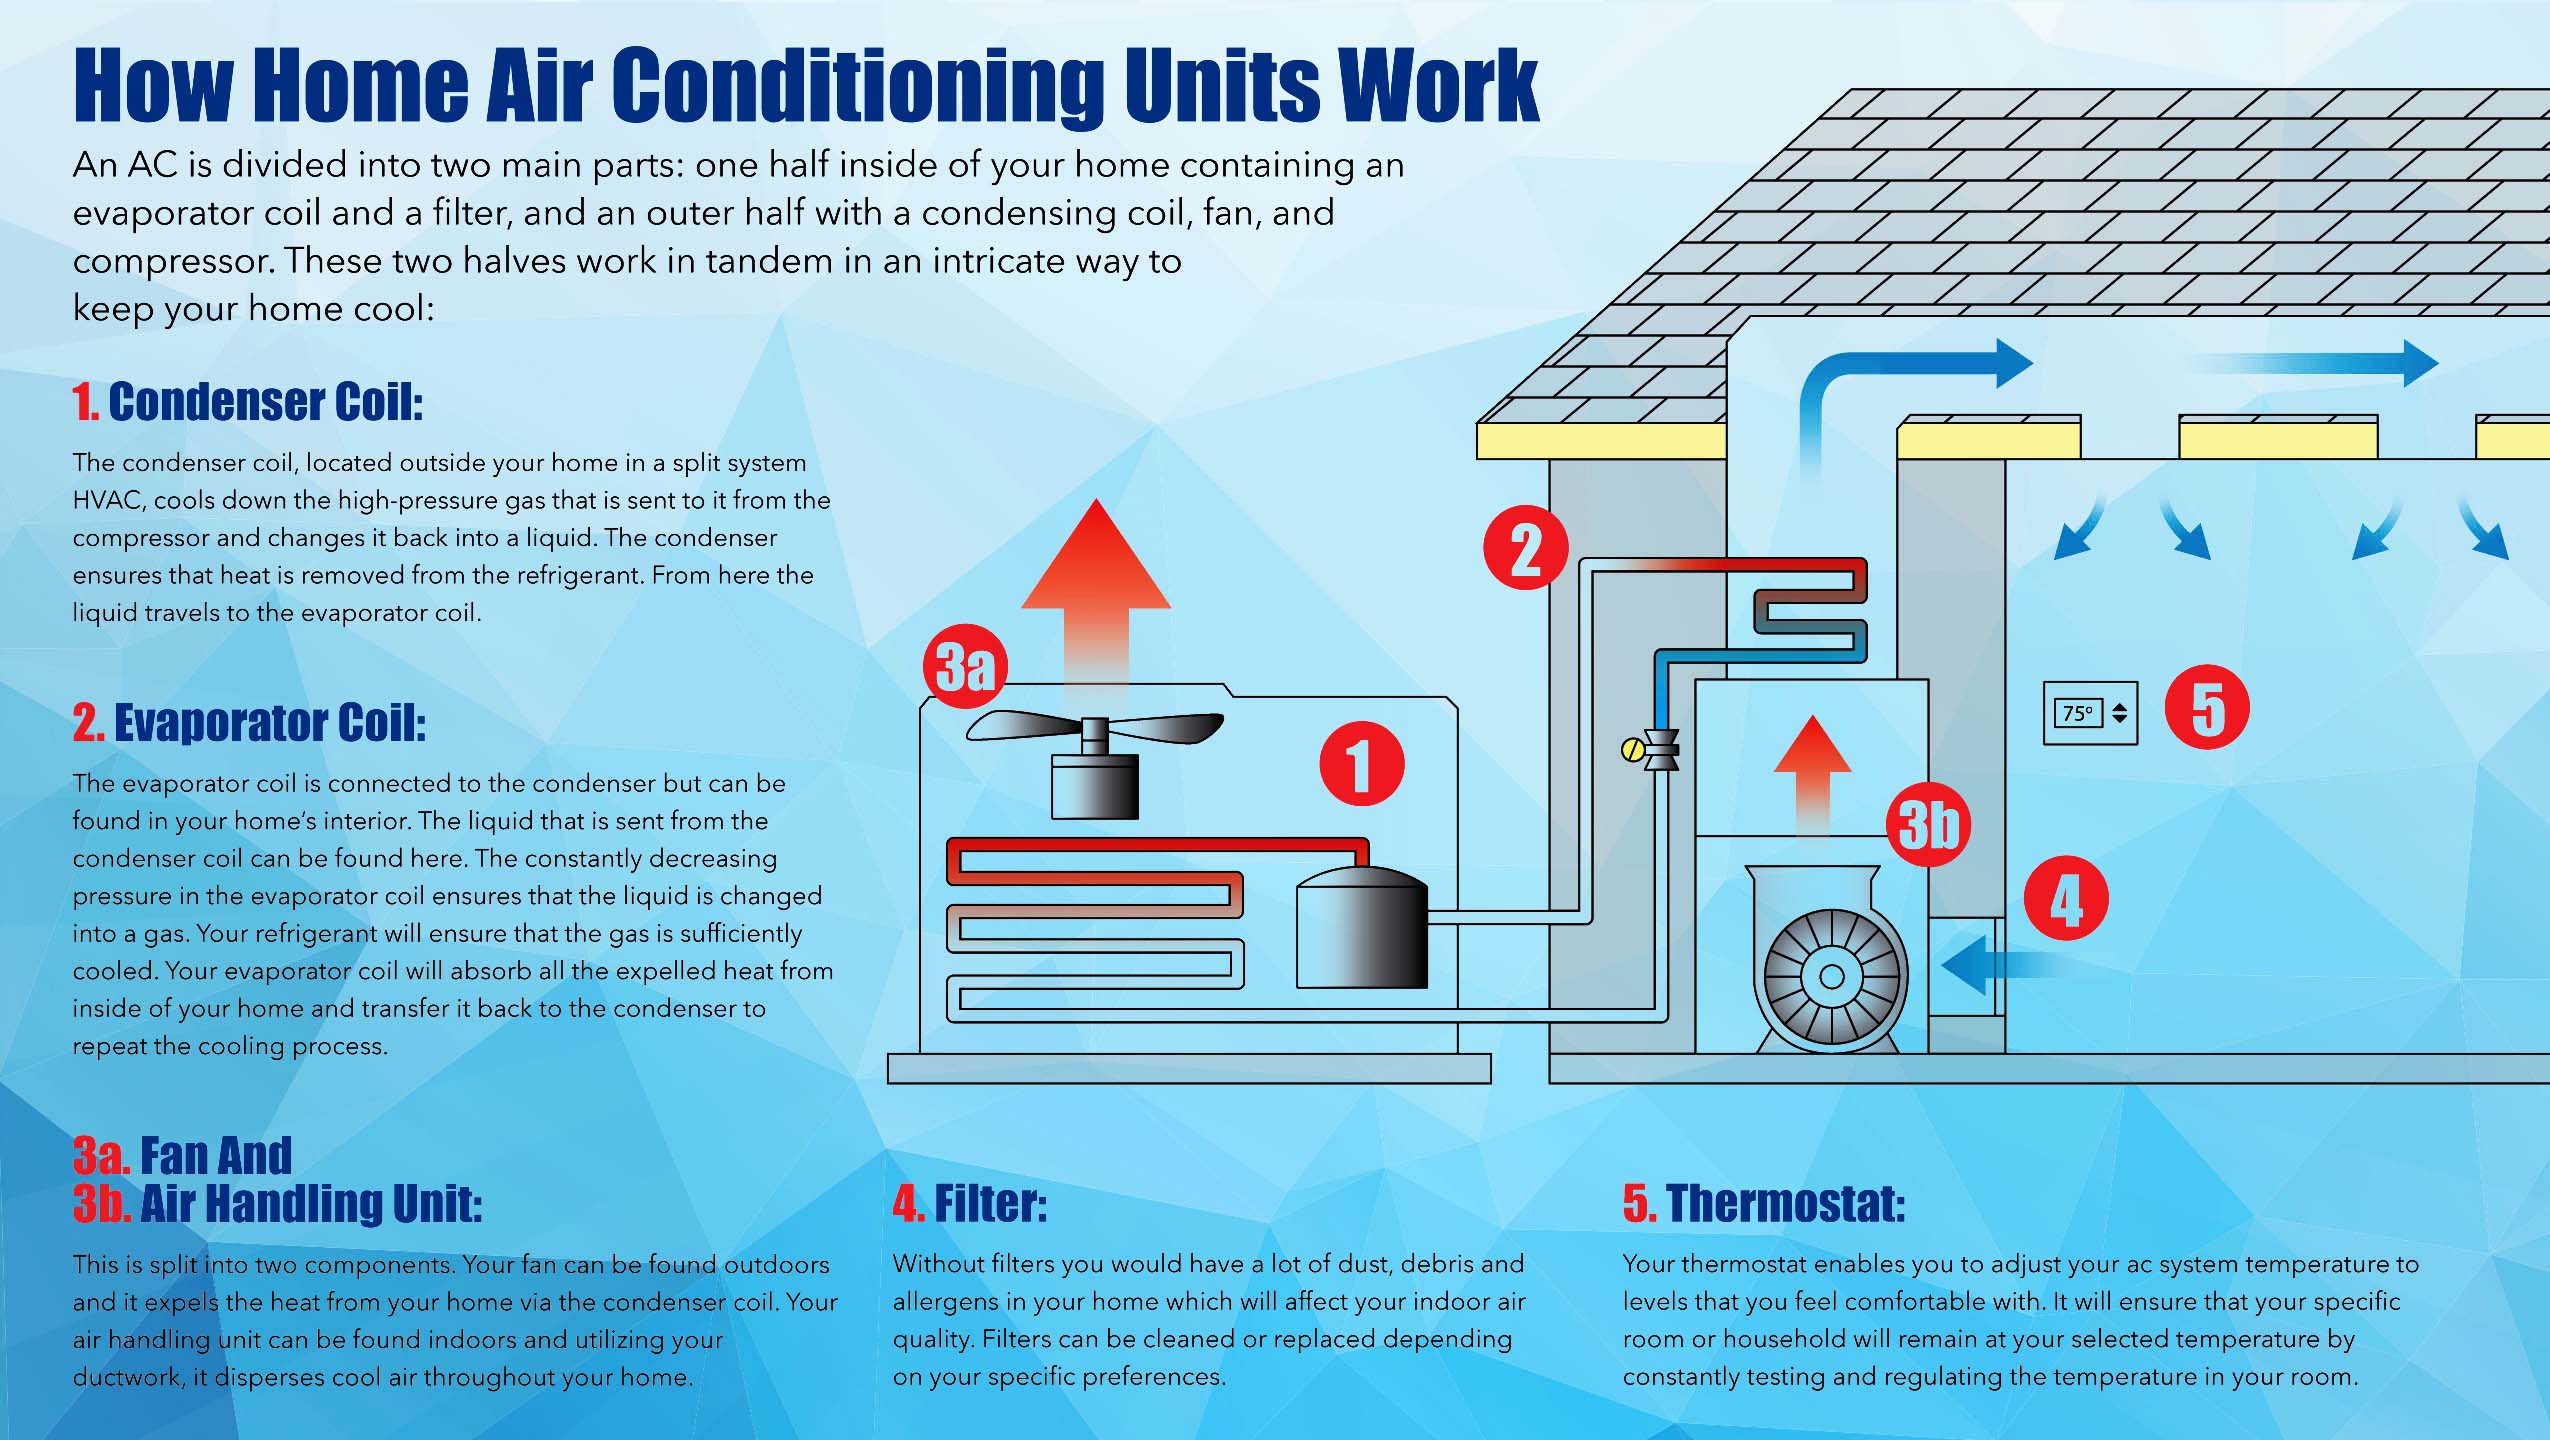
Understanding Your Apartment's HVAC System
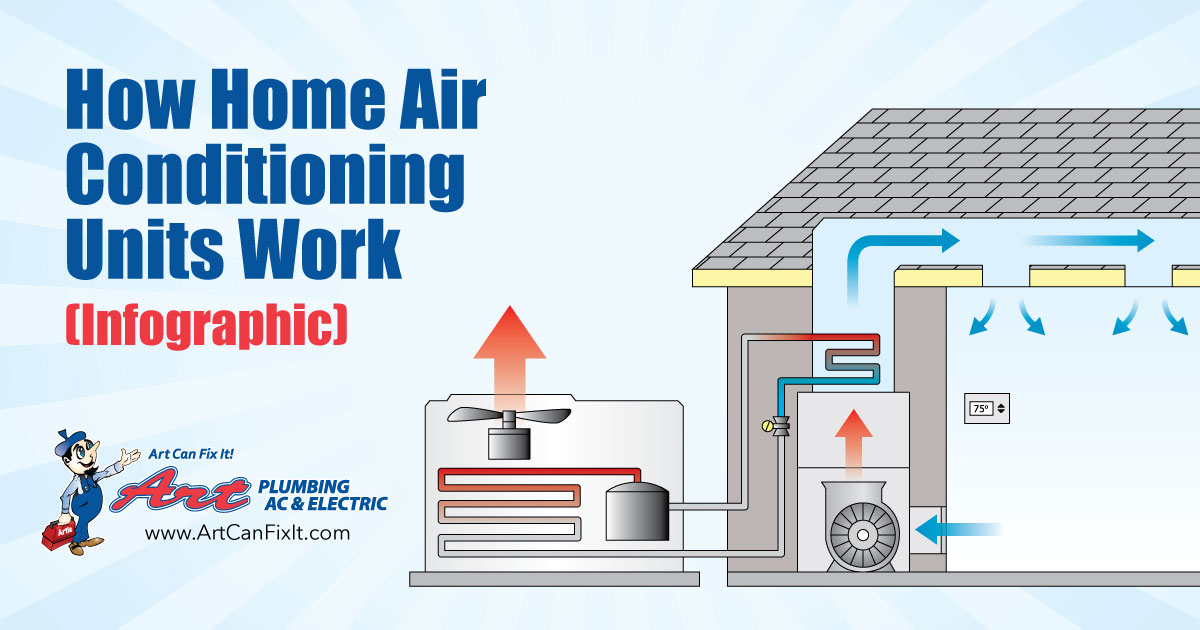
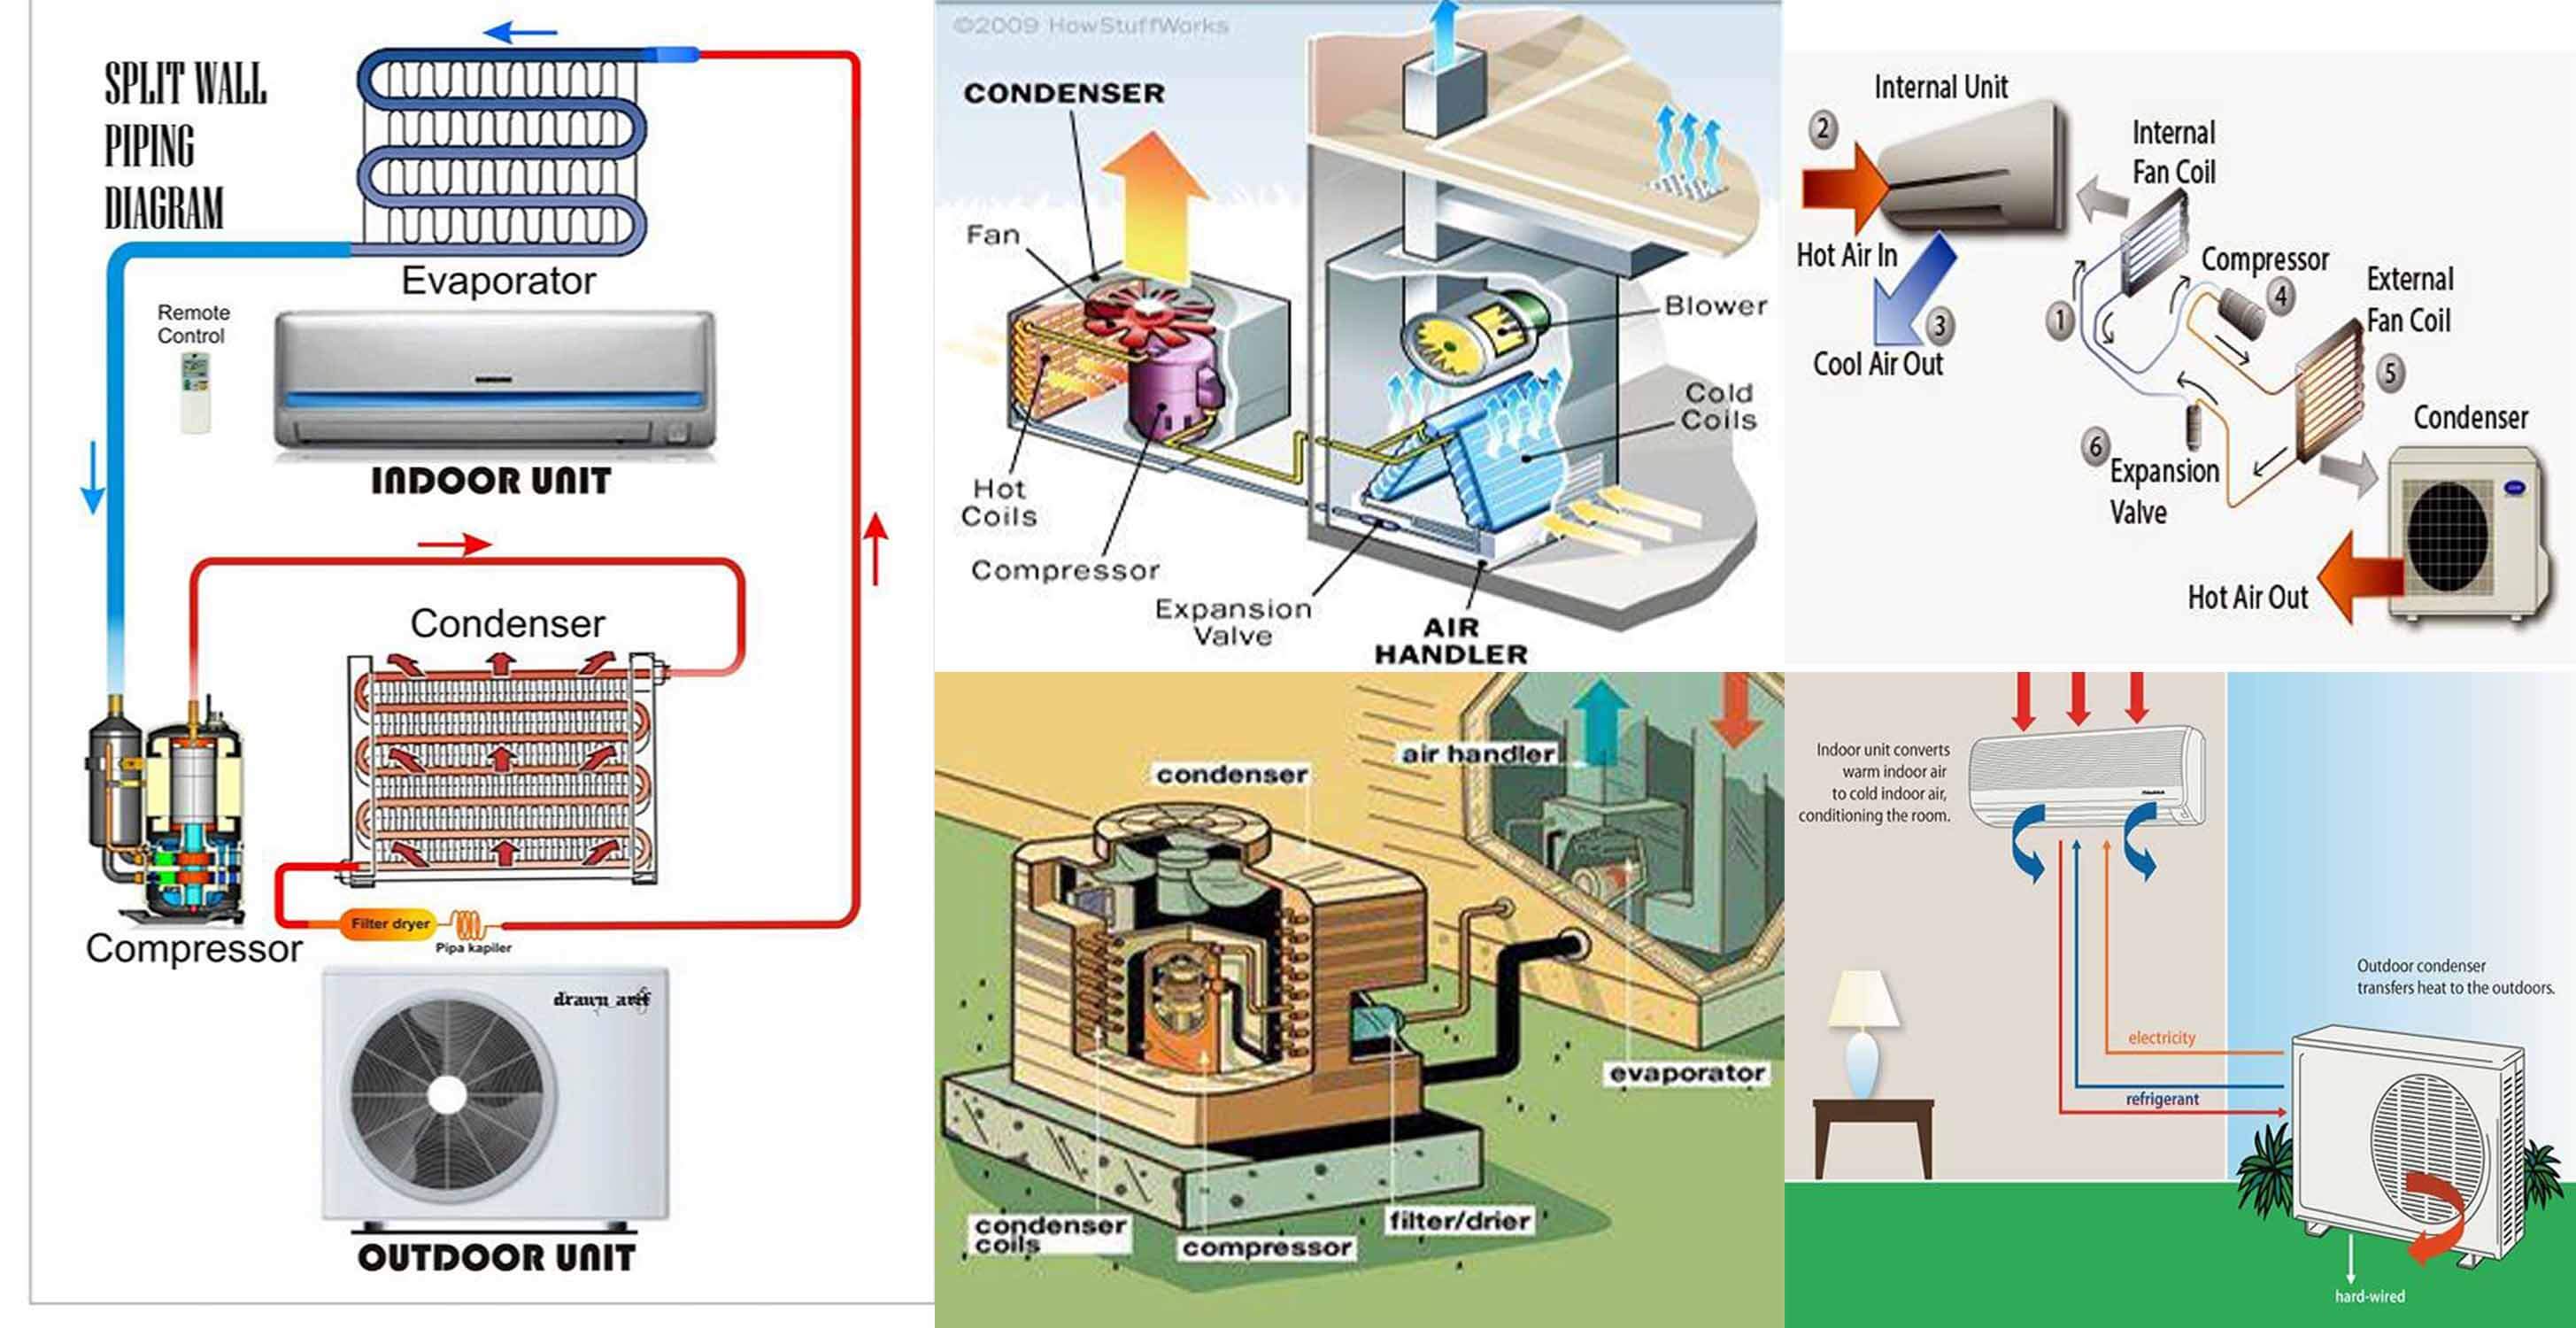
Before diving into troubleshooting, it's important to understand the basics of your apartment's HVAC system. HVAC stands for Heating, Ventilation, and Air Conditioning. In most apartments, you'll find one of two common types of systems:
- Central HVAC: This system uses a central unit (usually located on the roof or in a utility closet) to heat or cool air, which is then distributed throughout the apartment via ductwork. You'll control the temperature using a thermostat.
- Individual Units (Window Units or Wall Units): These self-contained units are installed in windows or walls and directly heat or cool the room they're located in. They have their own controls on the unit itself.
Knowing which type of system you have is crucial for proper troubleshooting.
Common Problem: No Cool or Warm Air
The most frequent complaint is that the HVAC system isn't producing cool air in the summer or warm air in the winter. Let's break down the diagnostic process.
Step 1: The Thermostat Check
The thermostat is the brain of your central HVAC system. First, ensure it's properly set.
- Is the thermostat set to "Cool" in summer or "Heat" in winter? It sounds obvious, but it's the most common mistake.
- Is the temperature set correctly? Make sure the target temperature is actually lower than the current room temperature (in cooling mode) or higher (in heating mode).
- Check the battery. A low battery can cause the thermostat to malfunction. Replace the batteries with fresh ones.
- Inspect the thermostat wires (Central HVAC only). If you're comfortable and *safely* can, remove the thermostat cover (usually it pulls off or has small screws). Are any wires loose or disconnected? If you find loose wires, gently try to reattach them, but *only* if you know where they go. If you're unsure, *do not* proceed and call a professional. Safety first!
DIY Fix: If the thermostat settings were incorrect, adjusting them may solve the problem. Replacing the thermostat batteries is also a quick and easy fix. If you reconnected a loose wire (safely!), test the system to see if that resolved the issue.
When to Call a Pro: If the thermostat is set correctly, has fresh batteries, and all visible wiring appears secure (or you're uncomfortable checking the wires), the issue likely lies elsewhere.
Step 2: The Air Filter Examination
A dirty air filter is a primary culprit behind many HVAC problems. A clogged filter restricts airflow, making the system work harder and less efficiently. This can lead to overheating (in heating mode) or poor cooling (in cooling mode), and can even damage the unit over time.
Locate your air filter. In central HVAC systems, it's typically located near the air handler (the indoor unit) or in a wall or ceiling vent. For individual units, it's usually behind a removable panel on the front of the unit.
Inspect the filter. Is it visibly dirty, dusty, or clogged with debris? If so, it's time to replace it.
DIY Fix:
- Replace the air filter. Purchase a new filter of the correct size (check the old filter for the dimensions or consult your apartment's documentation). Slide the new filter into place, ensuring the airflow direction arrow matches the direction of airflow in your system.
Tip: It's generally recommended to replace your air filter every 1-3 months, depending on usage and air quality.
When to Call a Pro: If replacing the air filter doesn't improve the situation, the problem likely isn't related to airflow restriction. Also, if you notice mold or excessive dust around the filter area, you may have a more serious issue requiring professional cleaning and inspection of the ductwork.
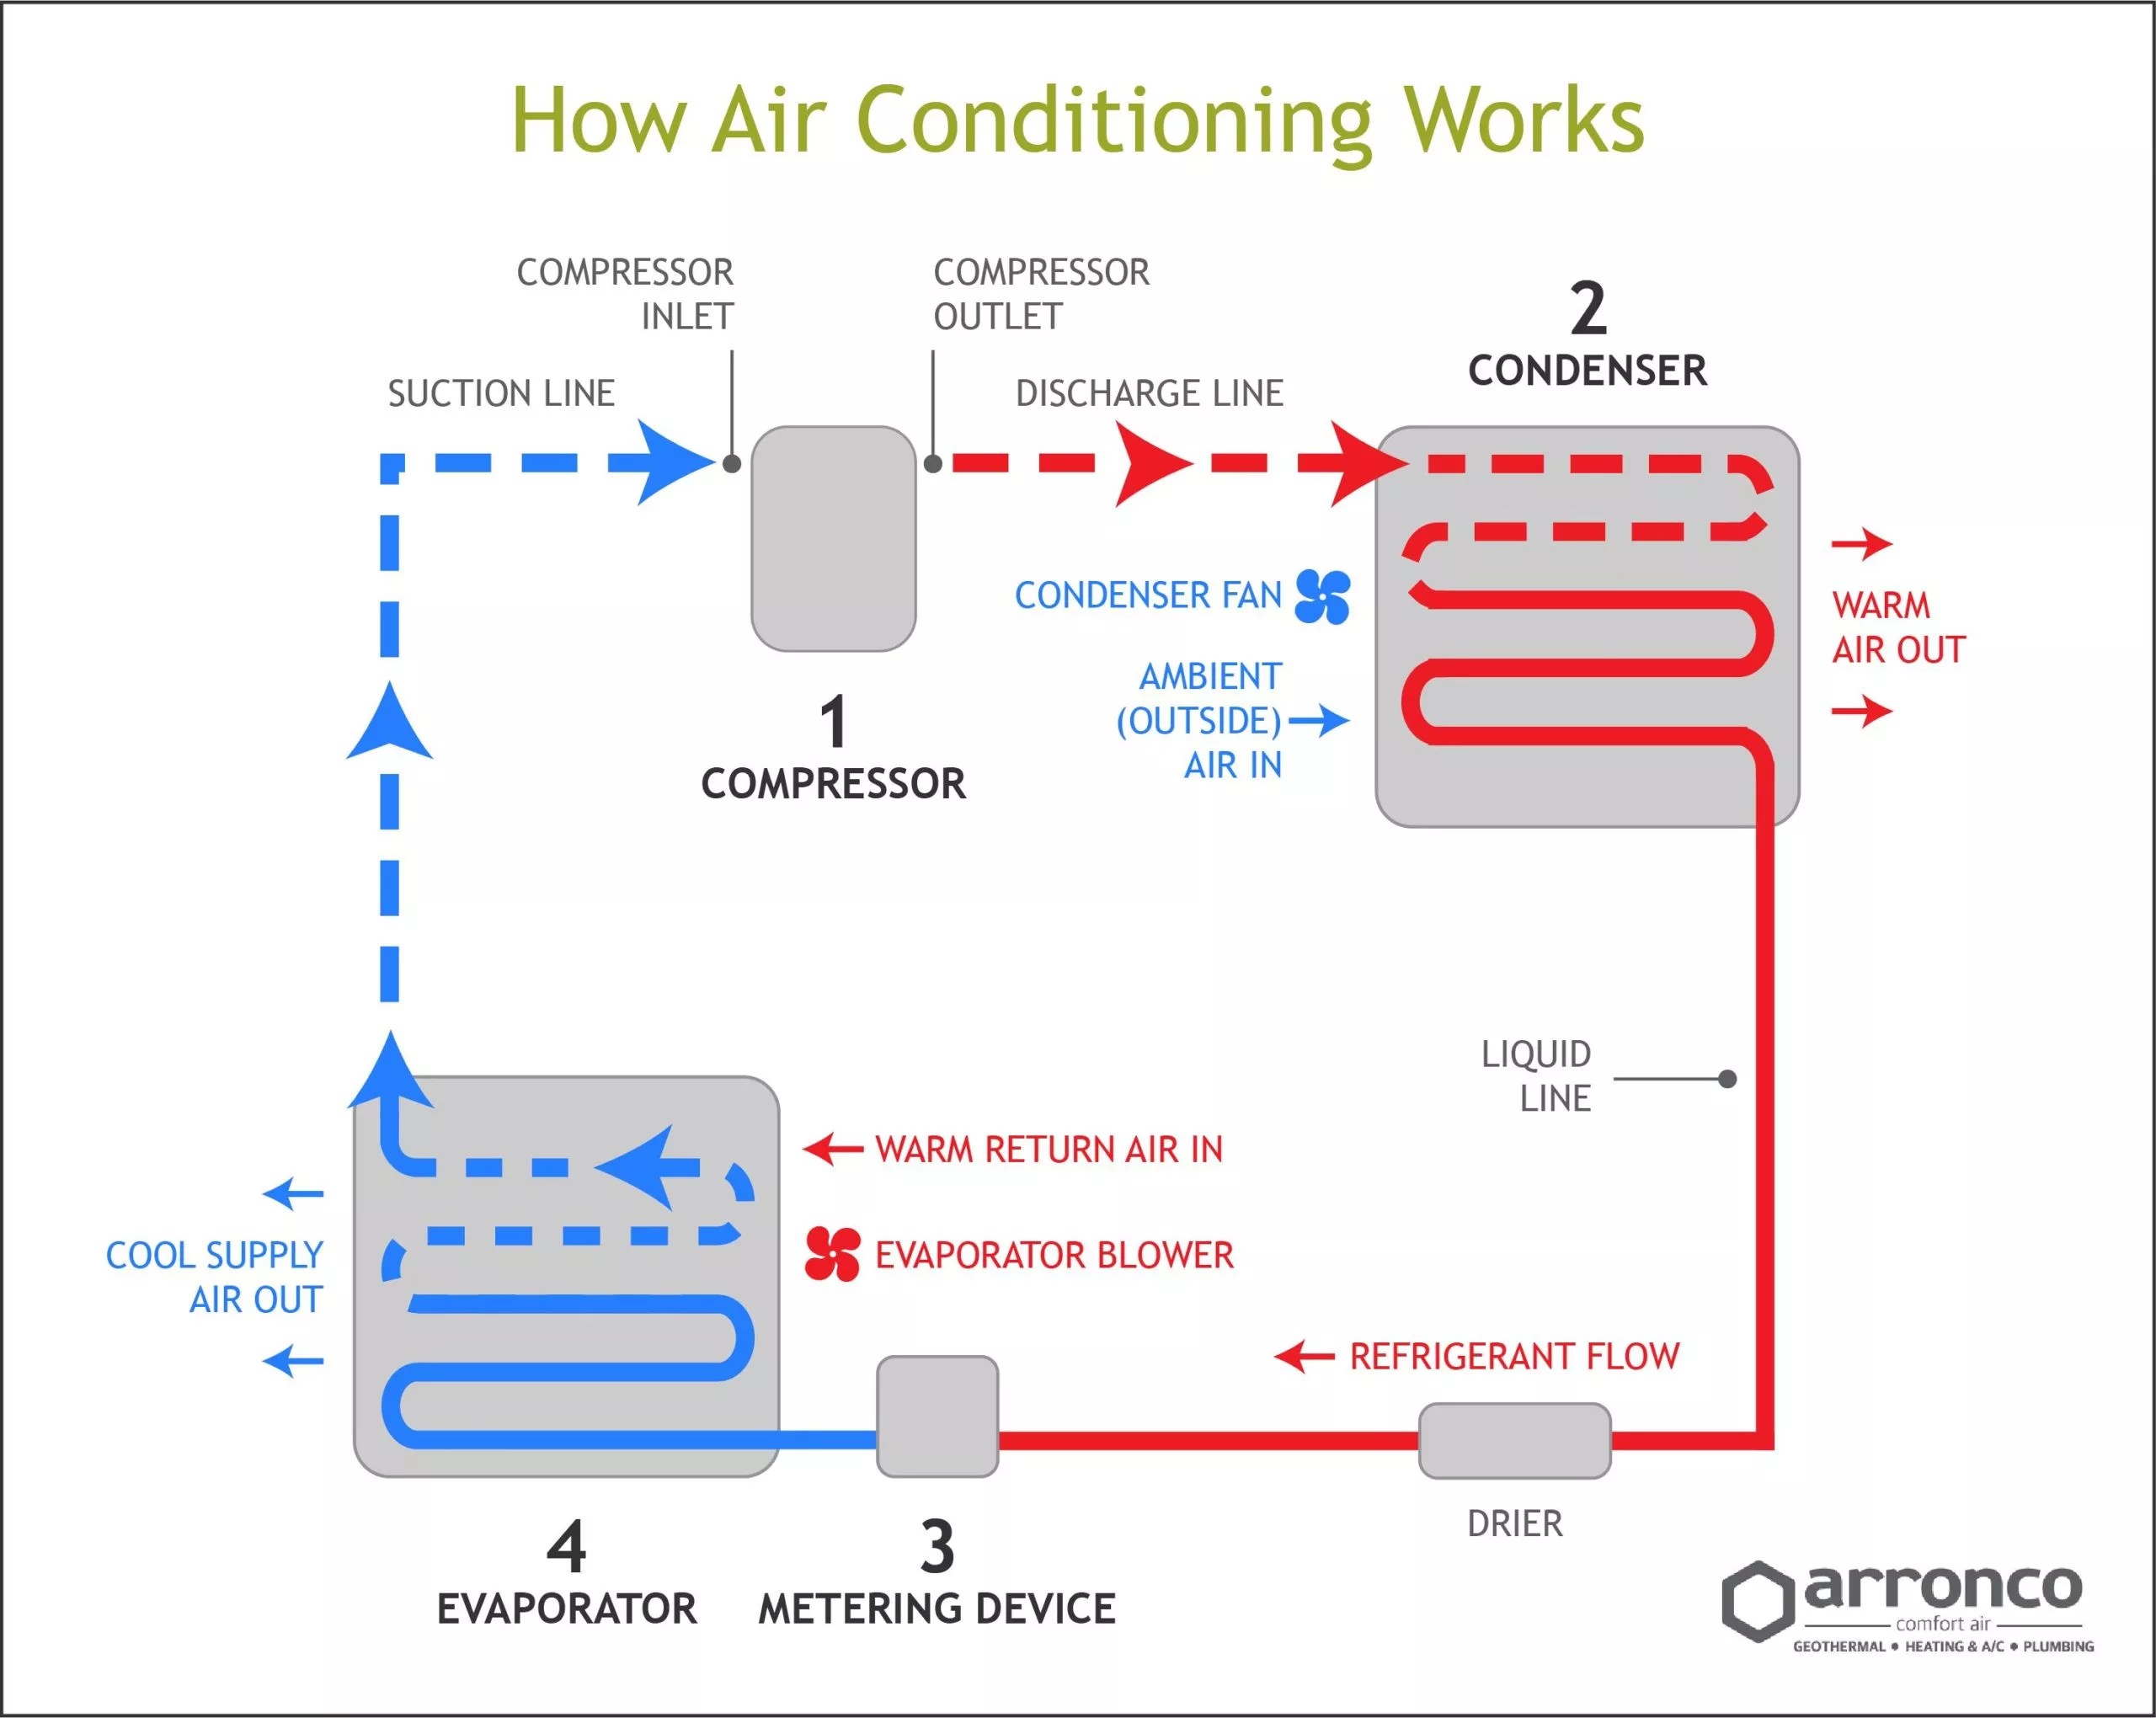
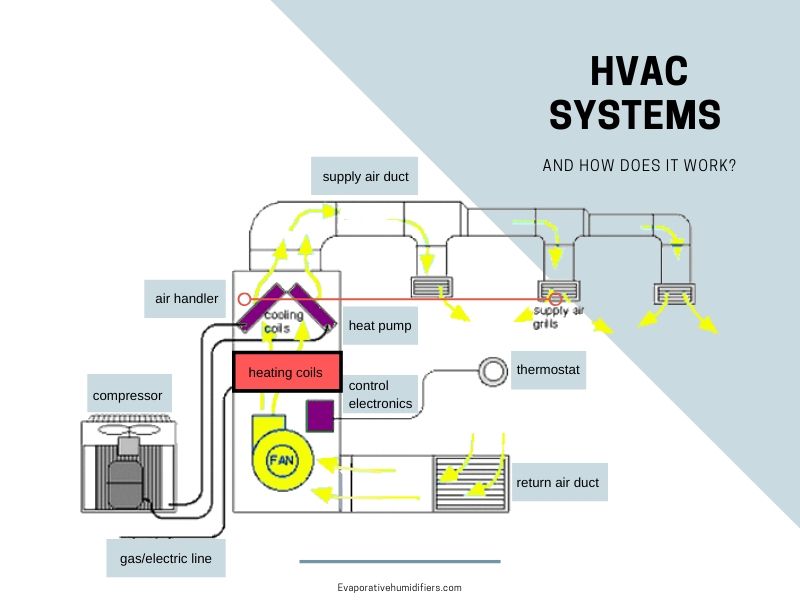
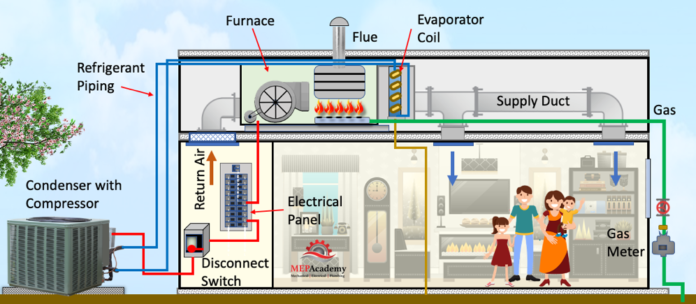
Step 3: Checking the Unit (Central HVAC)
If you have a central HVAC system, there's usually an outdoor unit (the condenser) and an indoor unit (the air handler). Let's start with the outdoor unit.
Outdoor Unit Inspection: (Only perform these checks if it's safe to access the outdoor unit and you're comfortable doing so. If it's on a high roof or difficult to reach, skip this step and call a professional.)
- Visually inspect the unit. Are there any obvious signs of damage, such as bent fins, debris blocking the unit, or ice buildup (in winter)?
- Check for obstructions. Make sure there's at least 2-3 feet of clear space around the unit to allow for proper airflow. Remove any leaves, branches, or other debris blocking the unit.
Indoor Unit Inspection:
- Listen for unusual noises. Is the unit making loud banging, rattling, or hissing sounds? These could indicate a mechanical problem.
- Check for leaks. Look around the unit for any signs of water leaks. Leaks can indicate a refrigerant issue or other internal problem.
DIY Fix (Outdoor Unit): Clearing debris from around the outdoor unit can sometimes improve airflow and system performance.
When to Call a Pro: Any signs of damage, unusual noises, leaks, or ice buildup on either the indoor or outdoor unit require professional attention. Do *not* attempt to repair or disassemble the unit yourself. Refrigerant leaks, in particular, require specialized equipment and training to handle safely.
Step 4: Individual Unit Inspection (Window or Wall Units)
If you have a window or wall unit, troubleshooting is a bit simpler.
- Check the power cord. Is it securely plugged into the outlet? Try a different outlet to rule out a faulty outlet.
- Clean the unit. Dust and debris can accumulate on the coils and vents, reducing efficiency. Use a vacuum cleaner with a brush attachment to clean the coils and vents. You can also use a damp cloth to wipe down the exterior of the unit. *Make sure the unit is unplugged before cleaning.*
- Check the seals. Are the seals around the unit tight? Gaps can allow air to leak in or out, reducing the unit's effectiveness. You can use weather stripping or caulk to seal any gaps.
DIY Fixes: Ensuring the unit is plugged in, cleaning the coils and vents, and sealing any gaps can significantly improve performance.
When to Call a Pro: If the unit is still not working after these steps, or if you notice unusual noises, leaks, or a burning smell, it's time to call a professional. Individual units often have sealed refrigerant systems, and any repairs to these systems should only be performed by qualified technicians.
Common Problem: Strange Noises
Unusual noises emanating from your HVAC system can be alarming. Here's a quick guide to some common noises and what they might indicate.
- Banging: Could indicate a loose component, a problem with the blower motor, or issues with the ductwork (if you have central HVAC).
- Rattling: Often caused by loose screws, debris in the blower fan, or vibrating ductwork.
- Hissing: Could indicate a refrigerant leak (serious - call a pro immediately) or a loose connection.
- Buzzing: Might indicate an electrical problem, a faulty capacitor, or a loose wire.
- Whistling: Often caused by restricted airflow due to a dirty air filter or blocked vents.
DIY Fix: Checking and tightening any visible loose screws can sometimes resolve rattling noises. Replacing a dirty air filter can eliminate whistling noises caused by restricted airflow.
When to Call a Pro: Any other unusual noises, especially hissing, buzzing, or loud banging, require professional diagnosis and repair. Do not attempt to fix electrical or refrigerant issues yourself.
Common Problem: Uneven Heating or Cooling
Is one room always hotter or colder than others? This is a common issue in apartments with central HVAC systems.
- Check the vents. Are all the vents open and unobstructed? Make sure furniture or rugs aren't blocking any vents.
- Inspect the ductwork (if accessible). Look for any obvious leaks or disconnections in the ductwork. (Note: In apartment complexes, ductwork is usually behind walls or in ceilings, making access difficult.)
- Consider room usage. Is the room with the temperature problem frequently used or left open to the outside air?
DIY Fixes: Opening vents and removing obstructions can improve airflow and even out temperatures. You can also try closing vents in rooms that are rarely used to direct more airflow to problem areas.
When to Call a Pro: If you suspect ductwork leaks or disconnections, or if adjusting vents doesn't resolve the issue, a professional can inspect the ductwork and balance the airflow throughout the apartment.
When to Always Call a Professional
While this guide provides troubleshooting steps and DIY fixes, there are certain situations where professional intervention is *always* necessary.
- Refrigerant Leaks: Refrigerant is a hazardous substance, and leaks require specialized equipment and training to handle safely.
- Electrical Issues: Do *not* attempt to repair electrical components of your HVAC system unless you are a qualified electrician. Electrical shock is a serious risk.
- Gas Leaks: If you smell gas near your furnace or HVAC system, evacuate the area immediately and call your gas company or the fire department.
- Complex Mechanical Problems: If you suspect a major mechanical problem with your HVAC unit (e.g., a broken compressor, a faulty blower motor), it's best to leave the repair to a professional.
- If you're uncomfortable: Your safety is paramount. If you are at all uncomfortable performing any of these troubleshooting steps, *stop* and call a qualified HVAC technician.
Important Note: In many apartment complexes, HVAC repairs are the responsibility of the landlord or property management company. Before attempting any repairs yourself, check your lease agreement to see what is covered and what is not. Contacting your landlord or property manager is often the first and best step.
By following this guide, you can confidently troubleshoot common apartment HVAC problems, potentially saving yourself time and money. Remember to prioritize safety and know when to call in the professionals. A well-maintained HVAC system ensures a comfortable and healthy living environment.
:max_bytes(150000):strip_icc()/what-are-central-air-conditioners-1152645_V2-390c6f1f6ca14b4ebc59426f226a78a8.png)