How Does A King Valve Work

Ever walked into your home on a sweltering summer day, only to be greeted by lukewarm air sputtering from your AC vents? Or shivered through a winter night despite your furnace running seemingly non-stop? These are frustrating experiences, and while many heating and cooling problems require a professional, some issues are related to components you can (carefully) investigate yourself. One such component, often overlooked, is the king valve. While not directly the *cause* of your woes, its position can tell you a *lot* about the state of your system, and whether or not a professional is needed.
Understanding the King Valve: Your System's Gatekeeper
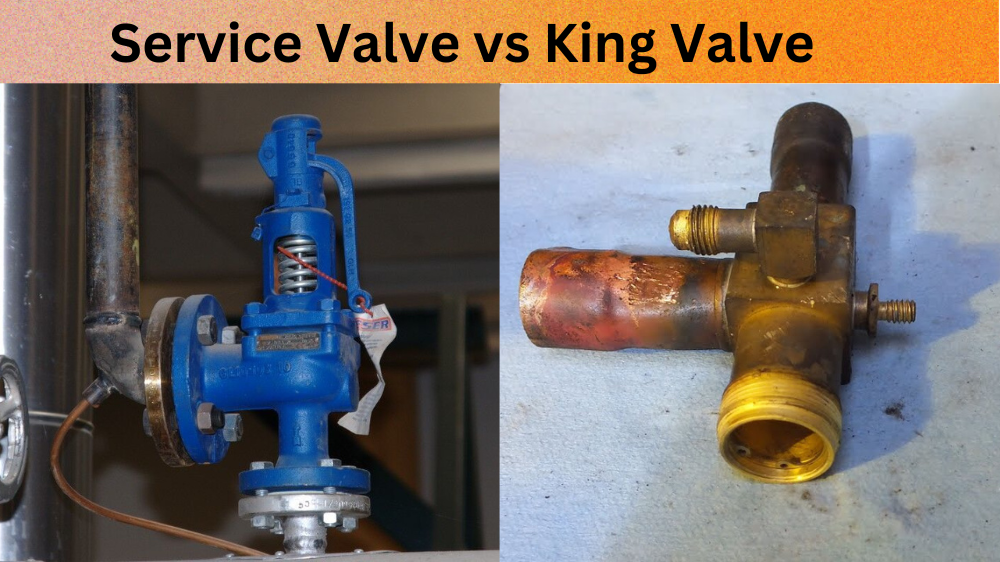
So, what exactly is a king valve? Simply put, it's a shut-off valve located on the refrigerant lines of your outdoor AC unit (the condenser) or heat pump. Think of it as a gatekeeper that controls the flow of refrigerant – the lifeblood of your cooling and heating system. There are typically two king valves: one on the liquid line (smaller diameter copper pipe) and one on the suction line (larger diameter copper pipe).
Its primary purpose isn't for homeowners to adjust. It's used by HVAC technicians for servicing the system. They use it to isolate the outdoor unit for repairs, refrigerant charging, and evacuation.
Diagnosing Problems: Is the King Valve the Culprit?
Before we dive in, a critical warning: Refrigerant is dangerous. Do NOT attempt to open or close the king valves yourself unless you are a qualified HVAC technician. Tampering with refrigerant lines can lead to serious injury (frostbite, chemical burns) and environmental damage. Our focus here is on *visually inspecting* the valve and understanding its position, not manipulating it.
Here’s a methodical approach to figuring out if the king valve might be contributing to your heating or cooling problems:
Step 1: Identify the King Valves
Locate your outdoor AC unit or heat pump. You'll find two copper pipes connecting the unit to your house. These are the refrigerant lines. Follow these lines to the unit itself. At the point where they connect, you should see two valves. These are your king valves.
What to look for (no tools needed):
- Presence: Are both valves actually present? Sometimes, due to damage or improper installation, one might be missing (rare, but possible).
- Visual Damage: Look for signs of physical damage like dents, corrosion, or oil residue around the valves. Oil residue can indicate a refrigerant leak.
- Valve Cap: Each valve should have a protective cap screwed on top. Ensure these caps are in place. They prevent dirt and moisture from entering the valve stem.
Step 2: Check the Valve Position
This is the most important step for homeowners. The king valves should be in the open position during normal operation. Visually, this means the valve stem (the part you'd turn to close it) should be backseated. It will typically look like a small bolt is unscrewed fully from the valve. When the valve is closed the stem will be fully screwed in.
What to look for (no tools needed):
- Both Valves Open: Are both the liquid line and suction line king valves in the fully open (backseated) position? This is the normal operating condition.
- One or Both Valves Closed: If one or both valves are closed (stem screwed in), it's likely the cause of your problem. This restricts or completely blocks the refrigerant flow.
Step 3: Understanding the Implications of Valve Position
Here's what different valve positions might indicate:
- Both Valves Open: This is the ideal scenario. If your system isn't working correctly and both valves are open, the king valves are likely not the problem. Move on to checking other potential issues (air filter, thermostat settings, etc.).
- One Valve Closed: If only one valve is closed, especially after recent service, it's possible the technician forgot to fully open it after completing their work. Do not attempt to open it yourself. Call the HVAC technician who performed the service and explain the situation. They should return to correct it.
- Both Valves Closed: If both valves are closed, it’s highly likely the system was deliberately shut down, perhaps for winterizing a vacation home or during extended periods of non-use. Again, Do not attempt to open it yourself. Call an HVAC professional to assess the situation. There might be a reason they were closed.
Step 4: Look for Other Signs of Problems (No Tools Needed)
While you're inspecting the king valves, take a look around the entire outdoor unit for other potential issues:
- Dirty Condenser Coils: The coils are the fins surrounding the unit. If they are clogged with dirt, leaves, or debris, it restricts airflow and reduces the system's efficiency.
- Ice Buildup: Ice on the refrigerant lines or the condenser coils can indicate a refrigerant leak, restricted airflow, or other serious problems. Immediately turn off the system and call an HVAC technician.
- Unusual Noises: Listen for any loud or unusual noises coming from the unit, such as banging, grinding, or hissing. These noises could indicate a failing compressor or other mechanical issues.
- Visible Leaks: Look for any signs of refrigerant leaks, such as oil residue, bubbling, or a sweet, pungent odor near the unit. Refrigerant leaks are dangerous and require immediate professional attention.
DIY Actions (Very Limited and Focused on Prevention)
As stated earlier, do NOT attempt to manipulate the king valves themselves. The only DIY actions you should consider are preventative maintenance measures.
- Cleaning the Condenser Coils (No Tools Needed Initially): If the condenser coils are dirty, you can gently clean them with a garden hose. First, turn off the power to the unit at the breaker box. Then, use a gentle spray nozzle to rinse the coils from the inside out, removing any dirt and debris. Be careful not to damage the delicate fins. If the dirt is caked on, a coil cleaner (available at hardware stores) might be necessary, but follow the product instructions carefully and wear appropriate safety gear (gloves, eye protection).
- Clearing Debris Around the Unit (No Tools Needed): Remove any leaves, branches, or other debris that might be obstructing airflow around the unit. Ensure there is at least 2-3 feet of clear space around the unit on all sides.
- Changing the Air Filter (Inside Your Home - No Tools Needed): This is crucial for maintaining good airflow throughout your entire system. A dirty air filter restricts airflow, making your system work harder and reducing its efficiency. Change the filter regularly (typically every 1-3 months, depending on the type of filter and usage).
When to Call a Professional: No Room for Guesswork
While some issues are simple to diagnose and address, many heating and cooling problems require the expertise of a qualified HVAC technician. Here are some situations where you should always call a professional:
- You suspect a refrigerant leak. Refrigerant leaks are dangerous and require specialized equipment to repair.
- The compressor is making unusual noises. Compressor problems are often complex and require professional diagnosis and repair.
- There is ice buildup on the refrigerant lines or condenser coils. This can indicate a serious problem with the system.
- You are uncomfortable working with electrical components. Incorrectly wiring electrical components can be dangerous and can damage the system.
- The king valves are damaged or corroded. Damaged valves need to be replaced by a qualified technician.
- You are unsure about any aspect of the troubleshooting process. When in doubt, it's always best to err on the side of caution and call a professional.
- One or both king valves are closed, and you did not close them. Do NOT attempt to open them yourself.
Tools You Might See an HVAC Tech Use (For Informational Purposes Only)
It's helpful to know what tools a technician *might* use when working on your system. This gives you a better understanding of the complexity of the job and why DIY isn't always the best option. Do not attempt to use these tools yourself unless you are properly trained and certified.
- Manifold Gauges: These gauges are used to measure the refrigerant pressure in the system. They provide valuable information about the system's performance and can help diagnose refrigerant leaks or other problems.
- Vacuum Pump: A vacuum pump is used to evacuate the refrigerant lines of air and moisture before charging the system with refrigerant.
- Refrigerant Recovery Machine: This machine is used to safely recover refrigerant from the system before performing repairs.
- Refrigerant Charging Scale: A charging scale is used to accurately weigh the refrigerant when charging the system.
- Leak Detector: A leak detector is used to locate refrigerant leaks.
- Multimeter: A multimeter is used to measure electrical voltage, current, and resistance. It is used to troubleshoot electrical problems in the system.
Conclusion: Safety First, Knowledge Second
Understanding the basics of how a king valve works can empower you to troubleshoot simple heating and cooling problems. However, remember that safety is paramount. Never attempt to manipulate refrigerant lines or electrical components unless you are a qualified HVAC technician. By following these guidelines, you can confidently assess your system and determine when it's time to call in the pros. Keeping your system well-maintained and promptly addressing issues will ensure years of comfortable and efficient heating and cooling.