How Does A Pump Down System Work

Imagine this: It’s a sweltering summer day, and you reach for a refreshing glass of ice water, only to find your refrigerator isn't cooling properly. Food is starting to spoil, and the ice maker is churning out nothing but lukewarm water. Before you panic and call a repair technician, let’s explore a common culprit and see if you can tackle the problem yourself: understanding and troubleshooting a pump down system in your refrigerator.
What is a Pump Down System and How Does it Work?
While not all refrigerators use a pump down system, it's a common feature in many modern models, particularly those with electronic controls and automatic defrost. Understanding its function is crucial for effective troubleshooting.
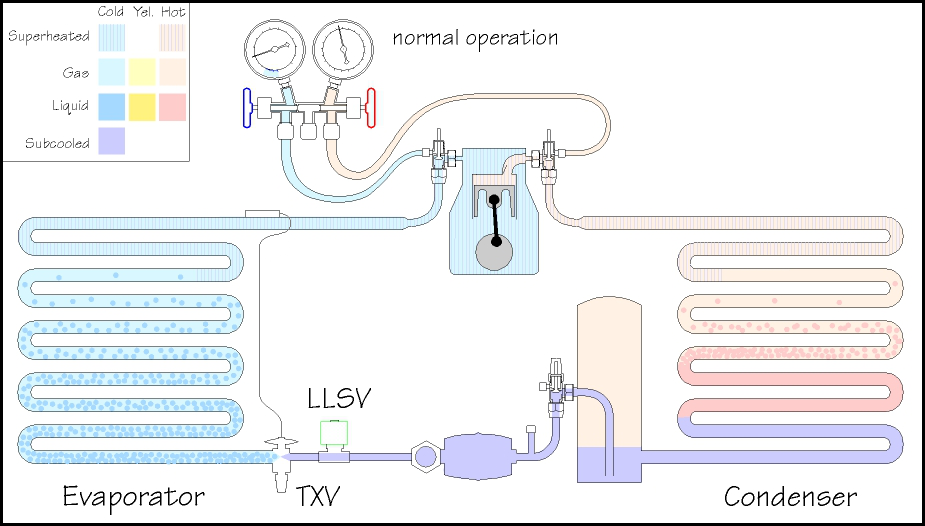
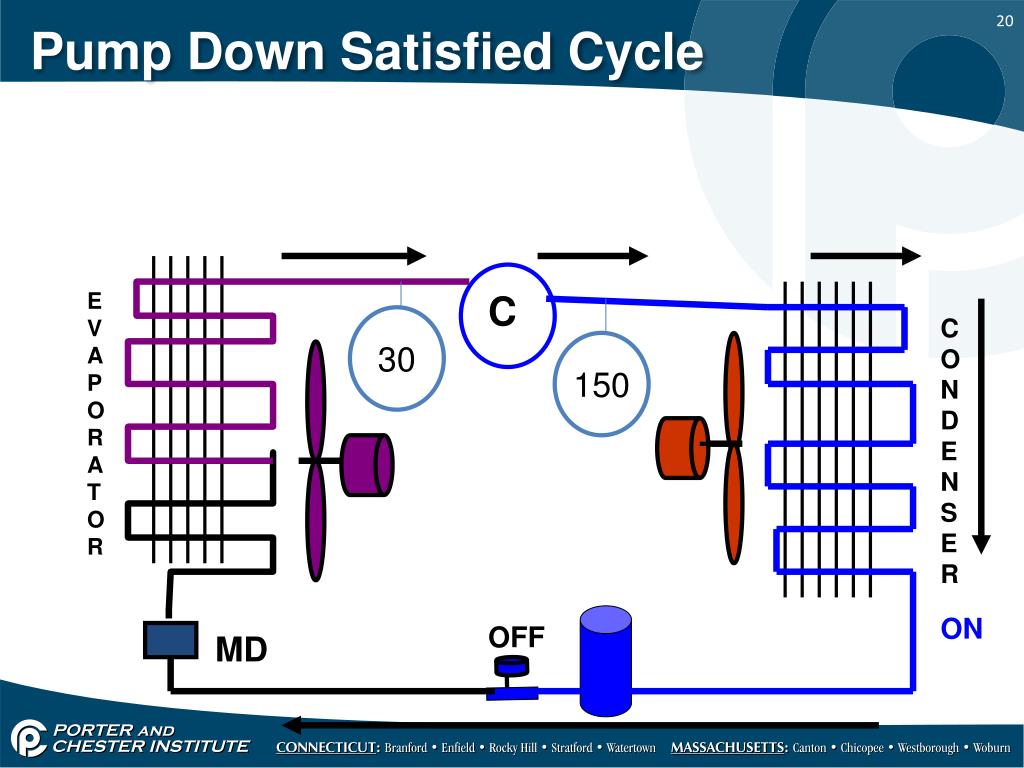
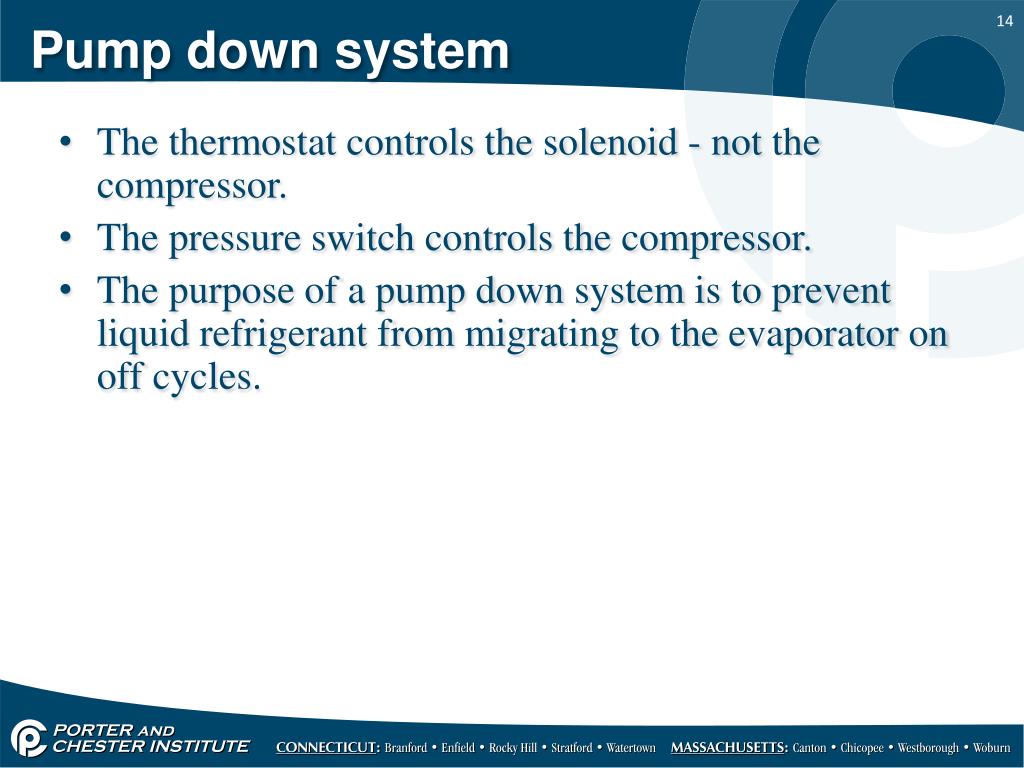
In essence, a pump down system is a method used to control the flow of refrigerant in your refrigerator's cooling circuit. Its primary purpose is to remove refrigerant from the evaporator coil (the part that gets cold inside the fridge) and store it in the receiver or condenser during the “off” cycle of the compressor.
Here’s a simplified breakdown of how it works:
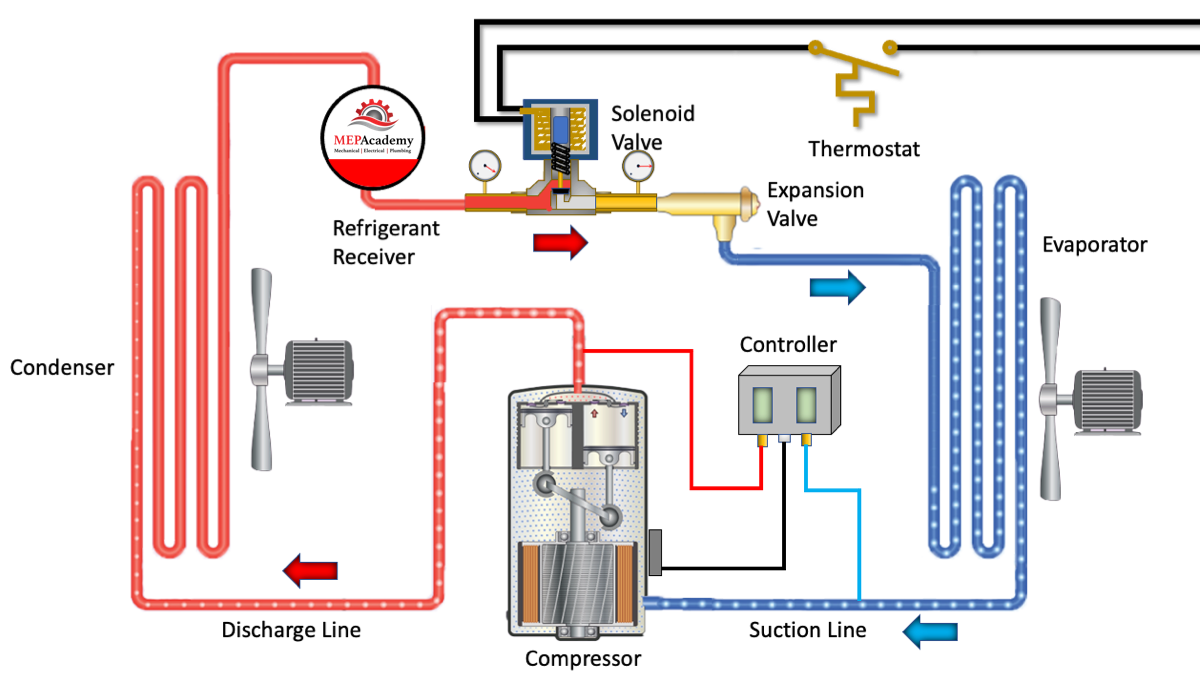
- Cooling Cycle (Compressor ON): The compressor circulates refrigerant through the system. The refrigerant absorbs heat inside the refrigerator, cools the interior, and then travels to the condenser where the heat is released.
- Temperature Reached (Compressor OFF): When the refrigerator reaches the set temperature, the thermostat signals the compressor to shut off. This is where the pump down system kicks in.
- Pump Down Phase: Instead of simply stopping, the compressor continues to run briefly after the thermostat has shut off. A solenoid valve (often called a liquid line solenoid valve) on the liquid line closes, preventing refrigerant from flowing to the evaporator. The compressor then pumps all the remaining refrigerant out of the evaporator coil and stores it in the high-pressure side of the system (condenser/receiver).
- Complete Shutdown: Once the evaporator is relatively free of refrigerant, the compressor finally shuts off.
Why is this important? A pump down system offers several advantages:
- Improved Efficiency: By removing refrigerant from the evaporator during the off cycle, it prevents liquid refrigerant from flooding back to the compressor. Liquid refrigerant can damage the compressor if it enters while it's running, and it also reduces cooling efficiency when the compressor starts again.
- Reduced Compressor Wear: Eliminating liquid slugging (liquid refrigerant entering the compressor) extends the life of the compressor.
- Better Defrosting: A dry evaporator coil defrosts more efficiently, leading to shorter and more effective defrost cycles.
Troubleshooting a Refrigerator with a Pump Down System
Now that you understand how a pump down system works, let's dive into troubleshooting steps. Remember to always prioritize safety. If you are uncomfortable with any of these steps, or if you suspect a refrigerant leak, contact a qualified HVAC/refrigeration technician immediately. Refrigerant leaks are environmentally hazardous and require specialized equipment to handle safely.
Step 1: Initial Checks - Is it Really a Pump Down Issue?
Before assuming the pump down system is at fault, rule out common, simpler issues:
- Power Supply:
- Check the outlet: Is the refrigerator plugged in securely? Test the outlet with another appliance to ensure it’s working.
- Circuit breaker: Has the circuit breaker tripped? Reset it if necessary.
- Temperature Settings:
- Thermostat: Is the thermostat set to the correct temperature? Make sure it hasn't been accidentally turned up.
- Controls: Are any of the other controls (e.g., express cool, vacation mode) interfering with normal operation? Consult your refrigerator’s manual.
- Airflow Obstructions:
- Blocked vents: Ensure that the vents inside the refrigerator and freezer are not blocked by food items. Proper airflow is essential for efficient cooling.
- Dirty condenser coils: The condenser coils are usually located at the back or bottom of the refrigerator. Dust and debris buildup can significantly reduce their ability to dissipate heat. Unplug the refrigerator and use a vacuum cleaner with a brush attachment to gently clean the coils. This is a crucial maintenance step.
- Door Seals:
- Check for leaks: Inspect the door seals for damage or gaps. A poor seal allows warm air to enter, forcing the refrigerator to work harder. You can test the seal by closing the door on a dollar bill; if you can easily pull the bill out, the seal is weak and may need replacement.
If these basic checks don’t solve the problem, proceed to investigate the pump down system.
Step 2: Identifying Pump Down System Symptoms
Here are some symptoms that might indicate a problem with the pump down system:
- Refrigerator not cooling properly: This is the most obvious symptom.
- Compressor running constantly: If the compressor is running non-stop, it could be a sign that the pump down system is not effectively removing refrigerant from the evaporator, leading to inefficient cooling.
- Long defrost cycles: If the evaporator coil isn't being properly evacuated during the off cycle, it might require longer and more frequent defrost cycles.
- Unusual noises from the compressor: A noisy compressor could indicate liquid slugging or other issues related to improper refrigerant management.
- Ice buildup on the evaporator coil: While ice buildup can have other causes, it can also be a sign of inefficient defrosting due to a malfunctioning pump down system.
Step 3: Troubleshooting the Liquid Line Solenoid Valve
The liquid line solenoid valve is a key component of the pump down system. If it fails to close properly, the system won't be able to pump down the refrigerant.
- Location: The solenoid valve is usually located on the liquid line (the small diameter copper tube) near the compressor or the condenser. Consult your refrigerator's service manual for its exact location.
- Visual Inspection: Look for any signs of physical damage to the valve or its wiring.
- Testing for Voltage:
- Safety First! Unplug the refrigerator before working with electrical components.
- Locate the valve's wires: Identify the wires connected to the solenoid valve.
- Use a multimeter: Set your multimeter to measure AC voltage.
- Plug the refrigerator back in briefly: Carefully plug the refrigerator back in and set the thermostat to a cold setting to initiate a cooling cycle.
- Measure voltage: When the compressor is running, check for voltage at the solenoid valve's terminals. You should see the voltage specified on the valve's label (usually 120VAC or 24VAC).
- No voltage? If there's no voltage, the problem could be with the thermostat, the control board, or the wiring leading to the valve. This usually requires a professional diagnosis.
- Testing the Valve's Functionality:
- Refrigerant Handling Warning! Do NOT attempt to open the refrigerant lines yourself. This is dangerous and requires specialized equipment.
- Listen closely: When the compressor shuts off (after the thermostat is satisfied), you should hear a distinct "click" as the solenoid valve closes. If you don't hear a click, the valve may be stuck or faulty. Leave this diagnosis to a professional. They have the tools and expertise to safely handle refrigerant and diagnose valve function.
Step 4: Checking the Compressor Relay/Overload
Sometimes, a faulty compressor relay or overload can mimic pump down system issues. These components protect the compressor from overheating.
- Location: The relay and overload are usually located near the compressor.
- Visual Inspection: Look for signs of burning or damage.
- Testing with a Multimeter: Unplug the refrigerator! Use a multimeter to test the continuity of the relay and overload. A broken connection indicates a faulty component. If you're uncomfortable with electrical testing, consult a professional.
- Replacement: Relays and overloads are relatively inexpensive and can be replaced if faulty. Be sure to use the correct replacement part for your refrigerator model.
Step 5: Defrost System Issues
Although seemingly unrelated, a malfunctioning defrost system can indirectly affect the pump down system's performance. Excessive ice buildup on the evaporator coil can prevent proper refrigerant flow and make the pump down process less effective.
- Check the Defrost Timer/Control Board: If your refrigerator has a defrost timer, ensure it's functioning correctly. Modern refrigerators often use an electronic control board to manage defrost cycles.
- Test the Defrost Heater: Unplug the refrigerator! Use a multimeter to test the continuity of the defrost heater. A lack of continuity means the heater is faulty.
- Check the Defrost Thermostat: The defrost thermostat monitors the evaporator coil temperature and activates the defrost heater when needed. It can be tested for continuity when cold.
When to Call a Professional
While many of these troubleshooting steps can be performed by a homeowner, certain situations require the expertise of a qualified HVAC/refrigeration technician:
- Refrigerant Leaks: If you suspect a refrigerant leak, do not attempt to fix it yourself. Refrigerant is harmful to the environment and requires specialized handling. Signs of a leak include:
- An oily residue near the compressor or tubing.
- A hissing sound.
- A strong, unusual odor.
- Complex Electrical Problems: If you are uncomfortable working with electrical components, or if you suspect a problem with the control board or wiring harness, consult a professional.
- Compressor Problems: Replacing a compressor is a complex and expensive repair that requires specialized tools and knowledge.
- Suspected Sealed System Issues: The sealed system includes the compressor, condenser, evaporator, and refrigerant lines. Repairs to the sealed system require specialized equipment for refrigerant recovery, evacuation, and charging.
- Uncertainty: If you've exhausted the troubleshooting steps and are still unsure of the problem, it's best to call a professional to avoid further damage.
Important Safety Reminders:
- Always unplug the refrigerator before working on any electrical components.
- Wear safety glasses and gloves when handling tools and components.
- Be careful when working with sharp objects or hot surfaces.
- If you are unsure about any step, consult a qualified technician.
By understanding the basics of a pump down system and following these troubleshooting steps, you can often diagnose and fix common refrigerator problems yourself. However, remember to prioritize safety and don't hesitate to call a professional when needed. With a little knowledge and a cautious approach, you can keep your refrigerator running smoothly and avoid costly repairs.