How Does A Radiant Barrier Work

Is your home feeling like an oven in the summer and an icebox in the winter, despite your HVAC system working overtime? Are your energy bills through the roof? You're not alone. Many homeowners struggle with maintaining a comfortable indoor temperature and keeping energy costs under control. One often overlooked factor is the effectiveness of your home's radiant barrier, if you have one. Let's troubleshoot how a radiant barrier works, and how to determine if it's contributing to your discomfort.
Understanding Radiant Heat and Radiant Barriers
To understand if your radiant barrier is failing, first, you need to grasp what radiant heat is and how these barriers function.
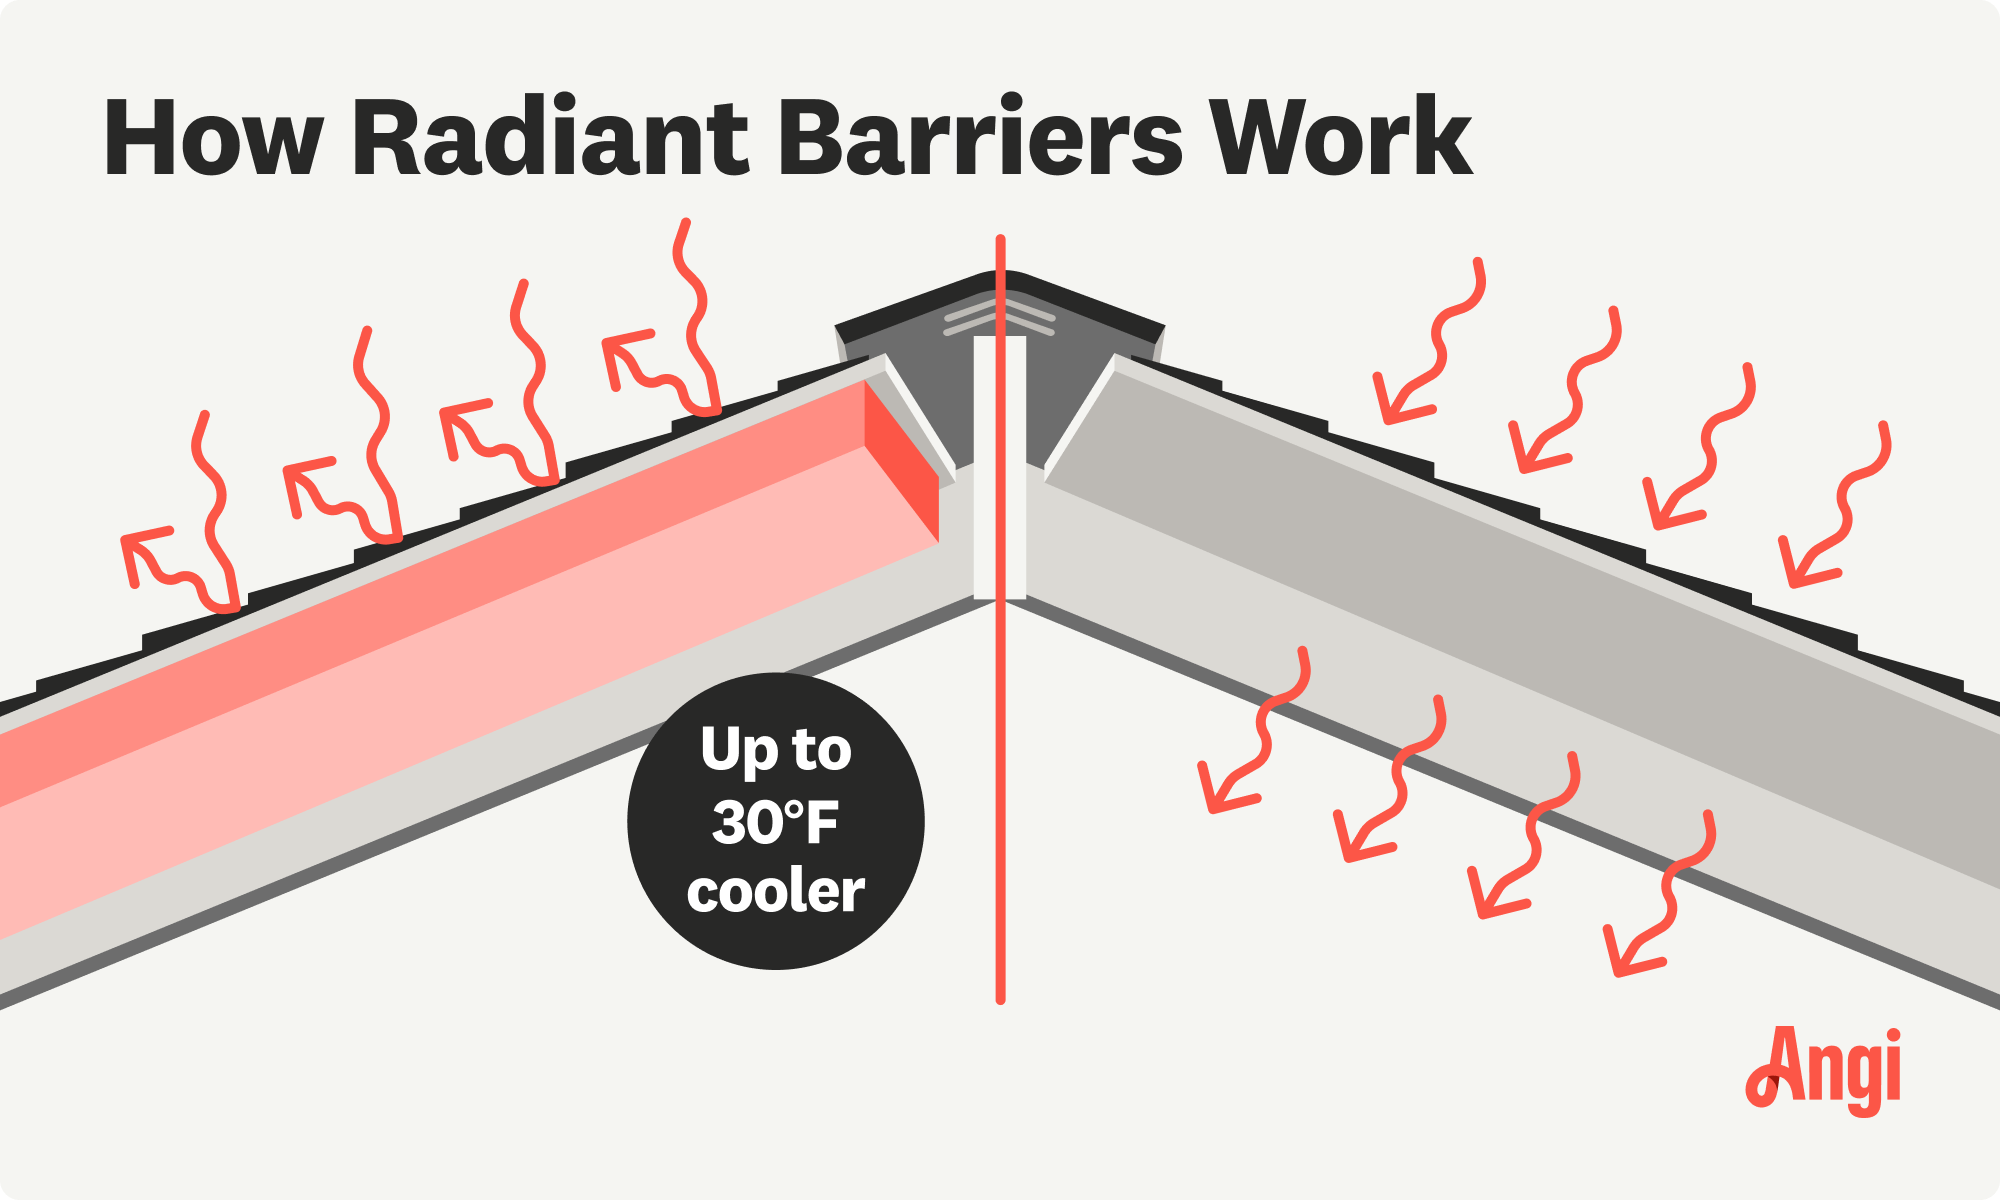
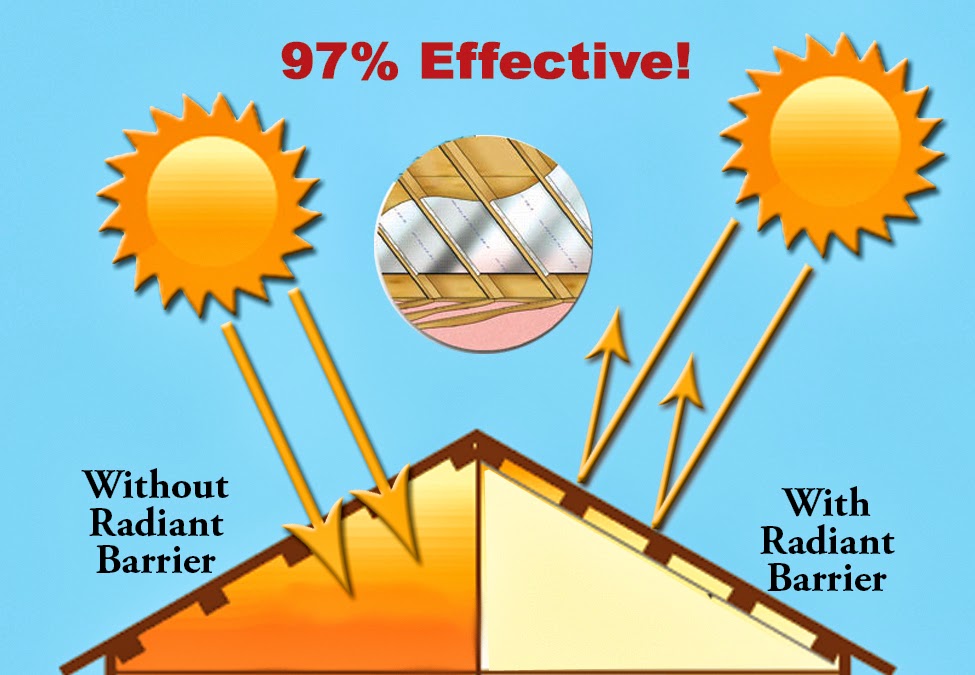
Radiant heat is energy that travels in electromagnetic waves. Think of the sun warming your skin – that's radiant heat. In your attic, the sun heats the roof, which then radiates heat downwards into your home. Conversely, in the winter, heat inside your home radiates upwards towards the cold roof.
A radiant barrier is a reflective material, usually aluminum foil-based, designed to block this radiant heat transfer. It doesn't stop heat from conducting or convecting, but it significantly reduces the amount of radiant heat that enters or leaves your home. The key is its *reflectivity*; it bounces the radiant energy back to its source.
Diagnosing Radiant Barrier Issues: A Step-by-Step Guide
Here’s a methodical approach to troubleshooting potential problems with your radiant barrier.
Step 1: Preliminary Checks (No Tools Required)
Before grabbing any tools, perform these simple visual checks.
- Check for Physical Damage: Carefully inspect the visible portions of your radiant barrier. Look for tears, rips, or large areas of missing material. Pay close attention to areas around vents, pipes, and other penetrations.
- Observe Dust Accumulation: Radiant barriers lose effectiveness when covered in dust. A light coating is normal, but a thick layer of dust significantly reduces its reflectivity. Can you easily see the reflective surface, or is it mostly obscured?
- Note Installation Quality: Was the radiant barrier installed correctly? Is it tightly secured or is it sagging, loose, or improperly overlapping? Poor installation can create gaps where radiant heat can bypass the barrier.
- Evaluate Ventilation: Proper attic ventilation is crucial for *any* insulation system to work effectively. Is your attic adequately ventilated with soffit vents, ridge vents, or gable vents? Poor ventilation traps heat and humidity, negating the benefits of the radiant barrier. You can usually see if vents are blocked from the outside.
What to look for without tools: Obvious damage (tears, missing pieces), excessive dust accumulation, visibly poor installation (sagging, gaps), and blocked or insufficient attic ventilation.
Step 2: Closer Inspection (Basic Equipment Needed)
For a more thorough assessment, you'll need some basic equipment.
- Flashlight: A bright flashlight helps you see into dark corners and identify hidden damage.
- Tape Measure: Use a tape measure to check the coverage area of the radiant barrier and identify any significant gaps.
- Utility Knife/Scissors: (Use with caution!) To carefully cut small sections of dust or debris for closer inspection or to temporarily repair small tears (see safety precautions below).
- Ladder: (Use with extreme caution!) To safely access the attic space. *Never work alone on a ladder.*
- Safety Glasses and Gloves: Protect your eyes and hands from dust, debris, and potential irritants.
Safety First! * Always turn off power to any electrical circuits in the attic before entering. * Wear appropriate protective gear, including safety glasses, gloves, and a dust mask. * Be mindful of your footing and avoid stepping on unstable surfaces (like between joists). * Never work alone in the attic. * If you're uncomfortable working at heights or in confined spaces, call a professional.
Detailed Inspection Steps:
- Measure Coverage Area: Compare the actual coverage area of the radiant barrier to the total attic floor area. Are there large sections that are completely uncovered? Significant gaps around fixtures?
- Assess Dust Buildup: Use your flashlight to get a closer look at the dust accumulation. Is it just a thin layer, or a thick, matted coating? Gently brush away a small area to see how easily the dust comes off.
- Examine Seams and Overlaps: Check how the radiant barrier sheets are joined together. Are the seams properly overlapped and secured with tape? Are there any areas where the seams have come apart?
- Inspect for Water Damage: Look for signs of water damage on the radiant barrier and the surrounding insulation. Water can damage the reflective surface and promote mold growth, reducing its effectiveness. Water damage needs immediate attention from a qualified professional.
- Temperature Check (Qualitative): On a sunny day, carefully feel the underside of the roof sheathing in an area *without* a radiant barrier and then in an area *with* a radiant barrier. The area with the radiant barrier should feel significantly cooler. *Don't burn yourself on hot surfaces!*
What to look for with basic equipment: Gaps in coverage, the severity of dust accumulation, the integrity of seams, signs of water damage, and a temperature difference between areas with and without the radiant barrier.
Step 3: Advanced Diagnostics (Requires Professional Expertise)
Some issues require specialized equipment and expertise to diagnose. If you encounter any of the following, it's time to call a professional HVAC technician or insulation specialist.
- Complex Airflow Issues: Diagnosing and resolving complex airflow problems within the attic and throughout the home often requires specialized equipment like blower door tests and thermal imaging cameras.
- Extensive Water Damage or Mold Growth: Water damage and mold are serious issues that can affect the structural integrity of your home and your health. Professional remediation is essential.
- Electrical Problems: If you suspect any electrical issues in the attic, such as damaged wiring or malfunctioning fixtures, do not attempt to fix them yourself. Contact a licensed electrician immediately.
- HVAC System Malfunctions: If you suspect that your HVAC system is not functioning properly, contact a qualified HVAC technician for diagnosis and repair.
Warning Signs You Need a Professional: * Evidence of rodents or pests nesting in the insulation or radiant barrier. * Large-scale water damage or mold growth. * Suspected electrical problems. * HVAC system malfunctions. * If you are unsure about any aspect of the troubleshooting process.
DIY Actions: Simple Fixes You Can Try
If your radiant barrier issue is relatively minor, there are some simple DIY actions you can take. Always prioritize safety!
- Seal Small Tears: Use aluminum foil tape to repair small tears or rips in the radiant barrier. Make sure the tape adheres properly to the reflective surface.
- Re-Secure Loose Sections: If sections of the radiant barrier are sagging or loose, use staples or construction adhesive to re-secure them to the rafters or framing.
- Clear Blocked Vents: Remove any debris that is blocking attic vents. This will improve airflow and help to reduce heat buildup.
- Light Dusting (Carefully!): If the dust accumulation is light, you can carefully dust the radiant barrier with a soft brush or vacuum cleaner attachment. *Avoid using excessive pressure, as this can damage the reflective surface.* It’s usually not worth the effort, as disturbing the dust can release it into the air. Spot clean only.
Tips for Effective DIY Repairs:
- Use high-quality aluminum foil tape for repairs.
- Overlap seams by at least 6 inches.
- Ensure proper ventilation after making repairs.
When to Call a Professional
While some minor repairs can be done yourself, it's crucial to recognize when the problem is beyond your capabilities. Here's a breakdown of situations that warrant professional help:
- Extensive Damage: If the radiant barrier has significant damage, such as large tears, missing sections, or water damage, it may be necessary to replace it entirely. This is a complex project that is best left to professionals.
- Dust Buildup (Severe): If the radiant barrier is heavily coated in dust, simply dusting it may not be enough. A professional cleaning or replacement may be required.
- Air Sealing and Insulation Issues: In many cases, radiant barrier problems are related to broader issues with air sealing and insulation. A professional energy audit can help identify these issues and recommend solutions.
- Comfort Issues Persist: If you've tried the DIY solutions and your home is still uncomfortable and your energy bills are still high, it's time to call a professional. They can diagnose the underlying cause of the problem and recommend the best course of action.
Choosing the Right Professional:
- Get multiple quotes from reputable contractors.
- Check their credentials and licensing.
- Ask for references from previous clients.
- Make sure they are insured and bonded.
Conclusion
A properly functioning radiant barrier can significantly improve your home's energy efficiency and comfort. By following this troubleshooting guide, you can identify potential problems and take appropriate action. Remember to prioritize safety and don't hesitate to call a professional when needed. With a little knowledge and effort, you can ensure that your radiant barrier is working effectively to keep your home comfortable year-round and save you money on energy bills. Don't forget, proper attic ventilation is key to any successful insulation system, including radiant barriers!