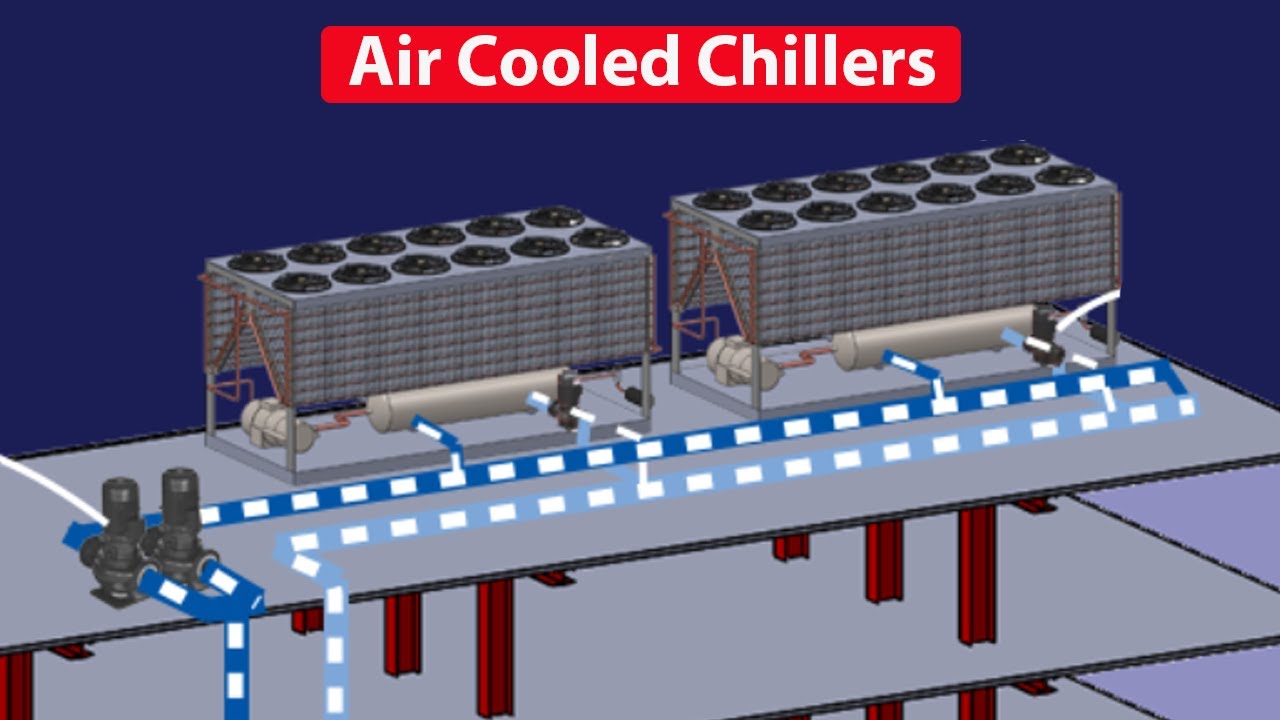
How Does An Air Cooled Chiller Work
Ah, the discomfort of a home that's either too hot or too cold! It's a common woe, and when your air-cooled chiller isn't doing its job, life can become pretty unpleasant. Before you resign yourself to sweltering summers or freezing winters, let's troubleshoot. This guide will walk you through the basics of how your air-cooled chiller works, and how to diagnose common issues. We'll cover some simple DIY checks, and importantly, when to call in the pros.
Understanding Your Air-Cooled Chiller: The Basics
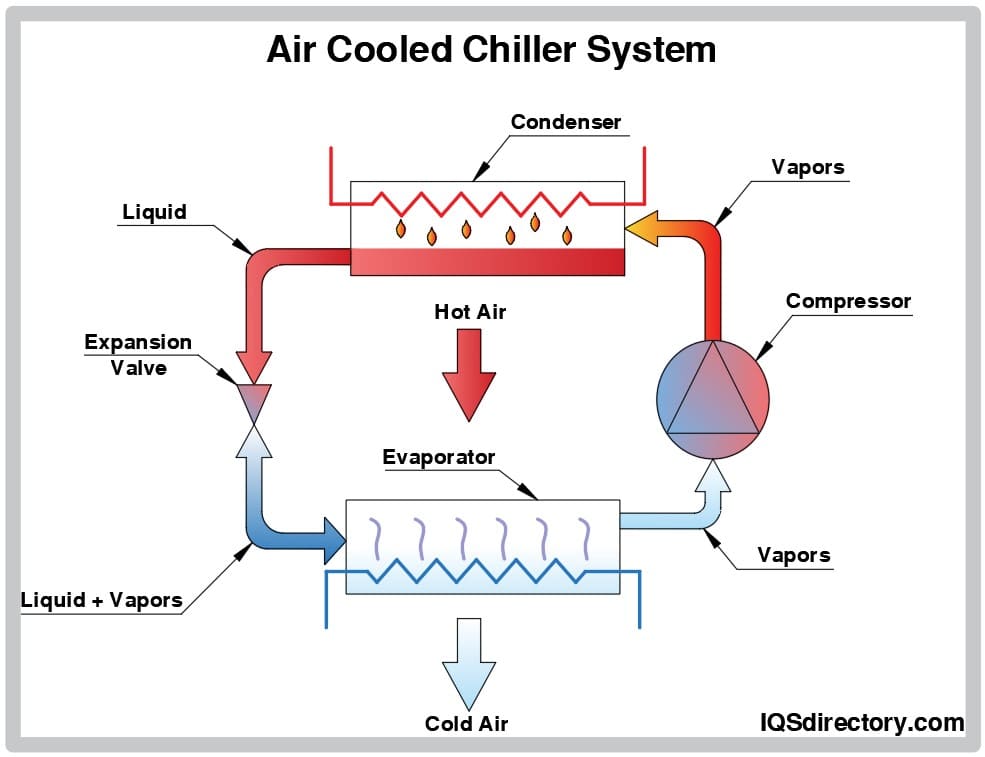
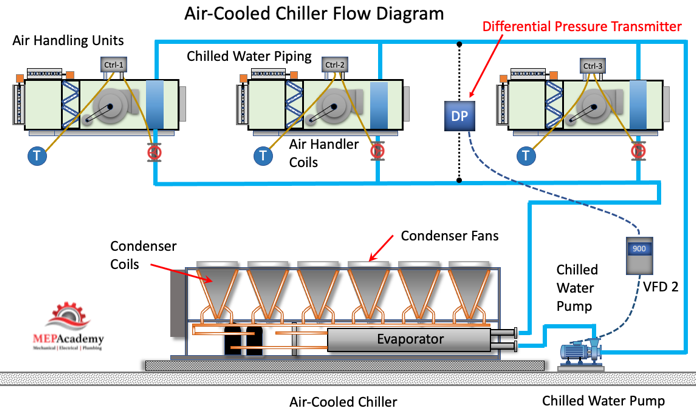
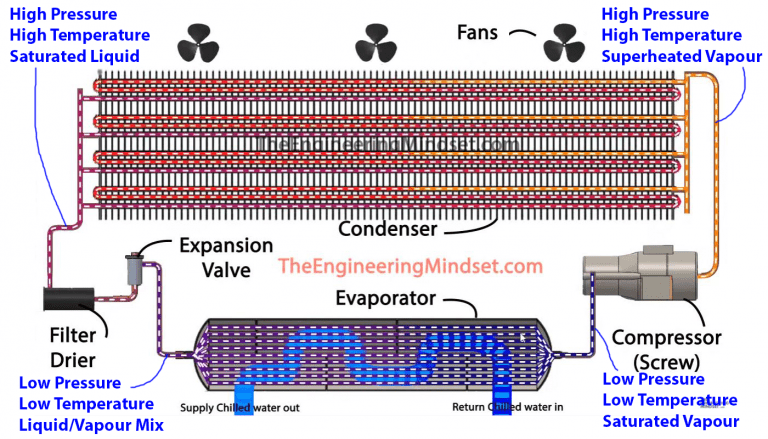
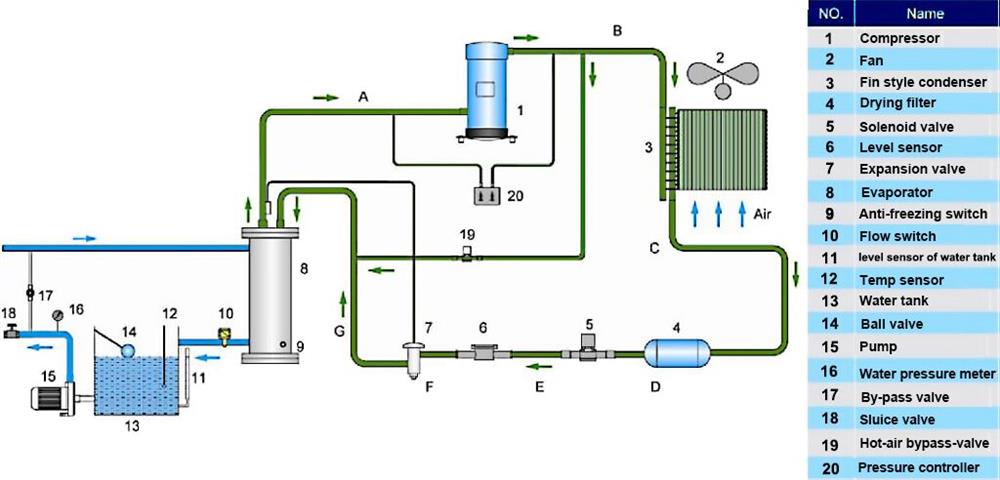
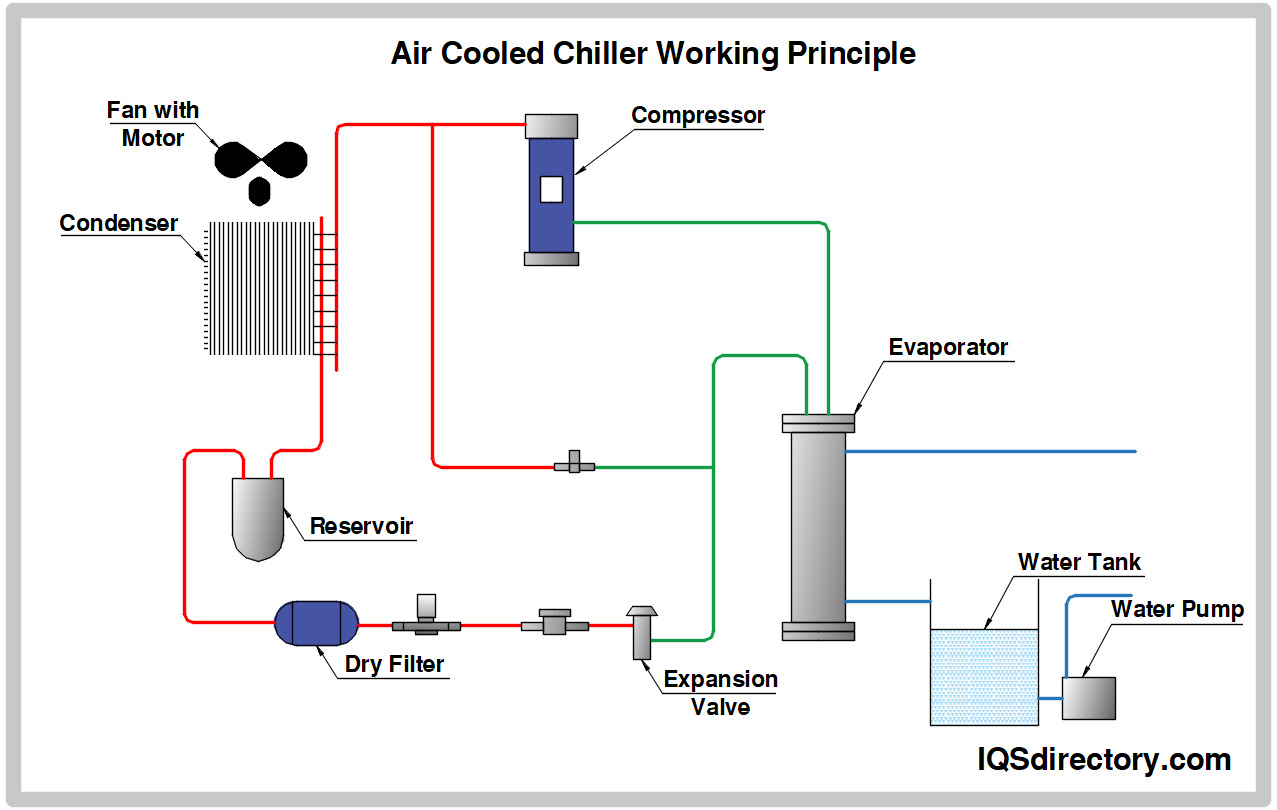
An air-cooled chiller, in essence, is a refrigerator for your entire home. It works by cooling water, which is then circulated throughout your building to absorb heat. Think of it as a central air conditioning system with a water-based twist. This cooled water then passes through air handlers (like the vents in your rooms), where fans blow air across the cold coils, providing you with that refreshing cool (or warming heat) feeling. The heated water then returns to the chiller to be cooled again, creating a continuous loop.
Here's a simplified breakdown of the key components and how they work together:
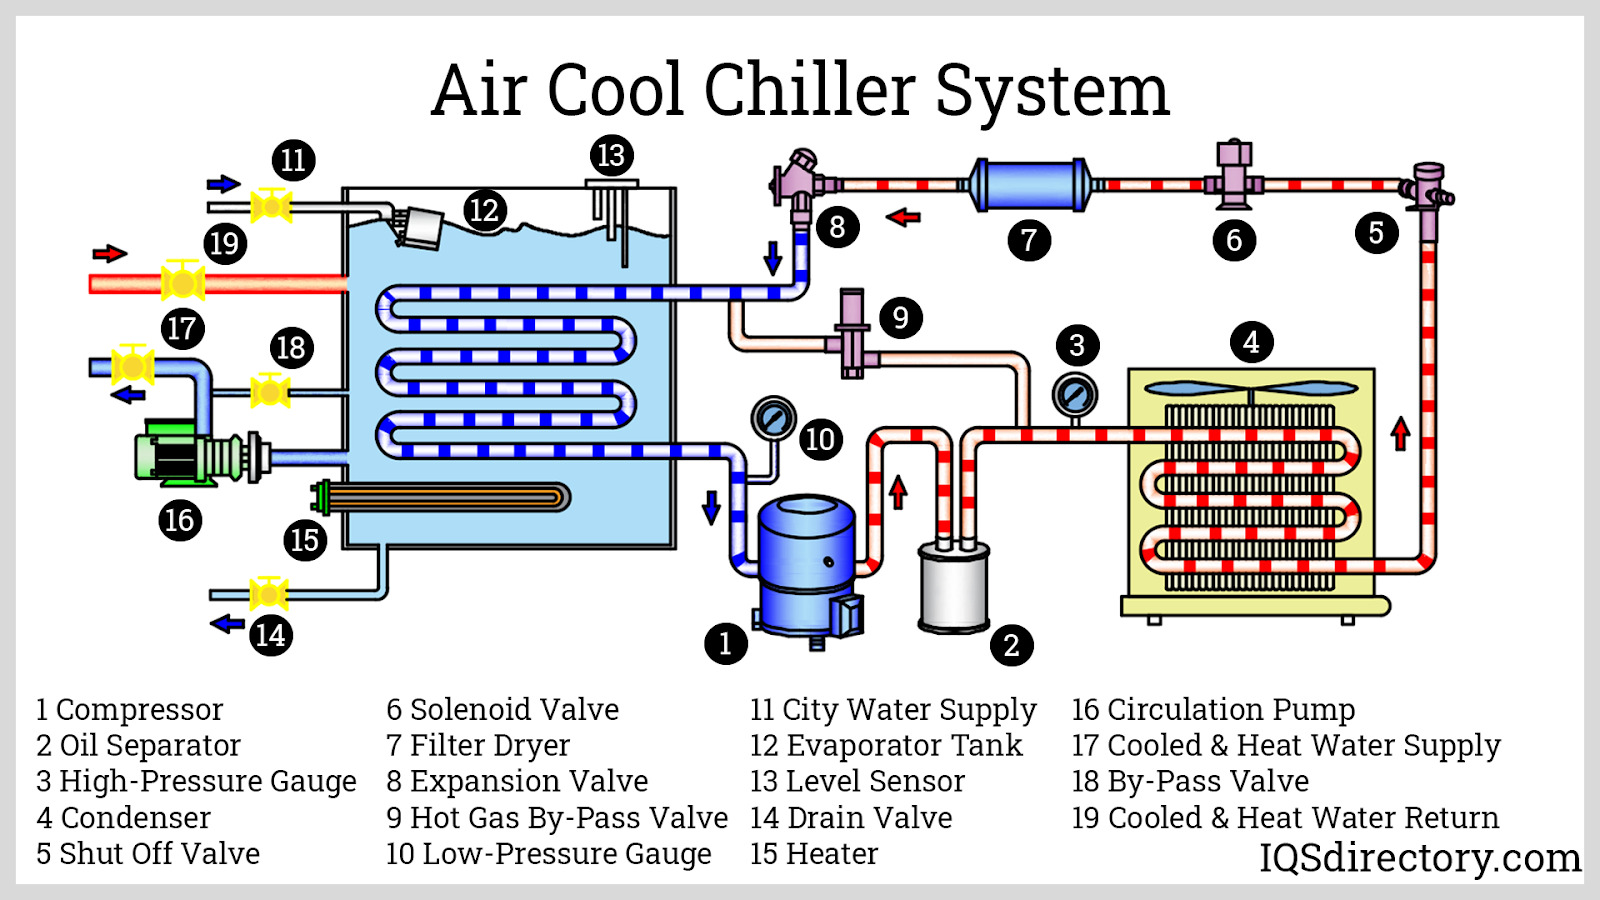
- Compressor: This is the heart of the system. It compresses the refrigerant, increasing its temperature and pressure.
- Condenser: Here, the hot, high-pressure refrigerant releases its heat to the outside air, turning into a high-pressure liquid. This is where you'll find the condenser coils and fans.
- Expansion Valve (or Metering Device): This reduces the pressure of the liquid refrigerant, causing it to cool rapidly.
- Evaporator: Inside the chiller, the cold, low-pressure refrigerant absorbs heat from the water, cooling it down. The refrigerant then evaporates into a low-pressure gas.
- Water Pump: This circulates the chilled water throughout your building.
- Air Handlers: Located in different zones of your home, these units contain coils that cool or heat air, distributing it through the vents.
Troubleshooting: Step-by-Step Guide
Let's get down to business. The following steps will help you diagnose why your air-cooled chiller might not be performing as expected.
Step 1: Preliminary Checks (No Tools Required)
Before you grab any tools, let’s start with the easy stuff:
- Check the Thermostat: This sounds obvious, but it's the most common culprit.
- Is it set to the correct mode (Cool or Heat)?
- Is the temperature set appropriately? Try lowering (for cooling) or raising (for heating) the setpoint a few degrees and see if anything happens.
- Are the batteries fresh? A dead thermostat won't communicate with your chiller.
- Inspect the Air Filters in Air Handlers: Clogged air filters restrict airflow and can cause your system to work harder and less efficiently.
- Locate the air filters in your air handlers (usually behind a grill or panel).
- Remove the filters and hold them up to the light. If you can't see much light through them, they're dirty and need replacing.
- Replace with new, clean filters.
- Check the Chiller's Power Supply:
- Is the chiller switched on? Look for a main power switch, often located near the unit.
- Check the circuit breaker. Locate the breaker for your chiller in your electrical panel and ensure it hasn't tripped. If it has, reset it. If it trips again immediately, there's likely a more serious electrical problem.
- Listen for Unusual Noises: Pay attention to any strange sounds coming from the chiller unit itself, the water pump, or the air handlers.
- Grinding, squealing, or banging noises could indicate mechanical problems.
- Hissing sounds could indicate a refrigerant leak.
- Inspect the Condenser Unit (Outdoor Unit):
- Is the area around the unit clear of debris? Blocked airflow can significantly reduce efficiency. Remove any leaves, branches, or other obstructions.
- Are the condenser fins clean? Over time, dust and debris can accumulate on the fins, hindering heat transfer. (More on cleaning these later).
Step 2: Basic Checks with Simple Tools (Requires Minimal Equipment)
If the preliminary checks didn't reveal the problem, let's move on to some checks that require basic tools. You'll need a screwdriver, a garden hose (with a spray nozzle), and possibly a multimeter (for checking voltage – use with extreme caution and only if you're comfortable with basic electrical work).
- Cleaning the Condenser Coils: Dirty condenser coils are a common cause of reduced efficiency.
- Turn off the power to the chiller at the breaker. Safety First!
- Carefully remove any large debris from the coils by hand.
- Use a garden hose with a gentle spray nozzle to rinse the coils from the inside out. Avoid using high pressure, as this can damage the fins.
- Allow the coils to dry completely before turning the power back on.
- Checking the Water Pump: A malfunctioning water pump can prevent the chilled water from circulating properly.
- Locate the water pump. It's typically near the chiller unit.
- Listen to the pump. Is it running? If not, check its power supply.
- Check for leaks around the pump. Leaks can indicate a failing pump or connections.
- (If you're comfortable with electrical work): Use a multimeter to check the voltage at the pump. Ensure it's receiving the correct voltage. (Refer to the pump's specifications). If you're not comfortable, skip this step and call a professional.
- Inspecting Water Lines:
- Check for any visible leaks or damage to the water lines connected to the chiller and air handlers.
- Ensure the lines are properly insulated. Damaged or missing insulation can lead to heat loss (or gain) and reduce efficiency.
- Checking Air Handler Blower Motors:
- Ensure the blower motors are running in each of your air handlers. If a blower motor isn't working, that zone won't receive cool (or warm) air.
- Listen for unusual noises coming from the blower motors.
Step 3: When to Call a Professional HVAC Technician
While some issues can be resolved with simple DIY checks, others require the expertise of a qualified HVAC technician. Attempting to fix complex issues yourself can be dangerous and may void your warranty. Here are some situations where professional help is essential:
- Refrigerant Leaks: Refrigerant is a hazardous substance, and handling it requires specialized equipment and training. If you suspect a refrigerant leak (e.g., hissing sounds, ice buildup on coils), do not attempt to fix it yourself.
- Compressor Problems: The compressor is a complex and expensive component. If you suspect a compressor issue (e.g., unusual noises, the chiller won't start), leave it to the professionals.
- Electrical Issues: Working with electricity can be dangerous. If you're not comfortable with basic electrical work, do not attempt to diagnose or repair electrical problems.
- Frozen Coils: While dirty air filters can cause frozen coils, other underlying issues, such as refrigerant leaks or airflow problems, may also be the cause. A professional can diagnose the root cause and fix the problem.
- Repeated Problems: If you're constantly experiencing the same issue, it's likely a sign of a more serious underlying problem. A professional can diagnose the problem and provide a long-term solution.
- Lack of Knowledge: If you're unsure about any aspect of troubleshooting or repair, it's always best to err on the side of caution and call a professional.
Signs You Need Professional Help Immediately:
- Burning smell from the unit or vents
- Electrical sparks or arcing
- Loud, violent noises coming from the unit
Preventative Maintenance: Keeping Your Chiller Running Smoothly
The best way to avoid costly repairs is to perform regular preventative maintenance. Here are some tips:
- Change Air Filters Regularly: At least every 1-3 months, or more frequently if you have pets or allergies.
- Clean Condenser Coils Annually: Remove debris and rinse the coils with a garden hose.
- Schedule Professional Maintenance: Have your chiller inspected and serviced by a qualified HVAC technician at least once a year. They can identify potential problems early and ensure that your system is running efficiently.
- Keep the Area Around the Condenser Unit Clear: Ensure adequate airflow around the unit.
Conclusion
Troubleshooting an air-cooled chiller doesn't have to be daunting. By following these steps, you can identify and resolve many common issues yourself. Remember to prioritize safety and call a professional when needed. With regular maintenance and a little knowledge, you can keep your chiller running smoothly and enjoy a comfortable home year-round. Good luck!