How Does An Air Exchanger Work

Imagine waking up to a stuffy, stale-smelling house, even though you had the windows closed all night. This is a common problem, especially during colder months when we seal our homes tightly to conserve energy. Often, the culprit is a malfunctioning air exchanger, also known as a heat recovery ventilator (HRV) or energy recovery ventilator (ERV). These devices are designed to bring fresh air into your home while exhausting stale, contaminated air, all while minimizing energy loss. When they fail, the air quality in your home can suffer, leading to discomfort and potential health problems. Before calling a professional, let's walk through some basic troubleshooting steps you can take yourself.
Understanding Your Air Exchanger
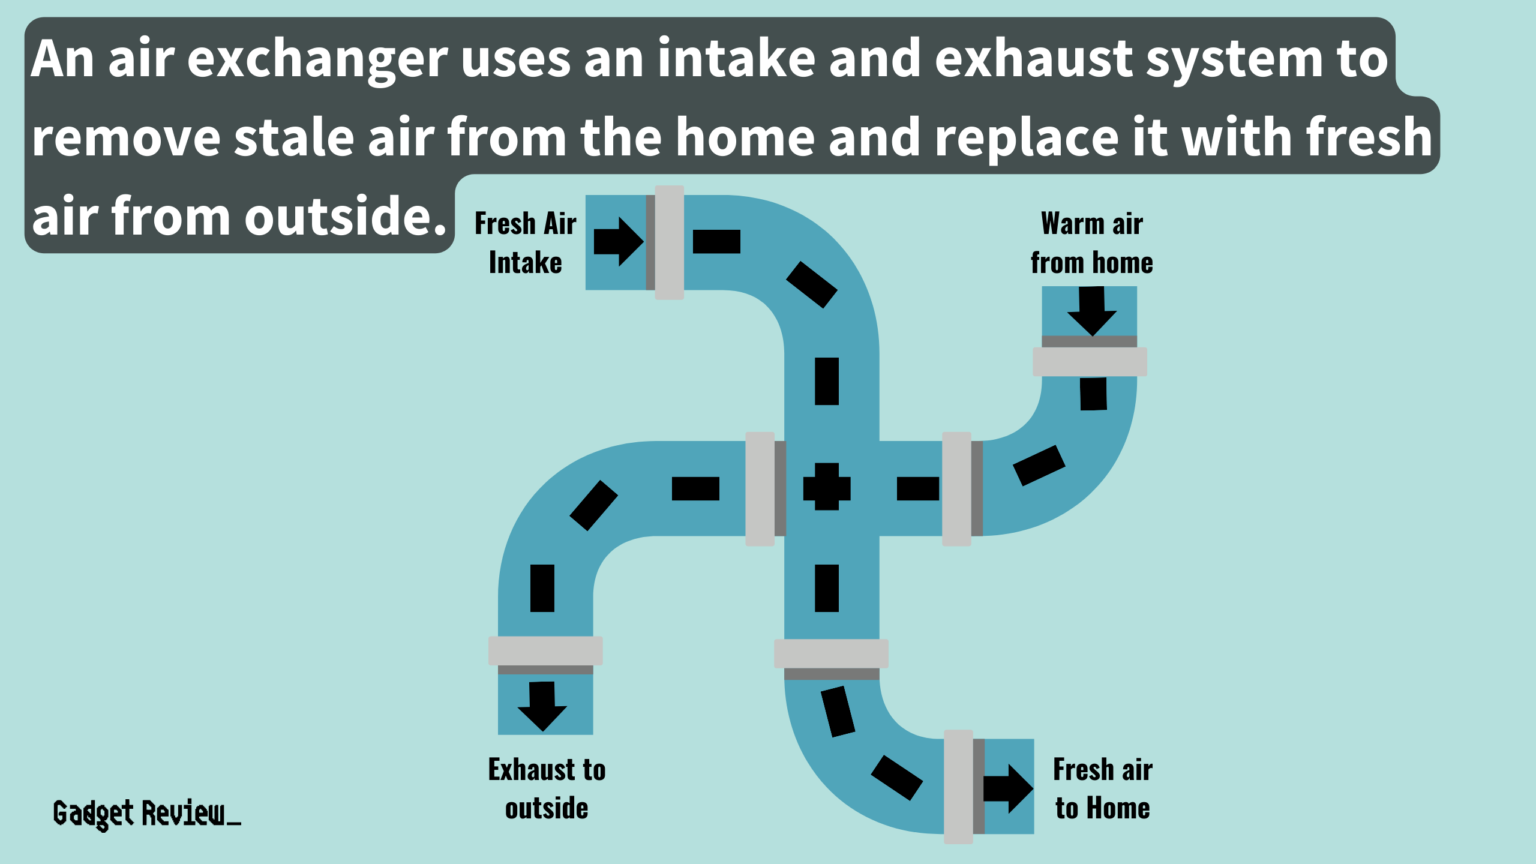
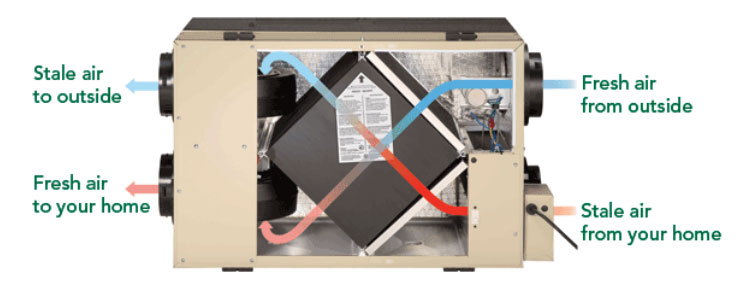
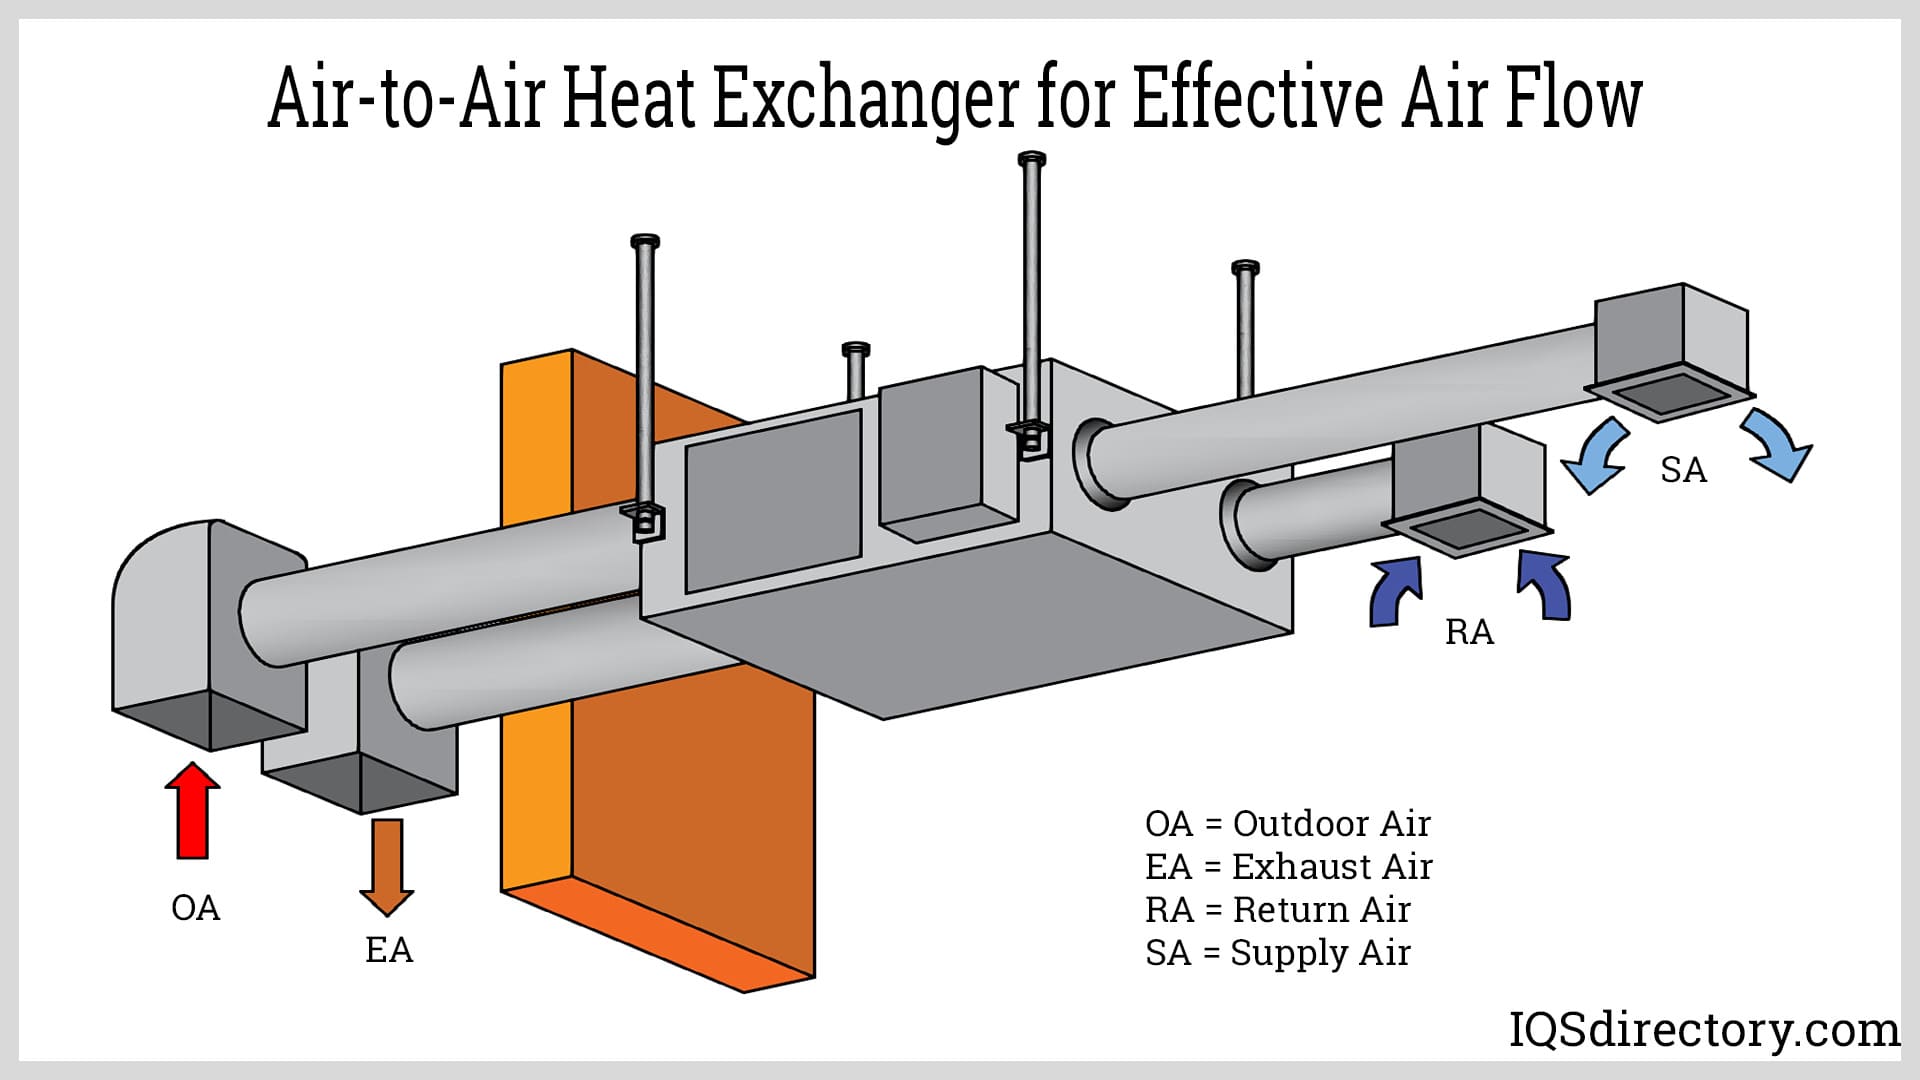
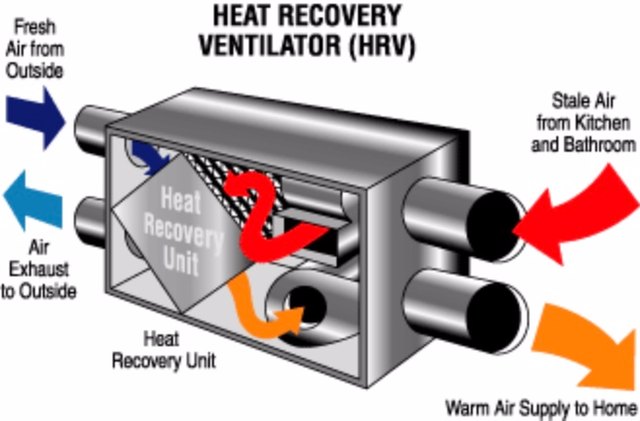
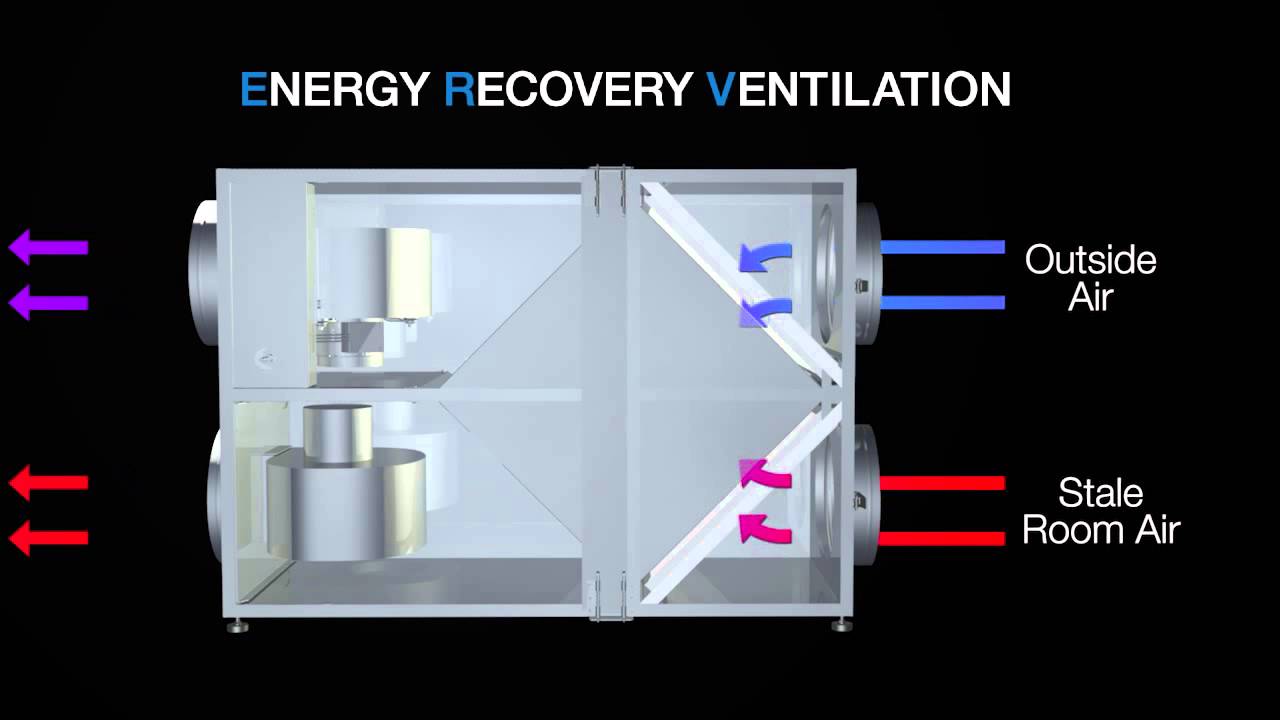
Before diving into troubleshooting, it's essential to understand how your air exchanger is supposed to work. An air exchanger is not an air purifier or an air conditioner. Its primary function is to ventilate your home by exchanging indoor air with outdoor air. HRVs (Heat Recovery Ventilators) transfer heat from the outgoing stale air to the incoming fresh air, which is great for colder climates. ERVs (Energy Recovery Ventilators) transfer both heat and moisture, which is beneficial in both cold and humid climates. This helps maintain a comfortable indoor temperature and humidity level while improving air quality.
Key components of a typical air exchanger include:
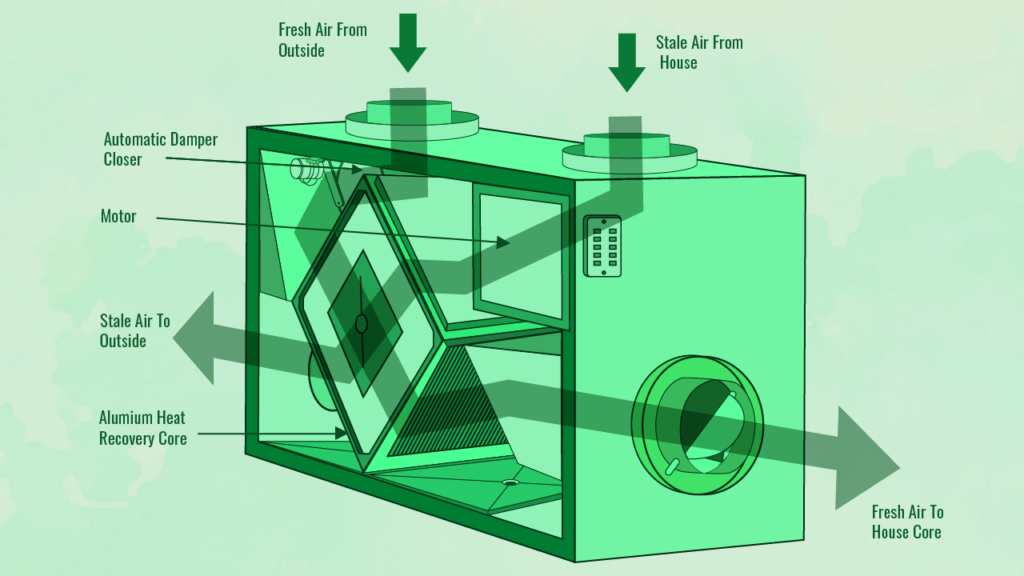
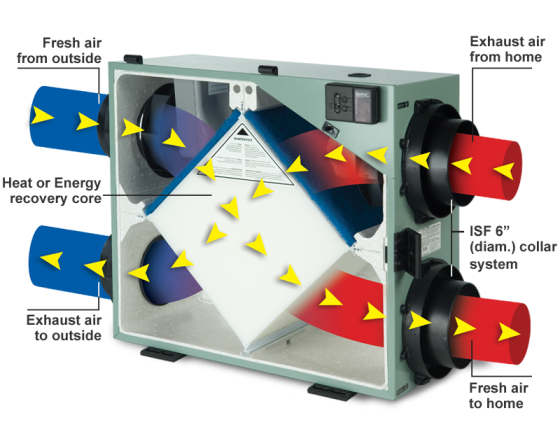
- Intake and Exhaust Vents: These are located outside your home and draw in fresh air and expel stale air.
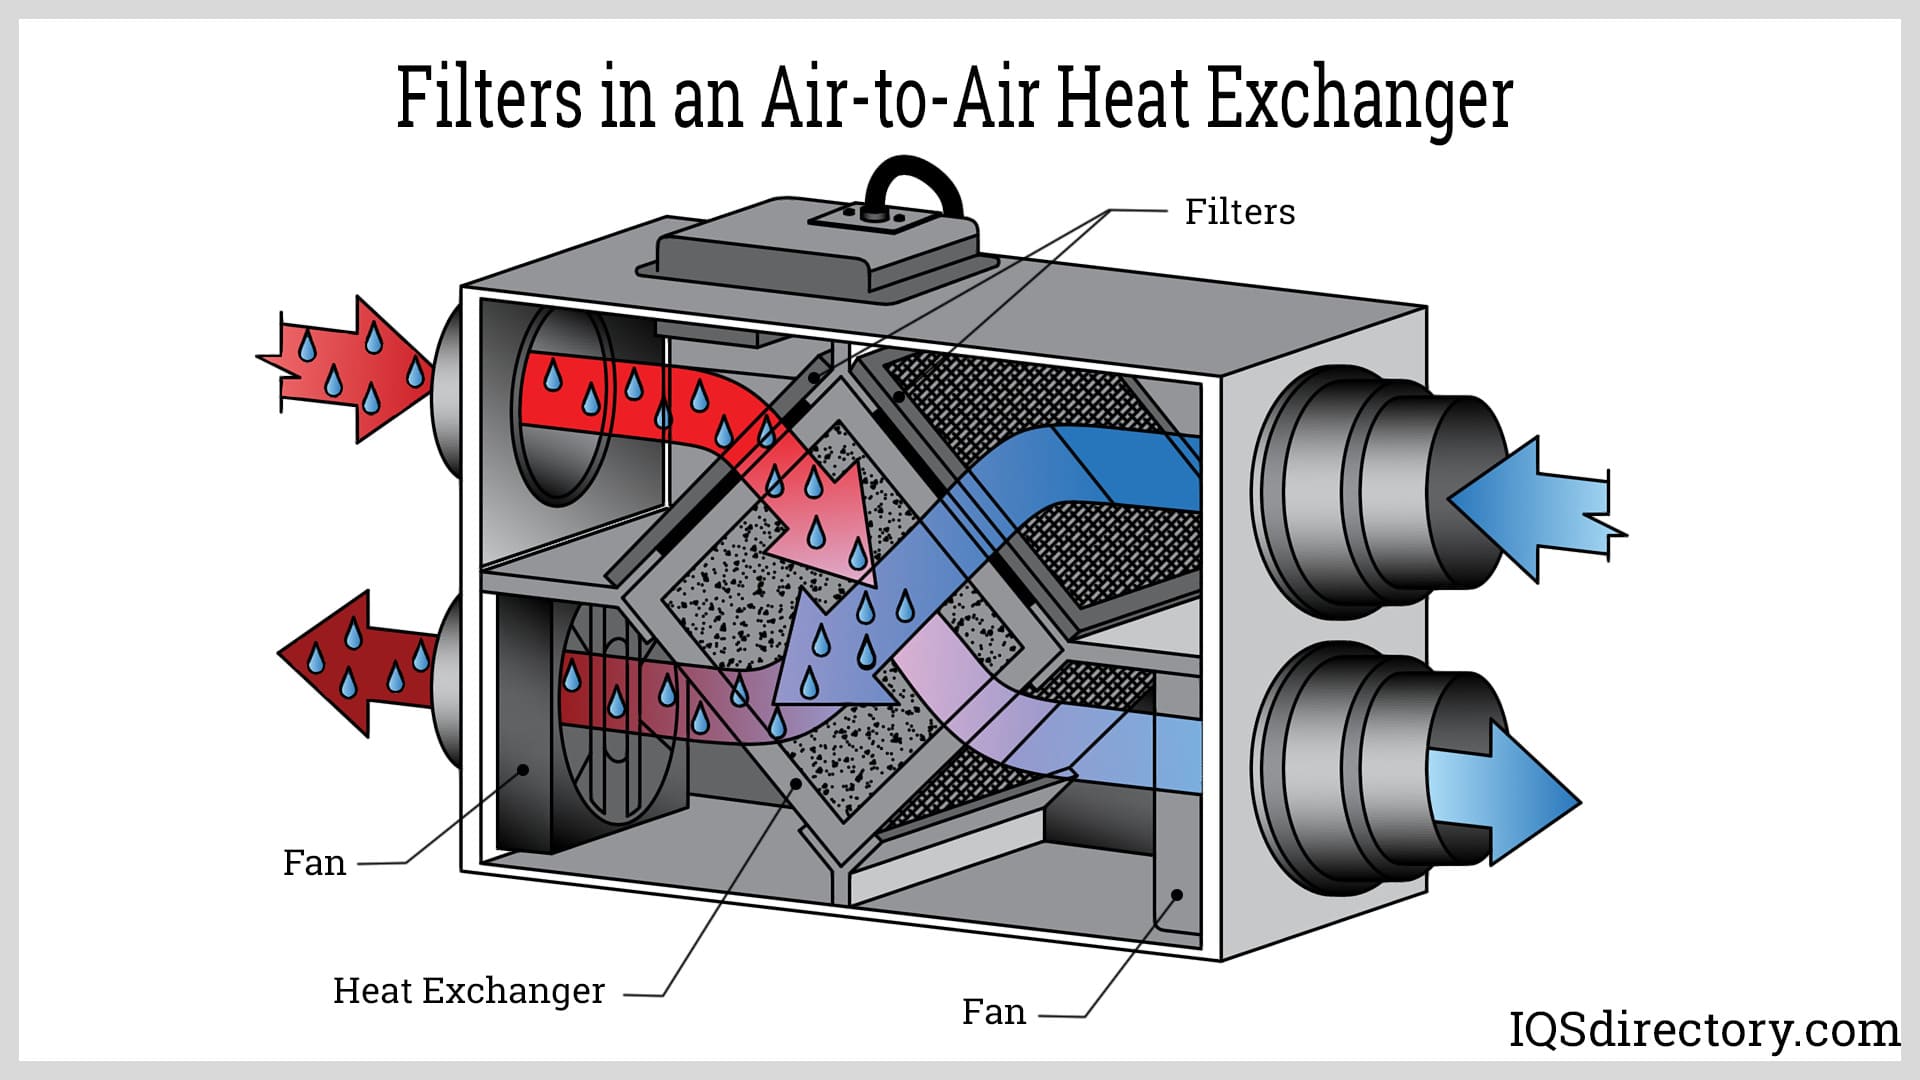
- Filters: These clean the incoming and outgoing air, removing dust, pollen, and other particles.
- Core (Heat Exchanger): This is the heart of the unit where heat (and sometimes moisture) is transferred between the air streams.
- Fans: These blow air through the system. Typically, there are two fans: one for intake and one for exhaust.
- Controls: These allow you to adjust the fan speed and operating mode of the unit.
- Drain Pan and Tube: This collects condensation formed during the heat exchange process and drains it away.
Troubleshooting: A Step-by-Step Guide
Let's get started with diagnosing the problem. Follow these steps in order:
Step 1: Check the Power Supply
This might seem obvious, but it's the first thing to check. A simple power issue is often the cause of many appliance failures.
- Is the unit plugged in? Make sure the power cord is securely plugged into the outlet.
- Check the circuit breaker: Locate the circuit breaker for the air exchanger in your electrical panel. If the breaker has tripped, reset it. Important: If the breaker trips immediately again, do not keep resetting it. This indicates a serious electrical problem that requires a professional electrician.
- Test the outlet: Use a different appliance or a voltage tester to confirm that the outlet is providing power. If the outlet is dead, contact an electrician to repair it.
Step 2: Inspect the Controls and Settings
Sometimes, the issue isn't a malfunction but simply incorrect settings.
- Mode settings: Ensure the air exchanger is set to the correct mode. Some units have different modes like "low," "high," "intermittent," or "off." Make sure it's set to a ventilation mode.
- Timer settings: Some units have timers that control when they operate. Check if the timer is preventing the unit from running.
- Dehumidistat (ERV only): If you have an ERV, it might have a dehumidistat that prevents it from running when the humidity is low. Ensure the dehumidistat is set appropriately.
- Manual Controls: Check for any manual switches or dials that might be set incorrectly. Refer to your owner's manual for specific instructions.
Step 3: Examine the Filters
Dirty filters are a very common cause of air exchanger problems. A clogged filter restricts airflow, which can reduce the unit's effectiveness and even damage the motor.
- Locate the filters: Refer to your owner's manual to find the location of the filters. They are usually located behind a removable panel.
- Inspect the filters: Remove the filters and examine them for dirt and debris. If they are visibly dirty, they need to be cleaned or replaced.
- Clean or replace the filters:
- Cleanable filters: Some filters can be cleaned by vacuuming them or washing them with mild soap and water. Allow the filters to dry completely before reinstalling them.
- Disposable filters: Disposable filters should be replaced with new ones of the same size and type. Always use the correct filter type recommended by the manufacturer.
- Reinstall the filters: Ensure the filters are properly seated in their frames before closing the access panel.
Step 4: Check the Vents and Ductwork
Blocked vents or ductwork can also restrict airflow and reduce the efficiency of your air exchanger.
- Inspect the intake and exhaust vents: Check the vents outside your home to ensure they are not blocked by snow, ice, leaves, or other debris. Clear away any obstructions.
- Check the ductwork: Inspect the visible ductwork for any signs of damage or blockage. Look for disconnected sections, crushed ducts, or accumulated dust and debris.
- Minor repairs: You can usually reconnect disconnected sections of ductwork with duct tape or clamps.
- Major damage: If you find significant damage to the ductwork, such as large tears or collapses, it's best to consult a professional HVAC technician.
- Clean the vents: Use a vacuum cleaner with a brush attachment to clean the vents inside your home. This will remove dust and debris that can restrict airflow.
Step 5: Listen for Unusual Noises
Unusual noises can indicate a problem with the fan motor or other components.
- Identify the source of the noise: Try to pinpoint where the noise is coming from. Is it coming from the fan motor, the core, or somewhere else in the unit?
- Grinding or squealing: These noises could indicate a problem with the fan motor bearings. In some cases, lubricating the bearings might help, but this often requires disassembling the unit. If you are not comfortable working with electrical components, it's best to leave this to a professional.
- Rattling: Rattling noises could indicate loose parts or debris inside the unit. Inspect the unit carefully for any loose screws or components.
- Humming: A humming noise could indicate a problem with the motor capacitor. Replacing the capacitor is a relatively simple repair, but it involves working with electricity. If you are not comfortable working with electrical components, it's best to leave this to a professional.
Step 6: Inspect the Drain Pan and Tube
A clogged drain pan or tube can cause water to leak from the air exchanger, leading to water damage.
- Locate the drain pan and tube: The drain pan is usually located at the bottom of the unit, and the drain tube runs from the pan to a drain.
- Check for clogs: Inspect the drain pan for standing water. If there is water in the pan, check the drain tube for clogs.
- Clear the clog: You can try to clear the clog by using a wet/dry vacuum to suck out any debris from the drain tube. You can also try using a stiff wire to dislodge the clog.
- Clean the drain pan: Clean the drain pan with a mild detergent and water to prevent the growth of mold and mildew.
DIY Repairs: What You Can Attempt (Safely!)
Based on the troubleshooting steps above, here are some basic DIY repairs you can attempt:
- Replacing filters: This is the most common and easiest repair. Always use the correct filter type.
- Clearing vents and ductwork: Removing obstructions and reconnecting disconnected ductwork.
- Cleaning the drain pan and tube: Clearing clogs and preventing water damage.
- Replacing a start capacitor: This is a repair that can be done safely at home with the correct part and following correct electrical safety procedures. Be sure to disconnect the power supply before working on the capacitor.
When to Call a Professional
While you can tackle some basic repairs, certain issues require the expertise of a qualified HVAC technician. Your safety is paramount.
- Electrical Problems: If you suspect an electrical problem, such as a tripped circuit breaker that repeatedly trips, or if you are uncomfortable working with electrical components, do not attempt to repair it yourself. Contact a licensed electrician.
- Gas Leaks: If you suspect a gas leak, evacuate your home immediately and call your gas company or the fire department.
- Complex Repairs: If you suspect a problem with the fan motor, the core, or other complex components, it's best to consult a professional. These repairs often require specialized tools and knowledge.
- Refrigerant Leaks: Some ERVs contain a refrigerant loop and should only be serviced by licensed HVAC professionals with specialized equipment.
- Warranty Issues: If your air exchanger is still under warranty, attempting to repair it yourself might void the warranty. Contact the manufacturer or a qualified service technician to arrange for repairs.
Preventive Maintenance
Preventive maintenance is key to keeping your air exchanger running smoothly and efficiently. Here are some tips:
- Change filters regularly: Check your filters monthly and replace them as needed, typically every 3-6 months.
- Clean the vents and ductwork: Clean the vents and ductwork annually to remove dust and debris.
- Inspect the drain pan and tube: Check the drain pan and tube regularly for clogs.
- Schedule professional maintenance: Have your air exchanger professionally inspected and maintained every 1-2 years.
Conclusion
Troubleshooting an air exchanger can seem daunting, but by following these steps, you can often diagnose and resolve simple issues yourself. Remember to prioritize your safety and never attempt repairs that you are not comfortable with. By understanding how your air exchanger works and performing regular maintenance, you can ensure that it continues to provide fresh, clean air for your home for years to come. When in doubt, contact a qualified HVAC professional for assistance. Your home's air quality is worth the investment!