How Does Ultraviolet Light Kill Bacteria
Feeling like your HVAC system is stuck in a germ-spreading cycle, constantly recirculating stale air and potentially harmful bacteria? You're not alone. Many homeowners experience concerns about air quality, especially regarding the presence of bacteria, mold, and viruses within their HVAC systems. The good news is that understanding how ultraviolet (UV) light can combat these issues can empower you to improve your home's air and possibly prevent issues before they arise.
Understanding the Power of UV Light Against Bacteria
UV light isn't just for tanning – it's a potent tool for disinfecting. But how exactly does it work to kill bacteria and other microorganisms?
The Science Behind UV-C Disinfection
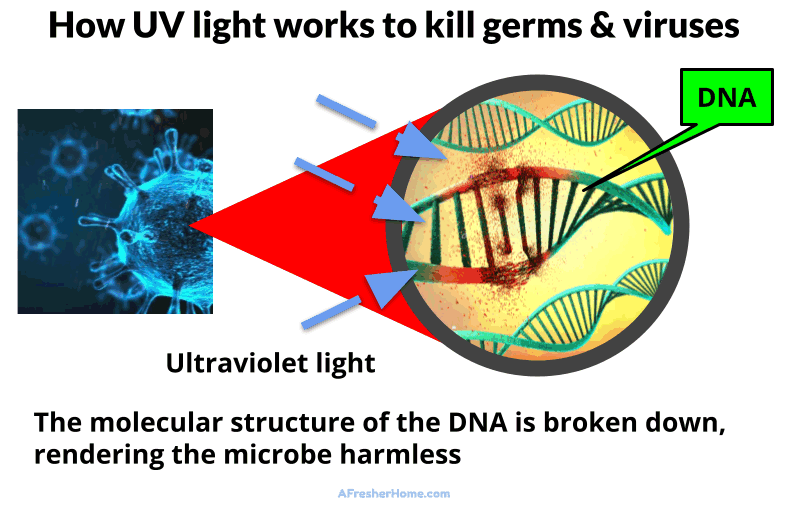
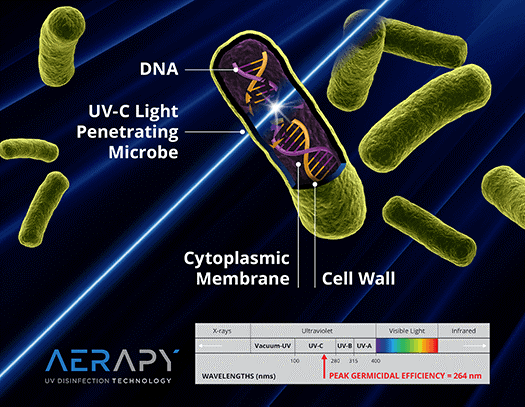
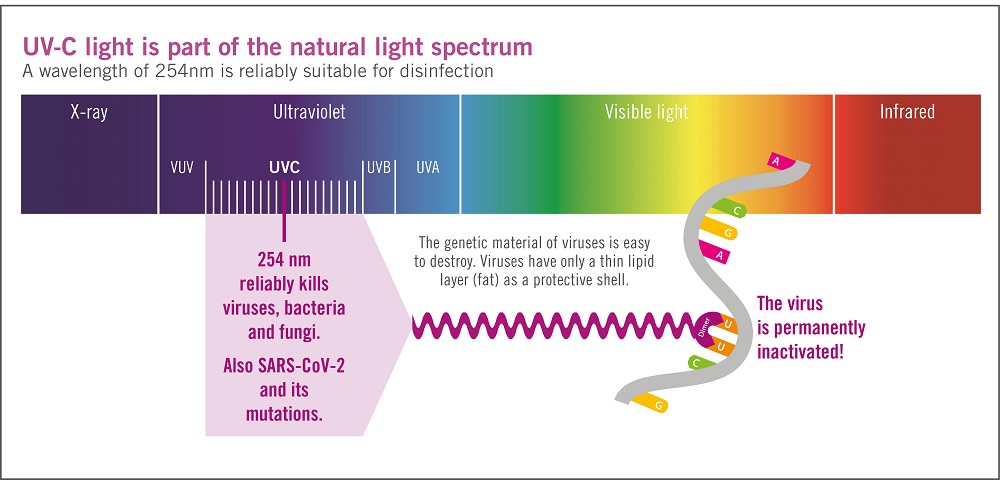
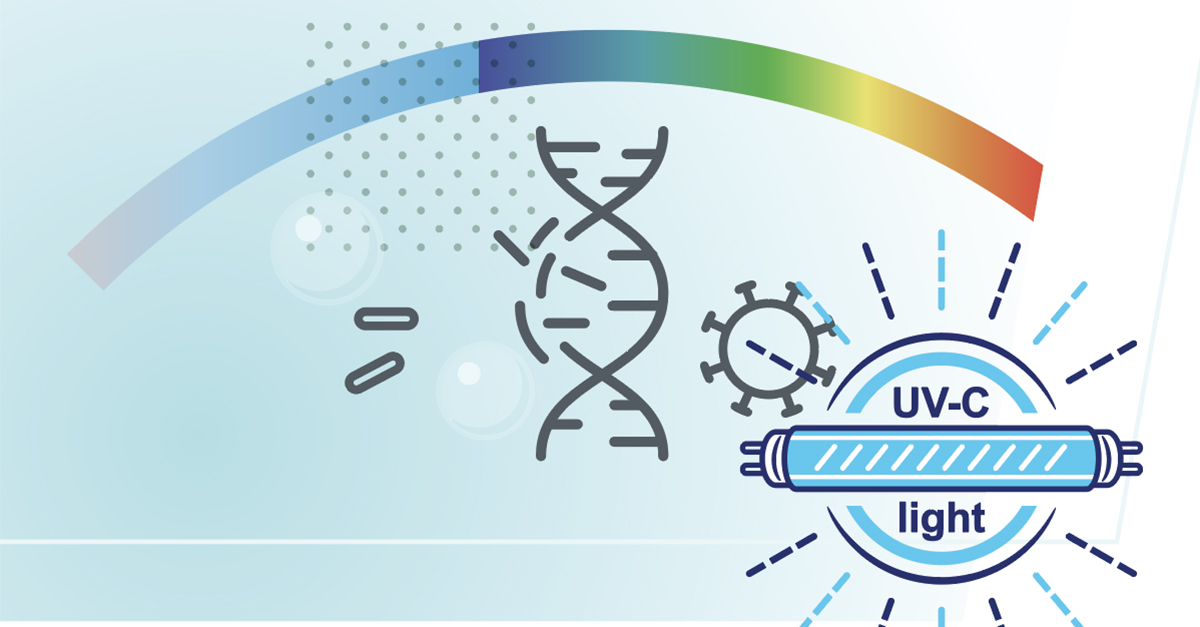
UV light, specifically UV-C light (with a wavelength of 200-280 nanometers), disrupts the DNA and RNA of microorganisms like bacteria, viruses, and mold. This damage prevents them from replicating and effectively neutralizes them. Think of it as scrambling their genetic code, rendering them harmless.
Different types of UV light exist (UV-A, UV-B, and UV-C), but UV-C is the most effective for disinfection because its specific wavelength is readily absorbed by the genetic material of microorganisms.
UV Lamps in HVAC Systems: Where They're Located
In HVAC systems, UV lamps are typically installed in two key locations:
- Air Handler: Often placed near the cooling coils, where moisture and condensation can create a breeding ground for mold and bacteria.
- Ductwork: Installed within the duct system to disinfect the air as it circulates throughout your home.
The intensity and placement of the UV lamps are crucial for effective disinfection. Proper installation and maintenance are key to ensuring the UV system is functioning optimally.
Troubleshooting a Suspicious Smell or Persistent Allergy Symptoms
Let's say you notice a musty odor coming from your vents or experience a persistent increase in allergy symptoms, even when your HVAC system is running. This could indicate the presence of mold or bacteria within the system, suggesting that your UV light system (if you have one) may not be working effectively, or that you have other issues that need addressing, regardless of UV lights.
Here’s a step-by-step troubleshooting guide:
Step 1: Preliminary Checks (No Tools Required)
- Smell Test: Sniff around your vents. Is the musty or moldy odor stronger in certain areas? This could pinpoint the source of the problem.
- Visual Inspection of Vents: Look inside the vents with a flashlight. Can you see any visible signs of mold or dust accumulation?
- Filter Check: A dirty air filter can contribute to poor air quality and reduce the effectiveness of your HVAC system. Replace it with a clean one. Note the date you replaced it for future reference.
- Check UV Lamp Indicator (if applicable): Some UV lamp systems have an indicator light that signals when the bulb needs replacing. Is the light on? Is it flashing? Consult your system's manual for the meaning of different indicator signals.
- Review Recent HVAC Maintenance: When was the last time your HVAC system was professionally cleaned and inspected? A neglected system is more prone to microbial growth.
Step 2: Deeper Inspection (Basic Equipment Needed)
- Accessing the Air Handler (HVAC Unit): Before proceeding, turn off the power to your HVAC system at the circuit breaker. This is crucial for your safety. Locate the air handler unit (usually indoors). Remove the access panel.
- Visual Inspection of Cooling Coils: Carefully examine the cooling coils (the fins that cool the air). Are they visibly dirty, moldy, or covered in dust? This is a common breeding ground for microorganisms.
- Tool Needed: Flashlight.
- UV Lamp Inspection: Locate the UV lamp (usually near the cooling coils). Is the bulb illuminated?
- Important Safety Note: Never look directly at a UV lamp when it's illuminated. UV-C light can damage your eyes.
- If the bulb is not lit, it may be burned out or there may be a power issue.
- Check the UV Lamp Timer/Controller: Some UV lamp systems have a timer or controller that indicates the bulb's age or usage hours. Check the display for any error messages or warnings. Consult your system's manual for troubleshooting steps.
- Tool Needed: Your system's manual (may be available online).
Step 3: DIY Cleaning (Proceed with Caution)
If you identify minor mold or dust accumulation on the cooling coils, you can attempt a gentle cleaning.
- Preparation: Turn off the power to your HVAC system at the circuit breaker. Wear safety glasses, gloves, and a dust mask to protect yourself from mold spores.
- Cleaning Solution: Prepare a mild cleaning solution of warm water and a small amount of dish soap or a specialized coil cleaner available at hardware stores. Avoid using harsh chemicals or bleach, as they can damage the coils.
- Gentle Cleaning: Using a soft brush or cloth, gently clean the cooling coils, being careful not to bend or damage the fins.
- Rinsing: Lightly rinse the coils with clean water.
- Tool Needed: Soft brush, cloth, spray bottle with clean water.
- Drying: Allow the coils to air dry completely before restoring power to the HVAC system. You can use a fan to speed up the drying process.
Step 4: UV Lamp Replacement (If Necessary)
If your UV lamp is burned out and you are comfortable doing so, you can replace it yourself.
- Safety First: Turn off the power to your HVAC system at the circuit breaker.
- Locate Replacement Bulb: Refer to your UV lamp system's manual to identify the correct replacement bulb. You can usually purchase replacement bulbs online or at HVAC supply stores.
- Careful Removal: Carefully remove the old bulb from its socket. Handle the bulb with gloves to avoid getting fingerprints on it, as this can reduce its lifespan.
- Installation: Install the new bulb into the socket, ensuring it is securely in place.
- Power On: Restore power to the HVAC system at the circuit breaker. Verify that the new bulb is illuminated.
- Tool Needed: Gloves, replacement bulb (correct type for your system).
When to Call a Professional HVAC Technician
While these DIY steps can address some common issues, certain situations require the expertise of a qualified HVAC technician.
- Extensive Mold Growth: If you find significant mold growth throughout your HVAC system, especially in areas that are difficult to access or clean, it's best to call a professional. Mold remediation can be complex and requires specialized equipment and techniques.
- Refrigerant Leaks: If you suspect a refrigerant leak (e.g., ice buildup on the cooling coils, reduced cooling performance), do not attempt to repair it yourself. Refrigerant handling requires specialized tools and certifications.
- Electrical Issues: If you encounter any electrical problems while inspecting or troubleshooting your HVAC system, such as loose wiring, burnt components, or unusual noises, immediately stop and call a professional. Electrical work can be dangerous.
- Complex UV Lamp System Issues: If you are unsure about how to troubleshoot or repair your UV lamp system, especially if it involves complex wiring or controls, it's best to consult a qualified HVAC technician.
- Persistent Odors or Allergy Symptoms: If you have thoroughly cleaned your HVAC system and replaced the UV lamp (if applicable), but you still experience persistent odors or allergy symptoms, there may be underlying air quality issues that require professional assessment. A technician can perform air quality testing and recommend appropriate solutions.
Prevention is Key
The best way to avoid air quality problems is to prevent them from occurring in the first place. Here are some preventative measures you can take:
- Regular Filter Changes: Change your air filter every 1-3 months, depending on the type of filter and the air quality in your area.
- Annual HVAC Maintenance: Schedule annual maintenance with a qualified HVAC technician. They can thoroughly clean and inspect your system, identify potential problems early on, and ensure that your UV lamp (if applicable) is functioning properly.
- Keep Your Home Clean: Regularly dust and vacuum your home to reduce the amount of dust and allergens that circulate through your HVAC system.
- Control Humidity: High humidity levels can promote mold growth. Use a dehumidifier in damp areas of your home, such as basements.
- Consider Air Purifiers: Supplement your HVAC system with portable air purifiers to further improve indoor air quality.
Staying Safe and Healthy
Improving the air quality in your home is crucial for your health and well-being. By understanding how UV light works, troubleshooting common HVAC problems, and implementing preventative measures, you can create a healthier and more comfortable living environment.
Remember to always prioritize safety when working with your HVAC system and don't hesitate to call a professional when needed. A little knowledge and proactive maintenance can go a long way in keeping your HVAC system running efficiently and your air clean.
Disclaimer: This information is intended for general guidance only and should not be considered a substitute for professional advice. Always consult with a qualified HVAC technician for specific issues or concerns related to your HVAC system.