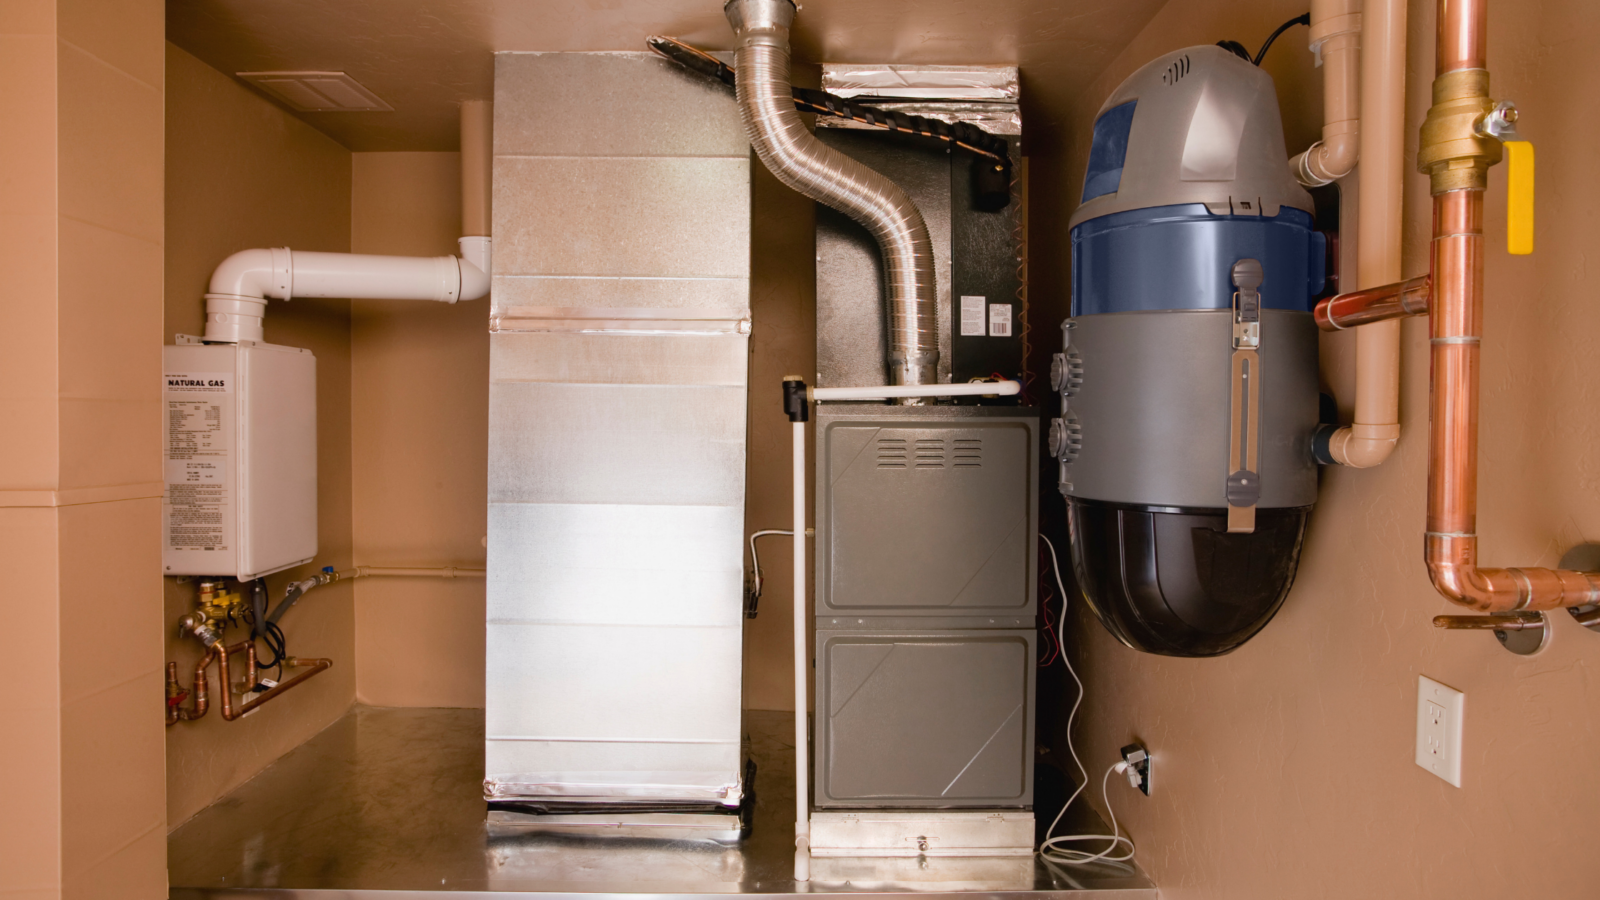
How Long Should A Furnace Last In A Home

It's a chilly evening, and you turn up the thermostat, expecting the warm embrace of your furnace. But nothing happens. Or worse, you hear strange noises and feel only a slight, lukewarm breeze. A malfunctioning furnace is a homeowner's nightmare, especially in the dead of winter. A common question that arises is: How long should my furnace actually last? Understanding this can help you plan for replacements and avoid unexpected breakdowns. This article will walk you through some simple troubleshooting steps to diagnose common furnace problems and determine when it's time to call in the professionals. Remember, safety is paramount, so if you are not comfortable with any of these steps, please contact a qualified HVAC technician.
Understanding Furnace Lifespan
Before diving into troubleshooting, let's address the core question. A well-maintained furnace typically lasts 15-20 years. However, several factors influence its lifespan, including:
- Type of Furnace: Gas furnaces generally last longer than electric furnaces.
- Maintenance: Regular maintenance is crucial for extending lifespan. Neglecting maintenance can significantly shorten it.
- Usage: Furnaces in colder climates, which run more frequently, may have a shorter lifespan than those in milder climates.
- Quality of Installation: A poorly installed furnace will likely experience more problems and a shorter lifespan.
- Quality of the Unit: Higher-quality furnaces tend to last longer and require fewer repairs.
Recognizing the typical lifespan is the first step. Now, let's troubleshoot some common issues.
Troubleshooting: The Furnace Won't Turn On
This is perhaps the most frustrating problem. Here's a methodical approach:
Step 1: Check the Thermostat
This might seem obvious, but it's the most common culprit. Ensure the thermostat is:
- Turned On: Verify the power switch is on.
- Set to "Heat": Make sure the thermostat is set to the "heat" mode.
- Set Above Room Temperature: Increase the target temperature a few degrees above the current room temperature. This should trigger the furnace to start.
- Battery Check: If your thermostat is battery-powered, replace the batteries. Low batteries can cause inaccurate readings or prevent the thermostat from communicating with the furnace.
DIY Fix: Replace the batteries and double-check the settings. If the thermostat still doesn't work, consider testing it with another device or calling an HVAC technician. It could be a faulty thermostat, not the furnace itself.
Step 2: Check the Power Supply
Next, confirm the furnace is receiving power.
- Circuit Breaker: Locate the circuit breaker panel (usually in the basement, garage, or utility room). Look for the breaker labeled "Furnace" or "HVAC." If the breaker is tripped (in the "off" or middle position), flip it all the way to the "off" position, then back to the "on" position.
- Furnace Switch: Many furnaces have a dedicated on/off switch, often located near the furnace itself. Ensure this switch is in the "on" position.
DIY Fix: Reset the circuit breaker and ensure the furnace switch is on. If the breaker trips again immediately or shortly after resetting, do not continue resetting it. This indicates a potential electrical problem that requires professional attention.
Step 3: Check the Gas Supply (For Gas Furnaces Only)
If you have a gas furnace, ensure the gas is flowing to the unit.
- Gas Valve: Locate the gas valve near the furnace. It should be in the "on" position (the handle should be parallel to the gas pipe).
- Pilot Light (Older Furnaces): Some older furnaces have a pilot light that needs to be lit. Follow the manufacturer's instructions for relighting the pilot light. If you smell gas, do not attempt to light the pilot light. Leave the area immediately and call your gas company.
DIY Fix: Ensure the gas valve is open. Do not attempt to repair or adjust any gas lines yourself. If you suspect a gas leak, evacuate the premises and call your gas company immediately. If you're comfortable, relight the pilot light following the manufacturer's instructions *if* you are certain there's no gas leak.
Step 4: Check the Furnace Filter
A clogged air filter is a very common cause of furnace problems. A dirty filter restricts airflow, causing the furnace to overheat and potentially shut down.
DIY Fix: Locate the air filter (usually near the blower fan) and inspect it. If it's dirty, replace it with a new filter of the correct size and type. Replacing your filter every 1-3 months is a crucial part of furnace maintenance.
Troubleshooting: The Furnace Turns On But Doesn't Blow Warm Air
If your furnace turns on but doesn't produce warm air, here's what to investigate:
Step 1: Check the Flame Sensor (For Gas Furnaces Only)
The flame sensor is a safety device that detects the presence of a flame. If it doesn't detect a flame, it shuts off the gas supply to prevent a buildup of unburned gas.
DIY Fix: *Turn off the power to the furnace at the breaker.* Locate the flame sensor (usually a small metal rod near the burner). Carefully remove it and clean it with fine steel wool or sandpaper to remove any carbon buildup. Reinstall the flame sensor and turn the power back on. This step requires caution and should only be attempted if you are comfortable working with basic tools.
When to call a Professional: If cleaning the flame sensor doesn't resolve the issue, the sensor itself may be faulty and needs to be replaced by a qualified technician. Also, if you are uncomfortable removing and cleaning the sensor, call a professional.
Step 2: Check the Blower Motor
The blower motor is responsible for circulating the heated air throughout your home. If the blower motor isn't working, the furnace may turn on, but no warm air will be distributed.
DIY Fix: First, check the blower motor capacitor. It's usually a small cylindrical component attached to the blower motor. If it looks swollen, bulging, or leaking, it's likely bad and needs to be replaced. *Turn off power to the furnace at the breaker before inspecting or replacing the capacitor.*
When to call a Professional: Replacing a capacitor can be dangerous if you are not familiar with electrical components. Furthermore, if the blower motor itself is making loud noises or not turning at all, it may need to be replaced by a professional. Diagnosing a faulty blower motor often requires specialized equipment.
Step 3: Check the Ductwork
Sometimes the issue isn't with the furnace itself, but with the ductwork that distributes the heated air. Leaky or damaged ductwork can cause significant heat loss.
DIY Fix: Visually inspect the accessible ductwork for any obvious leaks or damage. Seal any small leaks with duct tape (not regular tape). Ensure vents are open and unobstructed.
When to call a Professional: If you suspect significant ductwork damage or leaks within walls or ceilings, it's best to call a professional to assess and repair the ductwork. They have the tools and expertise to properly seal and insulate ductwork for optimal efficiency.
Troubleshooting: The Furnace is Making Strange Noises
Unusual noises coming from your furnace can be a sign of various problems. Here are some common noises and their potential causes:
- Banging or Popping: Often caused by expanding and contracting ductwork. Can also indicate a problem with the heat exchanger (call a professional immediately if you suspect a heat exchanger issue).
- Squealing: Usually indicates a worn or loose blower motor belt (if your furnace has one) or a problem with the blower motor bearings.
- Rattling: Could be loose panels, debris in the blower fan, or a more serious internal issue.
- Whistling: Often caused by restricted airflow due to a dirty air filter or closed vents.
DIY Fix: Tighten any loose panels, replace the air filter, and ensure vents are open. If you suspect a blower motor belt issue, you can try tightening or replacing the belt (only if you are comfortable and familiar with this process). However, any unusual or persistent noises warrant a professional inspection.
When to Call a Professional
While some furnace problems can be resolved with simple DIY fixes, there are situations where professional intervention is essential. Here's a summary:
- Gas Leaks: If you smell gas, evacuate the premises immediately and call your gas company.
- Electrical Issues: Repeatedly tripping circuit breakers or any signs of electrical arcing require a qualified electrician.
- Heat Exchanger Problems: A cracked heat exchanger is a serious safety hazard and requires immediate professional attention. Signs include a yellow or orange flame (instead of blue), a sweet or musty odor, and excessive soot.
- Carbon Monoxide Detection: If your carbon monoxide detector goes off, evacuate the premises and call the fire department. A malfunctioning furnace can produce dangerous levels of carbon monoxide.
- Complex Repairs: Any repairs involving gas lines, electrical wiring, or internal furnace components that you are not comfortable with should be left to a professional.
- Persistent Problems: If you've tried the basic troubleshooting steps and the problem persists, it's time to call a qualified HVAC technician.
- Age of Furnace: If your furnace is approaching the end of its lifespan (15-20 years) and requires frequent repairs, it may be more cost-effective to replace it with a new, more efficient model.
Preventative Maintenance: The Key to Longevity
The best way to extend the life of your furnace and prevent costly repairs is to perform regular preventative maintenance. Here are some essential maintenance tasks:
- Replace Air Filters Regularly: Change your air filter every 1-3 months, depending on usage and air quality.
- Annual Professional Inspection: Schedule an annual furnace inspection and tune-up with a qualified HVAC technician. They will clean and inspect the furnace, lubricate moving parts, check for any potential problems, and ensure it's operating safely and efficiently.
- Keep the Area Around the Furnace Clean: Remove any dust, debris, or clutter from the area around the furnace to ensure proper ventilation.
- Inspect Ductwork: Periodically inspect the accessible ductwork for any leaks or damage and seal them with duct tape.
By following these troubleshooting steps and implementing a regular maintenance schedule, you can keep your furnace running smoothly and efficiently for years to come. Remember, safety should always be your top priority. If you're unsure about any step, don't hesitate to call a qualified HVAC technician.


