How Much Is An Ac Compressor For A House

Air conditioning systems are essential for maintaining a comfortable home environment, especially during hot weather. A common issue homeowners face is a malfunctioning AC system, often pointing to a potential problem with the AC compressor. Understanding the basics of troubleshooting and knowing when to call a professional can save you time, money, and ensure your safety.
Is It Really the Compressor? Common AC Issues
Before jumping to the conclusion that your AC compressor is failing, it's crucial to rule out other, more common, and often simpler problems. Many issues can mimic compressor failure.
- Dirty Air Filter: A clogged air filter restricts airflow, causing the AC unit to work harder and potentially overheat. This can lead to performance issues that resemble compressor problems.
- Frozen Evaporator Coils: Low refrigerant levels, restricted airflow, or a malfunctioning blower motor can cause the evaporator coils to freeze over, reducing cooling efficiency.
- Dirty Condenser Coils: Located outside, condenser coils dissipate heat. When covered in dirt and debris, they can't function properly, leading to overheating and reduced cooling.
- Refrigerant Leaks: Low refrigerant levels mean the system can't cool effectively. This can stress the compressor and eventually damage it.
- Electrical Issues: Faulty wiring, a blown fuse, or a tripped circuit breaker can prevent the compressor from receiving power.
- Capacitor Problems: The start and run capacitors help the compressor start and run smoothly. A failing capacitor can prevent the compressor from starting or cause it to run erratically.
Step-by-Step Troubleshooting Guide
This guide provides basic troubleshooting steps. Remember to always turn off the power to your AC unit at the breaker box before performing any maintenance or inspections. Your safety is paramount. If you're uncomfortable with any of these steps, or if you suspect a serious problem, contact a qualified HVAC technician.
Step 1: Check the Thermostat
The first and simplest step is to ensure your thermostat is set correctly.
- Power: Make sure the thermostat has power. Check the batteries if it's battery-operated.
- Settings: Verify that the thermostat is set to "Cool" mode and that the desired temperature is lower than the current room temperature.
- Fan Setting: Ensure the fan is set to "Auto" or "On." If set to "On," the fan will run constantly, even if the compressor isn't running.
Step 2: Inspect the Air Filter
A dirty air filter is a common culprit behind many AC problems.
- Location: Air filters are typically located in the indoor unit or behind a return air vent.
- Inspection: Remove the filter and hold it up to the light. If you can't see light through it, it's likely dirty.
- Replacement: Replace the filter with a new one of the correct size and type. Air filters are inexpensive and should be replaced every 1-3 months, depending on usage and air quality.
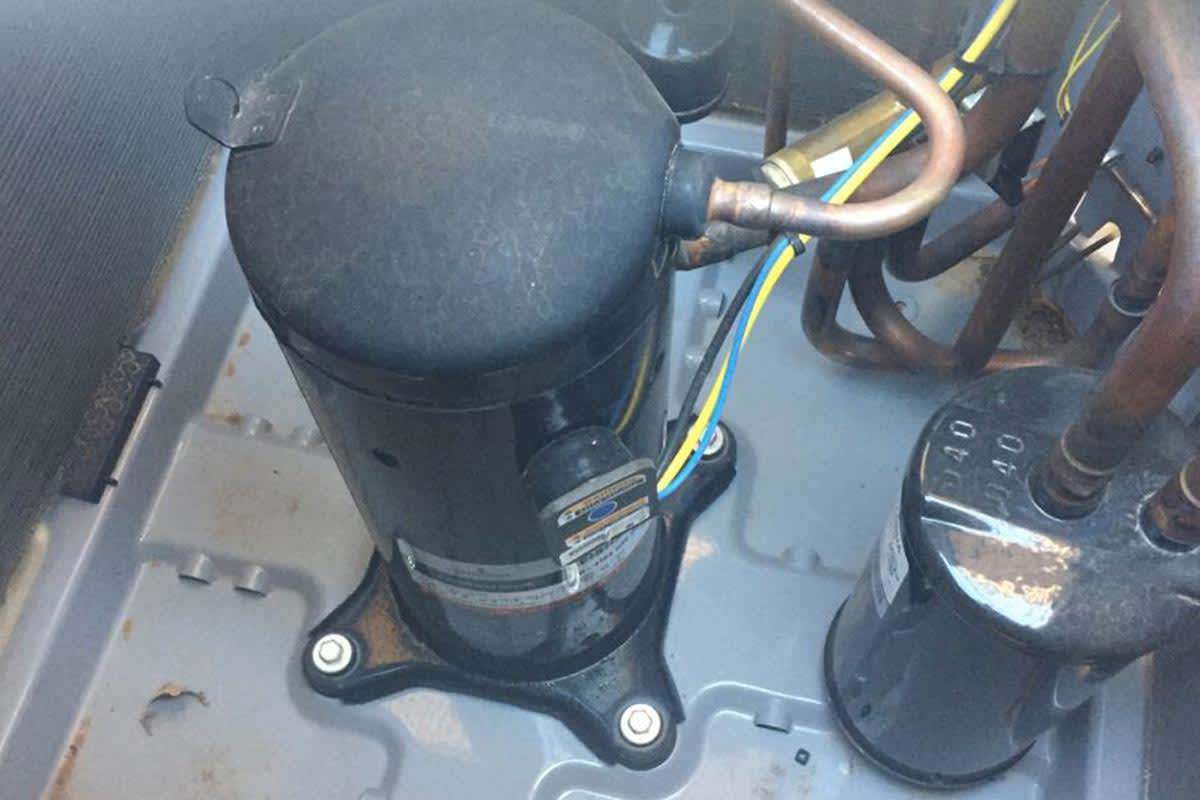
Step 3: Check the Outdoor Unit (Condenser)
The outdoor unit houses the compressor and condenser coils. Be careful when working around the outdoor unit, as it contains electrical components and moving parts.
- Power: Ensure the power to the outdoor unit is off at the breaker box.
- Clear Debris: Remove any leaves, grass, branches, or other debris from around the unit. Make sure nothing is blocking airflow to the condenser coils.
- Coil Cleaning: Gently clean the condenser coils with a garden hose. Use a soft brush to remove stubborn dirt. Avoid using a pressure washer, as it can damage the delicate fins.
Step 4: Inspect the Circuit Breaker
A tripped circuit breaker can cut power to the AC unit.
- Location: Locate the circuit breaker panel, usually in a utility room, basement, or garage.
- Inspection: Look for a tripped breaker (it will be in the "off" or "middle" position).
- Reset: Flip the breaker to the "off" position, then back to the "on" position. If the breaker trips again immediately, there's likely a more serious electrical problem that requires professional attention.
Step 5: Check for Frozen Evaporator Coils
Frozen evaporator coils can prevent the AC from cooling effectively.
- Location: Evaporator coils are located in the indoor unit.
- Inspection: Look for ice buildup on the coils. You may need to remove an access panel to see the coils.
- Thawing: If the coils are frozen, turn off the AC unit and set the fan to "On" to circulate air and thaw the ice. This may take several hours.
- Prevention: Once the coils are thawed, investigate the cause of the freezing. Check the air filter, blower motor, and refrigerant levels. If the problem persists, consult a professional.
Step 6: Listen for Unusual Noises
Unusual noises coming from the AC unit can indicate a problem.
- Grinding or Squealing: These noises could indicate a problem with the compressor motor or bearings.
- Hissing: A hissing sound could indicate a refrigerant leak.
- Clicking: Clicking sounds could indicate a problem with the electrical components, such as the capacitors.
If you hear any unusual noises, turn off the AC unit and consult a professional.
Step 7: Checking the Capacitor (Advanced - Requires Caution!)
Working with capacitors can be dangerous, as they can store a high electrical charge. If you're not comfortable working with electrical components, leave this step to a professional. Always discharge the capacitor before handling it.
- Location: Capacitors are typically located inside the outdoor unit's electrical compartment.
- Discharging: Before touching the capacitor, discharge it using a screwdriver with an insulated handle. Short the terminals of the capacitor with the screwdriver. This will release any stored electrical charge.
- Visual Inspection: Look for signs of damage, such as bulging, leaking, or corrosion.
- Testing: Use a multimeter to test the capacitor's capacitance. If the capacitance is significantly lower than the rated value, the capacitor needs to be replaced.
- Replacement: Replace the capacitor with a new one of the same voltage and capacitance rating. Ensure the power is off before replacing the capacitor.
When to Call a Professional
While some AC problems can be resolved with simple DIY fixes, others require the expertise of a qualified HVAC technician. Here are some situations where you should call a professional:
- Refrigerant Leaks: Handling refrigerants requires specialized equipment and training. It's illegal and environmentally harmful to release refrigerants into the atmosphere.
- Compressor Problems: Diagnosing and repairing compressor problems often requires specialized tools and knowledge. Replacing a compressor involves working with refrigerants and electrical components.
- Electrical Issues: Complex electrical problems, such as faulty wiring or a malfunctioning motor, should be handled by a licensed electrician or HVAC technician.
- No Cooling After Troubleshooting: If you've tried the basic troubleshooting steps and your AC unit still isn't cooling, it's time to call a professional.
- Suspect Gas Leak (If Applicable): Some AC systems use gas. If you suspect a gas leak, immediately evacuate the premises and call your gas company or emergency services.
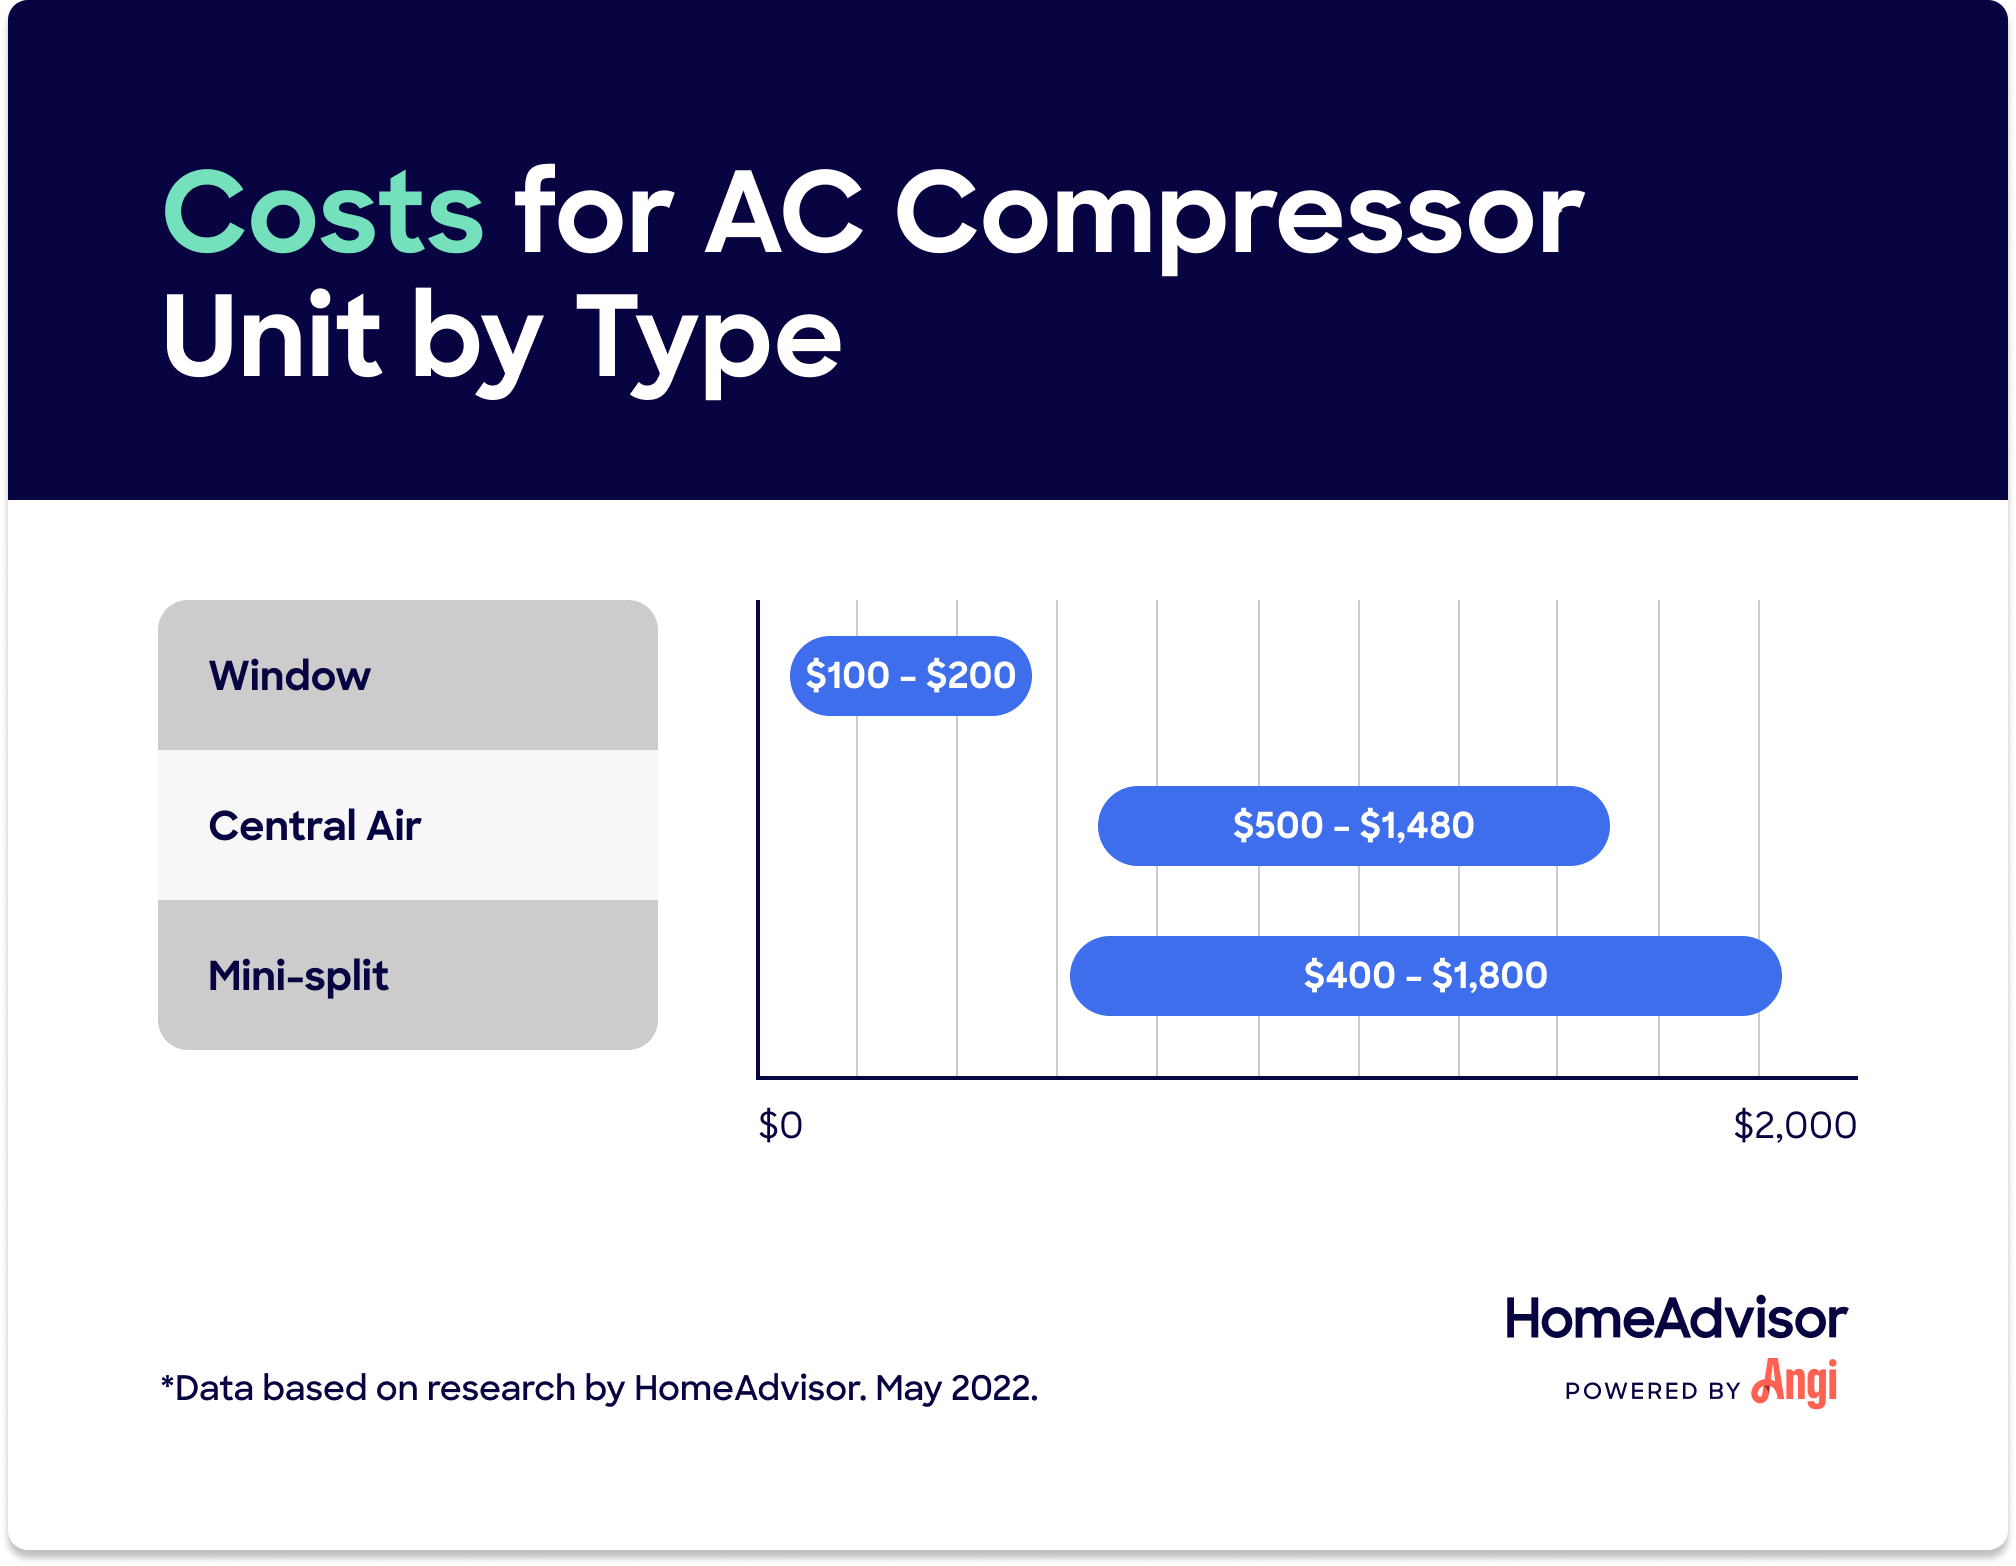
How Much is an AC Compressor for a House?
The cost of an AC compressor replacement can vary significantly depending on several factors:
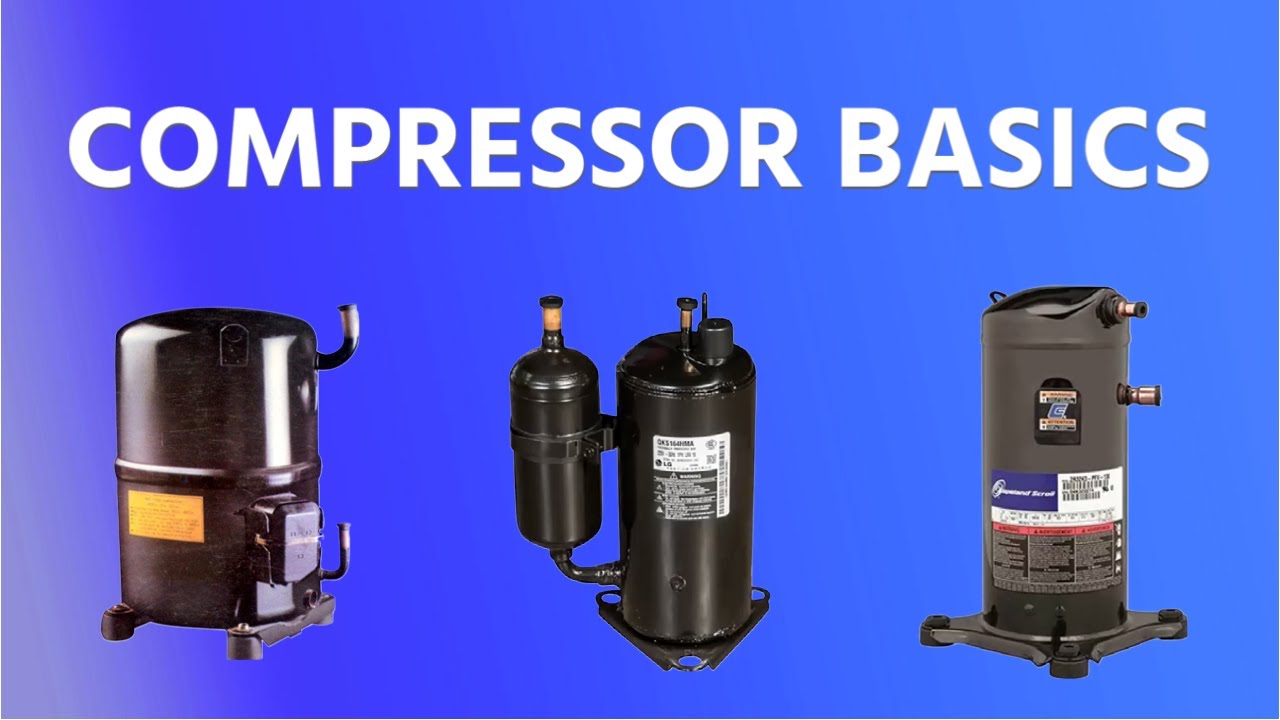
- Type of Compressor: Different types of compressors (e.g., scroll, reciprocating, rotary) have different price points.
- Size and Capacity: Larger AC units require larger and more expensive compressors.
- Brand: Some brands are more expensive than others due to reputation, features, and warranty.
- Accessibility: If the AC unit is difficult to access, the labor costs may be higher.
- Location: Labor costs vary depending on your geographic location.
Generally, you can expect to pay anywhere from $800 to $2,500+ for an AC compressor replacement, including parts and labor. A compressor itself can range from $500 to $1500, and the labor costs to install it can range from $300 to $1000+, depending on the complexity of the job.
It's always a good idea to get multiple quotes from different HVAC contractors before making a decision. Ask for a detailed breakdown of the costs, including the cost of the compressor, labor, and any other related expenses.
Alternatives to Compressor Replacement
In some cases, replacing the entire AC unit may be a more cost-effective option than replacing just the compressor. Consider these factors:
- Age of the Unit: If your AC unit is more than 10-15 years old, it may be nearing the end of its lifespan. Replacing the entire unit with a new, more energy-efficient model could save you money in the long run.
- Refrigerant Type: Older AC units may use R-22 refrigerant, which is being phased out. Replacing the compressor in an R-22 unit may not be a wise investment, as the refrigerant will become increasingly expensive and difficult to obtain.
- Repair History: If your AC unit has required frequent repairs in the past, it may be time to replace it.
When considering a new AC unit, look for models with a high SEER (Seasonal Energy Efficiency Ratio) rating. A higher SEER rating indicates better energy efficiency, which can save you money on your utility bills.
Preventative Maintenance
Regular maintenance can help prevent AC compressor problems and extend the lifespan of your AC unit. Here are some preventative maintenance tips:
- Change Air Filters Regularly: Replace air filters every 1-3 months, or more often if you have pets or allergies.
- Clean Condenser Coils: Clean the condenser coils at least once a year, or more often if they get dirty.
- Schedule Professional Maintenance: Have your AC unit professionally inspected and tuned up at least once a year. A technician can identify and address potential problems before they become major issues.
- Keep the Area Around the Outdoor Unit Clear: Ensure that there's ample space around the outdoor unit for proper airflow.
By following these troubleshooting steps and preventative maintenance tips, you can keep your AC unit running smoothly and avoid costly compressor repairs.