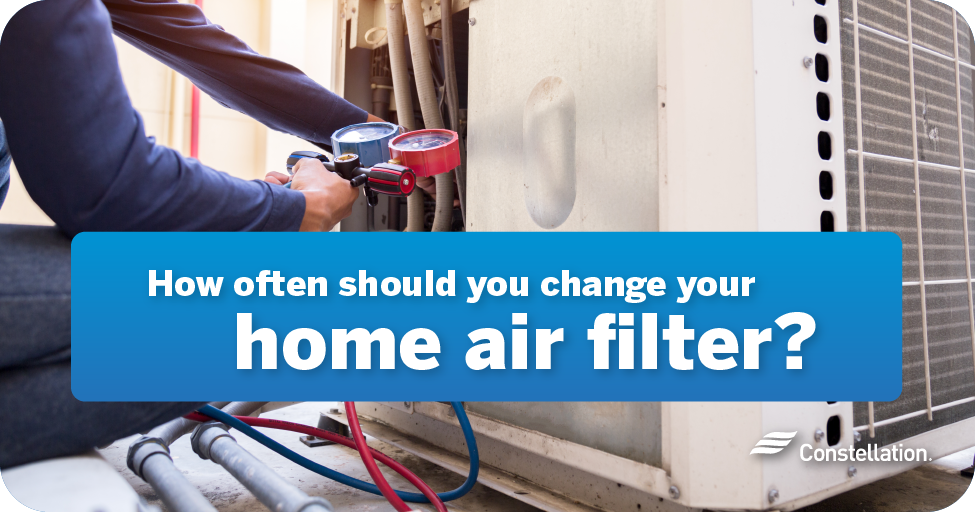
How Often To Change An Air Filter

Imagine this: it’s the peak of summer, the heat is sweltering, and suddenly your air conditioner sputters, groans, and gives up the ghost. A malfunctioning HVAC system is a common household headache, often striking at the worst possible time. While some issues require a professional, a surprisingly large number stem from a simple, often overlooked culprit: a dirty air filter.
Understanding the Importance of a Clean Air Filter
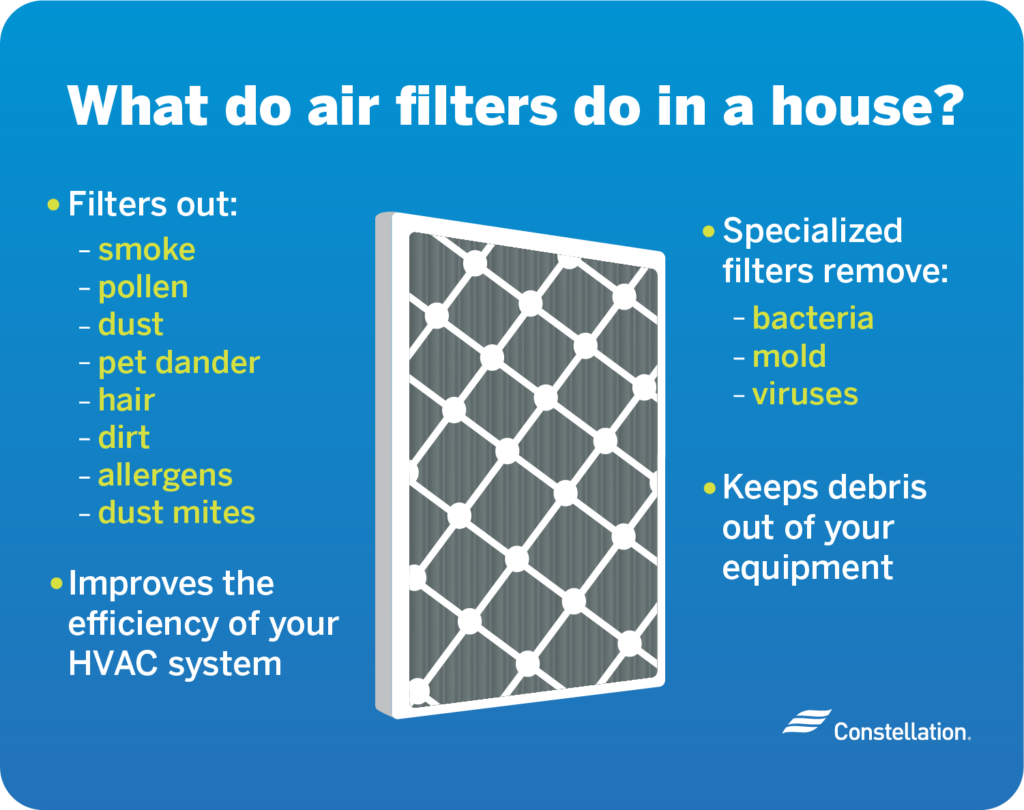
Your air filter is the unsung hero of your HVAC system. It traps dust, pollen, pet dander, and other airborne particles, preventing them from circulating through your home and damaging your equipment. A clean filter allows for optimal airflow, making your system more efficient and prolonging its lifespan. A dirty filter, on the other hand, restricts airflow, forcing your system to work harder, which can lead to:
- Reduced Efficiency: Your system has to work longer and harder to achieve the desired temperature, leading to higher energy bills.
- Overheating: Restricted airflow can cause the system's components to overheat, potentially leading to costly repairs.
- Poor Air Quality: A clogged filter can't effectively trap pollutants, leading to dustier air and aggravated allergies.
- System Failure: In severe cases, a persistently dirty filter can cause the system to break down completely.
How Often Should You Change Your Air Filter?
The million-dollar question! There's no one-size-fits-all answer, as the ideal frequency depends on several factors:
- Filter Type: Different filters have different lifespans.
- Household Size: Larger families tend to generate more dust and dander.
- Pets: Pets shed fur and dander, clogging filters more quickly.
- Allergies/Respiratory Issues: Those with allergies or respiratory problems may benefit from more frequent changes.
- Smoking: Smoking indoors significantly increases the amount of pollutants in the air.
- Construction/Renovation: Construction activities generate a lot of dust.
As a general guideline:
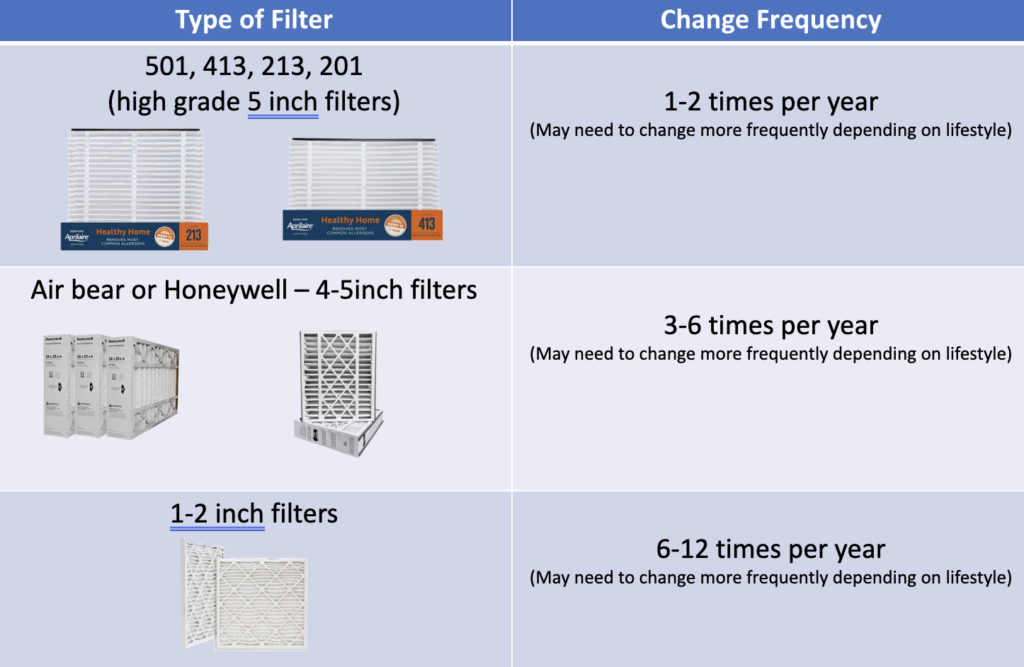
- Cheap Fiberglass Filters (1-inch thick): Replace every 30 days. These offer minimal filtration and clog quickly.
- Pleated Filters (1-inch thick): Replace every 60-90 days. These offer better filtration and last longer than fiberglass filters.
- Thicker Pleated Filters (4-5 inches thick): Replace every 6-12 months. These offer the best filtration and longest lifespan.
Important Note: These are just general recommendations. Regularly inspect your filter monthly to visually assess its condition. If it looks dirty, replace it, even if it's within the recommended lifespan. Consider setting a reminder on your phone or calendar to check your filter regularly.
Troubleshooting Your HVAC System: A Step-by-Step Guide (Starting with the Air Filter)
Before calling a professional, try these simple troubleshooting steps. Always disconnect the power to your HVAC system at the breaker box before performing any maintenance.
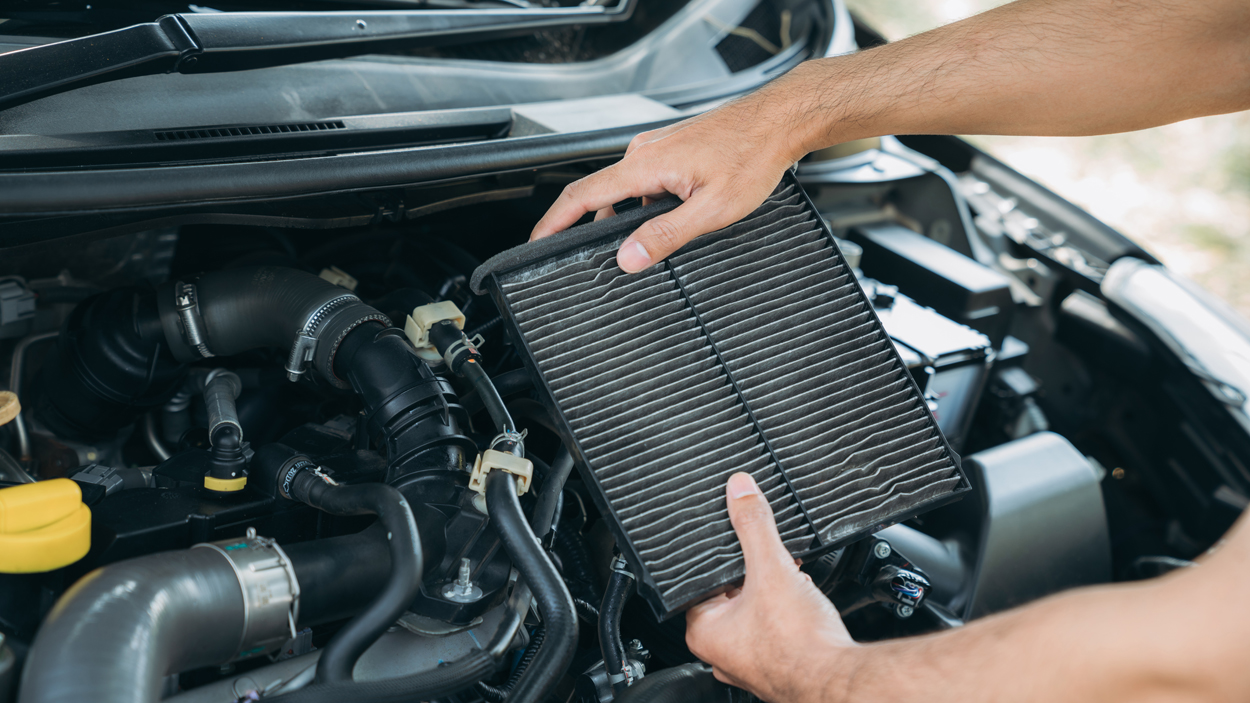
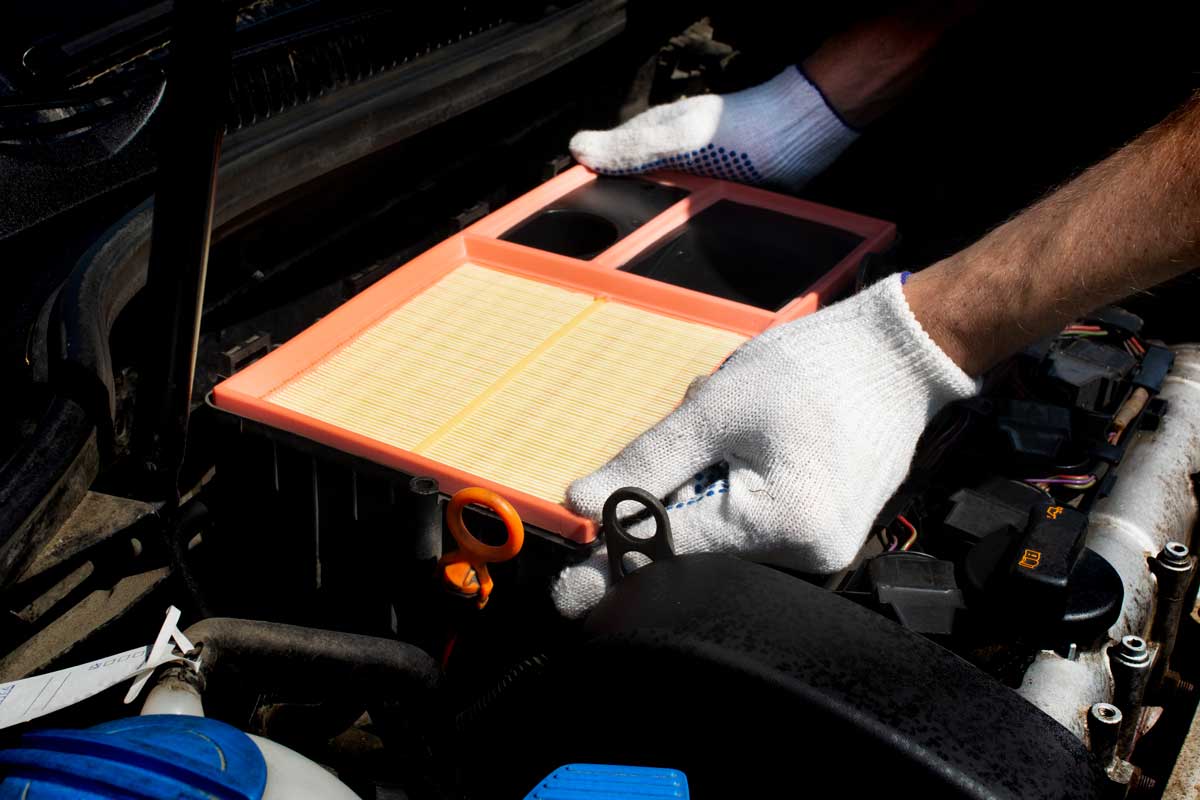
Step 1: Check the Air Filter (The Obvious Culprit)
- Locate the Filter: The air filter is usually located in the return air duct, where air enters the HVAC system. This is often in a wall, ceiling, or within the unit itself (especially for furnaces).
- Inspect the Filter: Remove the filter and hold it up to the light. If you can't see light through it, it's definitely time to replace it. Also, check for visible dirt, dust, and debris.
- Replace the Filter: Purchase a new filter of the correct size and MERV rating (see below). Slide the new filter into place, ensuring the arrow on the filter frame points in the direction of airflow (usually towards the furnace or air handler).
- Document the Change: Write the date of the filter change on the filter frame with a marker. This will help you keep track of when it was last replaced.
Understanding MERV Ratings: MERV (Minimum Efficiency Reporting Value) ratings indicate a filter's ability to capture particles. Higher MERV ratings (8-13) filter out smaller particles like pollen, mold spores, and pet dander. Lower MERV ratings (1-4) primarily capture larger particles like dust and lint. Consult your HVAC system's manual or a professional to determine the appropriate MERV rating for your system. Using a filter with too high a MERV rating can restrict airflow and damage your system.
Step 2: Check the Thermostat
A thermostat malfunction can prevent your system from operating correctly.
- Check the Batteries: Ensure the thermostat has fresh batteries. A low battery can cause erratic behavior.
- Verify the Settings: Make sure the thermostat is set to the correct mode (heat or cool) and temperature. Ensure the fan setting is appropriate (auto or on).
- Check for Error Codes: Some thermostats display error codes. Consult the thermostat's manual for troubleshooting information related to the specific code.
- Reset the Thermostat: Try resetting the thermostat to its factory defaults. Refer to the thermostat's manual for instructions.
Step 3: Check the Power Supply
No power, no operation! This is a basic, but crucial step.
- Check the Breaker: Locate the breaker for your HVAC system in the breaker box. Ensure the breaker is not tripped (in the "off" position). If it is, flip it all the way to the "off" position and then back to the "on" position.
- Inspect the Disconnect Switch: Near the outdoor unit (if applicable), there's usually a disconnect switch. Make sure it's in the "on" position.
Warning: Never work on electrical components with the power on. Disconnect the power at the breaker box before proceeding.
Step 4: Inspect the Outdoor Unit (If Applicable)
The outdoor unit, often called the condenser, is a critical component of air conditioning systems.
- Clear Debris: Remove any leaves, branches, or other debris that may be blocking the unit. Ensure there is at least two feet of clearance around the unit.
- Inspect the Fins: Check the fins (the thin metal plates surrounding the unit) for damage. Straighten any bent fins carefully using a fin comb (available at most hardware stores). Bent fins restrict airflow.
- Listen for Unusual Noises: If you hear any unusual noises, such as grinding, squealing, or rattling, turn off the unit immediately and contact a professional.
Step 5: Check the Vents
Blocked vents can restrict airflow and reduce the efficiency of your system.
- Ensure Vents are Open: Make sure all vents are fully open.
- Remove Obstructions: Check for furniture, rugs, or other objects that may be blocking vents.
- Clean Vents: Vacuum dust and debris from the vents.
Step 6: Condensate Drain Line
A clogged condensate drain line can cause water damage and prevent the system from cooling properly.
- Locate the Drain Line: The condensate drain line is a PVC pipe that drains water from the indoor unit. It usually exits the building near the outdoor unit or into a floor drain.
- Check for Clogs: Look for any signs of clogs, such as water backing up into the drain pan or leaking from the drain line.
- Clear the Drain Line: You can try clearing the drain line with a wet/dry vacuum or by flushing it with a solution of vinegar and water. Consult a professional if you are unable to clear the clog.
When to Call a Professional
While these DIY steps can resolve many common HVAC problems, some issues require the expertise of a qualified technician. Call a professional immediately if:
- You suspect a refrigerant leak: Refrigerant leaks can be harmful to the environment and your health.
- You smell gas: A gas leak is a serious safety hazard. Evacuate the premises immediately and call the gas company.
- You see sparks or smoke: These are signs of a serious electrical problem.
- You hear loud or unusual noises: These could indicate a mechanical problem within the system.
- You are uncomfortable working with electricity or gas: Safety should always be your top priority.
- You have tried the above steps and the problem persists: It's time to call in the experts.
- Your system is under warranty: Performing unauthorized repairs may void the warranty.
Remember: Don't attempt repairs that you are not comfortable with or that involve complex components. It's always better to be safe than sorry. Regular maintenance, including consistent air filter replacement, can help prevent many of these problems in the first place.
Choosing the Right Air Filter
Selecting the correct air filter is crucial for both air quality and HVAC system performance. Here’s a more in-depth look at the different types and how to choose the right one:
- Fiberglass Filters: These are the most basic and inexpensive type. They primarily protect the HVAC equipment from large particles like dust and lint, offering minimal air filtration. Replace monthly.
- Pleated Filters: Made from pleated paper or cloth, these filters offer much better filtration than fiberglass filters. They capture smaller particles like pollen, pet dander, and mold spores. They come in various MERV ratings. Replace every 1-3 months, depending on thickness and conditions.
- Electrostatic Filters: These filters use an electrostatic charge to attract and trap particles. They are washable and reusable, but they may not be as effective as pleated filters at capturing very small particles. Clean as per manufacturer instructions.
- HEPA Filters: HEPA (High-Efficiency Particulate Air) filters are the most efficient type of air filter. They are capable of capturing 99.97% of particles 0.3 microns in size, including bacteria and viruses. HEPA filters are often used in hospitals and other environments where air quality is critical. However, they can restrict airflow significantly and may not be suitable for all HVAC systems. Consult a professional before using a HEPA filter in your home system. Replace as per manufacturer's instructions.
Tips for Choosing the Right Filter:
- Check your HVAC system's manual: It should specify the recommended filter size and type.
- Consider your needs: If you have allergies or respiratory problems, choose a filter with a higher MERV rating.
- Don't overdo it: A filter with too high a MERV rating can restrict airflow and damage your system. Consult a professional if you are unsure.
- Measure your old filter: Ensure the new filter is the same size as the old one.
Long-Term Prevention: Scheduling Regular Maintenance
The best way to avoid HVAC problems is to schedule regular maintenance. A qualified technician can inspect your system, clean components, and identify potential issues before they become major problems. Here are some key maintenance tasks:
- Annual HVAC System Inspection: Schedule an annual inspection with a qualified technician to check refrigerant levels, electrical connections, and overall system performance.
- Coil Cleaning: Dirty coils can reduce the efficiency of your system. Have the coils cleaned regularly.
- Duct Cleaning: Over time, dust and debris can accumulate in your ductwork. Consider having your ducts cleaned every few years.
By following these tips and performing regular maintenance, you can keep your HVAC system running smoothly and efficiently for years to come. And remember, a clean air filter is the foundation of a healthy and efficient HVAC system!