How To Adjust A Gas Regulator

Is your home feeling unevenly heated or cooled? Are some rooms noticeably colder in the winter or warmer in the summer than others? This is a frustratingly common problem, and while several factors could be the cause, a misadjusted gas regulator on your furnace or other gas appliance might be the culprit. This article will guide you through a step-by-step process to diagnose and potentially resolve this issue yourself, while also emphasizing when it's time to call in the professionals.
Understanding the Problem: Uneven Heating/Cooling and Gas Regulators
Uneven heating and cooling often stems from inconsistent airflow, insufficient insulation, or problems with the heating/cooling system itself. One critical component in gas-powered heating systems is the gas regulator. This device controls the pressure of natural gas or propane flowing to the burner. If the regulator isn't functioning correctly, the burner may not receive the proper amount of fuel, leading to inefficient combustion and reduced heat output. This can manifest as inconsistent temperatures throughout your home.
Step 1: Preliminary Checks (No Tools Required)
Before you start fiddling with anything, perform these basic checks. These steps are safe and require no tools.
Check the Obvious
Start with the simple things:
- Thermostat Settings: Ensure your thermostat is set correctly for heating or cooling and that the desired temperature is appropriate. Make sure it's not in "fan only" mode.
- Air Filters: A clogged air filter restricts airflow, reducing the efficiency of your system. A dirty filter can cause the system to overheat or underperform. Check your filter and replace it if it's dirty. This is often the single easiest and most effective fix.
- Supply and Return Vents: Make sure all supply vents (where heated/cooled air comes out) and return vents (where air is drawn back into the system) are open and unobstructed. Furniture, rugs, or drapes can block airflow.
- Inspect Visible Flame (if applicable): If you can safely observe the burner flame (usually behind a small viewing window), look for a steady, blue flame. A yellow or orange flame indicates incomplete combustion, which could be caused by a gas regulator issue (or other problems like a dirty burner). If you smell gas, evacuate the area immediately and call your gas company!
Safety First!
Before proceeding with any further diagnostics, turn off the power to your furnace or appliance at the breaker box. This is a crucial safety precaution to prevent electrical shock.
Step 2: Diagnosing the Gas Regulator (Basic Tools Required)
If the preliminary checks haven't resolved the issue, you can move on to more specific diagnostics related to the gas regulator. This will require some basic tools, and a healthy dose of caution.
What You'll Need
- Screwdrivers (Phillips and flathead): For removing access panels and adjusting the regulator.
- Wrench Set: For tightening or loosening gas line connections (use the correct size to avoid damaging fittings).
- Manometer (U-tube or digital): This is *essential* for measuring gas pressure. You can purchase one online or at a hardware store. Do not attempt to adjust a gas regulator without a manometer.
- Gas Leak Detector (Soap Solution): A simple solution of soapy water (dish soap and water) in a spray bottle. This is used to check for gas leaks.
- Work Gloves: To protect your hands.
- Safety Glasses: To protect your eyes.
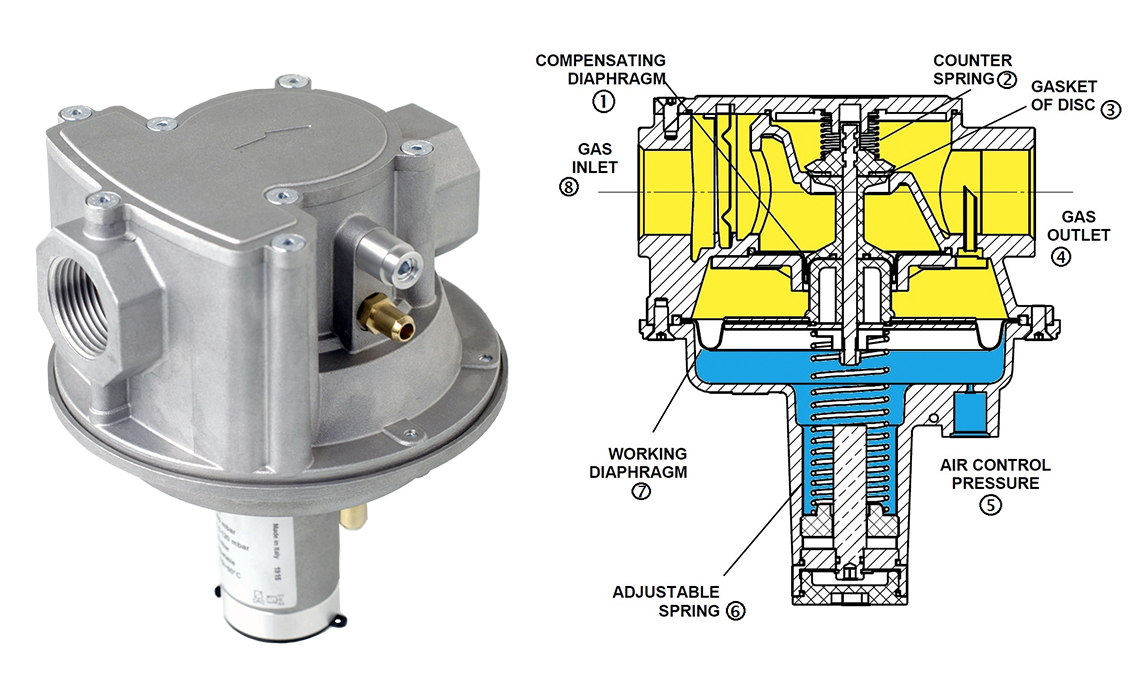
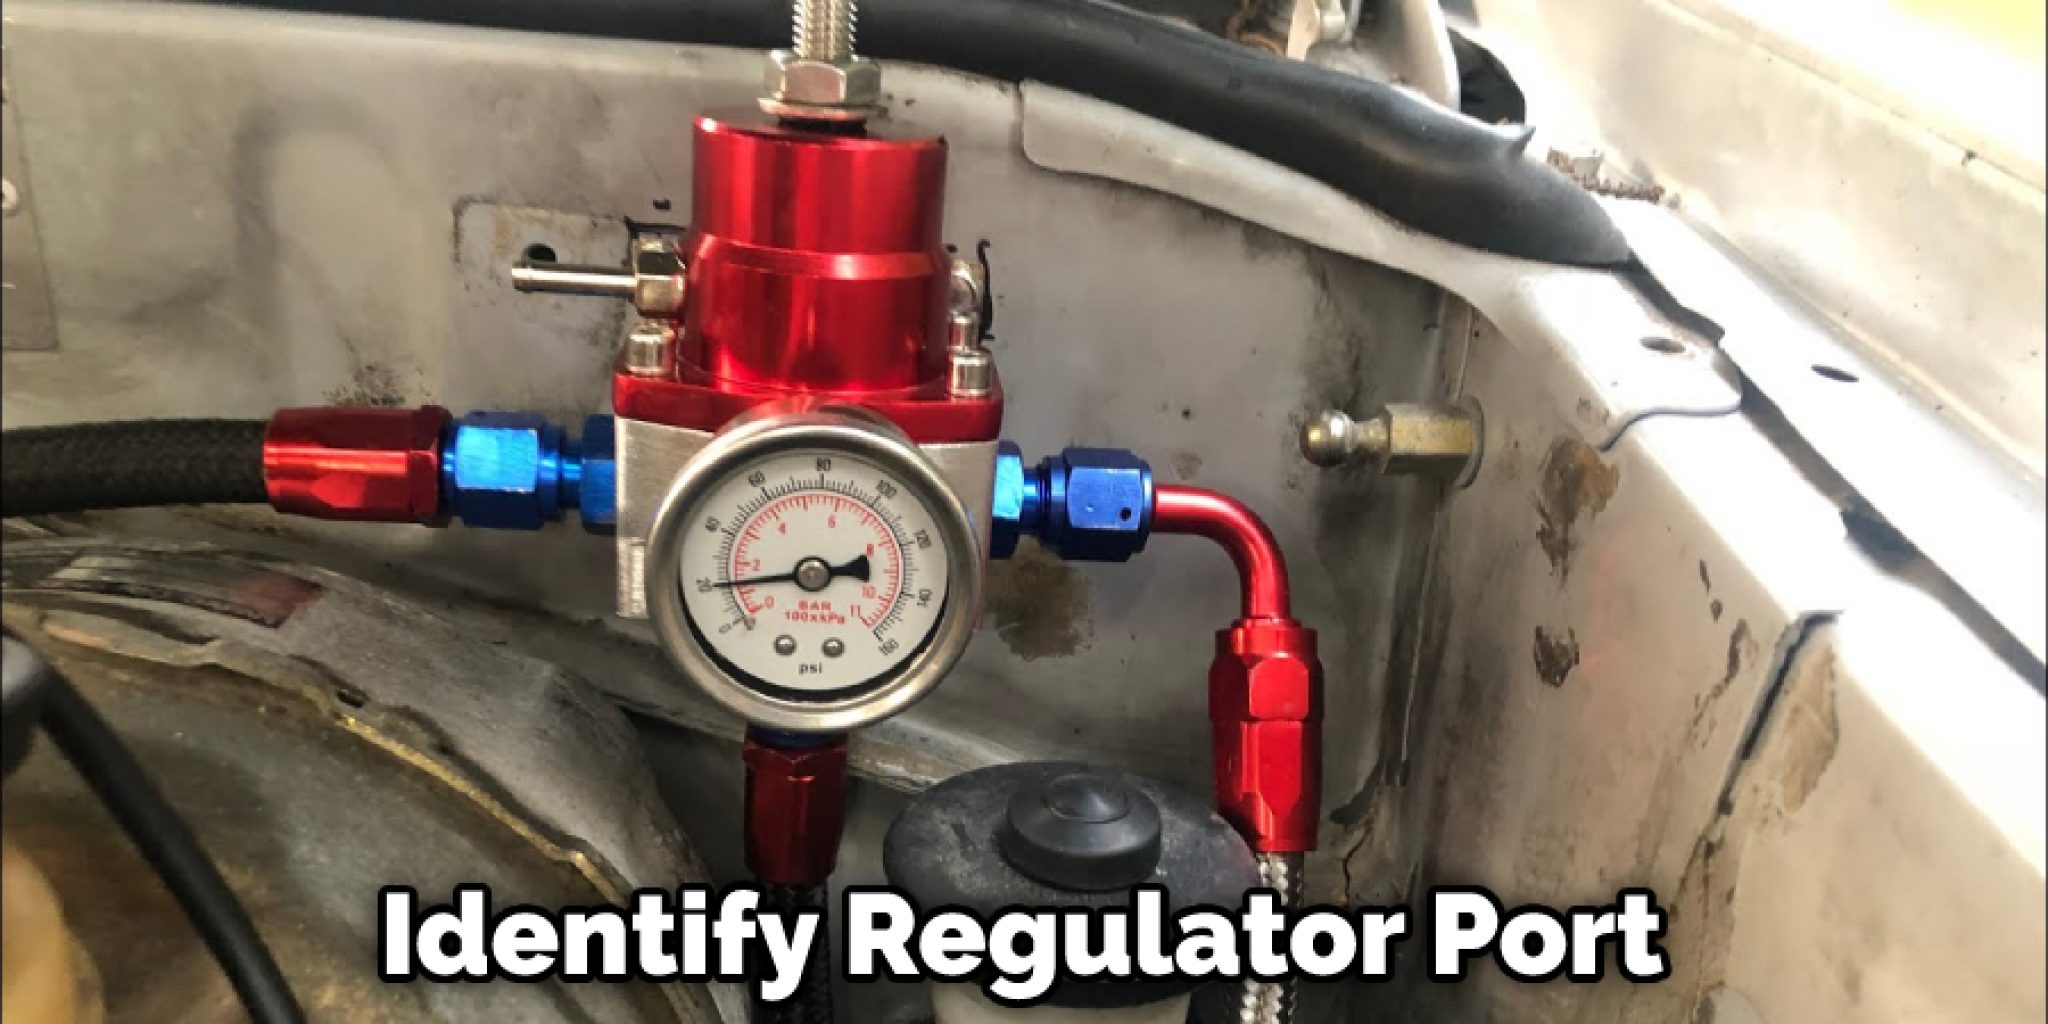
Locating the Gas Regulator
The gas regulator is usually located near the gas valve on your furnace, water heater, or other gas appliance. It's typically a small, dome-shaped device with gas pipes connected to it. Consult your appliance's manual for its exact location if you're unsure.
Checking Inlet Gas Pressure
The inlet gas pressure is the pressure of the gas *entering* the regulator. Checking this ensures that the regulator is receiving sufficient gas supply.
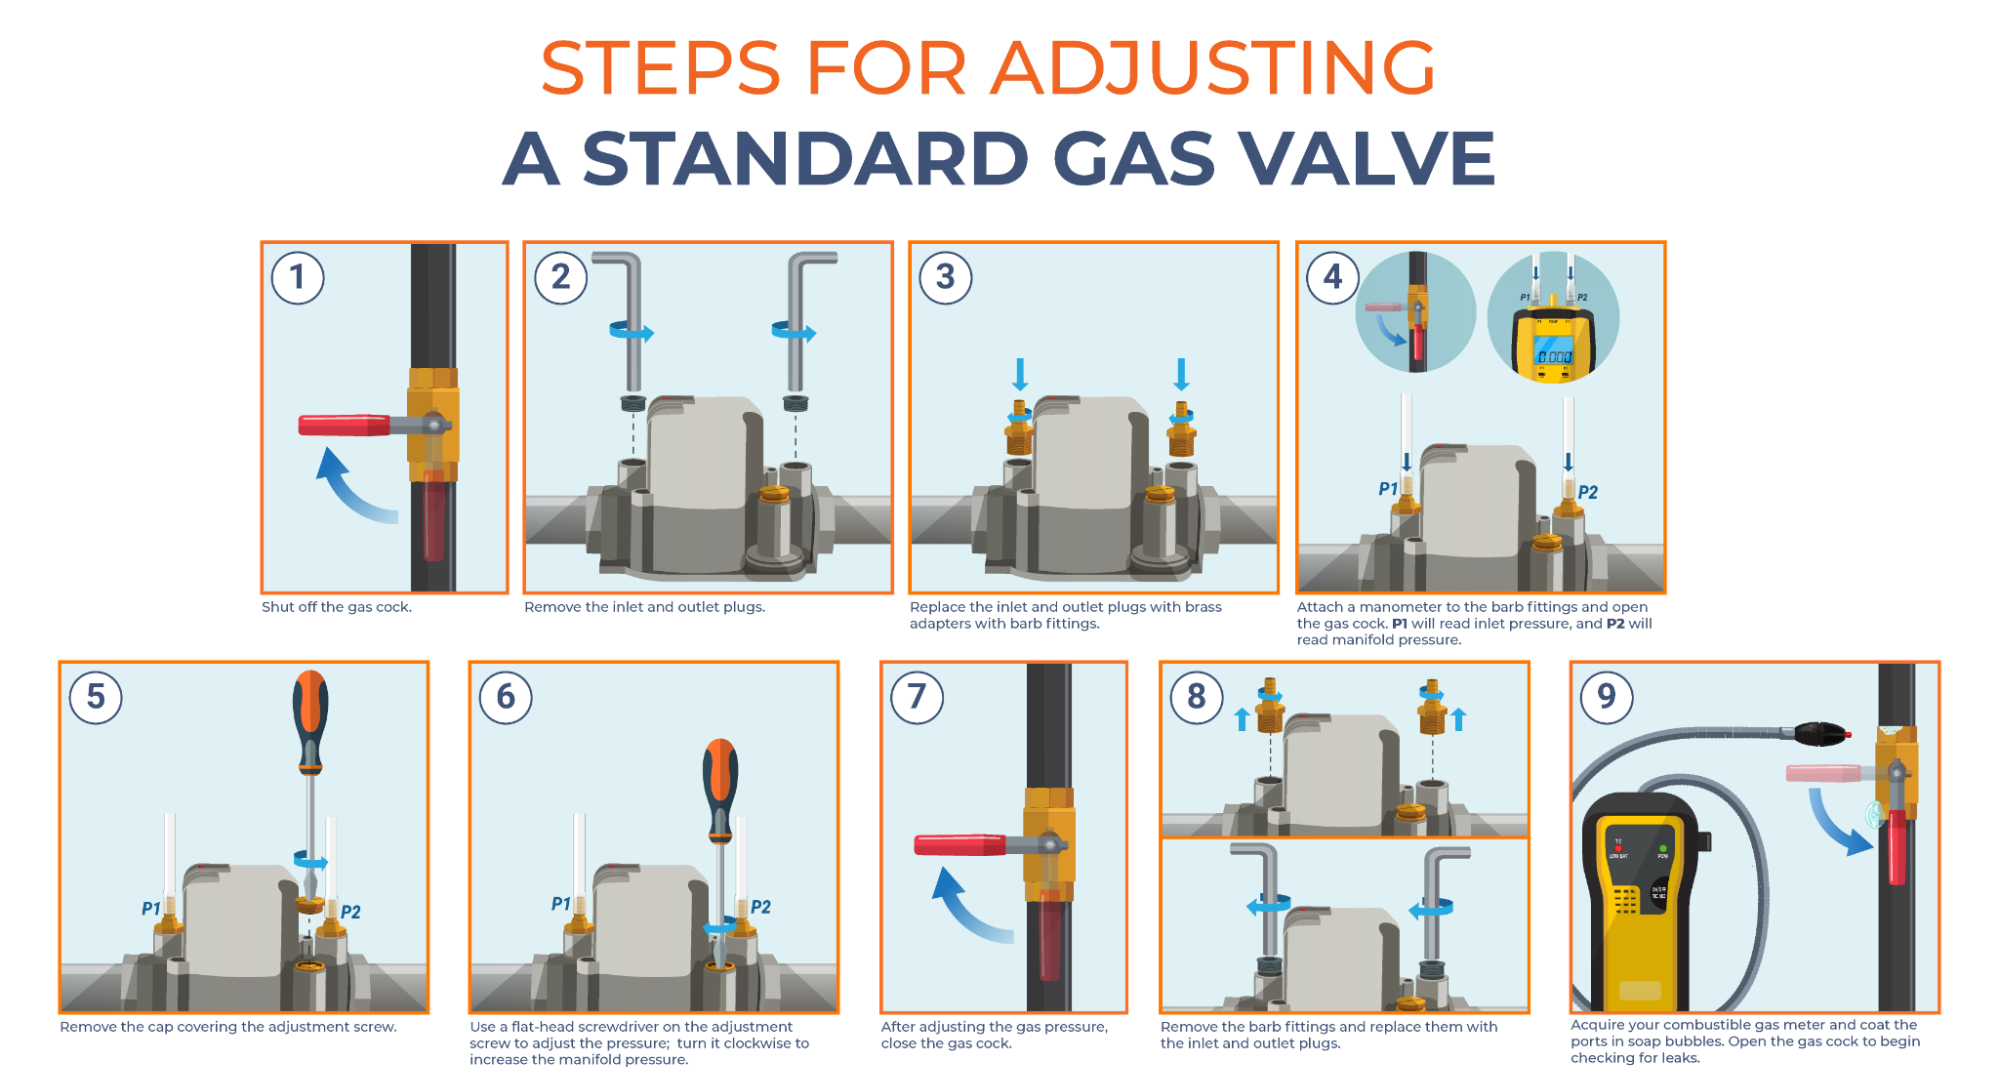
- Locate the Pressure Test Port: The regulator will have one or more pressure test ports, usually small threaded openings with screws or plugs in them. The inlet test port will be on the "upstream" side of the regulator (closer to the gas supply).
- Connect the Manometer: Carefully remove the screw or plug from the inlet test port. Connect one end of the manometer's tubing to the test port. Follow the manometer's instructions for proper connection.
- Restore Power and Turn on the Appliance: Turn the power back on to your furnace or appliance at the breaker box. Turn on the appliance.
- Read the Pressure: Observe the manometer reading. The inlet gas pressure should be within the range specified by the appliance manufacturer (consult your appliance's manual or the rating plate on the appliance). Typical values are around 7-11 inches of water column (WC) for natural gas and 11-13 inches WC for propane.
- Record the Reading: Write down the inlet pressure. This is your baseline.
- Turn Off and Disconnect: Turn off the appliance and disconnect the manometer. Replace the screw or plug in the test port. Ensure it is tightened securely.
- Leak Test: Spray the soapy water solution around the test port and the surrounding area. Look for bubbles forming. If you see bubbles, there is a gas leak. Turn off the gas supply immediately and call a qualified HVAC technician.
Checking Outlet Gas Pressure
The outlet gas pressure is the pressure of the gas *leaving* the regulator and going to the burner. This is the pressure the regulator is controlling.
- Repeat steps 1-7 from Checking Inlet Gas Pressure, but use the outlet test port. The outlet test port will be on the "downstream" side of the regulator (closer to the burner).
- Record the Reading: Write down the outlet pressure. Compare this to the manufacturer's specification. The outlet pressure is *typically* lower than the inlet pressure, and is crucial for proper burner operation. If the outlet pressure is significantly outside the specified range, the regulator may need adjustment.
Step 3: Adjusting the Gas Regulator (Proceed with Caution!)
Important Warning: Adjusting a gas regulator involves working with natural gas or propane, which are flammable and potentially dangerous. If you are uncomfortable with this process, or if you detect any gas leaks, do not attempt to adjust the regulator yourself. Call a qualified HVAC technician. Incorrect adjustments can lead to dangerous conditions.
Also, note that some regulators are *non-adjustable*. These are typically sealed and have no adjustment screw. If your regulator is non-adjustable, replacing it is usually the only option, and this should be done by a qualified technician.
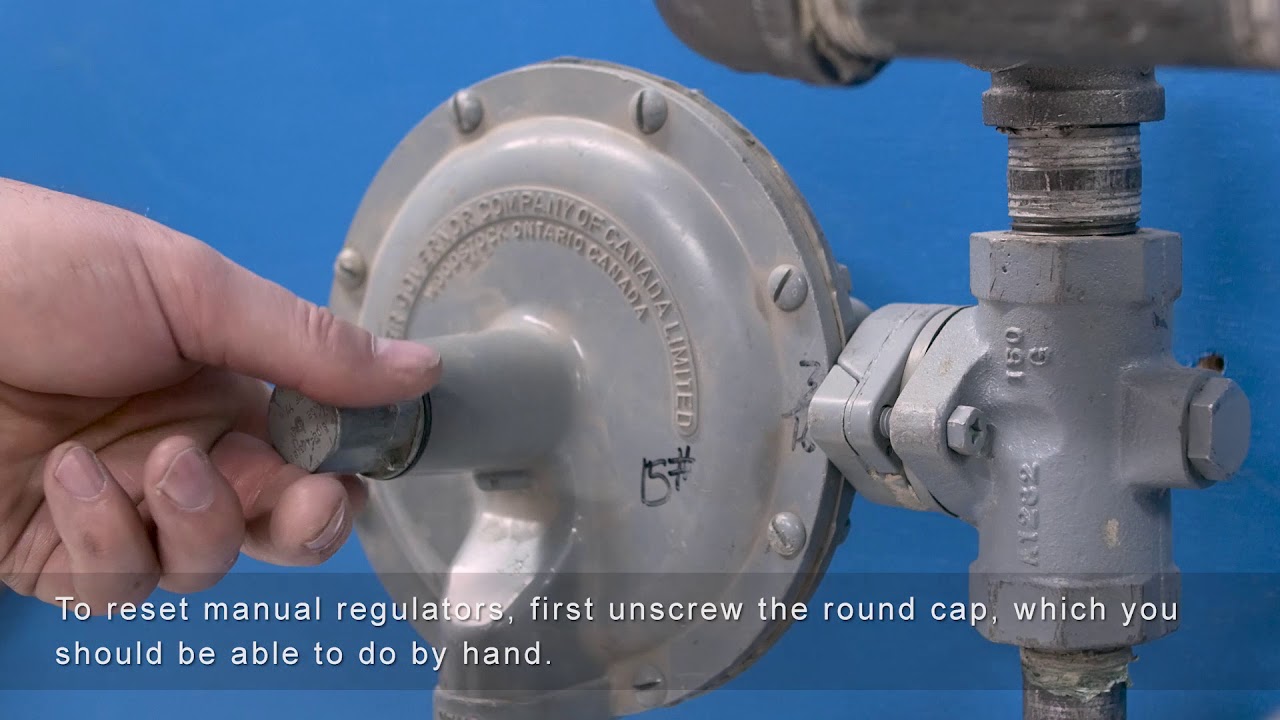
Locating the Adjustment Screw
The adjustment screw is usually located on the top or side of the gas regulator, often covered by a cap or protective cover. Refer to your appliance's manual or the regulator's labeling for its exact location.
Adjusting the Pressure
- Turn on the Appliance and Connect Manometer: Turn on the appliance and connect the manometer to the outlet test port, as described in the "Checking Outlet Gas Pressure" section.
- Remove the Protective Cap (If Applicable): Carefully remove the cap or cover over the adjustment screw.
- Make Small Adjustments: Using a small screwdriver, *very slowly and carefully* turn the adjustment screw. Turning it clockwise usually increases the pressure, while turning it counter-clockwise usually decreases the pressure. Make very small adjustments (no more than 1/8 of a turn at a time) and wait a few seconds for the pressure to stabilize on the manometer.
- Monitor the Pressure: Observe the manometer reading after each adjustment. The goal is to adjust the outlet pressure to the value specified by the appliance manufacturer.
- Repeat as Needed: Continue making small adjustments and monitoring the pressure until you reach the desired value.
- Replace the Protective Cap: Once the pressure is properly adjusted, replace the protective cap or cover over the adjustment screw.
- Turn Off and Disconnect: Turn off the appliance and disconnect the manometer. Replace the screw or plug in the test port. Ensure it is tightened securely.
- Leak Test: Spray the soapy water solution around the test port, the adjustment screw, and the surrounding area. Look for bubbles forming. If you see bubbles, there is a gas leak. Turn off the gas supply immediately and call a qualified HVAC technician.
- Monitor Performance: After adjusting the regulator, monitor the performance of your appliance. Check the burner flame (if visible) to ensure it is a steady, blue flame. Check if the uneven heating/cooling issue has improved.
Step 4: When to Call a Professional
While these steps can help you troubleshoot and potentially fix a misadjusted gas regulator, there are situations where you should always call a qualified HVAC technician:
- You smell gas: If you smell gas at any point, evacuate the area immediately and call your gas company.
- You are uncomfortable working with gas appliances: If you feel unsure or uncomfortable about any of the steps described above, don't proceed. It's better to be safe than sorry.
- You find a gas leak: If you find a gas leak, even a small one, do not attempt to fix it yourself. Turn off the gas supply and call a professional.
- The regulator is damaged or corroded: If the regulator is visibly damaged, corroded, or leaking, it needs to be replaced by a qualified technician.
- You cannot adjust the regulator to the correct pressure: If you are unable to adjust the regulator to the pressure specified by the manufacturer, there may be an underlying problem with the regulator or the appliance.
- The problem persists after adjusting the regulator: If the uneven heating/cooling issue continues after you have adjusted the regulator, the problem may be caused by something else, such as a faulty gas valve, a clogged burner, or problems with the ductwork.
- Your regulator is non-adjustable: As mentioned previously, non-adjustable regulators require replacement by a professional.
Final Thoughts
Adjusting a gas regulator can potentially resolve uneven heating and cooling issues, but it requires caution and a thorough understanding of the process. By following these steps, you can safely diagnose and potentially fix the problem yourself. However, remember that safety is paramount, and when in doubt, always call a qualified HVAC technician. Ignoring a gas leak or making incorrect adjustments can have serious consequences. Regular maintenance, including filter changes and professional inspections, can also help prevent these issues from arising in the first place.