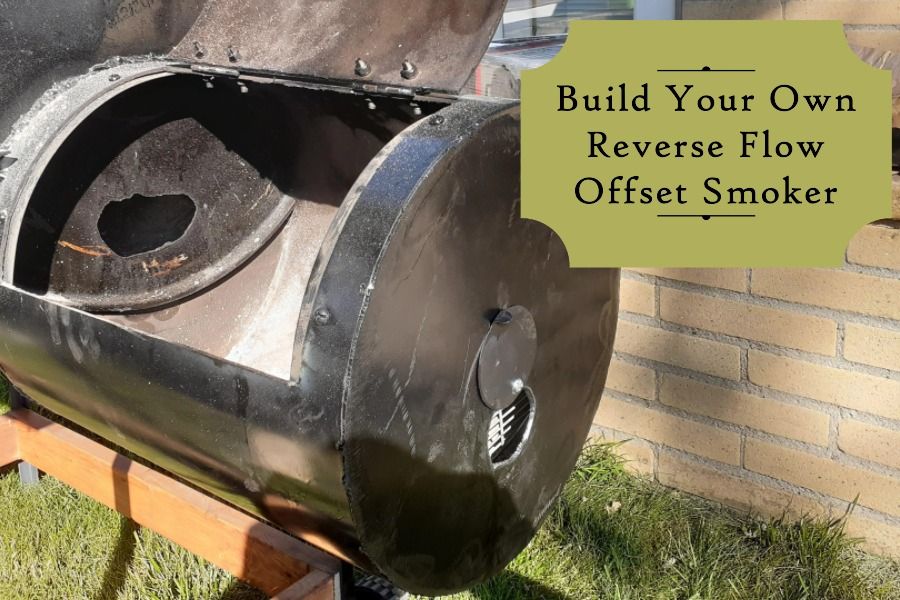
How To Build A Reverse Flow Offset Smoker
Building a reverse flow offset smoker is a rewarding project, delivering delicious, smoky flavors to your barbecues. However, achieving consistent temperatures and even heat distribution can be tricky. One common issue builders face is unpredictable temperature fluctuations, leading to unevenly cooked food. This can manifest as hot spots on one side, colder spots on the other, or simply difficulty maintaining a steady cooking temperature. Let's walk through troubleshooting steps to pinpoint the cause and get your smoker running smoothly.
Diagnosing Temperature Problems in Your Reverse Flow Offset Smoker
Before jumping to conclusions, it's crucial to systematically diagnose the problem. Here's a step-by-step approach:
Step 1: Initial Inspection (No Tools Required)
Start with a visual check. This initial assessment can often reveal obvious culprits.
- Check for Air Leaks: Inspect all welds, seams, and connections. Pay close attention to the firebox door, cooking chamber door, and where the firebox connects to the main chamber. Even small gaps can cause significant heat loss and airflow imbalances. Look for visible cracks or areas where smoke is escaping excessively.
- Inspect the Firebox: Ensure the firebox door seals properly. Check the air intake dampers for smooth operation. A sticky or blocked damper can restrict airflow and affect combustion. Clear any ash buildup inside the firebox. Excessive ash can smother the fire and reduce its efficiency.
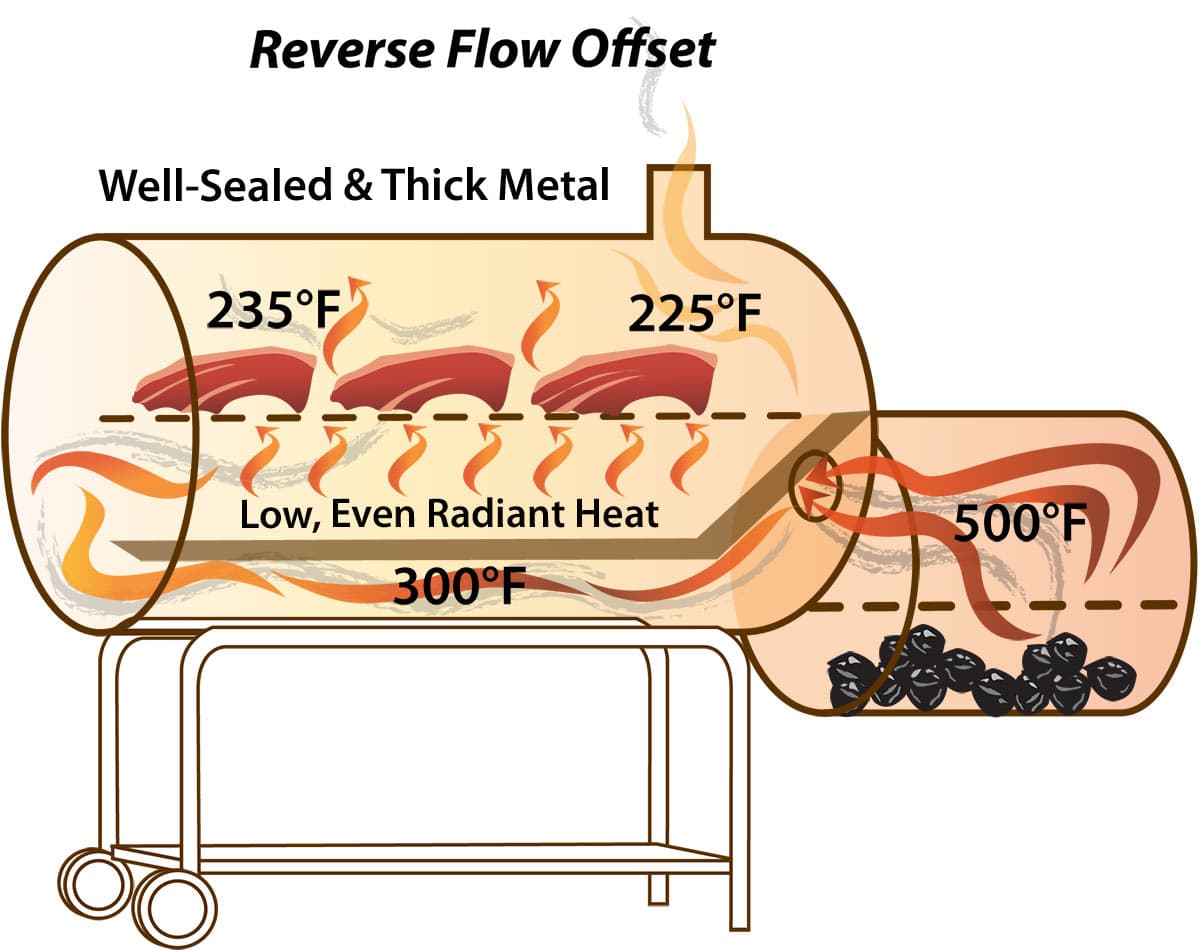
- Examine the Baffle Plate: The baffle plate is the heart of the reverse flow design. Make sure it's correctly positioned and that it spans the entire width of the cooking chamber, creating the reverse flow. Inspect it for warping or damage that could disrupt the airflow pattern.
- Assess the Chimney: Ensure the chimney is unobstructed and that the damper (if equipped) is functioning correctly. A blocked chimney will prevent proper exhaust and can lead to a smoky, inefficient fire. Check for bird nests or other debris.
DIY Action: If you find small air leaks, you can temporarily seal them with high-temperature BBQ sealant or aluminum foil tape. However, these are temporary fixes. Welding any cracks would be a long term solution. Remove any obstructions from the chimney.
Step 2: Temperature Mapping (Basic Tools Required)
This step involves using thermometers to understand the temperature distribution within your smoker.
Tools Needed:
- Multiple Thermometers: Ideally, use three to four oven-safe thermometers. Digital thermometers with remote probes are even better.
- Oven Mitts: To handle hot thermometers.
Procedure:
- Place the thermometers at various locations within the cooking chamber. One near the firebox side, one in the middle, and one near the chimney side. If possible, place one at grate level and another a few inches above.
- Light a small fire in the firebox, using the same type of fuel (wood or charcoal) you plan to use for cooking.
- Monitor the temperature readings on each thermometer over a period of 30-60 minutes. Take notes on any temperature differences or fluctuations.
Interpreting the Results:
- Significant Temperature Differences: A difference of more than 25-50°F between different areas of the cooking chamber indicates uneven heat distribution. This could be due to air leaks, an improperly positioned baffle plate, or an inefficient firebox design.
- Rapid Temperature Fluctuations: Large swings in temperature suggest problems with airflow, fuel management, or insufficient insulation.
- Low Overall Temperature: Difficulty reaching and maintaining your desired cooking temperature could indicate air leaks, an undersized firebox, or poor insulation.
DIY Action: Based on the temperature mapping, identify the areas with the most significant temperature discrepancies. This will help you focus your troubleshooting efforts.
Step 3: Airflow Analysis (Basic Tools and Observation)
Understanding how air flows through your smoker is essential for achieving consistent temperatures.
Tools Needed:
- Smoke Source: Incense stick, a small piece of smoldering wood, or a smoke pencil.
Procedure:
- Light the smoke source and hold it near potential leak points (welds, doors, etc.). Observe the direction of the smoke. If the smoke is pulled inwards, it indicates an air leak.
- Place the smoke source inside the firebox and observe how the smoke travels through the cooking chamber. It should flow evenly under the baffle plate, rise on the opposite side, and exit through the chimney. Uneven or turbulent smoke flow indicates airflow problems.
Interpreting the Results:
- Air Leaks: Smoke being drawn into the smoker through cracks or gaps confirms the presence of air leaks.
- Uneven Airflow: Turbulent or swirling smoke patterns suggest obstructions or imbalances in the airflow. The smoke may not be reaching certain areas of the cooking chamber.
- Backdrafting: If smoke is exiting from the firebox door or air intakes, it indicates a backdraft, which can be caused by a blocked chimney or insufficient airflow.
DIY Action: Seal any identified air leaks with high-temperature sealant or aluminum foil tape. Adjust the firebox air intakes and chimney damper to optimize airflow. Ensure the chimney is free from obstructions.
Step 4: Fire Management Assessment (Observation and Experience)
The way you manage your fire significantly impacts temperature control.
Checkpoints:
- Fuel Type: Are you using seasoned wood or properly lit charcoal? Wet or green wood will produce excessive smoke and struggle to maintain a consistent temperature. Charcoal should be fully lit before adding it to the firebox.
- Fuel Quantity: Are you using enough fuel to maintain the desired temperature? An undersized fire will struggle to heat the smoker properly.
- Airflow to the Fire: Are the air intakes providing enough oxygen for the fire to burn efficiently? Adjust the dampers to regulate airflow.
- Firebox Design: Is the firebox large enough for your smoker? An undersized firebox may require frequent refueling, leading to temperature fluctuations.
DIY Action: Experiment with different fuel types and quantities to find the optimal settings for your smoker. Practice your fire-building skills to maintain a consistent and efficient fire. Consider adding a small amount of fuel frequently to maintain a steady temperature, rather than adding large amounts all at once. Preheating your wood or charcoal can also help.
Common Problems and DIY Solutions
Based on your diagnosis, here are some common problems and their potential solutions:
- Problem: Air Leaks
- Solution: Seal small leaks with high-temperature BBQ sealant or aluminum foil tape. For larger leaks, consider welding the gaps closed.
- Problem: Uneven Baffle Plate
- Solution: Ensure the baffle plate is correctly positioned and spans the entire width of the cooking chamber. If it's warped or damaged, consider replacing it with a new one made from thicker steel. Reinforce it with angle iron to prevent future warping.
- Problem: Chimney Obstruction
- Solution: Remove any obstructions from the chimney. Use a chimney brush to clean out soot and creosote buildup regularly.
- Problem: Inefficient Firebox
- Solution: Optimize airflow to the fire by adjusting the air intakes. Ensure the firebox is large enough for your smoker. If it's too small, consider modifying it or building a larger one. A common upgrade is adding an air inlet pipe directly into the coal bed to get a hotter burn.
- Problem: Insufficient Insulation
- Solution: Adding insulation to the smoker can help maintain a more consistent temperature, particularly in cold weather. Weld a second skin around the smoker leaving an air gap or use high-temperature insulation blankets.
When to Call a Professional
While many temperature problems can be addressed with DIY solutions, some issues require professional expertise. Call a qualified welder or HVAC technician if:
- You are uncomfortable with welding or metal fabrication. Improper welding can compromise the structural integrity of your smoker and create safety hazards.
- You suspect structural damage to the smoker. Warped metal, significant corrosion, or cracks in critical areas require professional assessment and repair.
- You are unable to diagnose the problem after following the troubleshooting steps outlined above. A professional can use specialized equipment and knowledge to pinpoint the cause of the temperature problems and recommend appropriate solutions.
- You are experiencing backdrafting that you cannot resolve. Backdrafting can be dangerous and can indicate a serious problem with the smoker's design or ventilation.
Safety First: Always prioritize safety when working with fire and metal. Wear appropriate protective gear, such as gloves, eye protection, and a respirator. Work in a well-ventilated area to avoid inhaling harmful fumes. Never leave a burning smoker unattended.
Final Thoughts
Building and troubleshooting a reverse flow offset smoker can be challenging, but it's also a rewarding experience. By following these steps, you can diagnose and address common temperature problems, ensuring that your smoker delivers consistent and delicious results for years to come. Remember to be patient, persistent, and always prioritize safety. With a little effort and experimentation, you'll be smoking like a pro in no time!