How To Clean A Long Dryer Vent
Is your dryer taking longer and longer to dry your clothes? Are your utility bills creeping upwards, even though your usage habits haven't changed? One of the most common culprits behind these frustrating issues is a clogged dryer vent. A long dryer vent, while potentially more efficient in some setups, is particularly susceptible to lint buildup, creating a fire hazard and significantly reducing your dryer's performance.
Diagnosing a Dryer Vent Problem
Before you start tearing apart your laundry room, let's confirm the problem is indeed a clogged vent. Here's a methodical approach:
Step 1: Initial Observations (No Tools Needed)
Start with the easiest checks:
- Drying Time: Is it taking significantly longer than usual to dry a normal load of laundry? If clothes are still damp after a full cycle, this is a major red flag.
- Hot Laundry Room: Is the laundry room excessively hot or humid when the dryer is running? A properly functioning vent expels hot, moist air outside.
- Burning Smell: A burning smell, even faint, is a serious warning sign. Immediately stop using the dryer and proceed with caution. Lint is highly flammable.
- Lint Screen: Check your lint screen after each load. Is it excessively full, or does lint seem to be bypassing the screen and accumulating around the housing?
- Exterior Vent Flap: Go outside and locate your dryer vent's exterior termination point. Is the flap opening and closing freely when the dryer is running? A stuck flap can indicate a blockage or a malfunctioning damper.
Step 2: Dryer Performance Assessment (No Tools Needed)
Run a test cycle and pay close attention:
- Dryer Drum Temperature: Carefully check the inside of the dryer drum after a short drying cycle (5-10 minutes). Is it excessively hot? Overheating is a sign of poor ventilation.
- Airflow at Exterior Vent: While the dryer is running, feel the airflow at the exterior vent. A strong, consistent airflow indicates a relatively clear vent. Weak or nonexistent airflow suggests a blockage. Be cautious of hot air.
Step 3: Vent Inspection (Basic Tools Required)
Now, let's get a closer look. You'll need a few basic tools:
- Screwdriver: To disconnect the dryer vent from the dryer and the wall.
- Flashlight: To illuminate the inside of the vent.
- Vacuum with Hose Attachment: To remove loose lint from accessible areas.
- Duct Tape or Foil Tape: To reseal the vent connections.
Safety First: Unplug the dryer before proceeding!
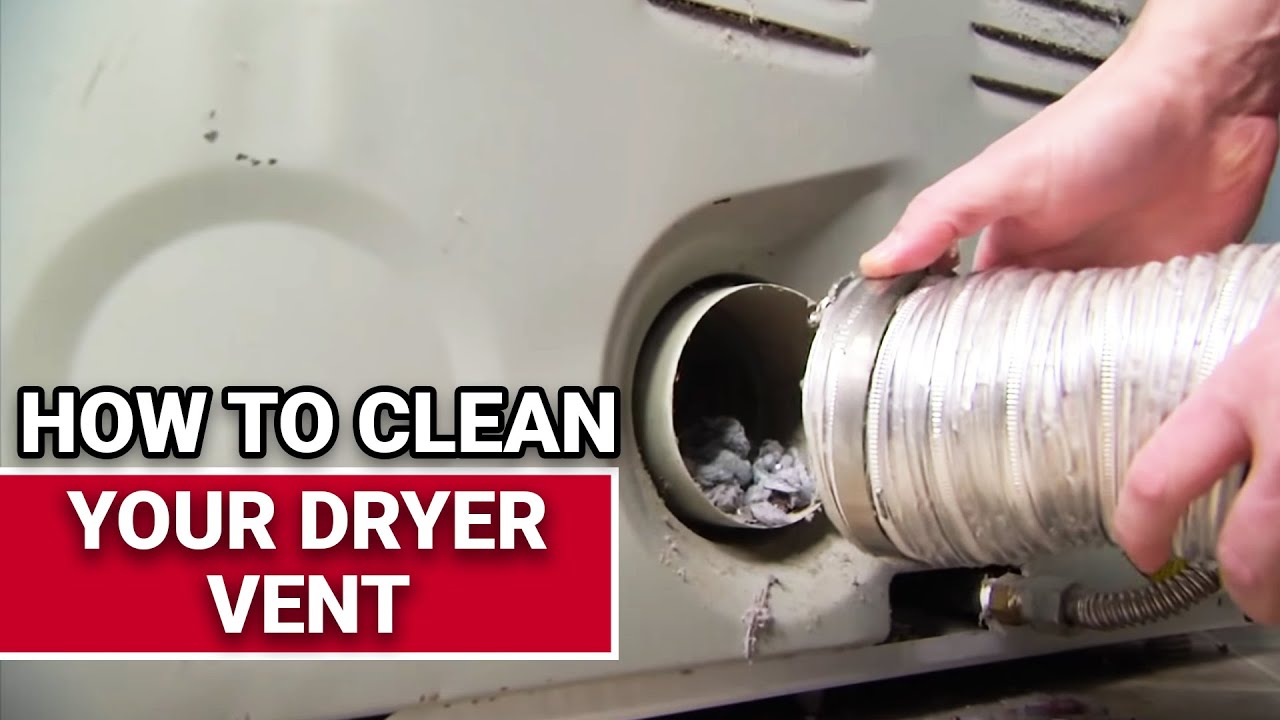
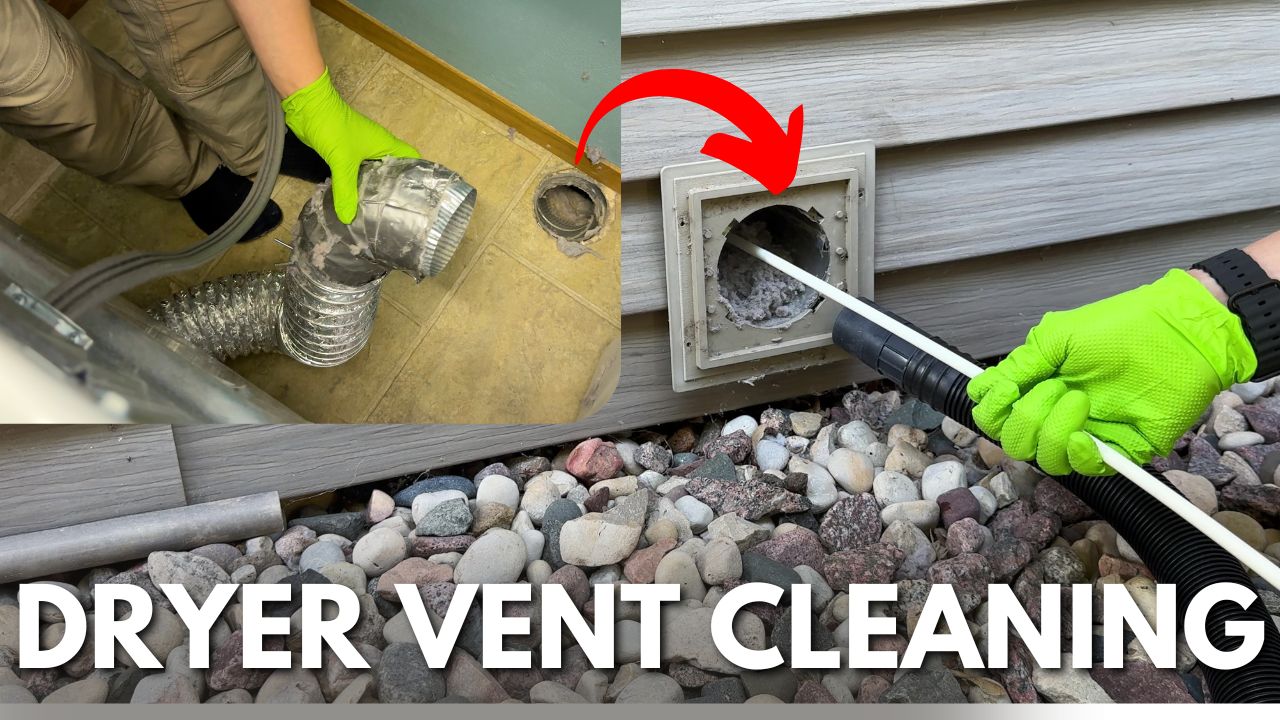
- Disconnect the Dryer: Carefully pull the dryer away from the wall, being mindful of gas lines if applicable (see warnings below). Disconnect the dryer vent from both the dryer and the wall.
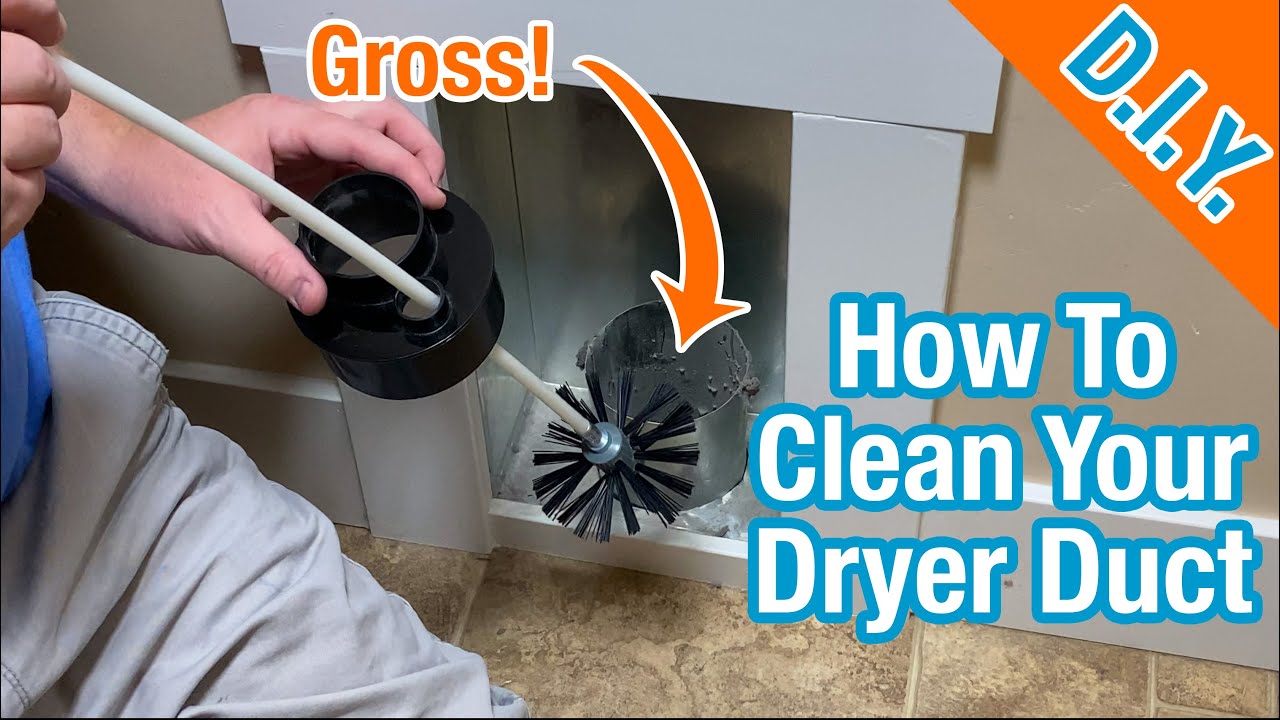
- Visual Inspection: Use your flashlight to inspect the vent openings at both ends. Can you see a significant buildup of lint? Can you identify any obvious obstructions?
- Vacuum Accessible Areas: Use the vacuum hose attachment to remove any loose lint you can reach from both ends of the vent.
DIY Dryer Vent Cleaning: A Step-by-Step Guide
If the diagnosis points to a clogged vent and the blockage seems accessible, you can attempt to clean it yourself. However, proceed with caution and be honest about your abilities. If at any point you feel uncomfortable or uncertain, call a professional HVAC technician.
Tools You'll Need:
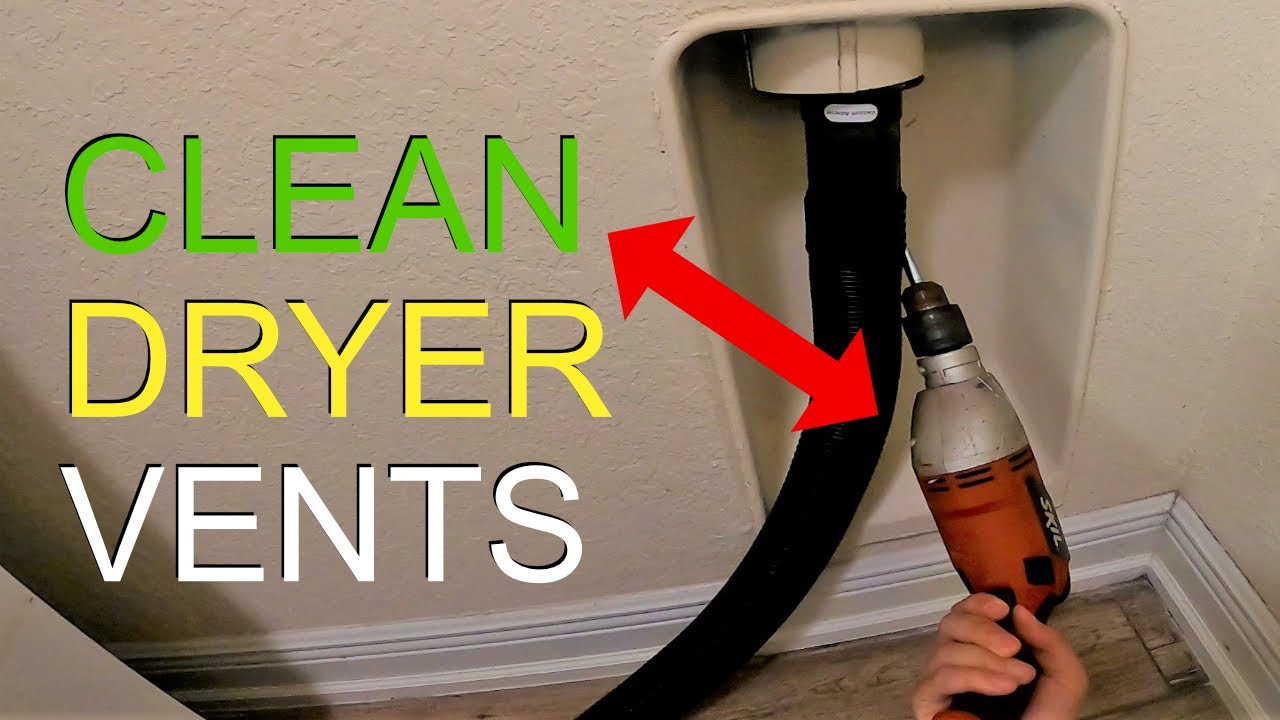
- Dryer Vent Cleaning Kit: These kits typically include flexible rods with a brush attachment designed to navigate long vent runs.
- Vacuum with Hose Attachment: Essential for removing loosened lint.
- Screwdriver: For disconnecting and reconnecting the vent.
- Duct Tape or Foil Tape: For resealing the vent connections. Foil tape is preferred for its heat resistance.
- Gloves: To protect your hands from dirt and debris.
- Dust Mask: To avoid inhaling lint particles.
- Safety Glasses: To protect your eyes from flying debris.
Step-by-Step Cleaning Process:
- Preparation:
- Unplug the dryer.
- Disconnect the dryer vent from both the dryer and the wall.
- Clear the area around the dryer and the vent openings.
- Put on your gloves, dust mask, and safety glasses.
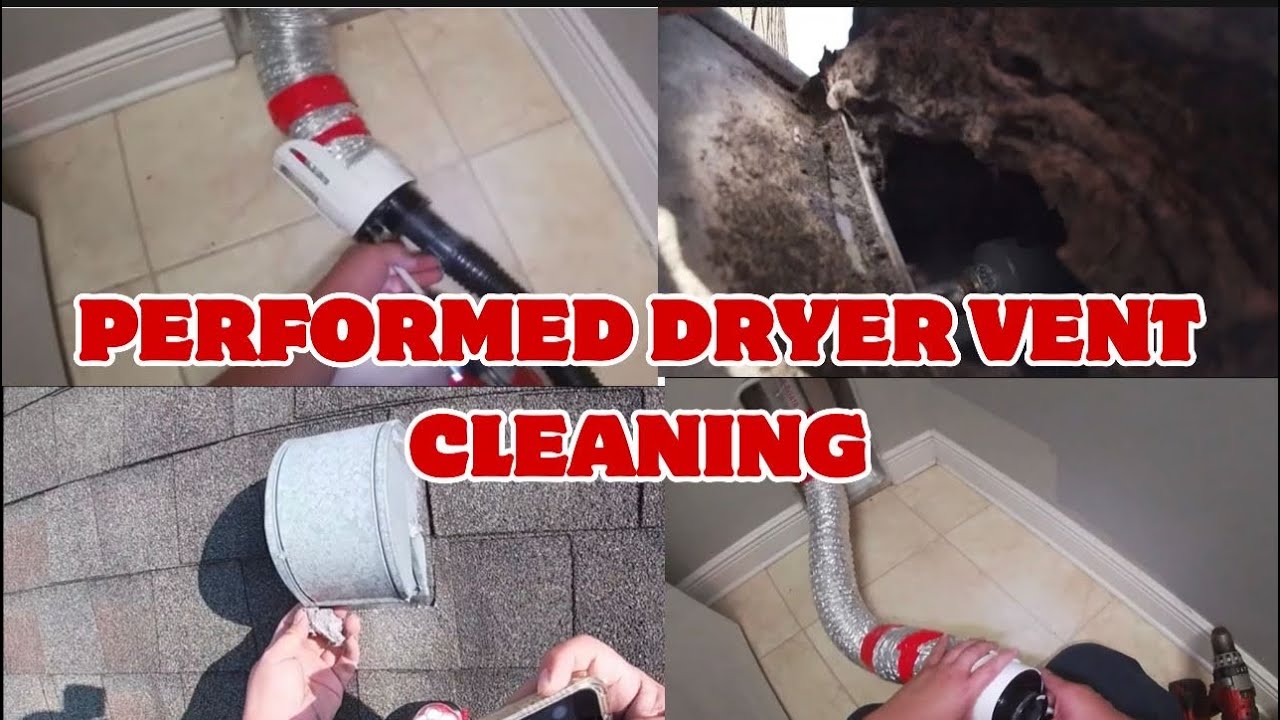
- Feeding the Brush:
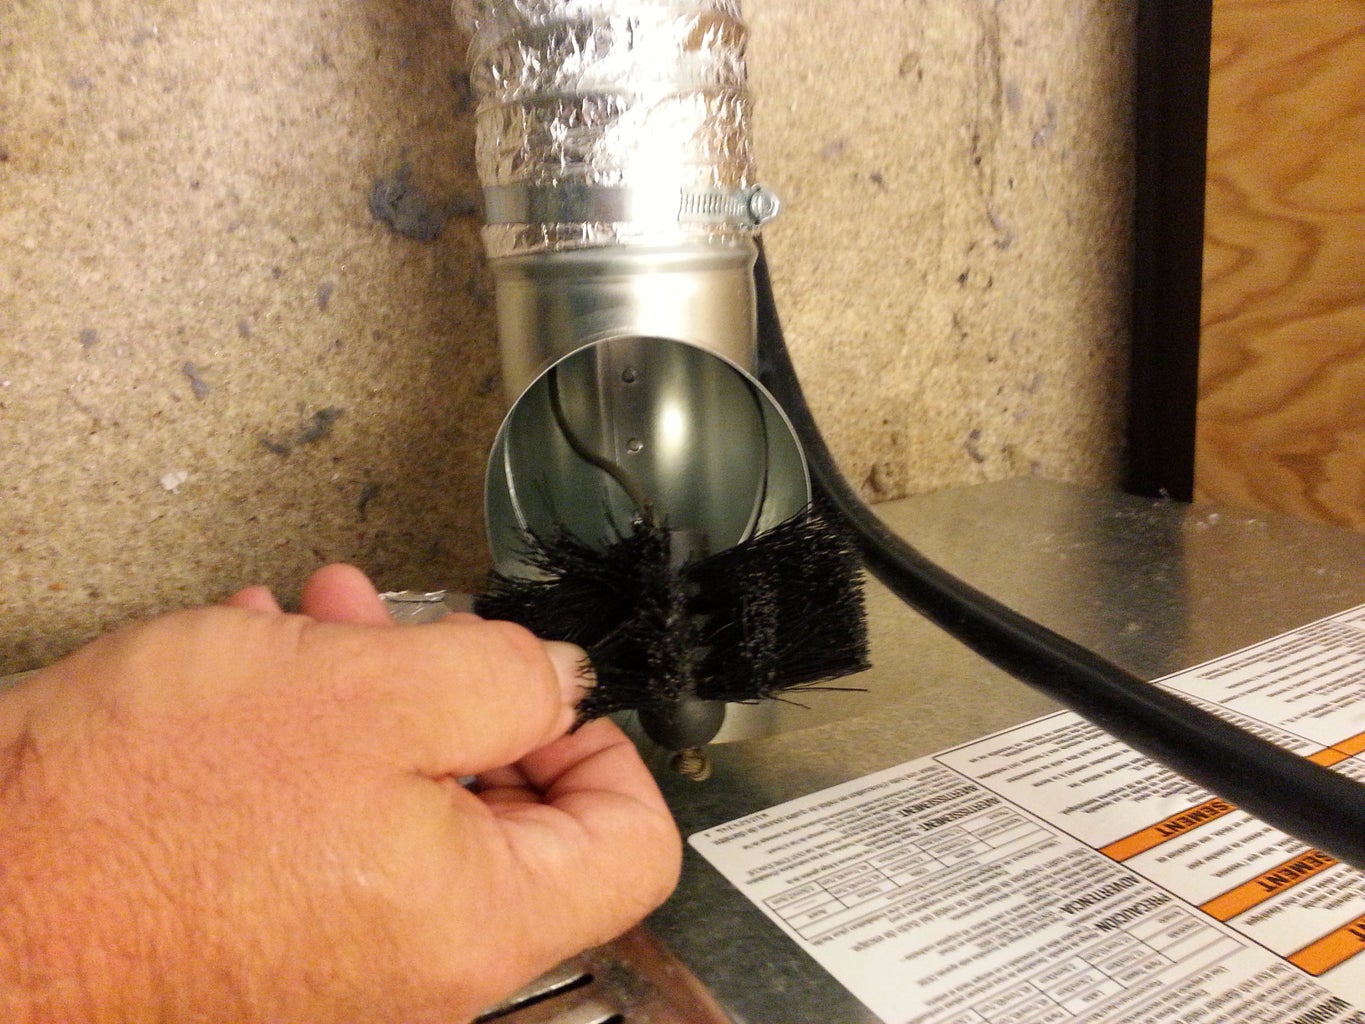
- Attach the brush to the first section of the flexible rod.
- Carefully insert the brush into one end of the dryer vent.
- Push the rod further into the vent, rotating it as you go. This helps to loosen the lint.
- Adding Rod Sections:
- As you push the rod further into the vent, add additional sections as needed, following the instructions in your dryer vent cleaning kit.
- Continue pushing and rotating the brush until you reach the other end of the vent.
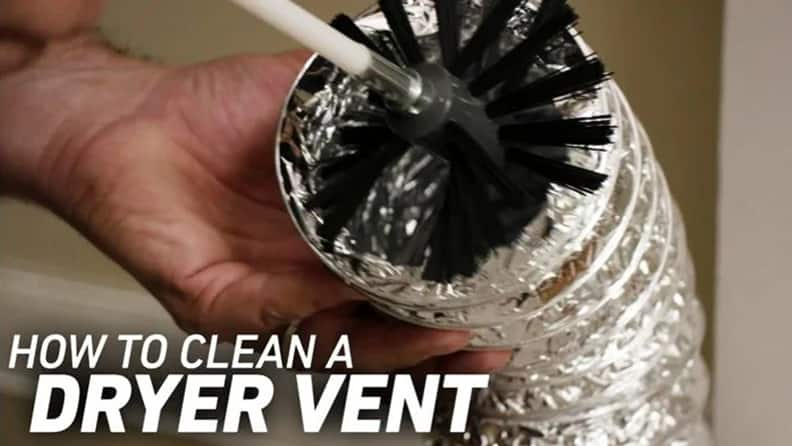
- Removing the Lint:
- Slowly pull the brush back out of the vent, continuing to rotate it. This will help to dislodge and pull out any remaining lint.
- Periodically stop and remove the brush to clean off any accumulated lint.
- Use the vacuum cleaner with the hose attachment to remove any loose lint from the vent opening as you pull the brush back.
- Repeat the Process:
- Repeat steps 2-4 several times, working from both ends of the vent, until you are no longer pulling out significant amounts of lint.
- Final Vacuuming:
- Thoroughly vacuum the entire length of the dryer vent with the hose attachment to remove any remaining loose lint.
- Also, vacuum around the dryer and the vent openings to clean up any spilled lint.
- Reassembly:
- Reconnect the dryer vent to both the dryer and the wall, ensuring a secure and airtight connection.
- Use duct tape or, preferably, foil tape to seal the connections.
- Push the dryer back into its original position, being careful not to kink or crush the vent.
- Testing:
- Plug the dryer back in.
- Run a short test cycle (15-20 minutes) and monitor the airflow at the exterior vent. It should be significantly stronger than before.
- Check the laundry room temperature. It should no longer be excessively hot.
When to Call a Professional
While DIY dryer vent cleaning can be effective, there are situations where it's best to call a qualified HVAC technician. Consider professional help if:
- You're Uncomfortable: If you're not comfortable working with tools or dealing with appliances, don't hesitate to call a professional.
- Gas Dryer: If you have a gas dryer and smell gas, immediately evacuate the area and call your gas company and a qualified HVAC technician. Do not attempt any repairs yourself. Gas leaks are extremely dangerous.
- Complex Vent Run: If your vent run is very long, has multiple bends, or is difficult to access, a professional has the tools and experience to clean it effectively.
- Persistent Clog: If you've tried cleaning the vent yourself but are still experiencing drying problems, there may be a deeper or more stubborn blockage that requires specialized equipment.
- Bird's Nest or Animal Infestation: If you suspect a bird's nest or other animal infestation in the vent, a professional can safely remove the nest and sanitize the vent.
- Damaged Vent: If you notice any damage to the vent itself, such as holes or tears, a professional can repair or replace it.
- You are renting. Many leases require that you have a professional do this type of service.
Preventative Measures
Once you've cleaned your dryer vent, take steps to prevent future clogs:
- Clean the Lint Screen Regularly: Empty the lint screen after every load. This is the single most important thing you can do to prevent lint buildup.
- Inspect the Vent Regularly: Check the exterior vent flap periodically to ensure it's opening and closing freely.
- Use Rigid Metal Ductwork: Replace flexible plastic or foil ductwork with rigid metal ductwork whenever possible. Rigid metal is less likely to trap lint.
- Shorten the Vent Run: If possible, shorten the length of the vent run. The shorter the vent, the less likely it is to clog.
- Professional Cleaning: Consider having your dryer vent professionally cleaned every 1-2 years, depending on your usage.
By taking these steps, you can keep your dryer running efficiently, reduce your energy bills, and, most importantly, prevent a dangerous fire hazard. Don't underestimate the importance of a clean dryer vent!
Important Considerations for Gas Dryers
If you have a gas dryer, extra precautions are necessary. Working with gas appliances carries inherent risks, and safety should always be your top priority.
- Gas Line Shut-Off: Before disconnecting a gas dryer, locate and shut off the gas supply valve. This is typically located behind the dryer or near the gas line connection.
- Gas Leak Test: After reconnecting the gas line, perform a gas leak test using a soapy water solution. Brush the solution onto the gas line connections. If bubbles form, there is a leak. Do not use the dryer if you suspect a gas leak. Immediately call a qualified HVAC technician or your gas company.
- Professional Inspection: If you are uncomfortable working with gas lines, always call a qualified HVAC technician to disconnect and reconnect the dryer.
Warning: Never attempt to repair or modify a gas dryer unless you are a qualified HVAC technician. Improper repairs can lead to gas leaks, explosions, and carbon monoxide poisoning.
:max_bytes(150000):strip_icc()/how-to-clean-outside-dryer-vent-2145966-03-59e94e1b999542cb980e604a4135f3d3.jpg)

:max_bytes(150000):strip_icc()/clean-your-dryer-vent-1824761-HERO-6c71552880e14393aead3a8fea0b4bf3.jpg?w=840&ssl=1)
:max_bytes(150000):strip_icc()/clean-your-dryer-vent-1824761_FINAL-5c47632246e0fb0001d59d25.png)