How To Connect Flexible Ductwork Together

Connecting flexible ductwork together is a common task for both HVAC professionals and DIY enthusiasts. While it might seem simple, doing it correctly is crucial for ensuring efficient airflow, preventing energy loss, and maintaining good indoor air quality. This guide provides a comprehensive breakdown of the process, covering essential tools, techniques, and best practices.
Understanding Flexible Ductwork
Flexible ductwork, often called "flex duct," is a type of ducting used in HVAC (Heating, Ventilation, and Air Conditioning) systems. It’s made of a flexible inner liner, usually plastic or metal, surrounded by insulation and an outer vapor barrier. This construction allows for bends and turns, making it ideal for connecting rigid ductwork to registers or navigating tight spaces. Think of it as the circulatory system for your home’s air, delivering conditioned air where it's needed.
However, flex duct is not a perfect replacement for rigid ductwork. It has a higher resistance to airflow, meaning air doesn't flow as easily through it. This can reduce the efficiency of your HVAC system. Therefore, it's best to use flex duct only when necessary and to keep runs as short and straight as possible.
Types of Flexible Ductwork
Several types of flex duct are available, each with specific properties and applications. Here are a few common types:
- Insulated Flex Duct: This is the most common type. It features insulation wrapped around the inner liner to reduce heat loss or gain, making it suitable for transporting heated or cooled air.
- Non-Insulated Flex Duct: Used primarily for exhaust vents or short runs where temperature control isn't critical.
- Acoustic Flex Duct: Designed to dampen noise from the HVAC system.
Choosing the right type of flex duct is crucial for optimal performance and energy efficiency. Always consult with an HVAC professional or refer to local building codes for specific requirements.
Essential Tools and Materials
Before you begin connecting flex duct, gather the necessary tools and materials. Having everything on hand will make the job smoother and more efficient.
- Utility Knife or Duct Knife: For cutting the flex duct and vapor barrier. A sharp blade is essential for clean cuts.
- Wire Snips or Pliers: To cut the wire reinforcement within the flex duct.
- Duct Tape (UL 181B-FX Listed): Not just any duct tape! Use a high-quality, code-approved duct tape specifically designed for HVAC applications. This tape is designed to withstand temperature changes and prevent air leaks.
- Metal Foil Tape (UL 181B-FX Listed): Another option for sealing connections. Some professionals prefer foil tape for its durability and long-lasting performance.
- Screw Driver or Nut Driver: For tightening clamps and screws.
- Measuring Tape: For accurate measurements and planning.
- Gloves: To protect your hands from the insulation and sharp edges.
- Safety Glasses: To protect your eyes from debris.
- Clamps (Duct Clamps or Zip Ties): To secure the flex duct to fittings and registers. Duct clamps offer a more secure and professional connection.
Investing in quality tools and materials will ensure a professional and long-lasting installation. Don't skimp on the duct tape or clamps; these are critical for preventing leaks and ensuring efficient airflow.
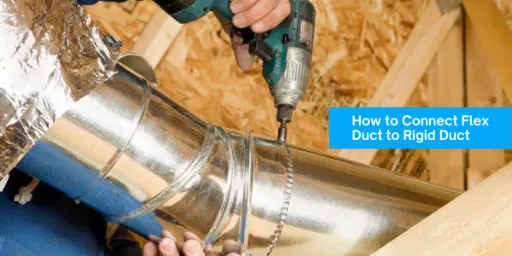
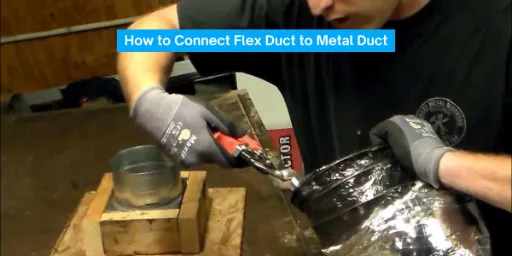
Step-by-Step Guide to Connecting Flex Duct
Follow these steps to connect flex ductwork properly:
- Measure and Cut the Flex Duct: Carefully measure the distance between the connection points, adding a few extra inches for overlap. Use a utility knife or duct knife to cut the outer jacket (vapor barrier) and insulation. Then, use wire snips or pliers to cut the wire reinforcement. Finally, cut the inner liner to the desired length. Accuracy is key here to avoid excess slack or strain.
- Prepare the Connection Point: Clean the surface of the fitting or register where you'll be connecting the flex duct. Remove any dust, dirt, or debris to ensure a good seal. If the connection point has sharp edges, smooth them out with sandpaper or a file to prevent damage to the flex duct.
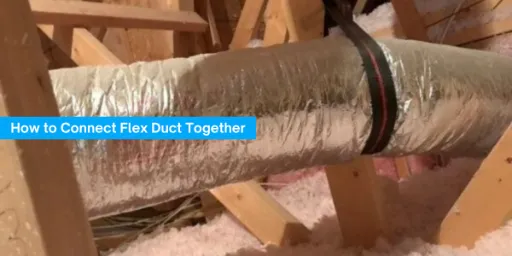
- Attach the Flex Duct to the Fitting: Slide the end of the flex duct over the fitting. Make sure the inner liner is snugly against the fitting. Secure the flex duct with a clamp (duct clamp or zip tie) tightened firmly around the outer jacket. The clamp should compress the insulation to create an airtight seal.
- Seal the Connection with Tape: Wrap the connection point with UL 181B-FX listed duct tape or metal foil tape. Overlap the tape by at least 2 inches and press firmly to create an airtight seal. Apply multiple layers of tape for added security, especially in areas prone to moisture or temperature fluctuations. Think of the tape as the "sealant" that keeps the air where it belongs.
- Repeat for the Other End: Follow steps 1-4 to connect the other end of the flex duct to the corresponding fitting or register.
- Inspect and Test: Once both ends are connected, carefully inspect the entire run of flex duct for any kinks, bends, or damage. Turn on the HVAC system and check for air leaks around the connections. If you detect any leaks, re-tape the connection points.
Properly sealing the connections is the most important part of this process. Leaks can significantly reduce the efficiency of your HVAC system and increase energy costs.
Best Practices for Flex Duct Installation
Following these best practices will ensure a professional and efficient flex duct installation:
- Minimize Length: Use the shortest possible length of flex duct to reduce airflow resistance.
- Avoid Sharp Bends: Sharp bends restrict airflow. Try to use gradual curves whenever possible.
- Support the Ductwork: Support long runs of flex duct with straps or hangers to prevent sagging. Sagging can restrict airflow and damage the ductwork.
- Insulate Properly: Ensure the insulation is intact and properly sealed to prevent heat loss or gain.
- Seal All Seams: Seal all seams and connections with UL 181B-FX listed duct tape or metal foil tape.
- Avoid Over-Tightening Clamps: Over-tightening clamps can damage the flex duct. Tighten them just enough to create an airtight seal.
- Consider the Environment: Take into account the surrounding environment. In humid areas, ensure the vapor barrier is properly sealed to prevent moisture buildup.
Think of your ductwork as a well-engineered system. Following these best practices will maximize its efficiency and lifespan.
Troubleshooting Common Issues
Even with careful planning, you might encounter some common issues during flex duct installation. Here are some troubleshooting tips:
- Air Leaks: Air leaks are the most common problem. Re-tape all connections and seams to ensure a tight seal. If the leaks persist, check the flex duct for damage.
- Reduced Airflow: Reduced airflow can be caused by several factors, including kinks, bends, sagging, or undersized ductwork. Straighten any kinks or bends, support sagging ductwork, and ensure the ductwork is properly sized for the application.
- Condensation: Condensation can occur if the flex duct is not properly insulated or if the vapor barrier is damaged. Repair any damage to the vapor barrier and ensure the insulation is adequate.
- Noise: Excessive noise can be caused by vibrations or airflow turbulence. Support the ductwork properly to reduce vibrations. Install acoustic flex duct to dampen noise.
If you're unable to resolve the issue yourself, consult with an HVAC professional. They have the expertise and equipment to diagnose and fix complex problems.
When to Call a Professional
While connecting flex duct can be a DIY project, there are times when it's best to call a professional:
- Complex Systems: If you have a complex HVAC system with multiple zones or complicated ductwork layouts, it's best to leave the installation to a professional.
- Permitting Requirements: In some areas, HVAC work requires permits and inspections. A professional will be familiar with local building codes and can ensure the installation meets all requirements.
- Lack of Experience: If you're not comfortable working with HVAC systems or don't have the necessary tools and skills, it's best to hire a professional.
- Suspected Mold or Asbestos: If you suspect mold or asbestos in the existing ductwork, do not attempt to remove it yourself. Call a qualified professional to handle the removal and replacement process.
Hiring a professional ensures the job is done correctly and safely. They can also provide valuable advice on optimizing your HVAC system for efficiency and performance.
Safety Precautions
Always prioritize safety when working with flex duct and HVAC systems:
- Wear Safety Glasses: Protect your eyes from debris and insulation fibers.
- Wear Gloves: Protect your hands from sharp edges and insulation.
- Work in a Well-Ventilated Area: Avoid breathing in dust and insulation fibers.
- Turn Off the Power: Before working on any electrical components, turn off the power to the HVAC system at the breaker.
- Follow Manufacturer's Instructions: Always follow the manufacturer's instructions for the flex duct and any other components you're using.
Safety is paramount. Taking these precautions will help prevent accidents and injuries.
Conclusion
Connecting flexible ductwork correctly is essential for maintaining an efficient and effective HVAC system. By following the steps outlined in this guide, using the right tools and materials, and adhering to best practices, you can ensure a professional and long-lasting installation. Remember to prioritize safety and consult with an HVAC professional when needed. A well-maintained ductwork system not only improves comfort but also contributes to energy savings and better indoor air quality. So, take your time, do it right, and enjoy the benefits of a properly functioning HVAC system.