How To Fix A Pin Hole In A Copper Pipe

Frequently Asked Questions: Fixing Pinholes in Copper Pipes
Finding a pinhole leak in your copper pipe can be frustrating. This guide provides straightforward answers to common questions about identifying and fixing these small but potentially damaging leaks. We aim to equip you with the knowledge to address the problem effectively.
Question 1: How do I know if I have a pinhole leak in my copper pipe? What are the key signs?
Pinhole leaks are notoriously small and often difficult to detect initially. Look for these common indicators:
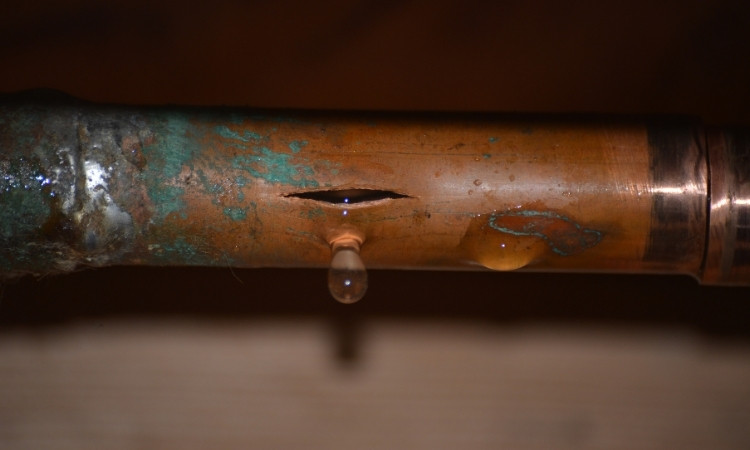
- Visible Water: Even a tiny leak can create a small puddle or damp spot on or around the pipe. Check under sinks, in basements, and along exposed pipes.
- Mineral Deposits: Over time, water leaking from a pinhole can leave behind greenish-white mineral deposits (often copper carbonates) around the leak site. These are a telltale sign, even if the water is no longer actively dripping.
- Dripping Sounds: Listen carefully. A faint, consistent dripping sound near your pipes could indicate a pinhole leak, especially if you can't see any obvious water.
- Increased Water Bill: A sudden, unexplained increase in your water bill might indicate a hidden leak, even a small one.
- Water Stains: Look for water stains on walls, ceilings, or floors near pipe runs. These stains can be an early indicator of a slow, persistent leak.
- Corrosion on the Pipe: Examine the copper pipe itself. Look for signs of corrosion, pitting, or discoloration, especially in areas where the pipe is joined or bent.
- Musty Odor: A persistent musty or moldy odor in a specific area could be caused by moisture from a hidden pinhole leak.
If you suspect a pinhole leak, investigate thoroughly to pinpoint the exact location. Early detection can prevent more significant water damage and costly repairs.
Question 2: What causes pinhole leaks in copper pipes? Is it always due to old age?
Pinhole leaks in copper pipes aren't always solely due to age. Several factors can contribute to their formation:
- Corrosion: This is the most common cause. Corrosive water, especially water with high acidity (low pH), can slowly erode the copper, creating tiny holes.
- Electrolysis: Stray electrical currents can also corrode copper pipes. This is more common in older homes with outdated electrical systems or near improperly grounded appliances.
- Improper Installation: Poor soldering or the use of incompatible metals during installation can create weak points that eventually fail.
- Water Chemistry: Certain chemicals in the water supply, such as chlorine or chloramine (used to disinfect water), can accelerate corrosion.
- Grounding Issues: Using copper pipes as a grounding point for electrical systems is a major cause of pinhole leaks. This practice should be avoided.
- High Water Pressure: Excessively high water pressure can stress the copper pipes, making them more susceptible to leaks, especially at joints and weakened areas.
- Water Softeners: While water softeners prevent scale buildup, improperly maintained softeners can increase the water's sodium content, which can be corrosive to copper.
While age can be a factor, the specific water conditions and installation practices are often more significant contributors to pinhole leaks. Understanding the potential causes can help prevent future leaks.
Question 3: Can I fix a pinhole leak in a copper pipe myself, or do I absolutely need to call a plumber? What are my DIY options?
Whether you can fix a pinhole leak yourself depends on your skill level, the location of the leak, and the extent of the damage. Here are some DIY options, but always prioritize safety and consult a professional if you're unsure.
- Epoxy Putty: This is a temporary fix for small, accessible leaks. Clean the area around the leak thoroughly, apply the epoxy putty according to the manufacturer's instructions, and allow it to cure completely. This is best for holding you over until a permanent solution can be made.
- Pipe Repair Clamp: These clamps are designed to seal leaks in pipes. Choose a clamp that's the correct size for your pipe, clean the area around the leak, and tighten the clamp securely. This is another more permanent band-aid to the problem.
- Rubber and Hose Clamp: A piece of rubber (like from an old bicycle inner tube) can be wrapped around the leak and secured with a hose clamp. This is a very temporary fix and should only be used in emergencies.
When to call a plumber:
- If you're not comfortable working with plumbing.
- If the leak is in a difficult-to-reach location.
- If the pipe is severely corroded or damaged.
- If you're unsure about the cause of the leak.
- If the DIY fix fails to stop the leak.
Remember, temporary fixes are just that. They buy you time, but a professional plumber can provide a more permanent solution, such as soldering a patch, replacing a section of pipe, or addressing the underlying cause of the corrosion.
Question 4: What's the proper way to solder a copper pipe to fix a pinhole leak? What tools do I need?
Soldering is a more permanent solution for fixing pinhole leaks, but it requires some skill and the right tools. Here's a general overview, but always refer to a detailed soldering guide for specific instructions.
Tools you'll need:
- Propane or MAPP Gas Torch: For heating the copper pipe and solder.
- Sandcloth or Abrasive Pad: To clean the pipe and fitting.
- Flux: To prevent oxidation and ensure a good solder joint.
- Lead-Free Solder: For creating a watertight seal.
- Pipe Cutter: For cutting the pipe if necessary.
- Flame Protector Cloth: To protect surrounding materials from the torch flame.
- Safety Glasses: To protect your eyes.
- Gloves: To protect your hands from the heat.
- Wire Brush: For cleaning the inside of fittings.
Steps:
- Turn off the water supply and drain the pipe completely. Make sure the area is dry!
- Clean the pipe: Use sandcloth to clean the outside of the pipe and the inside of the fitting until they are shiny and free of corrosion.
- Apply flux: Apply a thin, even coat of flux to both the pipe and the fitting.
- Assemble the joint: Slide the fitting onto the pipe.
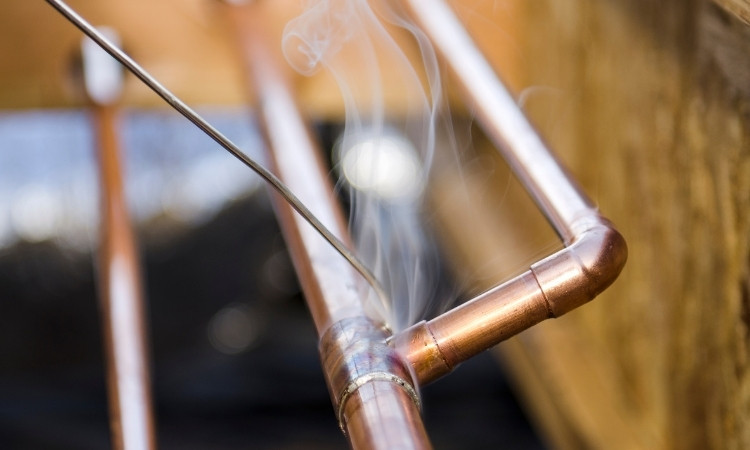
- Heat the joint: Apply the torch flame evenly to the fitting, focusing on the area where the pipe and fitting meet.
- Apply solder: Touch the solder to the joint. If the pipe is hot enough, the solder will melt and be drawn into the joint by capillary action.
- Allow to cool: Let the joint cool naturally. Do not touch it or try to cool it down with water.
- Test the joint: Turn the water supply back on slowly and check for leaks. If there's a leak, turn off the water, let the joint cool completely, and repeat the soldering process.
Important Safety Notes:
- Work in a well-ventilated area.
- Keep a fire extinguisher nearby.
- Protect surrounding materials from the torch flame.
- Allow the joint to cool completely before testing.
Soldering requires practice. If you're not comfortable with the process, it's best to call a qualified plumber.
Question 5: What if the pinhole leak is in a difficult-to-reach spot, like behind a wall? How can I fix it then?
Leaks in hard-to-reach areas present a challenge. Here are a few approaches, keeping in mind that professional help might be the safest and most effective option:
- Access Panel: If possible, create an access panel in the wall or ceiling to reach the leak. This involves cutting a hole and patching it later. This provides much more maneuverability in solving the issue.
- Flexible Repair Techniques: Certain epoxy putties and pipe repair clamps are designed for tight spaces. These may require some dexterity and specialized tools.
- Professional Leak Detection: Plumbers have specialized equipment, such as acoustic listening devices and infrared cameras, to pinpoint the exact location of hidden leaks. This can minimize the amount of wall or ceiling that needs to be opened up.
- Pipe Replacement: In some cases, the easiest solution is to replace the entire section of pipe that contains the leak. This might involve cutting the pipe at accessible points and installing new pipe using compression fittings or soldering.
- Temporary Fixes for Emergency: If immediate access is impossible, use a temporary fix like a rubber patch and hose clamp to minimize water damage until you can arrange for a more permanent repair.
Remember: Working in confined spaces can be dangerous. Take extra precautions to protect yourself from electrical hazards and sharp objects. If you're not comfortable working in these conditions, call a plumber.
Question 6: How can I prevent pinhole leaks in my copper pipes in the future? What are some preventative measures?
Preventing pinhole leaks is always better than fixing them. Here are some proactive measures you can take:
- Water Testing: Have your water tested regularly to check its pH level and the presence of corrosive chemicals. A pH between 6.5 and 8.5 is generally considered safe for copper pipes.
- Water Treatment: If your water is acidic or contains high levels of chlorine or chloramine, consider installing a water treatment system, such as a pH neutralizer or a carbon filter.
- Proper Grounding: Ensure that your electrical system is properly grounded and that your copper pipes are not being used as a grounding point. This is a common cause of electrolysis and corrosion.
- Water Pressure Regulation: Install a pressure regulator to maintain consistent water pressure and prevent excessive stress on your pipes. Ideal water pressure is typically between 40 and 60 PSI.
- Avoid Mixing Metals: When making repairs or additions to your plumbing system, avoid using dissimilar metals that can react with copper and cause corrosion. Use copper fittings and pipes whenever possible.
- Regular Inspections: Periodically inspect your exposed copper pipes for signs of corrosion, mineral deposits, or leaks. Early detection can prevent small problems from becoming big ones.
- Professional Plumbing Inspections: Consider having a professional plumber inspect your entire plumbing system every few years. They can identify potential problems before they lead to leaks.
- Flush Water Heater: Regularly flush your water heater to remove sediment buildup, which can contribute to corrosion in the pipes.
By implementing these preventative measures, you can significantly reduce the risk of pinhole leaks and extend the lifespan of your copper plumbing system.
Question 7: I've heard about alternatives to copper pipes, like PEX. Should I consider replacing my entire copper system with PEX to avoid future pinhole leaks?
Replacing your entire copper plumbing system with PEX (cross-linked polyethylene) is a significant decision with potential benefits and drawbacks. Here's a balanced perspective:
Advantages of PEX:
- Corrosion Resistance: PEX is highly resistant to corrosion, making it a good choice in areas with corrosive water.
- Flexibility: PEX is flexible and easier to install than copper, especially in tight spaces.
- Cost-Effective: PEX is typically less expensive than copper in terms of materials and installation.
- Freeze Resistance: PEX is more resistant to freezing and bursting than copper.
- Fewer Fittings: PEX systems often require fewer fittings, reducing the risk of leaks at joints.
Disadvantages of PEX:
- UV Sensitivity: PEX is sensitive to ultraviolet (UV) light and should not be exposed to direct sunlight for extended periods.
- Rodent Damage: Rodents can sometimes chew through PEX tubing.
- Permeability: PEX is slightly permeable to some chemicals, which can affect water quality in certain situations.
- Higher Expansion/Contraction: PEX expands and contracts more than copper with temperature changes, which can require special installation considerations.
- Professional Installation Recommended: While DIY installation is possible, professional installation is often recommended to ensure proper connections and prevent leaks.
Considerations before replacing your entire system:
- Cost: Replacing an entire plumbing system is a significant investment. Get multiple quotes from qualified plumbers.
- Disruption: Replacing your plumbing will involve some disruption to your home. Plan accordingly.
- Water Quality: If your water quality is the primary reason for considering PEX, explore water treatment options first.
- Long-Term Value: Consider the long-term benefits of PEX in terms of reduced maintenance and potential cost savings.
Ultimately, the decision to replace your copper plumbing with PEX depends on your specific circumstances, budget, and priorities. Consult with a qualified plumber to assess your situation and determine the best course of action. A partial replacement of problematic sections with PEX may be a viable alternative to a full system replacement.