How To Fix A Waterlogged Pressure Tank
Frequently Asked Questions: Fixing a Waterlogged Pressure Tank
A waterlogged pressure tank is a common issue in well systems, leading to inconsistent water pressure and potential pump damage. Understanding the causes and solutions can save you time and money. Here are some of the most frequently asked questions and their answers:
Question 1: What exactly does it mean when my pressure tank is "waterlogged"?
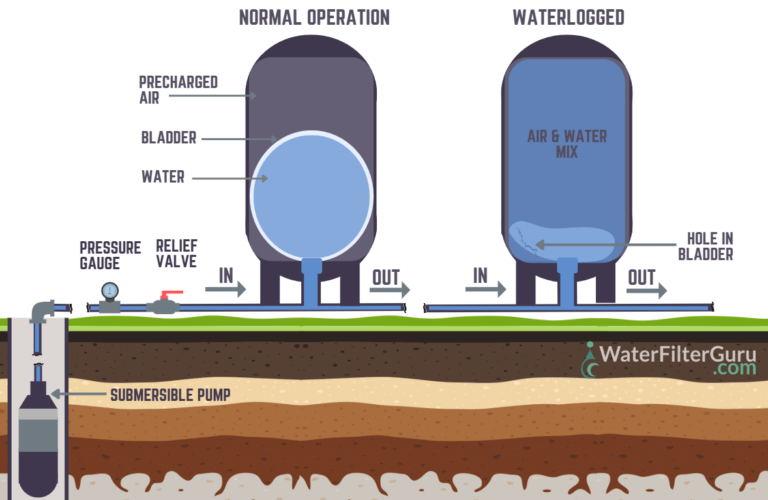
When a pressure tank is waterlogged, it means that the air cushion inside the tank has been depleted or lost. A pressure tank is designed to hold both water and compressed air. The air provides pressure that helps push water out of the tank and into your plumbing when you turn on a faucet or use a water-using appliance.
If the air cushion is gone, the tank fills almost entirely with water. This means the pump has to cycle on and off more frequently to meet demand. This short cycling wears out the pump faster and leads to unstable water pressure in your home. Think of it like this: a waterlogged tank has little to no "springiness" to it; it's just a container full of water.
Question 2: How do I know if my pressure tank is waterlogged? What are the symptoms?
Several symptoms can indicate a waterlogged pressure tank. Here are some of the most common signs to watch out for:
- Rapid Pump Cycling (Short Cycling): This is the most telltale sign. The well pump turns on and off frequently, even when you're only using a small amount of water. You might hear it kicking on for a few seconds, then shutting off again.
- Fluctuating Water Pressure: You'll experience noticeable changes in water pressure while using faucets or showers. The pressure might be strong one moment and weak the next. This inconsistency is a direct result of the pump constantly starting and stopping.
- Waterlogged Tank Sound: If you tap on the side of the tank, it will sound mostly full of water, even near the top. A healthy tank should sound hollow towards the top.
- Water Hammering: This is a banging or knocking sound in your pipes, often occurring when you turn off a faucet. Water hammering is exacerbated by the lack of an air cushion to absorb the shock of the water stopping suddenly.
- Pump Overheating: Constant cycling can cause the well pump to overheat, leading to premature failure.
- Air Spitting from Faucets: In some cases, you might notice air sputtering from your faucets. This can happen if the bladder is damaged and air is entering the water lines.
If you experience several of these symptoms simultaneously, there's a good chance your pressure tank is waterlogged.
Question 3: What causes a pressure tank to become waterlogged?
There are several potential causes for a waterlogged pressure tank, and identifying the root cause is crucial for preventing recurrence. Here are the most common culprits:
- Loss of Air Charge: This is the most frequent cause. Over time, air naturally escapes through the tank's components, particularly if the Schrader valve (the air valve) is leaking. Even with bladder tanks, a small amount of air loss is normal.
- Leaky Bladder (in Bladder Tanks): If your pressure tank has a bladder (a rubber or plastic bag that separates the air and water), a tear or puncture in the bladder can cause water to leak into the air side. This effectively eliminates the air cushion.
- Mineral Buildup: In tanks without bladders, minerals in the water can gradually accumulate on the tank walls, reducing the air volume and leading to waterlogging. This is more common in areas with hard water.
- Faulty Check Valve: The check valve prevents water from flowing back into the well when the pump is off. If the check valve is faulty, water can drain back into the well, leaving the tank filled mostly with water when the pump restarts.
- Sediment Accumulation: Sediment in the well water can settle in the bottom of the tank, reducing the effective volume and contributing to waterlogging.
- Improper Tank Sizing: If the pressure tank is too small for your household's water demands, it can lead to excessive pump cycling and premature wear, which can eventually contribute to waterlogging.
Question 4: How can I fix a waterlogged pressure tank? Can I do it myself, or do I need a professional?
The method for fixing a waterlogged pressure tank depends on the type of tank you have (bladder or non-bladder) and the severity of the problem. Here's a breakdown of the different approaches:
- For Tanks with a Schrader Valve (Air Valve):
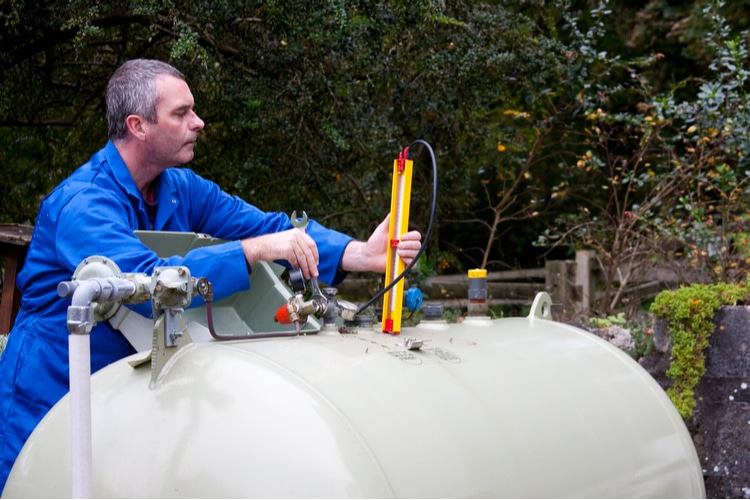
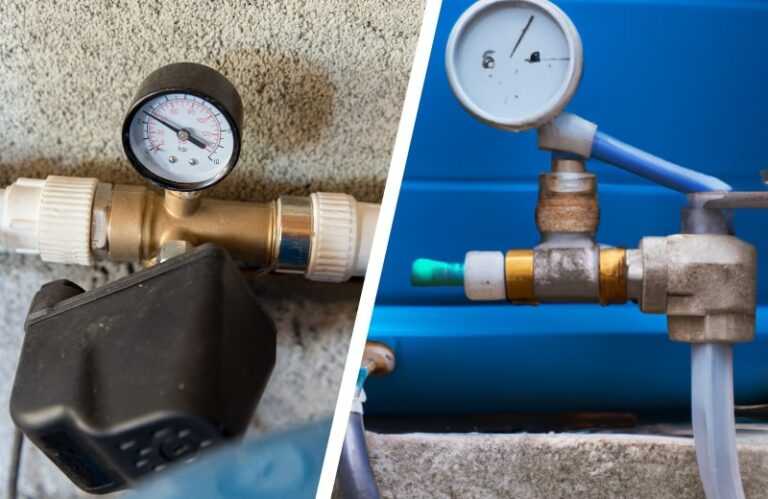
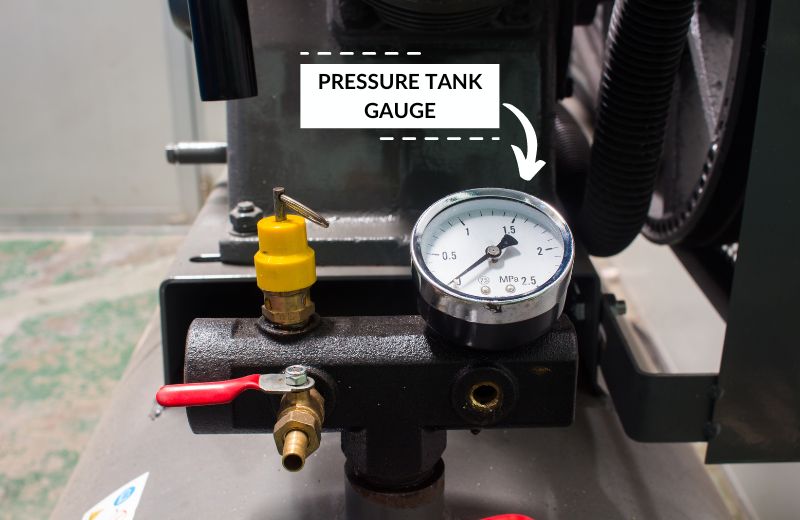
- Check Air Pressure: Use a tire pressure gauge to check the air pressure in the tank (with the pump off and the tank drained). The pressure should be 2 PSI below the pump's cut-in pressure (the pressure at which the pump turns on). The cut-in and cut-out pressure are typically marked on the pressure switch.
- Add Air: If the pressure is too low, use an air compressor to add air until it reaches the correct level.
- Bleed Air: If the tank is completely full of water, you'll need to drain it first. Turn off the pump and open a faucet downstream to relieve pressure. Then, open the drain valve at the bottom of the tank. Once the tank is empty, add air.
- Check for Leaks: After adding air, monitor the pressure over the next few days to see if it holds. If the pressure drops quickly, there's likely a leak in the tank or the Schrader valve. You can test the valve with soapy water – bubbles indicate a leak. Replace the valve if necessary.
- For Bladder Tanks:
- Follow the same steps as above for checking and adding air. If the bladder is ruptured, adding air won't solve the problem permanently.
- Check for Water at the Air Valve: Depress the Schrader valve briefly. If water comes out instead of air, it's almost certain that the bladder is ruptured and the tank needs to be replaced.
- Replacement: If the bladder is damaged, the tank will likely need to be replaced. Bladders are sometimes replaceable, but it's often more cost-effective to replace the entire tank, especially for older models.
- For Tanks without Bladders (Older Style):
- Drain and Recharge: Turn off the pump, drain the tank completely, and then turn the pump back on. This process can sometimes re-establish an air cushion.
- Air Volume Control (AVC): These tanks often have an AVC, a device that automatically replenishes the air cushion. Check the AVC for proper functioning and replace it if needed.
- Consider Replacement: Older tanks are more prone to corrosion and mineral buildup. If your tank is old and waterlogged, replacing it with a modern bladder tank is often the best long-term solution.
DIY or Professional?
Checking and adding air to a pressure tank is a relatively simple task that most homeowners can handle. However, replacing a pressure tank involves plumbing, electrical work, and lifting a heavy object. If you're not comfortable with these tasks, it's best to hire a qualified plumber or well technician. Additionally, if you suspect a more serious problem with your well pump or check valve, professional diagnosis and repair are recommended.
Question 5: How do I drain a pressure tank?
Draining a pressure tank is necessary to check the air charge or completely empty a waterlogged tank. Here's how to do it safely and effectively:
- Turn Off the Well Pump: Locate the breaker switch that controls your well pump and turn it off. This will prevent the pump from running while you're draining the tank.
- Relieve Water Pressure: Open a faucet or two in your house, ideally on the lowest level. This will help to relieve the water pressure in the system and allow the tank to drain more easily.
- Locate the Drain Valve: The drain valve is usually located near the bottom of the pressure tank. It's typically a spigot or hose bib.
- Connect a Hose (Optional): If you want to direct the water away from the tank, attach a garden hose to the drain valve.
- Open the Drain Valve: Slowly open the drain valve. The water will start to flow out of the tank.
- Allow the Tank to Drain Completely: It may take some time for the tank to drain completely, depending on its size and the water pressure. Be patient and let the water flow until it stops.
- Close the Drain Valve: Once the tank is empty, close the drain valve tightly.
- Turn the Well Pump Back On: After you've completed the necessary repairs or maintenance, turn the breaker switch back on to restart the well pump.
- Allow the Tank to Refill: Let the pump run until the pressure tank refills to its normal operating pressure.
- Check for Leaks: After the tank has refilled, inspect the drain valve and other connections for any leaks.
Important Safety Tip: Before working on any electrical components, always disconnect the power source to prevent electrical shock.
Question 6: Can I prevent my pressure tank from becoming waterlogged in the future?
Yes, there are several steps you can take to prevent your pressure tank from becoming waterlogged again. Implementing these preventative measures will extend the life of your tank and your well pump:
- Regularly Check Air Pressure: Check the air pressure in the tank at least twice a year. Maintain the correct pressure (2 PSI below the pump's cut-in pressure). Use a tire pressure gauge for accuracy.
- Inspect the Schrader Valve: Periodically check the Schrader valve for leaks. Apply soapy water to the valve and look for bubbles. Replace the valve if it's leaking.
- Install a Sediment Filter: A sediment filter will prevent sediment from accumulating in the tank, especially if you have well water with high sediment content.
- Consider a Water Softener: If you have hard water, a water softener can help prevent mineral buildup inside the tank and pipes.
- Proper Tank Sizing: Ensure that your pressure tank is properly sized for your household's water demands. A tank that's too small will cause excessive pump cycling. Consult with a plumber or well technician to determine the correct size.
- Annual Well Inspection: Schedule an annual inspection of your well system, including the pump, tank, and related components. A professional can identify potential problems early on and prevent costly repairs.
- Use a Cycle Stop Valve: A cycle stop valve can help maintain constant water pressure and reduce pump cycling, especially in homes with fluctuating water demands.
Question 7: How much does it cost to fix or replace a waterlogged pressure tank?
The cost to fix or replace a waterlogged pressure tank varies depending on several factors:
- Type of Repair: Simply adding air to the tank is the least expensive option, usually costing only a few dollars for the air and your time.
- Replacement Parts: Replacing a Schrader valve or other small parts will cost a bit more, typically under $50.
- Tank Replacement: Replacing the entire pressure tank is the most expensive option. The cost will depend on the tank size, brand, and installation labor. Expect to pay anywhere from $300 to $1000 or more, including the tank and professional installation.
- Labor Costs: If you hire a plumber or well technician, labor costs will add to the overall expense. Labor rates vary depending on your location and the complexity of the job.
- Tank Size and Quality: Larger tanks and higher-quality brands will generally cost more.
Getting a Quote: It's always a good idea to get quotes from several plumbers or well technicians before making a decision. Be sure to ask for a detailed breakdown of the costs involved, including the price of the tank, labor charges, and any additional fees.
By understanding the causes of a waterlogged pressure tank, the symptoms to watch for, and the available solutions, you can take proactive steps to maintain your well system and avoid costly repairs. Remember, when in doubt, consult with a qualified professional.